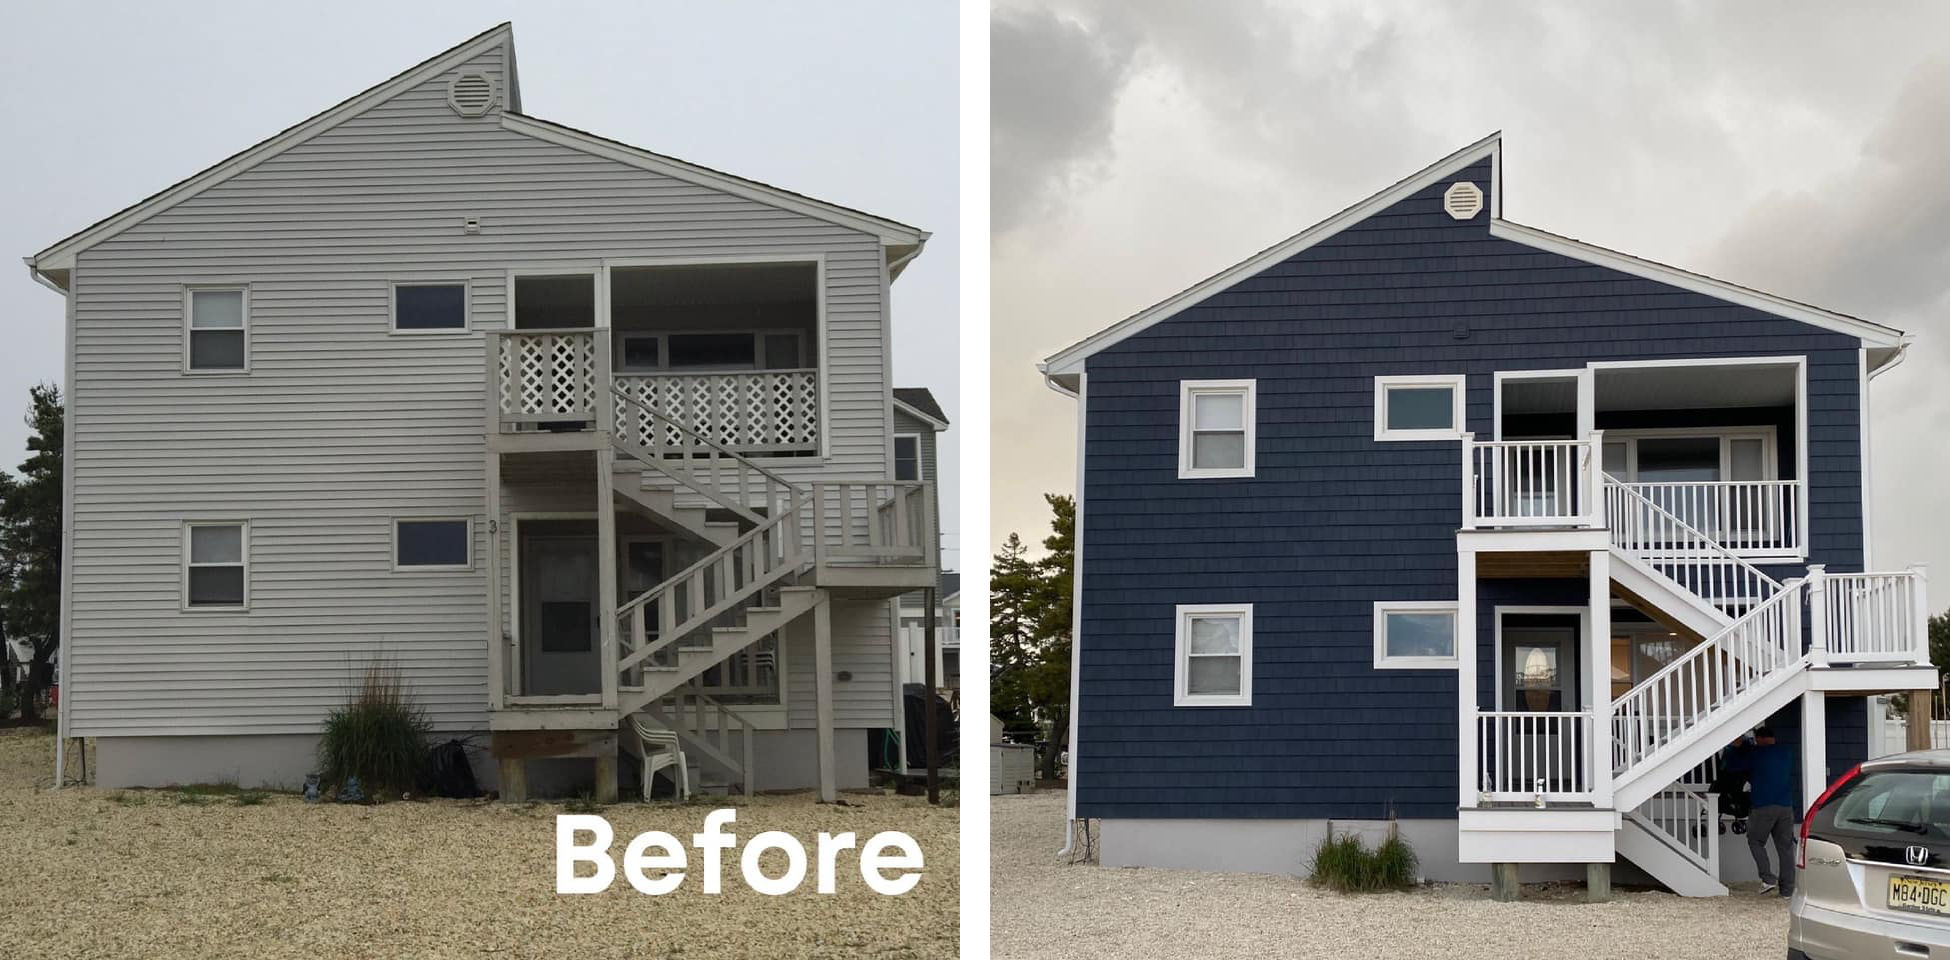
DIY vs. Professional Wood Siding Maintenance: Pros and Cons – Choosing between tackling wood siding maintenance yourself or hiring a professional is a significant decision for homeowners. This comprehensive guide explores the advantages and disadvantages of both approaches, helping you weigh the factors of cost, time commitment, skill level, and potential risks to make an informed choice. We’ll delve into the necessary steps, from initial assessment and cleaning to repairs, painting, and long-term maintenance strategies, providing you with the knowledge to confidently decide what’s best for your home and budget.
Initial Assessment & Planning
Proper planning is crucial for successful wood siding maintenance, whether you’re tackling the project yourself or hiring a professional. A thorough initial assessment will determine the scope of work, the necessary materials, and ultimately, the cost and time commitment. This process is equally important for both DIY and professional approaches, ensuring efficient and effective maintenance.
A comprehensive inspection of your wood siding is the foundation of any effective maintenance plan. This involves a systematic examination of the entire surface area, paying close attention to details that might indicate damage or deterioration. Careful observation will prevent small issues from escalating into costly repairs.
Thorough Inspection of Wood Siding
Before beginning any maintenance, a meticulous inspection is necessary. This involves a visual examination of all sides of the house, including hard-to-reach areas. Use binoculars or a ladder to access higher sections safely. The inspection should focus on identifying potential problems early, preventing larger, more expensive repairs down the line. This proactive approach saves both time and money in the long run.
Tools and Materials for Wood Siding Maintenance
The tools and materials required will vary depending on the scope of the maintenance. DIY projects may necessitate a more basic toolkit, while professional jobs often involve specialized equipment. However, some essential items are common to both.
- DIY: A sturdy ladder, paint scraper, wire brush, putty knife, sandpaper (various grits), paintbrushes/rollers, drop cloths, safety glasses, work gloves, caulking gun, wood filler, exterior paint/stain, cleaning solutions (e.g., TSP).
- Professional: Power washer, scaffolding, specialized paint sprayers, advanced diagnostic tools (moisture meters, infrared cameras), potentially more extensive safety equipment and potentially specialized cleaning agents for severe mildew or mold.
Wood Siding Condition Checklist
A systematic checklist ensures a thorough evaluation of the siding’s condition. This checklist helps identify areas needing immediate attention and guides the maintenance plan. Regular use of this checklist prevents minor issues from developing into significant problems.
| Condition | Description | Severity |
|---|---|---|
| Rot | Decayed or softened wood, often dark in color and spongy to the touch. | Minor (small areas), Moderate (larger areas), Severe (extensive decay) |
| Cracks | Splits or fissures in the wood, varying in size and depth. | Minor (small, superficial cracks), Moderate (larger cracks, affecting structural integrity), Severe (deep cracks compromising siding integrity) |
| Insect Damage | Holes, tunnels, or frass (insect droppings) indicating infestation. | Minor (few isolated holes), Moderate (multiple holes, signs of active infestation), Severe (extensive damage, significant structural compromise) |
| Paint Condition | Peeling, blistering, fading, or chalking of the paint. | Minor (minor chipping, slight fading), Moderate (significant peeling or blistering), Severe (extensive paint failure, bare wood exposed) |
Sample Wood Siding Maintenance Schedule
A regular maintenance schedule is vital for preserving the longevity and aesthetic appeal of your wood siding. This schedule outlines tasks and their recommended frequency. Adjust the schedule based on your climate and siding type.
| Task | Frequency |
|---|---|
| Visual Inspection | Annually |
| Cleaning (pressure washing or scrubbing) | Annually or as needed |
| Caulking and Repair of Minor Cracks | Annually or as needed |
| Repainting or Restraining | Every 3-5 years (depending on paint/stain type and climate) |
| Major Repairs (rotted boards replacement) | As needed |
Cleaning Methods
Maintaining the beauty and longevity of your wood siding, whether you’ve tackled the installation yourself or hired a professional, requires regular cleaning. Different cleaning methods offer varying levels of effectiveness, cost, and risk of damage. Choosing the right approach depends on the type of wood, the finish, the extent of soiling, and your comfort level with different cleaning techniques.
Several methods exist for cleaning wood siding, each with its own set of advantages and disadvantages. Pressure washing offers speed and efficiency, while hand scrubbing provides more control and minimizes the risk of damage. The choice ultimately depends on the specific needs of your siding and your personal preferences.
Cleaning Method Comparison
The following table compares three common wood siding cleaning methods: pressure washing, scrubbing with a brush and cleaning solution, and a combination approach. Note that the cost and potential for damage can vary depending on factors such as the size of the area, the type of equipment used, and the experience level of the person performing the cleaning.
| Method | Effectiveness | Cost | Potential Damage |
|---|---|---|---|
| Pressure Washing | High, removes heavy dirt and grime quickly | Moderate to High (equipment rental or professional service) | High, risk of damaging wood fibers, removing paint or stain, and causing water damage if not used properly |
| Hand Scrubbing | Moderate, effective for light to moderate dirt and grime | Low (cleaning solution and brush) | Low, minimal risk of damage if done carefully |
| Combination (Pressure Wash then Scrub) | High, effective for removing heavy dirt and grime while allowing for careful cleaning of delicate areas | Moderate (equipment rental or professional service, cleaning solution and brush) | Moderate, risk of damage reduced by careful pressure washing and follow-up scrubbing |
Pressure Washing Techniques
Pressure washing can be highly effective but requires careful technique to avoid damage. Using excessive pressure or an improperly angled nozzle can easily damage the wood fibers, remove paint or stain, or force water behind the siding, leading to rot.
To minimize damage, use a pressure washer with adjustable pressure settings. Start with the lowest setting possible and gradually increase it as needed. Maintain a distance of at least 12-18 inches between the nozzle and the siding. Use a wide-angle nozzle to distribute the water evenly and avoid concentrating the pressure on a single point. Always work from the bottom up to prevent streaking and allow the cleaner to work its way down. For particularly delicate areas, consider hand scrubbing instead of using a pressure washer.
Cleaning Solution Preparation
The choice of cleaning agent depends on the type of wood and finish on your siding. For untreated wood, a mild solution of water and a biodegradable cleaner is often sufficient. For painted or stained wood, use a cleaner specifically designed for that type of finish. Always test any cleaning solution on an inconspicuous area first to ensure it doesn’t damage the finish. Avoid harsh chemicals, as they can strip away protective finishes or damage the wood.
Example cleaning solutions:
- Untreated Wood: Mix a solution of warm water and a mild dish soap (like a biodegradable option). A ratio of 1 tablespoon of dish soap per gallon of water is a good starting point.
- Painted Wood: Use a cleaner specifically formulated for painted wood siding. Follow the manufacturer’s instructions carefully.
- Stained Wood: Use a cleaner designed for stained wood. Again, follow the manufacturer’s instructions carefully.
Hand Scrubbing Process
Hand scrubbing is a gentler approach suitable for light to moderate dirt and grime, or for areas where pressure washing is too risky. This method requires more time and effort but minimizes the chance of damage.
- Prepare your cleaning solution according to the instructions above.
- Use a soft-bristled brush to apply the solution to the siding, working in small sections at a time.
- Allow the solution to dwell on the siding for the recommended time (usually 5-10 minutes).
- Gently scrub the siding with the brush, using a back-and-forth motion. Avoid scrubbing too hard, as this could damage the wood.
- Rinse the siding thoroughly with a garden hose or low-pressure sprayer. Ensure all traces of cleaning solution are removed.
- Allow the siding to air dry completely before applying any protective finishes.
Repairing Damaged Siding
Maintaining wood siding involves addressing damage that occurs over time. Understanding common problems and repair techniques is crucial for preserving the aesthetic appeal and structural integrity of your home. This section details methods for repairing minor and major damage, ensuring your siding remains in optimal condition.
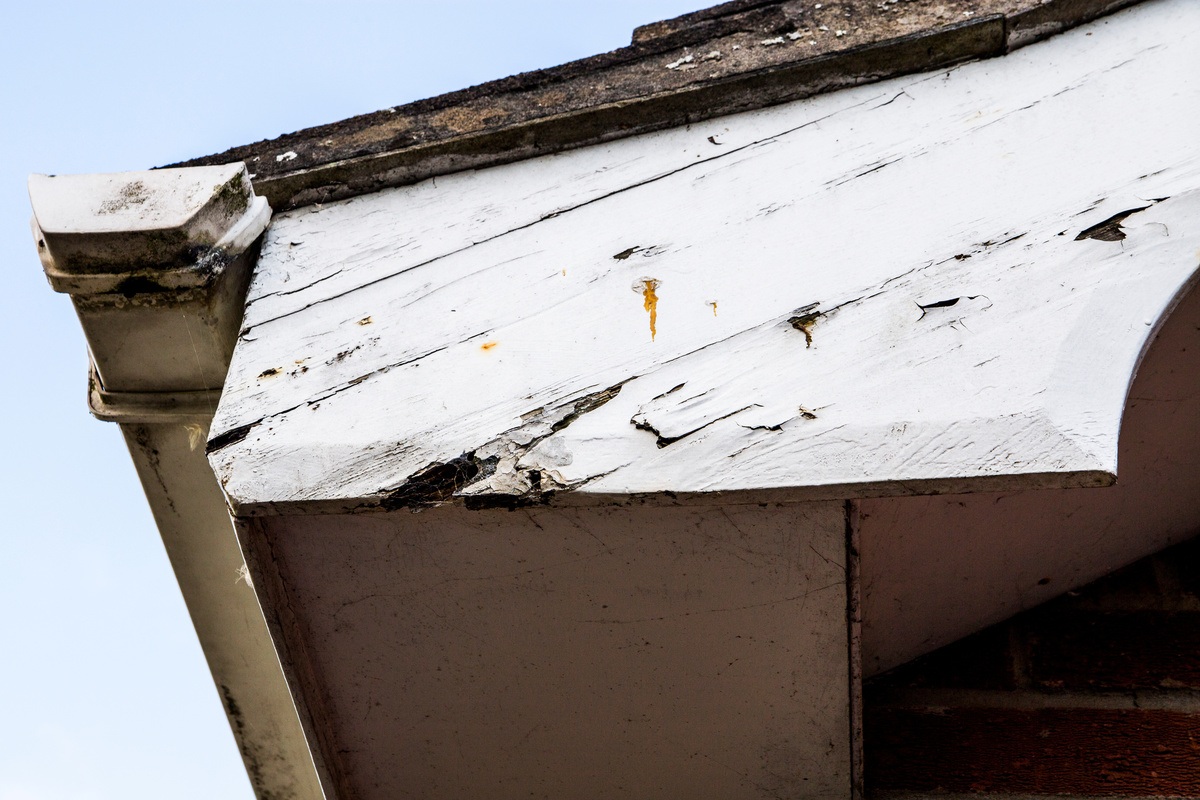
Wood siding is susceptible to various types of damage, often stemming from exposure to the elements and age. Common problems include cracks and splits, caused by expansion and contraction due to fluctuating temperatures and humidity; rot, resulting from prolonged water exposure and fungal growth; and insect infestation, leading to structural weakening and potential collapse. These issues can range from minor cosmetic blemishes to significant structural compromises, requiring different repair approaches.
Repairing Minor Cracks and Splits
Minor cracks and splits, often appearing as hairline fractures or small separations in the wood, can usually be repaired with wood filler. First, clean the damaged area thoroughly to remove dirt and debris. Then, apply a high-quality exterior-grade wood filler, ensuring it is firmly packed into the crack. Once the filler has dried completely, sand the area smooth and apply a coat of exterior-grade paint or stain that matches the existing siding to seamlessly blend the repair. For larger splits, consider using wood glue in addition to filler to improve strength and prevent further splitting. This method provides a cost-effective solution for minor damage, preventing further deterioration and maintaining the siding’s appearance.
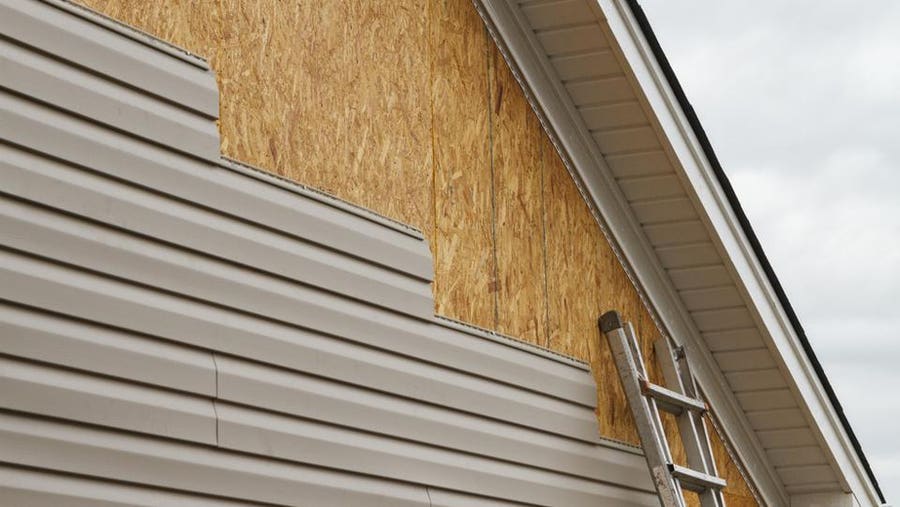
Replacing Damaged or Rotten Siding Boards
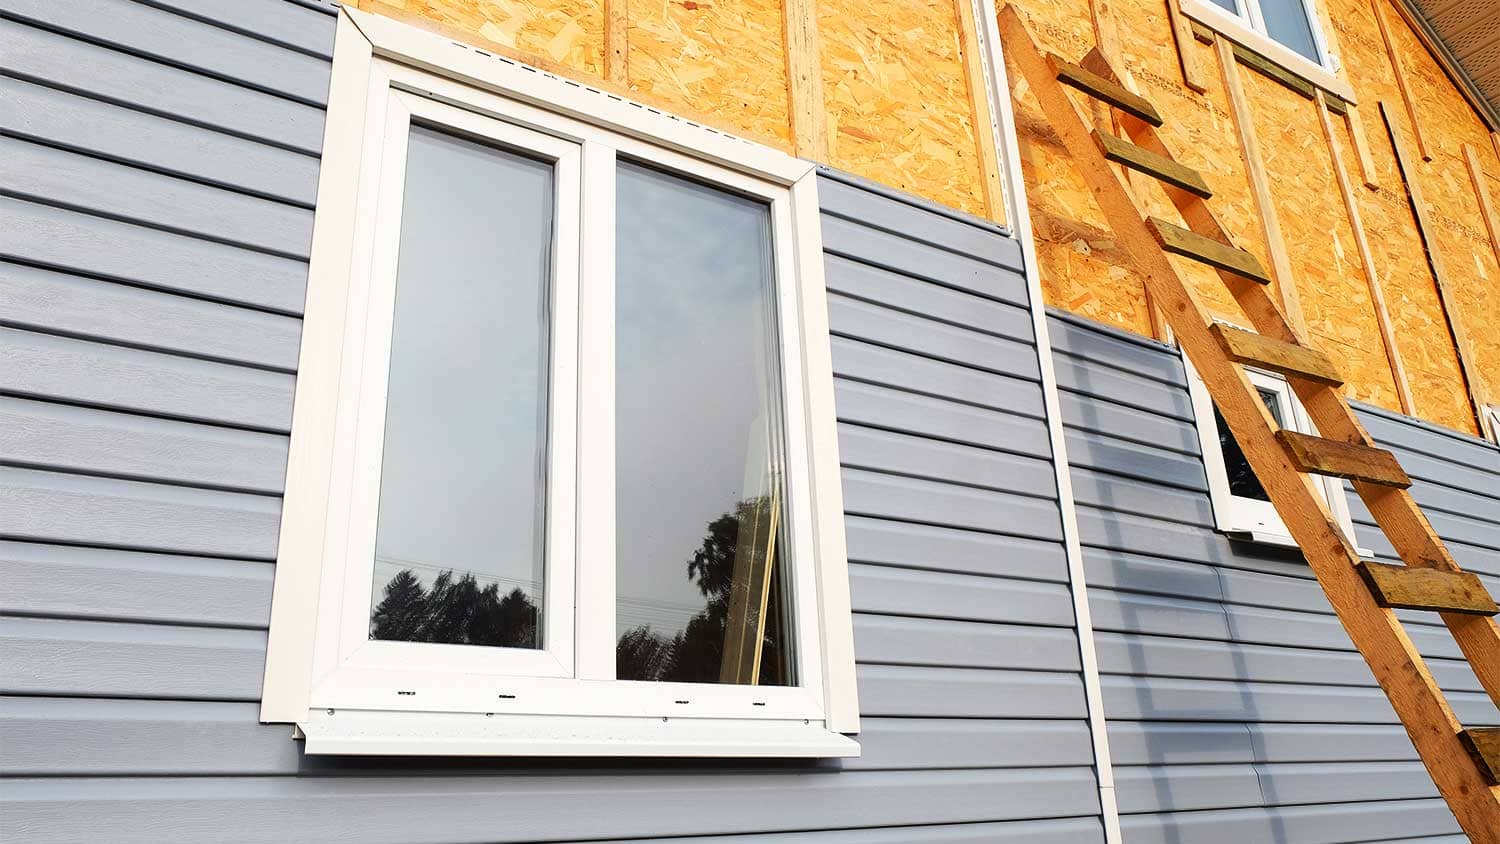
More extensive damage, such as rot or significant structural compromise, necessitates replacing the affected siding board. This involves carefully removing the damaged board using a pry bar or other suitable tool, taking care not to damage adjacent boards. Measure the length and width of the removed board to accurately select a replacement. Install the new board, ensuring it fits snugly against adjacent boards and is properly fastened using appropriate nails or screws. Caulking around the edges of the new board seals gaps and prevents water penetration, extending the life of the replacement board. This process requires more skill and potentially specialized tools, making it a task best suited for those with some DIY experience or professional assistance. For example, replacing a rotten board near a window requires careful consideration of flashing and proper sealing to prevent water damage around the window frame.
Caulking and Sealing Gaps and Cracks
Proper caulking and sealing are essential for preventing water intrusion, a major cause of wood siding damage. Inspect the siding for gaps and cracks around windows, doors, and joints between boards. Use a high-quality exterior-grade caulk that is paintable and flexible. Apply the caulk smoothly into the gaps, ensuring complete coverage and a watertight seal. Tool the caulk with a wet finger or caulking tool to create a smooth, even finish. Once the caulk has dried, paint or stain it to match the surrounding siding. This simple yet effective technique significantly enhances the siding’s weather resistance and extends its lifespan. For instance, failing to caulk around a window frame can lead to water damage, causing rot in the surrounding wood siding and potentially requiring more extensive and costly repairs.
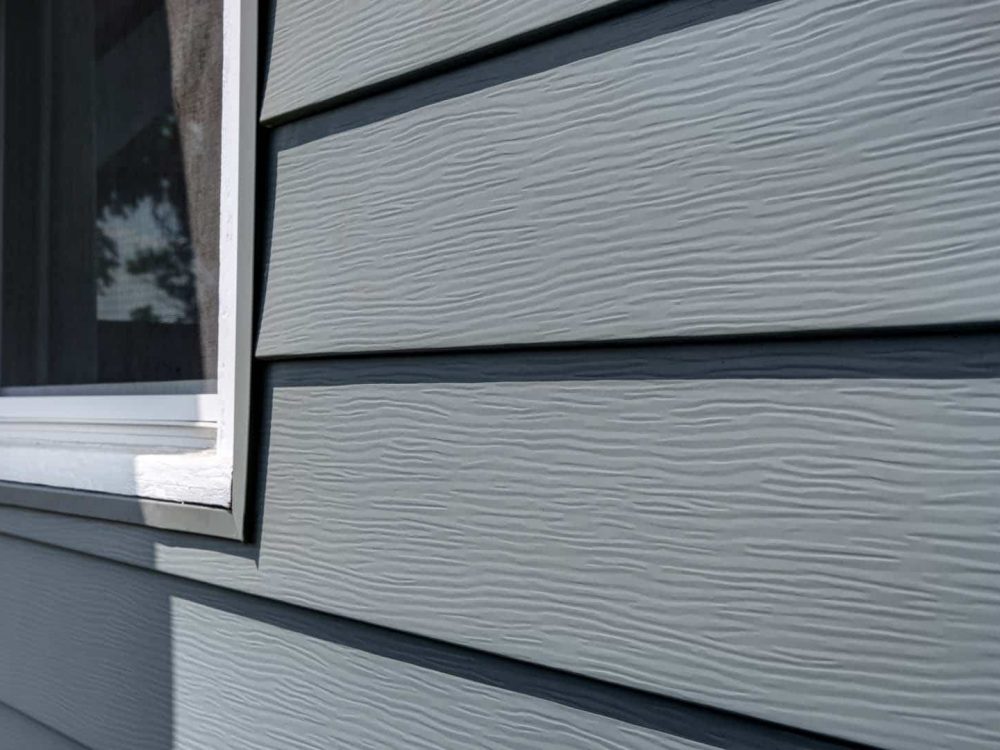
Painting and Staining
Choosing between paint and stain for your wood siding is a crucial decision impacting both aesthetics and the longevity of your home’s exterior. Both options offer protection from the elements, but they achieve this in different ways and have distinct advantages and disadvantages. Understanding these differences will help you make an informed choice tailored to your specific needs and preferences.
Painting Versus Staining Wood Siding
Paint forms a solid, opaque layer over the wood, completely hiding the natural grain and texture. Stain, on the other hand, penetrates the wood, enhancing its natural beauty while providing protection. Painting offers greater color flexibility, allowing you to achieve virtually any color you desire. Staining provides a more natural look, preserving the wood’s character. However, paint generally offers better protection against UV damage, moisture, and insect infestation, requiring less frequent reapplication than stain, which typically needs refreshing every few years. The durability of paint also makes it a more suitable choice for areas with harsh weather conditions.
Preparing Wood Siding for Painting or Staining
Proper preparation is key to achieving a long-lasting and attractive finish. This involves several steps, beginning with a thorough cleaning to remove dirt, mildew, and loose paint or stain. Power washing is often effective, but care must be taken to avoid damaging the wood. After cleaning, allow the siding to dry completely. Next, any damaged or rotting wood should be repaired or replaced. Sanding is crucial to create a smooth surface for better paint or stain adhesion. Use a medium-grit sandpaper to smooth out any imperfections and then a fine-grit sandpaper for a final smoothing. Finally, priming is recommended, especially for bare wood or when switching from stain to paint. Primer improves adhesion, provides a uniform surface, and helps prevent the wood from absorbing too much paint or stain, leading to uneven coverage and faster deterioration.
Applying Paint or Stain to Wood Siding
Applying paint or stain requires careful technique to ensure even coverage and a professional finish. For both, using a high-quality brush or sprayer is recommended, depending on the size of the area and personal preference. When using a brush, apply thin, even coats, working in the direction of the wood grain. Avoid overloading the brush, as this can lead to drips and runs. With a sprayer, maintain a consistent distance and overlap each pass slightly to prevent streaking. Multiple thin coats are always preferable to one thick coat, allowing each layer to dry thoroughly before applying the next. For staining, applying stain with a rag or brush can provide a more natural look, as opposed to the smoother finish produced by sprayers. This allows for better penetration and less surface buildup.
Choosing Appropriate Paint or Stain
The choice of paint or stain should consider both the type of wood and the climate. For example, cedar and redwood are naturally resistant to rot and decay, so a high-quality stain might be sufficient. However, softer woods like pine might require a more durable paint for optimal protection, especially in areas with heavy rainfall or extreme temperature fluctuations. Oil-based paints offer superior durability and water resistance, but they have a stronger odor and require longer drying times compared to water-based options. Similarly, oil-based stains penetrate deeper but take longer to dry. Water-based paints and stains are more environmentally friendly and have lower VOCs (volatile organic compounds), making them a preferable choice for health-conscious individuals. In hot, sunny climates, choosing a paint or stain with high UV protection is essential to prevent fading and cracking. In areas with high humidity, mildew-resistant formulations are recommended.
Cost Comparison
The financial implications of DIY versus professional wood siding maintenance are significant and should be carefully considered before embarking on a project. Understanding the associated costs, including labor, materials, and potential unforeseen expenses, is crucial for effective budgeting and project planning. This section will provide a detailed comparison to help you make an informed decision.
Several factors significantly influence the overall cost of maintaining your wood siding. The size of your house directly impacts the amount of materials needed and the time required for both DIY and professional work. The current condition of your siding plays a crucial role; extensive damage necessitates more extensive repairs, increasing costs. Finally, the choice of materials, such as the type of paint, stain, or wood sealant, will affect the price. High-quality, long-lasting products are typically more expensive upfront but can save money in the long run by reducing the frequency of maintenance.
Cost Breakdown: DIY vs. Professional
| Task | DIY Cost | Professional Cost | Time Savings |
|---|---|---|---|
| Cleaning (pressure washing, scrubbing) | $50 – $150 (for cleaning supplies) | $200 – $500 (depending on house size) | Several hours to a full day |
| Repairing Damaged Siding (minor repairs) | $50 – $200 (for materials like wood filler, caulk) | $300 – $800 (per damaged area, depending on complexity) | Half a day to a full day per area |
| Painting/Staining (average-sized house) | $300 – $800 (for paint/stain, brushes, rollers) | $1500 – $4000 (depending on house size and number of coats) | Several days to a week |
| Unexpected Expenses (e.g., rotted wood replacement) | Variable, can significantly increase DIY cost | Often included in professional estimates, but can still add to the cost | Time depends on the extent of the unexpected repairs |
Note: These cost estimates are approximate and can vary greatly based on location, material choices, and the specific needs of your home. Always obtain multiple quotes from professionals before making a decision.
Factors Influencing Overall Cost
The overall cost of wood siding maintenance is influenced by several key factors. For example, a larger house will naturally require more materials and labor, increasing both DIY and professional costs. The condition of the existing siding is another critical factor; extensive damage from rot, insect infestation, or severe weathering will significantly increase repair costs. Finally, the choice of materials plays a substantial role. High-quality paints, stains, and sealants offer superior protection and longevity but come at a higher initial cost. Choosing less expensive options might seem attractive initially, but could lead to more frequent maintenance and higher costs in the long run.
For instance, a 2000 sq ft home in good condition might cost $500-$1000 for DIY maintenance, while a similar-sized home requiring extensive repairs could easily exceed $2000. Professional costs would be proportionally higher, ranging from $1500 to $5000 or more depending on the extent of the work.
Time Commitment
Maintaining wood siding, whether you tackle it yourself or hire a professional, demands a significant time investment. The total time required varies greatly depending on several factors, most notably the size of the area needing attention and the complexity of the necessary repairs or treatments. This section will explore the time commitment differences between DIY and professional approaches.
The time commitment for a DIY wood siding maintenance project is highly variable. A small project, such as cleaning and staining a single section of siding, might only take a weekend for a moderately skilled individual. However, a larger project encompassing the entire exterior of a house, including extensive repairs, could easily consume several weeks, even for someone with experience. This is because DIY projects often involve multiple stages, requiring time for material acquisition, preparation, execution, and cleanup. Unforeseen issues, such as discovering significant rot or damage, can further extend the timeframe considerably.
DIY Wood Siding Maintenance Time Estimates
A small project, such as cleaning and light staining a 100 square foot section of siding, might take a skilled DIYer approximately 8-12 hours spread over a weekend. A more substantial project involving cleaning, repairing minor damage, and repainting or restaining 500 square feet of siding could easily take 40-60 hours, spread over multiple weekends or even several weeks, depending on the individual’s pace and skill level. Larger, more complex projects involving significant repairs or the replacement of damaged sections can require substantially more time. For instance, repairing extensive water damage and replacing rotten siding boards on a large house could take several weeks or even months of dedicated work.
Professional Wood Siding Maintenance Time Estimates
Professional contractors typically work more efficiently due to experience and specialized tools. They can often complete a project significantly faster than a DIY enthusiast. A professional crew might complete the cleaning and staining of a 500 square foot area in a single day or less, depending on the crew size and the complexity of the project. Larger, more complex projects, such as those involving significant repairs or replacements, will still take longer, but the overall timeline is generally shorter compared to a DIY approach. For example, a project that might take a DIYer several weeks could be completed by a professional team in a matter of days, particularly if they have multiple workers on site. However, scheduling with a professional team might require more lead time due to their existing workload.
Skill and Experience
Successfully maintaining wood siding, whether DIY or professionally, hinges significantly on the appropriate skillset and experience. Undertaking this task requires a blend of practical abilities and theoretical knowledge, impacting both the final result and the safety of the project. A lack of sufficient expertise can lead to costly mistakes and even safety hazards.
Understanding the necessary skills and experience is crucial for making an informed decision about whether to tackle wood siding maintenance as a DIY project or to hire a professional. This section will outline the essential skills needed and the potential negative consequences of attempting this work without the proper qualifications.
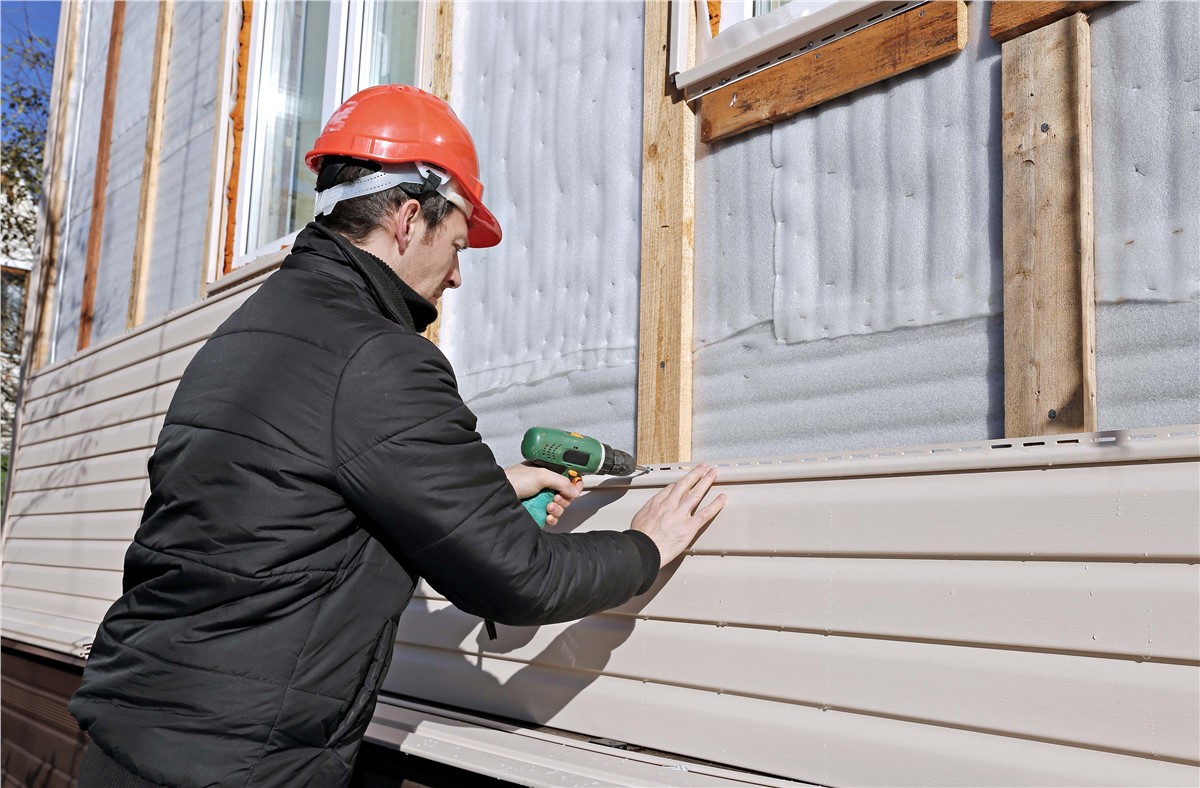
Necessary Skills for DIY Wood Siding Maintenance
Successful DIY wood siding maintenance demands a combination of practical skills and knowledge. These skills aren’t necessarily learned overnight; they often require practice and experience. Improper techniques can lead to damage to the siding, compromising its protective qualities and the overall aesthetic appeal of your home.
- Basic Carpentry Skills: This includes the ability to use hand tools such as hammers, screwdrivers, and saws safely and effectively. Familiarity with power tools like drills, nail guns, and sanders is also beneficial but requires proper training and safety precautions.
- Understanding of Wood and its Properties: Knowledge of different wood types, their susceptibility to rot, insect infestation, and the impact of weather conditions is vital. This knowledge helps in identifying potential problems and selecting the appropriate treatment methods.
- Painting and Staining Techniques: Proper surface preparation, including cleaning, priming, and applying paint or stain according to manufacturer’s instructions, is crucial for achieving a durable and aesthetically pleasing finish. Uneven application or improper surface preparation can lead to premature peeling or fading.
- Ladder Safety and Working at Heights: Working on ladders requires careful attention to safety procedures. Incorrect ladder placement or usage can lead to serious injuries. Understanding safe working practices and using appropriate safety equipment is paramount.
- Problem-Solving and Troubleshooting: Identifying and addressing issues such as rot, insect damage, or loose siding requires problem-solving skills. Being able to diagnose the problem accurately and choose the appropriate solution is essential.
Potential Risks of Insufficient Skills
Attempting DIY wood siding maintenance without sufficient skills can result in a range of negative consequences, including financial losses and safety hazards. These risks should be carefully considered before embarking on the project.
- Damage to Siding: Improper use of tools or incorrect repair techniques can cause further damage to the siding, potentially requiring more extensive and costly repairs.
- Increased Repair Costs: Mistakes made during DIY maintenance can lead to more extensive and expensive repairs later on. For instance, improperly applied stain can lead to premature deterioration, necessitating costly repainting or replacement.
- Safety Hazards: Working at heights without proper safety training and equipment significantly increases the risk of falls and injuries. Improper handling of power tools can also lead to accidents.
- Voiding Warranties: Some siding manufacturers’ warranties may be voided if maintenance is not performed according to their specifications. This could leave you responsible for costly repairs.
- Compromised Home Protection: Improperly maintained siding can compromise the home’s protection against the elements, leading to water damage, mold growth, and other structural issues. This can cause significant and costly damage in the long run.
Safety Precautions
Maintaining wood siding, whether DIY or professionally done, involves inherent risks. Prioritizing safety is crucial to prevent accidents and injuries. This section details essential safety precautions to ensure a smooth and hazard-free maintenance process. Careful planning and adherence to these guidelines will minimize potential risks.
Wood siding maintenance often requires working at heights, handling potentially hazardous chemicals, and using sharp tools. Understanding and mitigating these risks is paramount. Ignoring safety measures can lead to serious injuries, including falls, cuts, chemical burns, and eye injuries. Proper planning and the use of appropriate safety equipment are essential for a safe and successful project.
Ladder Safety
Safe ladder use is paramount when working on wood siding, especially for multi-story homes. Always ensure the ladder is on a stable, level surface and extends at least three feet above the roofline. Never overreach while on a ladder; instead, reposition the ladder as needed. Inspect the ladder before each use for any signs of damage or wear and tear. Consider using a ladder stabilizer for added security, especially on uneven ground. A spotter can also be invaluable for added safety and support.
Protective Gear
Appropriate protective gear is essential to minimize the risk of injury. This includes safety glasses or goggles to protect eyes from flying debris, dust, and chemical splashes. Gloves should always be worn to protect hands from splinters, cuts, and chemical irritants. A dust mask or respirator is necessary when working with sanding materials or applying paints and stains to prevent inhaling harmful particles or fumes. Sturdy work boots provide protection against punctures and slips. For working at heights, a safety harness might be necessary, depending on the project’s complexity and height.
Chemical Handling
Many cleaning and painting products used in wood siding maintenance contain hazardous chemicals. Always read and follow the manufacturer’s instructions carefully. Wear appropriate protective gear, including gloves, goggles, and a respirator, as indicated on the product label. Work in a well-ventilated area, or use appropriate ventilation equipment. Never mix different cleaning products, as this can create dangerous fumes or reactions. Store chemicals safely and securely, out of reach of children and pets. Dispose of leftover chemicals according to local regulations and guidelines. In case of accidental spills or contact, follow the instructions on the product label and seek medical attention if necessary.
Potential Hazards and Safety Measures
Several potential hazards are associated with wood siding maintenance. Understanding these hazards and implementing appropriate safety measures is crucial for a safe working environment.
| Hazard | Safety Measure |
|---|---|
| Falls from ladders or heights | Use a stable ladder, extend it sufficiently, maintain three points of contact, use a safety harness for significant heights, and have a spotter. |
| Cuts and splinters | Wear gloves, use sharp tools carefully, and inspect siding for loose or protruding nails or splinters before starting work. |
| Chemical exposure | Wear appropriate personal protective equipment (PPE), including gloves, goggles, and a respirator, work in a well-ventilated area, and follow product instructions carefully. |
| Eye injuries | Wear safety glasses or goggles at all times. |
| Inhalation of dust and fumes | Use a dust mask or respirator when sanding or working with chemicals. |
| Electrical hazards | Keep electrical cords away from water and ensure that all electrical equipment is properly grounded. |
| Fire hazards | Keep flammable materials away from ignition sources and use caution when working with power tools. |
Warranty Considerations
Maintaining your wood siding properly is crucial not only for its longevity and aesthetic appeal but also for preserving any existing warranties. The type of maintenance performed—DIY or professional—significantly impacts the validity and coverage of these warranties. Understanding these implications is vital for homeowners.
Manufacturers often include warranties covering defects in materials and workmanship for a specific period. However, these warranties typically contain clauses that void coverage if damage results from improper maintenance or repairs. This is where the distinction between DIY and professional maintenance becomes critical.
Impact of DIY Maintenance on Warranties
Improper DIY maintenance can easily invalidate your wood siding warranty. For example, using the wrong cleaning solutions, applying paint or stain incorrectly, or performing repairs without the necessary skill can lead to premature deterioration and damage. If a manufacturer determines that damage resulted from such improper maintenance, they may refuse to honor warranty claims. This can leave you responsible for costly repairs or replacements, even if the initial siding defect was covered under the warranty. Consider a scenario where improper pressure washing leads to damage. A manufacturer might easily argue that this damage was not caused by a defect in the siding itself, but rather by improper maintenance, thus voiding the warranty.
Protection of Warranties Through Professional Maintenance
Professional siding maintenance offers a significant advantage in protecting your warranties. Reputable contractors are trained and experienced in the proper care and repair of wood siding. They use appropriate cleaning methods, materials, and techniques, minimizing the risk of damage that could be attributed to improper maintenance. Furthermore, professional maintenance often includes detailed documentation, which can be crucial in supporting warranty claims should a problem arise. If a defect is discovered, the documentation of proper professional maintenance strengthens your case for warranty coverage. For instance, a professional’s report detailing regular cleaning and preventative maintenance can provide compelling evidence that any subsequent damage wasn’t caused by neglect or improper handling.
Warranty Clauses and Specifics
It’s imperative to carefully review your siding manufacturer’s warranty documentation. Pay close attention to clauses related to maintenance and repair. These clauses often specify acceptable maintenance practices and may even recommend using specific cleaning products or contractors. Understanding these specifics will help you make informed decisions about your maintenance approach and protect your investment. Failing to adhere to these specified guidelines could significantly impact your ability to file a successful warranty claim.
Environmental Impact
Maintaining wood siding, whether through DIY or professional methods, carries environmental implications. The choices made regarding waste disposal and material selection significantly influence the overall environmental footprint of the project. Understanding these impacts allows for informed decision-making towards more sustainable practices.
The environmental impact of DIY versus professional wood siding maintenance hinges primarily on waste generation and the responsible sourcing of materials. DIY projects often result in smaller quantities of waste, as materials are typically purchased only as needed. However, improper disposal of leftover paint, stains, and wood scraps can negate this advantage. Professional services, while potentially generating more waste due to larger-scale operations, often have established systems for responsible waste management, including recycling and proper disposal of hazardous materials. The choice of materials also plays a critical role; sustainably sourced wood and low-VOC paints minimize the environmental burden.
Waste Disposal Practices
Responsible waste disposal is crucial in minimizing the environmental impact of wood siding maintenance. Improper disposal of leftover paints, stains, and wood scraps can contaminate soil and water sources. DIYers should research local regulations regarding hazardous waste disposal and utilize designated drop-off centers. Professionals typically adhere to stricter environmental regulations and have established procedures for the safe disposal of waste materials. This often includes recycling wood scraps whenever possible and using specialized containers for hazardous waste. Examples of responsible disposal include separating paint cans from regular trash, using designated recycling bins for wood, and properly labeling and transporting hazardous waste to authorized facilities. Failure to do so can lead to fines and environmental damage.
Material Selection and Sourcing
The selection of materials significantly influences the environmental impact. Choosing sustainably sourced wood, certified by organizations like the Forest Stewardship Council (FSC), ensures that the wood comes from responsibly managed forests. Similarly, opting for low-VOC (volatile organic compound) paints and stains reduces air pollution and minimizes the release of harmful chemicals into the environment. Professionals often have access to a wider range of eco-friendly materials and may be more knowledgeable about sustainable sourcing options. For example, using reclaimed wood for repairs significantly reduces the demand for newly harvested timber, thereby lowering deforestation rates. Choosing paints with low or zero VOC content can significantly reduce air pollution during and after application.
Environmentally Responsible Practices
Implementing environmentally responsible practices during wood siding maintenance is achievable through careful planning and execution. This includes minimizing waste generation through accurate material estimations, using reusable containers and tools, and employing proper cleaning techniques to prevent excessive water usage. Selecting sustainable materials, such as FSC-certified wood and low-VOC paints, further reduces the environmental footprint. Professional services often incorporate these practices as part of their standard operating procedures. For instance, a professional might use a pressure washer with a water recycling system to conserve water, or they might carefully remove and reuse existing siding components rather than replacing them entirely. Prioritizing these practices, regardless of whether the work is DIY or professional, contributes to a more sustainable approach to wood siding maintenance.
Long-Term Maintenance Strategies
Developing a comprehensive long-term maintenance plan is crucial for preserving the beauty and structural integrity of your wood siding. A proactive approach, incorporating regular inspections and preventative measures, will significantly extend the lifespan of your siding and minimize costly repairs down the line. This plan should be tailored to your specific climate and the type of wood used.
Regular inspections and preventative maintenance are key to extending the life of your wood siding. Ignoring minor issues can lead to more extensive and expensive damage later. A well-defined plan ensures that problems are addressed promptly, preventing escalation and protecting your investment. This proactive approach will not only save money in the long run but also maintain the aesthetic appeal of your home.
Preventative Maintenance Schedule
A well-structured preventative maintenance schedule should be implemented to address potential issues before they become major problems. This schedule should include regular cleaning, inspections for damage, and timely application of protective coatings. For example, a homeowner in a region with heavy rainfall might need to schedule more frequent inspections for signs of rot or moisture damage than someone in a drier climate.
Inspection Procedures
Regular inspections are essential for early detection of problems. These should involve a thorough visual examination of all siding surfaces, paying close attention to areas prone to damage such as corners, joints, and areas near the ground. Look for signs of rot, insect infestation, warping, cracking, and loose or damaged boards. Note the location and severity of any damage found, and create a prioritized list for repairs. Consider using a checklist to ensure consistency and thoroughness. For instance, a checklist might include items such as: checking for cracks, assessing paint condition, inspecting for insect damage, and verifying proper flashing around windows and doors.
Protective Coating Application
The frequency of protective coating applications (paint or stain) will depend on several factors including the type of coating used, the climate, and the wood species. However, a general guideline might be to repaint or restain every 3-7 years, depending on the exposure and the quality of the coating. Proper surface preparation, including cleaning and repairing damaged areas, is crucial before applying any new coating. Using high-quality paints or stains designed for exterior use will significantly extend the life of the coating and protect the wood from the elements. For example, using a high-quality, UV-resistant stain can prevent premature fading and cracking, extending the time between recoating applications.
Addressing Common Issues Proactively
Proactive maintenance involves addressing common issues before they become significant problems. For example, promptly repairing minor cracks or replacing damaged boards prevents water penetration and subsequent rot. Regularly cleaning debris and removing overhanging branches reduces the risk of moisture buildup and insect infestation. Addressing these issues in a timely manner prevents small problems from escalating into costly repairs. For instance, a small crack in a board, if left unaddressed, can lead to extensive water damage requiring significant repairs or even board replacement.
Conclusive Thoughts
Ultimately, the decision of DIY versus professional wood siding maintenance hinges on a careful evaluation of your skills, available time, budget, and the condition of your siding. While DIY offers potential cost savings and a sense of accomplishment, professional maintenance ensures expertise, warranty protection, and often a faster turnaround. By understanding the pros and cons outlined in this guide, you can make a confident decision that best protects your investment and enhances the beauty of your home for years to come. Remember to always prioritize safety and consider the long-term implications of your choice.