Category: Home Improvement

  • Where to Buy Affordable Aluminum Siding

    Where to Buy Affordable Aluminum Siding

    Where to Buy Affordable Aluminum Siding for Your Home is a question many homeowners ask. Finding the right balance between cost and quality can be challenging, but understanding the market and your options makes the process significantly easier. This guide explores various avenues for purchasing affordable aluminum siding, considering factors like material quality, installation costs, and financing options to help you make an informed decision.

    From identifying reputable manufacturers and online retailers to understanding the nuances of installation and maintenance, we’ll cover essential aspects to ensure you achieve the best possible outcome for your home improvement project. We’ll also delve into the importance of warranties, environmental considerations, and ways to avoid hidden costs, equipping you with the knowledge to navigate the process confidently.

    Defining “Affordable”

    Determining the affordability of aluminum siding hinges on a variety of factors, making it difficult to assign a single price point that applies universally. The cost varies significantly based on location, project size, and the quality of materials and labor involved. Understanding these variables is key to making an informed decision.

    Affordability in the context of aluminum siding typically refers to a price range that represents good value for the investment, considering the product’s longevity and maintenance requirements. While the initial outlay might be higher than some alternatives, the long-term cost-effectiveness should be a primary consideration.

    Price Ranges for Affordable Aluminum Siding

    The price of aluminum siding typically ranges from $3 to $12 per square foot, including both materials and installation. This wide range reflects differences in material quality (thickness, finish, color), labor costs (regional variations and contractor experience), and the complexity of the installation (e.g., intricate trim work, multiple architectural features). In regions with higher labor costs, such as major metropolitan areas on the East and West Coasts, the higher end of this range is more common. More rural areas might see prices closer to the lower end. A homeowner in a rural area of the Midwest might find $4-$6 per square foot to be a reasonable price, while someone in New York City might consider $8-$12 per square foot affordable, recognizing the increased cost of labor.

    Factors Influencing Perceived Affordability

    Several factors beyond the base price per square foot significantly impact the perceived affordability of aluminum siding.

    Material quality plays a crucial role. Thicker aluminum sheets are more durable and resistant to damage, justifying a higher initial cost. Premium finishes, such as those with enhanced fade resistance or textured surfaces, also increase the price. However, these premium materials often translate to lower long-term maintenance costs and increased lifespan, making the investment worthwhile for many homeowners.

    Installation costs constitute a substantial portion of the overall expense. The complexity of the project, including the size of the house, the number of architectural details, and the need for specialized labor (e.g., for difficult-to-reach areas), directly affects labor costs. Choosing a reputable and experienced installer is crucial, even if it means a slightly higher upfront cost, as it minimizes the risk of costly mistakes or future repairs.

    Price Comparison of Siding Materials

    The following table compares the approximate price ranges for aluminum siding with other common siding materials. These figures are estimates and can vary significantly based on location, quality, and installation costs.

    Siding Material Price Range Per Square Foot (USD) Pros Cons
    Aluminum $3 – $12 Durable, low maintenance, long lifespan, fire-resistant Higher initial cost compared to vinyl, can dent
    Vinyl $1 – $6 Affordable, easy to install, low maintenance Less durable than aluminum, can fade or crack
    Wood $4 – $20+ Aesthetically pleasing, natural look High maintenance, susceptible to rot and insect damage, expensive
    Fiber Cement $6 – $15 Durable, fire-resistant, low maintenance More expensive than vinyl, requires professional installation

    Sourcing Aluminum Siding

    Finding the right aluminum siding for your home involves understanding where to source it and comparing options to ensure you get the best value for your budget. This section will explore various avenues for purchasing aluminum siding, highlighting the advantages and disadvantages of each. Careful consideration of these options will help you make an informed decision.

    Major Aluminum Siding Manufacturers and Distribution Channels

    Several major manufacturers produce aluminum siding, each with its own distribution network. These manufacturers often sell their products through a combination of wholesale distributors, specialized siding contractors, and, in some cases, directly to consumers. Understanding these channels is crucial for securing competitive pricing and reliable installation services.

    • Alcoa: A leading producer of aluminum products, Alcoa’s siding is often available through building material suppliers and contractors specializing in exterior renovations. Their distribution often relies on a network of established wholesalers and dealers.
    • CertainTeed: Known for a wide range of building materials, CertainTeed offers aluminum siding distributed through a similar network to Alcoa, including home improvement retailers and contractors.
    • Mastic: Mastic, a prominent player in the exterior cladding market, typically distributes its aluminum siding through a network of independent dealers and contractors, alongside some larger home improvement chains.

    Online Retailers Specializing in Aluminum Siding Sales and Pricing Strategies

    The internet provides a convenient platform for comparing prices and finding deals on aluminum siding. However, it’s important to be aware of the different pricing strategies employed by online retailers. Some may offer competitive pricing on bulk orders, while others may focus on offering a wider selection of styles and colors, potentially at a higher price point. Always compare total costs, including shipping and handling fees.

    • Many online retailers operate as marketplaces, listing products from various manufacturers and suppliers. Pricing can vary significantly depending on the seller and the specific product specifications.
    • Some online retailers specialize in home improvement supplies and offer competitive pricing by leveraging bulk purchasing power. They may offer discounts for larger orders or bundle deals that include installation materials.
    • Direct-to-consumer manufacturers may offer online sales, often bypassing the traditional distribution network. This can potentially result in lower prices but might require more direct involvement in the purchasing and shipping process.

    Big-Box Stores versus Specialized Siding Contractors

    Purchasing aluminum siding from big-box stores versus specialized siding contractors presents distinct advantages and disadvantages. Big-box stores offer convenience and potentially competitive pricing on standard products, but may lack the specialized knowledge and service provided by experienced siding contractors.

    • Big-box stores typically offer a limited selection of aluminum siding options and may not provide comprehensive installation services. However, they are generally convenient for smaller projects and readily accessible.
    • Specialized siding contractors often offer a wider selection of siding options, expert installation services, and potentially better warranties. They can also provide valuable advice on choosing the right siding for your home and climate. However, their services typically come at a higher cost.

    Evaluating Material Quality

    Choosing high-quality aluminum siding is crucial for ensuring the longevity and aesthetic appeal of your home’s exterior. The initial cost savings of lower-quality materials can quickly be offset by premature deterioration, requiring costly repairs or replacements. Understanding the key characteristics of durable aluminum siding will help you make an informed decision.

    Aluminum siding thickness, coating type, and manufacturer warranty are key indicators of quality. Thicker siding generally offers greater resistance to dents and damage, while a high-quality coating protects against fading, chipping, and corrosion. A comprehensive warranty demonstrates the manufacturer’s confidence in their product.

    Aluminum Siding Thickness and Gauge

    Aluminum siding is measured by its gauge, a number inversely proportional to thickness. Lower gauge numbers indicate thicker siding. For example, a .032-inch thick siding (gauge 26) is considered more durable than a .024-inch thick siding (gauge 28). Thicker aluminum siding better withstands impacts from hail, debris, and accidental bumps, contributing to a longer lifespan. This added durability translates to less frequent repairs and replacements, ultimately saving you money in the long run. While thicker siding generally costs more upfront, the investment pays off in increased longevity and reduced maintenance.

    Aluminum Siding Coatings and Finishes

    The coating applied to aluminum siding significantly influences its resistance to weathering and fading. Two common types are painted and powder-coated finishes. Painted finishes, while generally less expensive, are often less durable than powder-coated finishes. Powder-coating involves applying a dry powder coating and then curing it at high temperatures, resulting in a thicker, more resilient finish that better resists chipping, peeling, and fading. Powder-coated siding often comes with longer warranties reflecting its superior performance. The choice between painted and powder-coated siding depends on budget and desired longevity; powder-coating offers superior protection and longevity but commands a higher initial cost.

    Warranty Information and Manufacturer Reputation

    A comprehensive warranty is a strong indicator of a manufacturer’s confidence in their product. Look for warranties that cover defects in materials and workmanship for an extended period, typically 20-30 years or longer. A reputable manufacturer will stand behind their product and offer prompt resolution of any issues. Checking online reviews and ratings from previous customers can also help assess the manufacturer’s reliability and customer service. Understanding the specifics of the warranty, including what is and is not covered, is crucial before making a purchase.

    Questions to Ask Manufacturers or Suppliers

    Before committing to a purchase, it is essential to gather all necessary information regarding material quality and warranties. The following points should be clarified:

    • What is the gauge (thickness) of the aluminum siding?
    • What type of coating is used (painted, powder-coated, etc.) and what is its thickness?
    • What is the warranty period and what specific defects are covered?
    • What is the manufacturer’s reputation and history in the industry?
    • Are there any independent certifications or testing results verifying the siding’s quality and durability?
    • What are the available color options and their fade resistance ratings?

    Installation Costs and Considerations

    Installing aluminum siding involves significant costs, encompassing both materials and labor. Understanding these expenses is crucial for budgeting and making informed decisions about your home improvement project. Accurate cost estimation depends on several key factors, allowing for a realistic assessment of the overall investment.

    The total cost of aluminum siding installation is typically a combination of material costs and labor charges. Material costs vary depending on the type of siding chosen (thickness, color, style), the amount needed (square footage of your home), and the supplier. Labor costs are heavily influenced by factors such as the complexity of the installation (e.g., intricate trim work, multiple gables), the size of your home, and prevailing regional labor rates. In many cases, contractors provide a comprehensive quote encompassing both materials and labor.

    Typical Installation Cost Breakdown

    A detailed breakdown of installation costs is difficult to provide without specifics about your home and location. However, we can offer a general range based on national averages. Keep in mind that these are estimates and actual costs may vary significantly. Always obtain multiple quotes from reputable contractors for accurate pricing in your area.

    For a typical single-family home, the cost of aluminum siding installation can range from $6,000 to $15,000 or more. This includes both materials and labor. The lower end of the range often applies to smaller homes with simpler designs and straightforward installations, while the higher end reflects larger homes, complex architectural features, and potentially higher labor rates in certain regions.

    Factors Influencing Installation Costs

    Several factors significantly impact the final cost of your aluminum siding installation. Understanding these variables allows for better budgeting and realistic expectations.

    • Home Size: Larger homes naturally require more materials and more labor hours, leading to higher overall costs.
    • Home Complexity: Homes with intricate architectural details, such as dormers, multiple gables, or complex trim work, increase labor time and thus the cost. These details require more precision and careful installation.
    • Regional Labor Rates: Labor costs vary significantly across geographical locations. Areas with higher costs of living generally have higher labor rates for contractors.
    • Material Choice: The type of aluminum siding selected impacts the material cost. Higher-quality siding, featuring thicker gauge aluminum or specialized finishes, will be more expensive.
    • Existing Siding Removal: If existing siding needs removal before installation, this adds to both labor and disposal costs.

    DIY Installation versus Hiring a Professional

    The decision to install aluminum siding yourself or hire a professional contractor involves weighing the potential benefits and risks of each approach.

    Factor DIY Installation Professional Installation
    Cost Potentially lower initial cost (materials only) Higher initial cost (materials and labor)
    Time Significantly longer project duration Faster project completion
    Skill Level Requires significant experience and skill Expertise and experience guaranteed
    Warranty Limited or no warranty on installation Warranty typically provided on both materials and labor
    Risk of Damage Higher risk of damage to the home or improper installation Lower risk of damage or improper installation

    While DIY installation might seem cost-effective initially, the potential for errors, damage, and increased project time can ultimately negate any savings. Professional contractors possess the expertise, tools, and insurance to ensure a proper and safe installation, offering peace of mind and a warranty to protect your investment.

    Financing Options

    Securing funding for your aluminum siding project can significantly impact your budget and timeline. Understanding the various financing options available allows you to make informed decisions based on your financial situation and the project’s scope. This section will explore several common methods, highlighting their advantages and disadvantages.

    Several financing avenues exist for home improvement projects, each with its own set of benefits and drawbacks. Choosing the right option depends heavily on factors such as your credit score, the project’s cost, and your repayment comfort level. Careful consideration of these factors will lead to a more financially sound decision.

    Home Improvement Loans

    Home improvement loans are specifically designed for projects like siding replacement. These loans offer fixed interest rates, predictable monthly payments, and longer repayment periods than credit cards. However, they typically require a credit check and may involve closing costs. For example, a homeowner might secure a 5-year loan with a 7% interest rate to cover a $10,000 siding project. The monthly payments would be calculated based on the loan amount, interest rate, and loan term. This predictability allows for better budgeting.

    Credit Cards

    Credit cards offer immediate access to funds, making them convenient for smaller projects. However, high interest rates and potential for accumulating debt are significant drawbacks. Using a credit card for a large home improvement project could lead to substantial interest charges over time if not paid off quickly. For instance, using a credit card with a 18% APR to finance a $5,000 project could result in significantly higher total costs compared to a home improvement loan.

    Home Equity Loans or Lines of Credit (HELOCs)

    Home equity loans and HELOCs use your home’s equity as collateral. HELOCs offer flexibility, allowing you to borrow funds as needed up to a pre-approved limit. Home equity loans provide a lump-sum payment. Both options typically offer lower interest rates than credit cards but carry the risk of foreclosure if payments are not made. For larger projects, a HELOC might be advantageous, allowing for staged payments as the project progresses. However, it’s crucial to understand the terms and conditions, including potential interest rate fluctuations with a HELOC.

    Comparison of Financing Options

    The following table compares common financing options for home improvement projects. Remember that interest rates and terms can vary based on your creditworthiness and the lender.

    Financing Option Typical Interest Rate Range Typical Repayment Term Advantages
    Home Improvement Loan 6% – 12% 1-7 years Fixed interest rate, predictable payments, longer repayment period
    Credit Card 15% – 25% Varies, often revolving Immediate access to funds, convenience
    Home Equity Loan 5% – 10% 5-15 years Lower interest rates than credit cards, lump sum payment
    HELOC Variable, typically lower than credit cards Draw period and repayment period vary Flexibility, access to funds as needed

    Warranty and Guarantees

    Protecting your investment in new aluminum siding requires careful consideration of the warranty offered by the manufacturer and installer. A comprehensive warranty provides peace of mind and safeguards against potential defects or issues that may arise over time. Understanding the specifics of different warranty types is crucial for making an informed purchasing decision.

    A thorough review of warranty information is paramount before committing to a purchase. Warranties vary significantly between manufacturers, impacting the level of protection you receive. Some may only cover material defects, while others might extend coverage to include workmanship or even labor costs associated with repairs. Choosing a product with a robust warranty can significantly reduce the risk of unforeseen expenses down the line.

    Warranty Types Offered by Manufacturers

    Manufacturers typically offer several types of warranties for their aluminum siding products. These warranties often address different aspects of the product and its installation. Common types include material defect warranties, which cover flaws in the manufacturing process, and workmanship warranties, which cover issues arising from improper installation. Some manufacturers offer combined warranties encompassing both material and workmanship, providing more comprehensive coverage. Additionally, some may offer extended warranties for an additional cost, providing longer-term protection. For example, one manufacturer might offer a 30-year warranty against material defects, while another might offer a 20-year warranty that covers both material defects and workmanship. A third might offer a 25-year limited warranty covering material defects, with an option to purchase a 10-year extended warranty covering labor. These differences highlight the importance of carefully comparing warranty terms.

    Key Aspects to Consider When Evaluating an Aluminum Siding Warranty

    Before finalizing your purchase, carefully examine the warranty’s fine print. A checklist of essential considerations includes:

    • Warranty Period: Note the duration of coverage for material defects and workmanship. Longer warranty periods generally indicate higher confidence in the product’s quality and durability.
    • Coverage Details: Understand precisely what is covered under the warranty. Does it include only material defects, or does it also encompass labor costs for repairs or replacements? Are there specific exclusions, such as damage caused by extreme weather events?
    • Transferability: Determine if the warranty is transferable to a future homeowner should you sell your property. Transferable warranties add significant value to your home.
    • Claim Process: Review the procedure for filing a warranty claim. Is it straightforward, or are there complex requirements or lengthy processing times?
    • Manufacturer Reputation: Research the manufacturer’s reputation and track record for honoring warranties. Online reviews and customer testimonials can offer valuable insights.
    • Written Documentation: Ensure you receive a clear and concise written warranty document. This document should clearly outline all terms and conditions of the warranty.

    Local Suppliers and Contractors

    Finding the right local supplier and contractor is crucial for a successful aluminum siding project. Choosing reputable professionals ensures quality materials, proper installation, and peace of mind. This section will guide you through the process of identifying and vetting potential partners for your home improvement project.

    Locating reputable local suppliers and contractors involves a multi-pronged approach. Online searches, referrals from trusted sources, and direct inquiries within your community are all effective strategies. Thorough vetting is paramount to avoid potential pitfalls and ensure a positive experience.

    Finding Reputable Local Suppliers and Contractors

    Several methods exist for finding qualified professionals. Online directories, such as those provided by the Better Business Bureau (BBB) and Angie’s List, offer ratings and reviews from past clients. Local home improvement stores often have relationships with reliable contractors and can provide recommendations. Networking within your community—asking friends, neighbors, and family for recommendations—can also yield valuable leads. Finally, checking with your local building permits office may provide a list of licensed contractors operating in your area. It’s advisable to contact several suppliers and contractors to compare prices and services.

    Vetting Potential Contractors

    Before committing to a contractor, a thorough vetting process is essential. This involves verifying their licensing and insurance, checking online reviews, and requesting references. Confirm that the contractor holds the necessary licenses to operate legally in your area. Verify they carry adequate liability and workers’ compensation insurance to protect you from potential financial liabilities in case of accidents or damages. Examine online reviews on platforms like Yelp, Google My Business, and the BBB to gauge customer satisfaction and identify any recurring issues. Request references from previous clients to directly inquire about their experiences with the contractor’s work quality, professionalism, and adherence to deadlines.

    Negotiating Prices and Securing Favorable Terms

    Negotiating prices and securing favorable terms requires preparation and clear communication. Obtain multiple quotes from different contractors to compare pricing and services. Clearly outline your project requirements, including the scope of work, materials, and desired timeline. Don’t hesitate to negotiate based on the quotes received, highlighting competitive pricing from other contractors. Clarify payment terms, including the down payment amount, payment schedule, and any penalties for late payments. Ensure the contract clearly specifies all aspects of the project, including materials used, warranty provisions, and dispute resolution mechanisms. A well-defined contract protects both you and the contractor, minimizing the potential for misunderstandings or disputes. For larger projects, consider breaking down the project into phases with milestone payments linked to the completion of each phase.

    Environmental Impact

    Aluminum siding, while offering durability and affordability, carries environmental implications throughout its lifecycle, from manufacturing to disposal. Understanding these impacts allows for informed decision-making, promoting responsible home improvement choices. This section details the environmental considerations associated with aluminum siding, comparing it to alternatives and outlining recycling options.

    Aluminum siding production is energy-intensive. The extraction of bauxite ore, the primary aluminum source, requires significant energy consumption and can lead to habitat disruption and water pollution. The smelting process, transforming bauxite into aluminum, also necessitates substantial energy input, often relying on fossil fuels, contributing to greenhouse gas emissions. Furthermore, the manufacturing of siding involves additional energy usage for processes like rolling, coating, and finishing.

    Aluminum Siding Manufacturing and Disposal

    The environmental impact of aluminum siding manufacturing stems primarily from energy consumption during bauxite mining and aluminum smelting. These processes contribute to greenhouse gas emissions and habitat destruction. Disposal presents another concern, as improper disposal can lead to landfill accumulation and resource depletion. However, the durability of aluminum siding often translates to a longer lifespan compared to some alternatives, potentially offsetting some of the initial environmental costs. The impact can be further reduced by choosing recycled aluminum content in the siding itself.

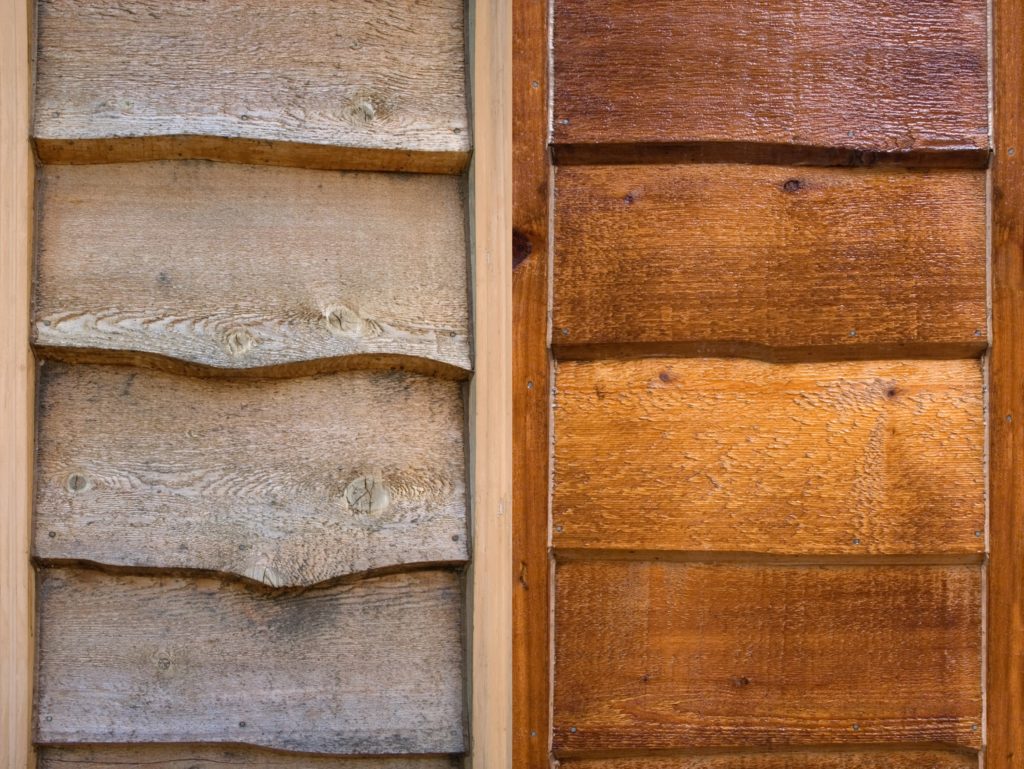
    Comparison with Other Siding Materials

    Compared to other common siding materials, aluminum siding presents a mixed environmental profile. Vinyl siding, while often cheaper initially, is derived from petroleum, a non-renewable resource, and releases harmful chemicals during manufacturing and incineration. Wood siding, while renewable, requires extensive logging, potentially impacting forests and biodiversity. The environmental impact of each material depends on factors such as manufacturing processes, transportation distances, and end-of-life management. Life cycle assessments, which consider the entire lifespan of a product, are necessary for comprehensive comparisons. For instance, a life cycle assessment might reveal that while the initial energy input for aluminum is high, its longevity and recyclability can make its overall environmental impact comparable to, or even better than, other options, depending on the specific scenarios and the other materials being compared.

    Aluminum Siding Recycling

    Aluminum is a highly recyclable material. At the end of its lifespan, aluminum siding can be recycled and reused in the production of new aluminum products, significantly reducing the demand for newly mined bauxite. Many scrap metal recycling centers accept aluminum siding. The recycling process requires significantly less energy than primary aluminum production, minimizing environmental impact. Checking with local recycling facilities to confirm their acceptance of aluminum siding is recommended before undertaking removal and disposal. The high recyclability rate of aluminum makes it a more environmentally sustainable option compared to materials with lower recyclability rates, such as vinyl.

    Long-Term Maintenance

    Aluminum siding, while durable, requires regular maintenance to preserve its appearance and extend its lifespan. Neglecting maintenance can lead to increased repair costs and a diminished aesthetic appeal. Understanding the typical maintenance needs and potential damage scenarios is crucial for homeowners.

    Aluminum siding is relatively low-maintenance compared to other siding materials, but it still needs attention to keep it looking its best and functioning properly. Proper care prevents costly repairs and extends the life of your investment.

    Cleaning Aluminum Siding

    Regular cleaning is essential for removing dirt, grime, and other debris that can accumulate over time. This prevents staining and helps maintain the siding’s original color and luster. A simple solution of mild detergent and water, applied with a soft brush or sponge, is usually sufficient. Power washing can be used, but should be done cautiously to avoid damaging the siding’s finish. Excessive pressure can strip paint or damage the surface. For stubborn stains, a specialized siding cleaner might be necessary, always following the manufacturer’s instructions. Annual cleaning is recommended, but more frequent cleaning may be necessary depending on environmental factors, such as proximity to trees or heavy pollution.

    Repairing Damaged Aluminum Siding

    Despite its durability, aluminum siding can be susceptible to damage from impacts, such as hail or flying debris. Minor dents can often be repaired by carefully pushing the dent back into place from the back side of the panel. More significant damage, such as large dents, cracks, or holes, may require panel replacement. The cost of repair will vary depending on the extent of the damage and the labor involved. For example, replacing a single damaged panel might cost between $50 and $150, including the cost of the replacement panel and labor, while more extensive repairs could cost several hundred dollars. It’s advisable to contact a qualified siding contractor for significant repairs to ensure proper installation and prevent further damage.

    Maintenance Schedule for Aluminum Siding

    A proactive maintenance schedule helps prevent costly repairs and keeps your aluminum siding looking its best.

    Task Frequency Notes
    Cleaning (mild detergent and water) Annually More frequent cleaning may be needed in areas with heavy pollution or near trees.
    Inspection for damage Semi-annually Check for dents, cracks, loose panels, or other signs of damage.
    Caulk inspection and repair Annually Check caulking around windows and doors for cracks or gaps. Repair as needed.
    Professional inspection Every 5-10 years A professional can identify potential problems early on and recommend necessary repairs.

    Style and Aesthetics

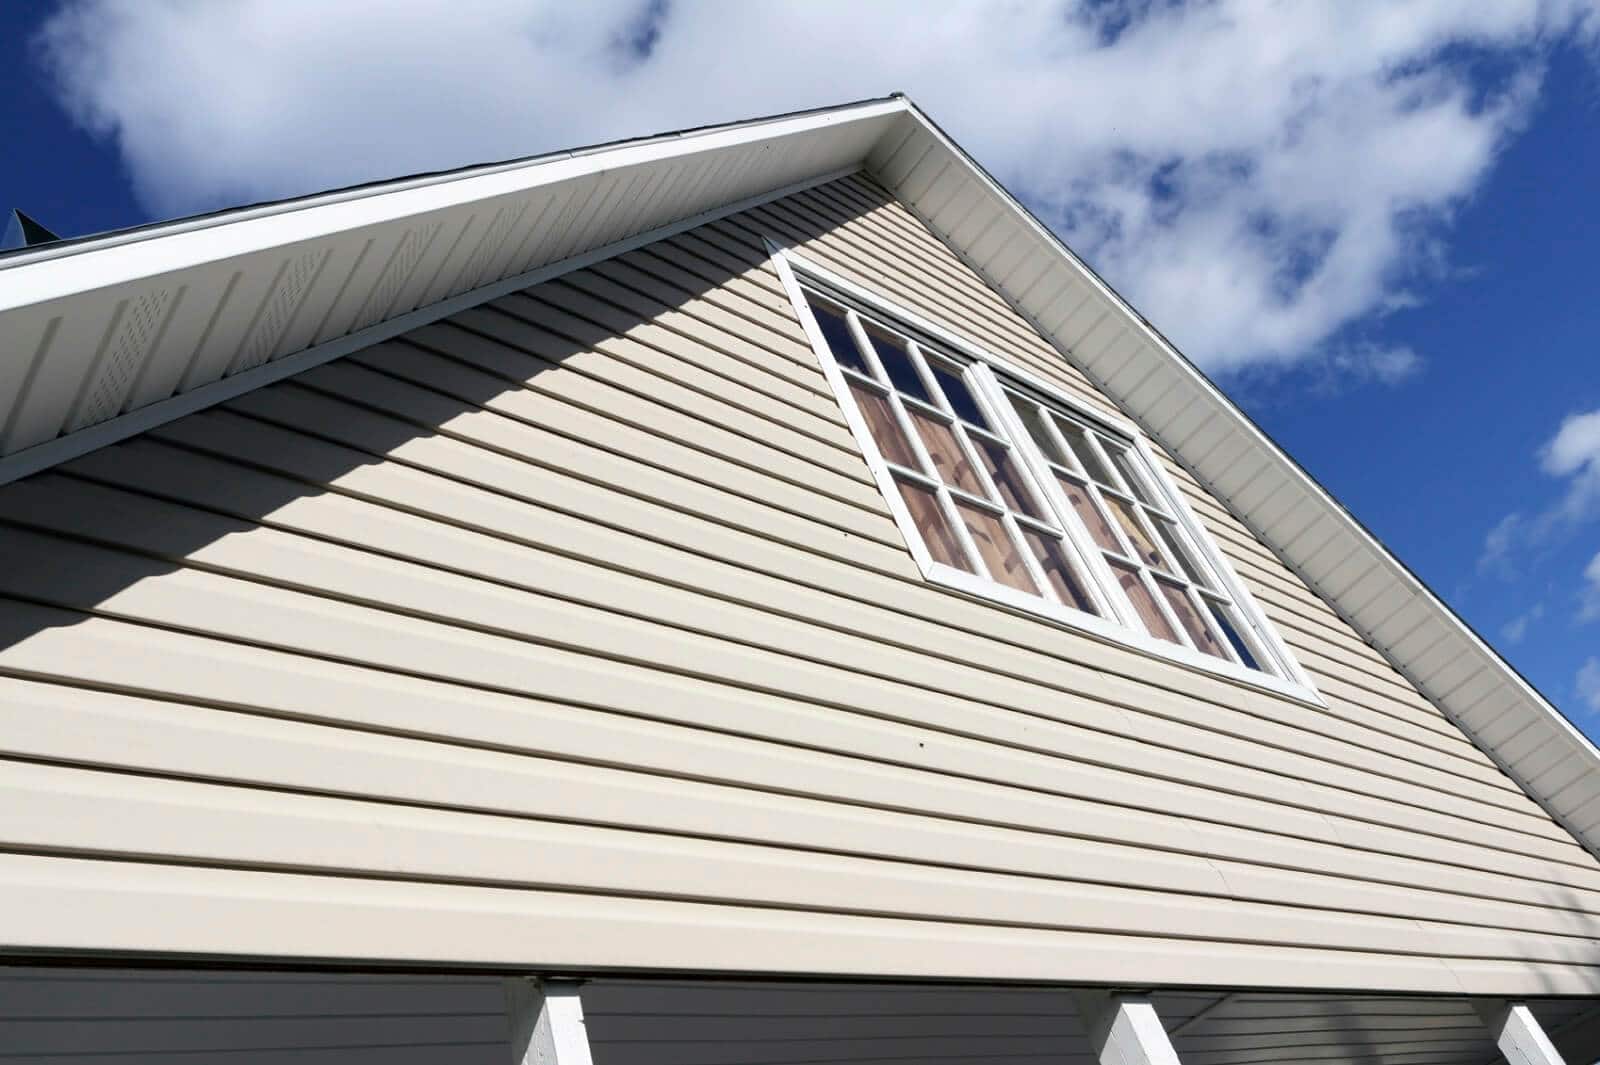
    Aluminum siding offers a surprisingly diverse range of aesthetic options, moving beyond the perception of a purely utilitarian material. Careful selection can significantly enhance a home’s curb appeal and complement its architectural style, providing a durable and attractive exterior. The key lies in understanding the available styles and colors and how they interact with the overall design of the house.

    Aluminum siding comes in a variety of styles and colors designed to mimic other materials or create a modern, clean look. The ability to customize the appearance allows homeowners to achieve a specific aesthetic without the higher cost and maintenance of traditional materials like wood or brick. This versatility makes it a popular choice for both renovations and new constructions.

    Color Options and Finishes

    Aluminum siding manufacturers offer an extensive palette of colors, ranging from classic neutrals to bold and vibrant hues. These colors are achieved through a durable powder-coating process, providing excellent protection against fading and chipping. Popular choices include various shades of white, beige, gray, and brown, which tend to complement a wide range of architectural styles. However, bolder colors like deep blues, greens, and reds can also be incorporated to create a striking visual impact, particularly on homes with modern or contemporary designs. Finishes also vary, offering options that mimic wood grain, stone textures, or a smooth, even surface. The choice of color and finish significantly impacts the overall appearance and should be carefully considered.

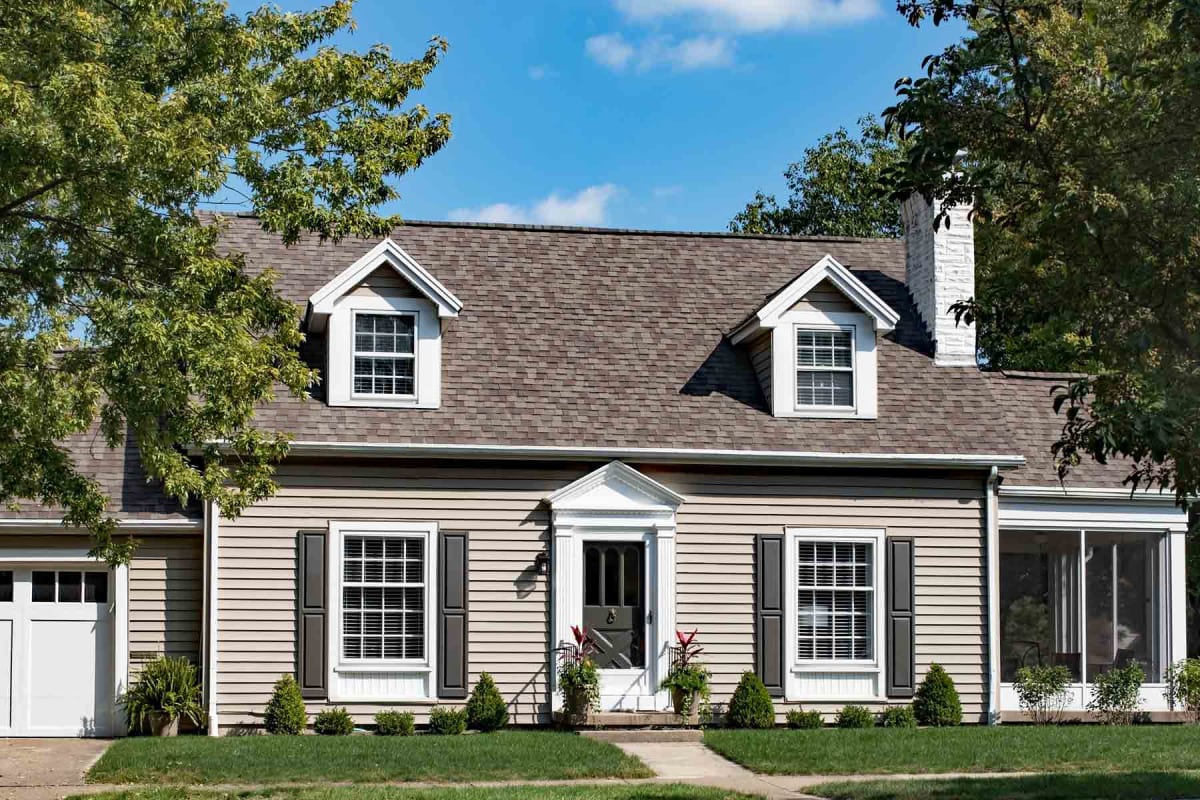
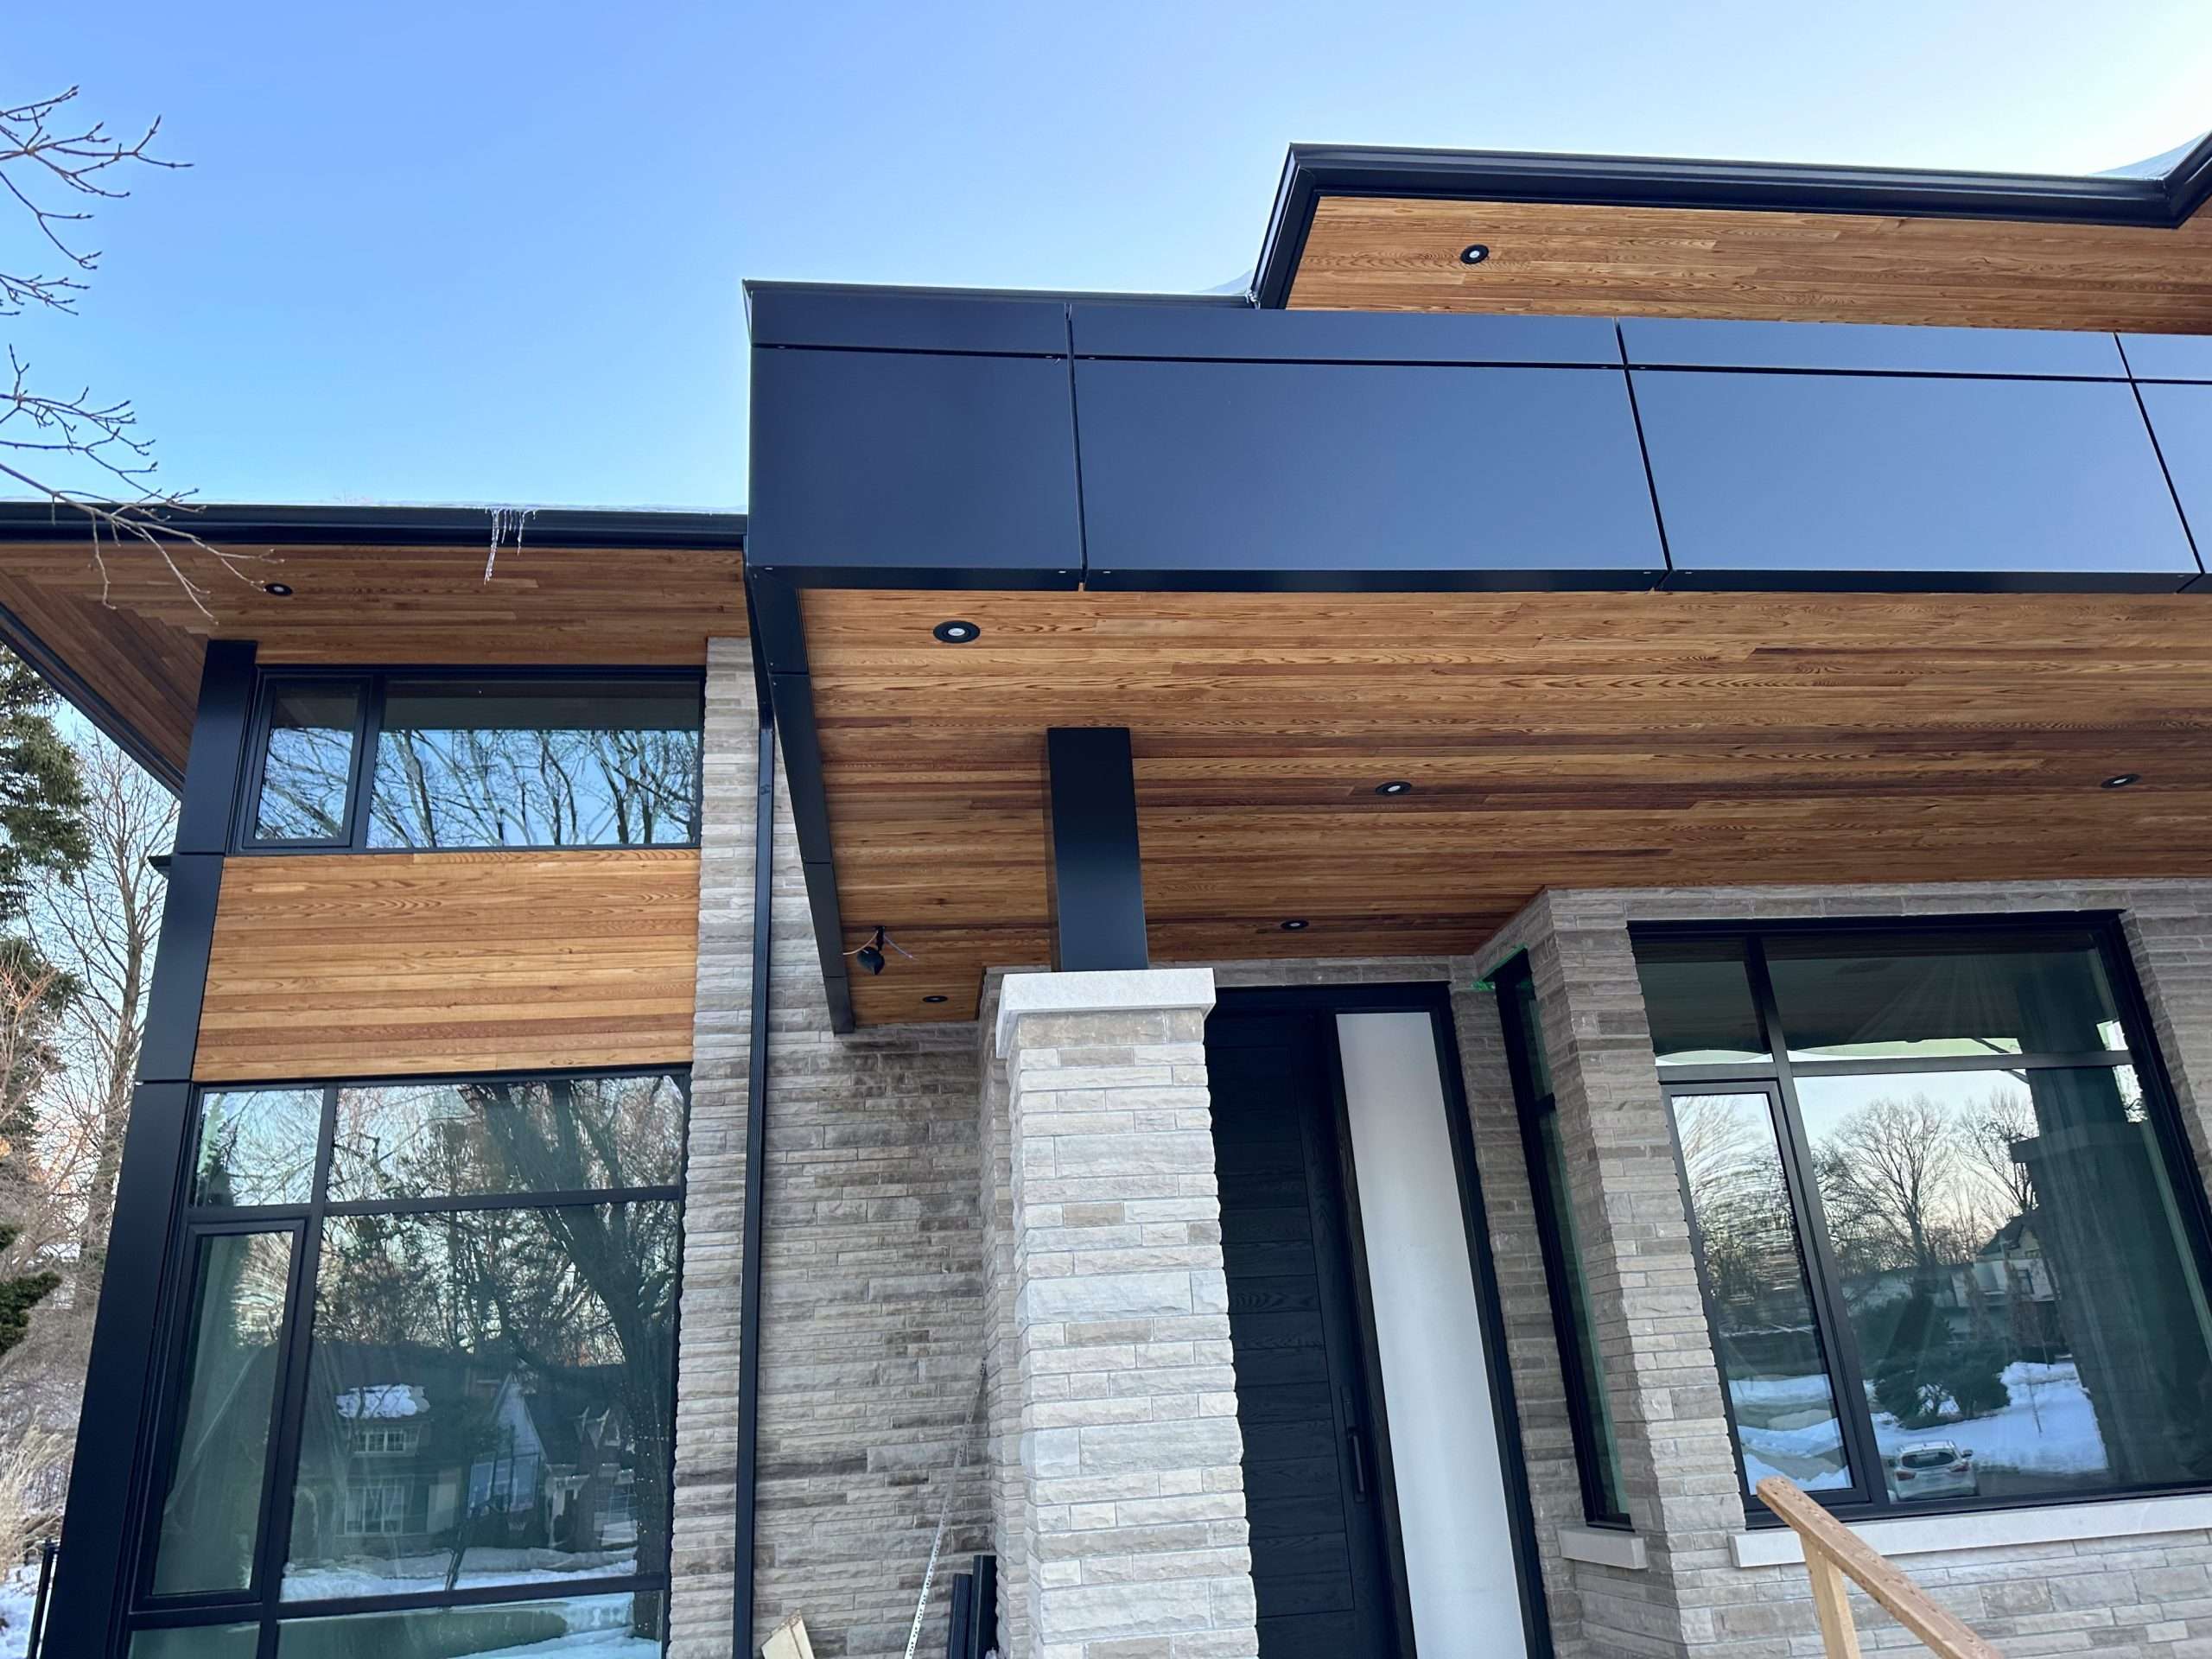
    Aluminum Siding and Architectural Styles

    The adaptability of aluminum siding makes it suitable for various architectural styles. For example, a classic colonial home might be complemented by aluminum siding in a muted, earth-toned color with a subtle texture that mimics wood clapboard. This creates a traditional look without the maintenance demands of real wood. A contemporary home, on the other hand, might benefit from sleek, smooth aluminum siding in a bold color like charcoal gray or deep blue, enhancing the modern lines and minimalist aesthetic. Ranch-style homes often look great with horizontal siding, while Victorian homes might use vertical siding or a combination of patterns to accentuate the architectural details. The choice of siding style and color should always be considered in relation to the existing architectural features and the desired overall effect.

    Enhancing Curb Appeal with Aluminum Siding

    To maximize curb appeal, careful consideration should be given to the interplay of color, style, and trim. Choosing colors that complement the roof, windows, and landscaping is crucial. For instance, a home with a dark gray roof might look stunning with light gray or beige aluminum siding, creating a balanced and visually appealing contrast. The use of contrasting trim colors, such as white or black, can add visual interest and highlight architectural details. Moreover, selecting a siding style that complements the home’s proportions and architectural features can significantly enhance its overall aesthetic. For example, vertical siding can make a home appear taller, while horizontal siding can emphasize its width. Paying attention to these details ensures that the aluminum siding not only protects the home but also enhances its beauty and value.

    Hidden Costs

    While the upfront cost of aluminum siding is a significant factor in your decision, several hidden expenses can significantly inflate the final bill. Understanding these potential costs beforehand is crucial for accurate budgeting and avoiding financial surprises during the installation process. Failing to account for these hidden costs can lead to project delays, budget overruns, and ultimately, homeowner dissatisfaction.

    Permitting and Inspection Fees

    Securing the necessary permits from your local municipality is a non-negotiable step in any home improvement project, including aluminum siding installation. These permits ensure your project complies with building codes and safety regulations. Permit fees vary widely depending on location, the scope of the project, and the complexity of the design. For example, a large home requiring extensive siding replacement might incur significantly higher permit fees than a smaller project involving only a section of the house. Additionally, you should anticipate inspection fees, which are typically charged for each stage of the installation process, ensuring compliance with the approved plans. Always inquire about these fees early in the planning process to accurately incorporate them into your budget.

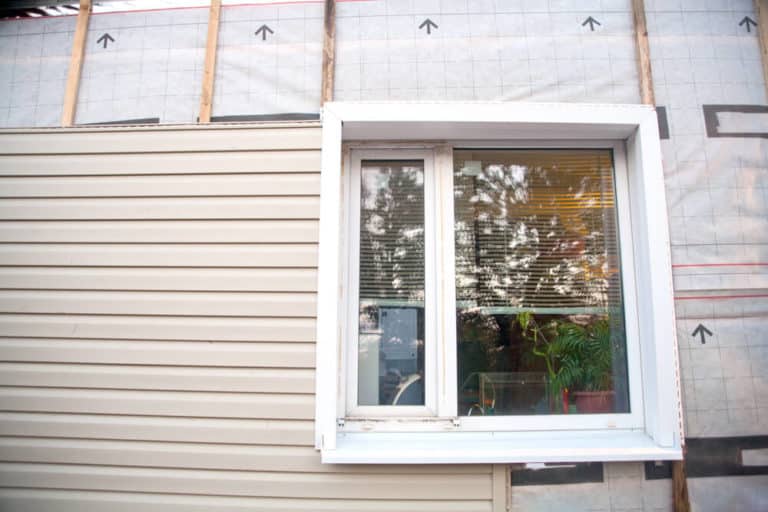
    Demolition and Removal Costs

    Before the new aluminum siding can be installed, the existing siding (if any) needs to be removed. This demolition process may involve additional costs beyond the initial siding quote. For instance, if the old siding is difficult to remove due to its age or condition, the labor costs can increase substantially. Moreover, disposal fees for the removed materials must be considered. These costs depend on your local waste disposal regulations and the volume of material removed. It’s advisable to obtain separate quotes for demolition and waste removal to avoid unexpected expenses during the project’s execution. Consider obtaining multiple quotes to compare pricing.

    Unexpected Repairs and Damage

    During the siding removal and installation process, unforeseen damage to underlying structures may be discovered. This could involve rotted wood, damaged sheathing, or insect infestation requiring repairs before the new siding can be safely installed. These repairs can significantly impact the overall project cost, sometimes exceeding the initial siding estimate. A thorough inspection of the existing siding and underlying structure before starting the project can help minimize such surprises. A pre-installation inspection can provide a clearer picture of potential issues and associated repair costs.

    Accurate Cost Estimation

    Accurately estimating the total cost of an aluminum siding project requires a comprehensive approach. Obtain detailed quotes from at least three reputable contractors. Ensure these quotes clearly outline all aspects of the project, including materials, labor, permits, demolition, and waste disposal. Don’t hesitate to ask clarifying questions about any ambiguities. Consider adding a contingency buffer of 10-15% to the total cost to account for unforeseen expenses. This buffer helps avoid financial stress if unexpected issues arise during the installation. Compare the quotes meticulously, ensuring they cover the same scope of work before making a decision.

    Aluminum Siding Installation Checklist: Avoiding Unexpected Expenses

    To minimize unexpected costs, use this checklist throughout the process:

    • Obtain multiple detailed quotes from reputable contractors.
    • Inquire about permit and inspection fees upfront.
    • Get separate quotes for demolition and waste removal.
    • Request a thorough pre-installation inspection to identify potential repairs.
    • Include a contingency buffer (10-15%) in your budget.
    • Review the contract carefully before signing, ensuring all aspects of the project are clearly defined.
    • Maintain open communication with the contractor throughout the process.

    Conclusion

    Ultimately, securing affordable aluminum siding for your home involves careful planning and research. By considering the factors outlined in this guide—from material selection and sourcing to installation and long-term maintenance—you can confidently make choices that enhance your home’s aesthetic appeal and value while staying within your budget. Remember to prioritize quality, obtain multiple quotes, and thoroughly vet any contractor before committing to a project. Your investment in new siding will enhance your home’s beauty and curb appeal for years to come.

  • Budgeting for a Full Home Siding Replacement

    Budgeting for a Full Home Siding Replacement

    Budgeting for a Full Home Siding Replacement is a crucial step in any home renovation project. This process involves careful consideration of various factors, from material costs and labor expenses to permits, unexpected repairs, and financing options. Understanding these elements ensures a smooth and financially responsible renovation, transforming your home’s exterior and potentially increasing its value. This guide will walk you through each stage, providing valuable insights and practical advice to help you navigate the budgeting process with confidence.

    We will explore the cost differences between various siding materials like vinyl, wood, and fiber cement, highlighting the long-term cost-effectiveness of each. We’ll also delve into the complexities of labor costs, contractor selection, and permit acquisition, offering strategies for finding reliable contractors and navigating the permitting process efficiently. Furthermore, we’ll address potential hidden costs, contingency planning, and financing options to ensure you’re fully prepared for the financial aspects of your siding replacement.

    Understanding Material Costs

    Replacing your home’s siding is a significant investment, and understanding the material costs is crucial for accurate budgeting. The price of siding varies considerably depending on the material chosen, its quality, and regional factors. This section will break down the costs of common siding materials and discuss their long-term value.

    Typical Siding Material Costs

    Several factors influence the final cost of siding materials. These include the type of siding, its quality (e.g., thickness, durability ratings), the style and color chosen, and regional variations in material availability and labor rates. Additionally, the complexity of your home’s design, such as the number of angles, dormers, and other architectural features, will affect the overall material needs and, consequently, the final cost. Premium materials and finishes will naturally command higher prices.

    Cost Comparison of Siding Materials

    Choosing the right siding material involves weighing initial costs against long-term maintenance and lifespan. Vinyl siding is generally the most affordable upfront, but may not last as long as other options. Wood siding offers a classic look but requires significant ongoing maintenance to prevent rot and insect damage. Fiber cement provides excellent durability and longevity, but comes with a higher initial price tag. Metal siding, while durable, can be susceptible to dents and may be more expensive than vinyl but less so than fiber cement.

    Cost Per Square Foot of Various Siding Materials

    The following table provides estimated costs per square foot for various siding materials, including both material and installation costs. These figures are averages and can vary based on location, installer, and material specifics. It’s crucial to obtain multiple quotes from reputable contractors in your area for accurate pricing.

    Siding Material Material Cost ($/sq ft) Installation Cost ($/sq ft) Total Cost ($/sq ft)
    Vinyl $2 – $6 $3 – $5 $5 – $11
    Wood $6 – $15 $5 – $10 $11 – $25
    Fiber Cement $8 – $18 $6 – $12 $14 – $30
    Metal $7 – $15 $5 – $8 $12 – $23

    Labor Costs and Contractor Selection

    Replacing your home’s siding is a significant investment, and labor costs represent a substantial portion of the total expense. Understanding the factors that influence these costs and employing effective strategies for contractor selection are crucial for a successful and budget-friendly project. This section will explore these key aspects to help you navigate this important phase of your home improvement project.

    Labor costs for siding replacement are influenced by several interconnected factors. The size of your home directly impacts the time and effort required, with larger homes naturally demanding more labor hours. The complexity of the project also plays a significant role. Homes with intricate architectural details, multiple stories, or difficult-to-access areas will necessitate more skilled labor and thus, higher costs. Finally, geographical location influences labor rates. Areas with high costs of living or a shortage of skilled tradespeople tend to have higher labor rates for construction projects. For example, a siding replacement project in a densely populated urban area might cost considerably more than a similar project in a rural region due to higher demand and overhead costs for contractors.

    Factors Influencing Labor Costs

    Several key factors contribute to the overall labor costs associated with siding replacement. Project size, measured in square footage, directly correlates with the number of labor hours required. More complex projects, involving intricate designs, multiple materials, or significant repairs to underlying structures, will naturally command higher labor costs due to increased time and specialized skills needed. The geographical location of the property also plays a crucial role; areas with higher labor costs due to factors such as high demand or local regulations will translate to a higher price tag for the labor component of the project. For instance, a coastal region might have higher labor rates due to a combination of high demand and potentially more stringent building codes. Finally, the type of siding chosen also influences labor costs. Certain materials, such as intricate stone veneer, require more specialized skills and time to install than simpler vinyl siding, resulting in a higher labor expense.

    Strategies for Finding Reliable and Reasonably Priced Contractors

    Securing a reliable and reasonably priced contractor is paramount. Begin by requesting referrals from friends, family, or neighbors who have recently undergone similar projects. Online reviews and ratings on platforms like Yelp or Angie’s List can also provide valuable insights into contractors’ reputations and past performance. It is crucial to obtain at least three detailed bids from different contractors to compare pricing and services. During the bidding process, ensure the bids clearly outline all included materials, labor costs, and any additional fees. Verify that the contractors are properly licensed, insured, and have a proven track record of successful projects.

    Contractor Bidding Processes and Contract Structures

    Contractors typically employ different bidding processes. Some provide fixed-price bids, outlining a total cost for the entire project. Others might offer time-and-materials bids, where the final cost is determined by the actual labor hours and materials used. Fixed-price bids offer greater cost certainty, but they might not account for unforeseen complications. Time-and-materials bids offer flexibility but could potentially lead to higher-than-anticipated costs if the project encounters unexpected challenges. Regardless of the bidding process, the contract should clearly specify the scope of work, payment schedule, timelines, and warranty provisions. Thoroughly reviewing the contract before signing is crucial to protect your interests and ensure a clear understanding of the agreement between you and the contractor. A well-structured contract will clearly define the responsibilities of both parties, outlining payment milestones and addressing potential disputes. It should also include details about permits, insurance coverage, and the warranty period for the completed work. Consider consulting with a legal professional to review the contract before signing, especially for large-scale projects.

    Permits and Inspections

    Securing the necessary permits and passing inspections are crucial steps in any home siding replacement project. These processes ensure your project complies with local building codes and regulations, protecting both your investment and the safety of your property. Failure to obtain the correct permits can lead to significant fines, delays, and even the need to undo completed work.

    Obtaining building permits for a siding replacement typically involves submitting an application to your local building department. This application usually requires detailed plans, specifications of the materials to be used, and sometimes even a contractor’s license number. The review process can vary in length depending on the complexity of the project and the workload of the building department.

    Permitting Process

    The permitting process generally begins with submitting a complete application to your local building department. This application will include detailed information about the project, including the type of siding, the area to be covered, and any structural modifications involved. After the application is reviewed, the department may schedule an inspection of your property to verify the information provided. Upon approval, you’ll receive your permit. This permit grants you legal authorization to proceed with the project. Any work performed without a permit is considered illegal and subject to penalties. It’s important to keep copies of all permits and inspection reports for your records.

    Permit and Inspection Costs

    The cost of permits and inspections varies considerably depending on location, project scope, and the complexity of the work. Permit fees are usually calculated based on factors such as the square footage of the siding to be replaced and the type of materials used. Inspection fees are often charged per inspection, with multiple inspections required at various stages of the project. For example, a typical permit fee for a mid-sized home siding replacement might range from $200 to $1000, while inspection fees could add another $100 to $500. It’s advisable to contact your local building department for a precise estimate based on your specific project details.

    Potential Delays and Complications

    Several factors can cause delays or complications during the permitting process. Incomplete applications, missing documentation, or discrepancies between the application and the actual project can lead to significant delays. Furthermore, unusually high workloads at the building department, changes in local regulations, or unforeseen issues discovered during inspections can also extend the timeline. In some cases, appeals or disputes may arise if the building department denies a permit, further delaying the project. For example, a homeowner might experience a delay of several weeks if they need to resubmit corrected plans or if the building department’s workload is unexpectedly high. Proactive communication with the building department and careful preparation of the application are crucial to minimize potential delays.

    Hidden Costs and Contingencies

    Replacing your home’s siding is a significant undertaking, and while careful planning helps minimize expenses, unforeseen costs can significantly impact your budget. Understanding these potential hidden costs and implementing strategies to account for them is crucial for a successful and stress-free project. Failing to plan for contingencies can lead to project delays, budget overruns, and even compromise the quality of the finished work.

    Unexpected expenses during a siding replacement project are common. These costs often stem from issues discovered only after the project has begun, requiring additional work and materials. Thorough planning, including a contingency budget, helps mitigate the financial impact of these surprises.

    Examples of Unexpected Costs

    Discovering underlying problems during siding removal is a frequent source of unexpected expenses. For example, extensive rotted wood under the existing siding may require significant repair or replacement before new siding can be installed. This could involve replacing damaged sheathing, adding additional structural support, or even addressing underlying moisture problems. Similarly, foundation issues, such as cracks or settling, might be revealed, requiring costly repairs before the siding installation can proceed. Other unexpected costs might include the discovery of lead paint under the old siding, necessitating specialized removal procedures that comply with environmental regulations. Unexpectedly high material costs due to supply chain issues or material shortages can also occur, particularly during periods of high demand. Finally, unforeseen site conditions, such as difficult terrain or the presence of underground utilities that require additional safety measures, could lead to increased labor costs.

    Strategies for Budgeting for Unforeseen Expenses

    A proactive approach to budgeting for unforeseen expenses involves adding a contingency to your overall project cost. This contingency should be a percentage of the total estimated cost, typically ranging from 10% to 20%, depending on the complexity of the project and the age of the home. A higher percentage is advisable for older homes or those with known potential issues. Detailed pre-project inspections by a qualified contractor can help to refine this percentage and identify potential problem areas early on. Regular communication with your contractor throughout the project allows for early identification of potential cost overruns and the development of solutions to keep the project on track. Maintaining a detailed record of all expenses, including receipts and change orders, ensures transparency and facilitates accurate financial tracking. Finally, securing sufficient funding before commencing the project, including the contingency budget, protects you from unexpected financial strain.

    Sample Contingency Budget

    Let’s assume a total estimated cost for a siding replacement project is $15,000. Using a conservative contingency of 15%, the contingency budget would be $2,250. This contingency fund could be allocated as follows:

    Contingency Item Allocated Amount
    Wood Repair/Replacement $750
    Foundation Repair (minor) $500
    Lead Paint Removal (if necessary) $500
    Unexpected Material Cost Increases $500

    Note: This is a sample budget and the actual allocation will vary depending on the specific circumstances of your project.

    Financing Options

    Replacing your home’s siding is a significant investment. Securing the necessary funds can be a crucial step in the process. Several financing options exist, each with its own advantages and disadvantages. Understanding these options will help you choose the best fit for your financial situation and project needs.

    Financing your siding replacement project typically involves securing a loan to cover the upfront costs. The repayment schedule and interest rates will significantly impact your overall expenses. Careful consideration of these factors is essential to avoid financial strain.

    Home Equity Loans

    Home equity loans utilize the equity you’ve built in your home as collateral. This means you borrow against the difference between your home’s value and the amount you still owe on your mortgage. These loans typically offer fixed interest rates and fixed monthly payments, making budgeting easier. However, it’s crucial to remember that you risk losing your home if you default on the loan. The interest rates are usually lower than those of personal loans due to the lower risk for the lender. For example, a homeowner with substantial equity might secure a home equity loan at a rate of 6%, significantly lower than a personal loan’s potential rate of 12% or higher.

    Personal Loans

    Personal loans are unsecured loans, meaning they don’t require collateral. This makes them accessible to individuals who may not qualify for a home equity loan or prefer not to risk their home. However, the interest rates on personal loans are generally higher than home equity loans, reflecting the increased risk for the lender. The repayment terms are also variable, depending on the lender and the borrower’s creditworthiness. A personal loan might offer a higher interest rate, such as 10-15%, but its accessibility makes it a viable option for those with limited equity or less-than-perfect credit.

    Credit Cards

    Using a credit card can be a convenient short-term solution for smaller siding projects or unexpected costs. However, this method carries the highest interest rates and should be avoided for larger projects due to the accumulating debt and high interest charges. It’s generally advisable to use this option only for smaller, unforeseen expenses during the project and not as primary financing.

    Comparison of Financing Options

    Financing Option Interest Rate Pros Cons
    Home Equity Loan Generally lower (e.g., 6%) Lower interest rates, fixed payments, potentially tax deductible Requires home equity, risk of foreclosure
    Personal Loan Generally higher (e.g., 10-15%) No collateral required, accessible to a wider range of borrowers Higher interest rates, less favorable terms
    Credit Cards Very high (e.g., 18-25%) Convenient for small expenses Extremely high interest rates, potential for significant debt accumulation

    Project Timeline and Scheduling

    Planning a realistic timeline for your home siding replacement is crucial for managing expectations and avoiding delays. A well-defined schedule helps ensure the project progresses smoothly and minimizes disruptions to your daily life. Understanding the factors that can influence the timeline allows for proactive adjustments and mitigates potential problems.

    A typical home siding replacement project can take anywhere from a few weeks to several months, depending on several key factors. The size of the house, the complexity of the design, and the chosen materials all play a significant role in determining the overall duration. Furthermore, unforeseen circumstances can extend the timeline, highlighting the importance of building in buffer time.

    Factors Affecting Project Timeline

    Several factors can significantly influence the duration of a siding replacement project. These factors range from predictable elements like weather conditions to less predictable ones such as material availability. Accurate project planning requires careful consideration of these potential delays.

    • Weather Conditions: Inclement weather, such as heavy rain, snow, or extreme heat, can cause significant delays. Exterior work is often weather-dependent, and prolonged periods of unsuitable weather can push back the project schedule considerably. For example, a project planned for the rainy season in a region with frequent downpours might experience several weeks of delays.
    • Material Availability: Delays in material delivery can occur due to supply chain issues, manufacturer backlogs, or transportation problems. Specifying uncommon or specialized siding materials might increase the risk of delays compared to using readily available options. For instance, a project requiring a specific type of imported cedar siding might face delays if shipments are delayed due to port congestion.
    • Contractor Availability and Scheduling: The contractor’s existing workload and scheduling conflicts can influence the project timeline. Choosing a contractor who is already overcommitted might lead to delays as they juggle multiple projects. Similarly, unexpected issues or emergencies arising on other projects may impact their availability for your project.
    • Permitting and Inspection Processes: Obtaining necessary permits and scheduling inspections can sometimes take longer than anticipated, especially if there are unforeseen complications or bureaucratic delays. Lengthy review processes or required revisions to submitted plans can significantly extend the overall project timeline.
    • Unexpected Issues: Unforeseen problems, such as discovering rotted wood under the existing siding or encountering unexpected structural issues, can necessitate additional work and extend the project schedule. Thorough inspections prior to commencement can help minimize these surprises, but they are not always entirely preventable.

    Sample Project Schedule

    The following sample schedule illustrates a potential timeline for a medium-sized home siding replacement project. This schedule assumes favorable weather conditions and readily available materials. It is crucial to remember that this is a sample, and individual projects will vary significantly.

    Phase Milestone Estimated Duration Start Date (Example) End Date (Example)
    Preparation Permit Acquisition & Site Survey 1-2 weeks October 23rd November 5th
    Demolition Removal of Existing Siding 1 week November 6th November 12th
    Preparation & Repair Underlayment Installation & Repairs 1 week November 13th November 19th
    Installation New Siding Installation 2-3 weeks November 20th December 7th
    Finishing Final Inspection & Cleanup 1 week December 8th December 14th

    Waste Removal and Disposal

    Replacing your home’s siding generates a significant amount of waste, and proper disposal is crucial for both budgetary and environmental reasons. This section details the costs associated with waste removal, environmentally sound disposal practices, and relevant local regulations. Failing to plan for waste removal can lead to unexpected expenses and potential legal issues.

    Proper disposal of old siding materials is essential for environmental protection and compliance with local regulations. The costs associated with this process vary depending on several factors, including the type and quantity of waste, the distance to the disposal site, and the chosen disposal method. Understanding these factors is key to accurately budgeting for your siding replacement project.

    Costs Associated with Waste Removal and Disposal

    The cost of waste removal and disposal for a siding replacement project can range considerably. Factors influencing the final cost include the volume of waste generated (determined by the size of your home and the type of siding being removed), the type of waste (e.g., wood, vinyl, asbestos), and the distance the waste needs to be transported to a disposal or recycling facility. A small project might cost a few hundred dollars, while larger projects involving the removal of multiple layers of siding or specialized materials could reach several thousand. Obtaining multiple quotes from waste removal companies is highly recommended to ensure you are getting a competitive price. Many companies offer both dumpster rental services and full-service removal, where they handle all aspects of waste collection and disposal.

    Environmentally Responsible Disposal Methods for Old Siding Materials

    Many siding materials can be recycled or repurposed, reducing landfill waste and minimizing environmental impact. For example, some types of vinyl siding can be recycled through specialized programs, while wood siding may be suitable for use as firewood (after ensuring it’s free of harmful treatments) or repurposed for other construction projects. Asbestos siding, however, requires special handling and disposal due to its hazardous nature. It’s crucial to identify the type of siding being removed to determine the appropriate disposal method. Contractors experienced in siding replacement should be knowledgeable about environmentally sound disposal options and be able to provide information on local recycling programs or disposal facilities that accept construction debris. Choosing a contractor committed to sustainable practices is a valuable step towards responsible waste management.

    Examples of Local Regulations Regarding Waste Disposal for Construction Projects

    Local regulations regarding construction waste disposal vary widely. Many municipalities have specific ordinances concerning the permitted disposal methods, required permits, and potential fines for non-compliance. For example, some cities might mandate the separation of different waste streams (e.g., wood, metal, plastic), while others may have limits on the amount of waste that can be disposed of at a specific location. Before starting your siding replacement project, contact your local building department or waste management authority to obtain information on relevant regulations, required permits, and disposal fees. Understanding these regulations upfront will help you avoid potential delays, fines, and additional expenses associated with improper waste disposal. Failure to comply with these regulations can result in significant penalties, making proactive research a cost-effective measure.

    Insurance and Warranties

    Protecting your investment in a new siding installation requires careful consideration of insurance and warranties. Understanding the coverage offered by both your insurance provider and the siding contractor is crucial to ensuring a smooth and worry-free project. Unexpected issues can arise, and having the appropriate protection in place can save you significant financial burdens.

    Importance of Insurance Coverage During a Home Improvement Project

    Comprehensive insurance coverage is vital during a home siding replacement. General liability insurance held by the contractor protects you from financial losses should accidents occur on your property during the project, such as worker injury or damage to neighboring properties. Additionally, it’s advisable to review your homeowner’s insurance policy to confirm sufficient coverage for damage to your home during the renovation, including potential damage from unforeseen weather events during the construction phase. This could cover expenses related to temporary repairs or additional costs resulting from project delays due to weather-related damage. For example, a sudden hailstorm during installation could damage both the new and existing siding, necessitating additional repair costs that your homeowner’s insurance might cover.

    Types of Warranties Offered by Siding Manufacturers and Contractors

    Siding manufacturers typically offer warranties on their products, covering defects in materials and workmanship for a specified period. These warranties can vary significantly in length and the types of defects covered. Some manufacturers offer limited warranties covering only manufacturing defects, while others offer more comprehensive warranties that also cover issues like fading or cracking due to normal wear and tear, although often with specific conditions and limitations. Contractors also provide warranties on their labor, typically covering issues related to their installation work for a set period, such as improper installation leading to leaks or premature failure of the siding. The length and scope of contractor warranties can vary greatly depending on the contractor’s experience and reputation.

    Comparison of Warranty Options and Coverage

    A manufacturer’s warranty might cover defects in the siding material for 20 years, but exclude damage caused by improper installation. Conversely, a contractor’s warranty might cover installation defects for 10 years but not the underlying material itself. Therefore, understanding the specific terms and conditions of both the manufacturer’s and contractor’s warranties is essential. A strong siding installation typically combines a robust manufacturer’s warranty with a comprehensive contractor’s warranty, providing more extensive protection against potential problems. For example, if a section of siding fails after five years due to a manufacturing defect, the manufacturer’s warranty would likely cover the replacement cost of the siding. However, if the failure is due to improper installation, the contractor’s warranty should cover the repair or replacement. Comparing warranties involves careful review of the fine print, paying close attention to exclusions and limitations, and understanding how the manufacturer’s and contractor’s warranties interact. Some contractors might offer extended warranties at an additional cost, providing even greater peace of mind.

    Visual Aids: Before & After Scenarios

    Choosing new siding is a significant decision impacting your home’s curb appeal and value. Visualizing the transformation is crucial, and before-and-after scenarios can greatly assist in this process. Reviewing examples of different siding types on various home styles allows for a clearer understanding of the potential impact of a full home siding replacement.

    Before and After Scenarios: Siding Types and Home Styles

    The visual impact of a siding replacement varies considerably depending on the original siding, the chosen replacement, and the architectural style of the home. Below are a few examples illustrating these differences.

    Example 1: Ranch Style Home – Vinyl to Fiber Cement

    Before: Imagine a single-story ranch home with aged, faded beige vinyl siding. The siding shows signs of wear, with some discoloration and cracking. The overall appearance is somewhat drab and lacks visual interest.
    After: The same ranch home now features sleek, charcoal gray fiber cement siding. The new siding provides a clean, modern look, enhancing the home’s architectural lines. The dark gray color creates a striking contrast against the lighter-colored trim and foundation, adding depth and visual appeal. The improved texture and consistent color dramatically enhance the home’s curb appeal.

    Example 2: Victorian Style Home – Wood Shake to Engineered Wood

    Before: Picture a Victorian-style home with weathered wood shake siding. The shakes are uneven in color and texture, showing signs of age and damage. The overall appearance is somewhat rustic, but also slightly unkempt.
    After: The same Victorian home is now clad in rich, dark brown engineered wood siding. The new siding maintains the home’s historical character while providing a more polished and updated look. The consistent color and even texture enhance the intricate details of the home’s architecture, creating a more elegant and refined appearance. The improved weather resistance also suggests a longer lasting solution.

    Example 3: Colonial Style Home – Aluminum to Insulated Vinyl

    Before: Consider a colonial-style home with outdated aluminum siding. The aluminum siding is showing significant signs of fading and pitting, with a generally dull and lifeless appearance.
    After: The same colonial home boasts crisp white insulated vinyl siding. The new siding provides a clean, classic look that complements the home’s architectural style. The bright white color creates a feeling of spaciousness and elegance. The improved insulation properties, though not directly visible, are a significant benefit alongside the improved aesthetics. The smooth, consistent surface of the vinyl enhances the overall visual appeal.

    Example 4: Modern Farmhouse – Brick to Board and Batten

    Before: A modern farmhouse with exposed brick showing signs of age and discoloration. The brick might be uneven in color and texture, creating a somewhat inconsistent appearance.
    After: The same farmhouse is now clad in clean, white board and batten siding. The board and batten siding adds a fresh, modern farmhouse aesthetic while maintaining a rustic feel. The crisp white siding contrasts beautifully with darker accents, such as window frames and rooflines, creating a striking and visually appealing result. The vertical lines of the board and batten siding add visual interest and draw the eye upwards.

    Impact on Home Value

    Replacing your home’s siding is a significant investment, but it can offer a substantial return in terms of increased home value. A well-chosen and professionally installed siding system can dramatically improve your home’s curb appeal and overall condition, making it more attractive to potential buyers and increasing its market value. The extent of this increase depends on several key factors.

    The potential increase in home value from a siding replacement varies depending on several factors. A high-quality, durable siding material, like fiber cement or engineered wood, will generally yield a higher return on investment than a less expensive option. Similarly, the overall condition of the home, the location, and the current market trends all play a role. A beautifully updated home in a desirable neighborhood will naturally see a greater increase in value compared to a similar upgrade in a less sought-after area.

    Return on Investment Factors

    Several factors influence the return on investment (ROI) for siding upgrades. These factors should be carefully considered before embarking on the project.

    The choice of siding material significantly impacts the ROI. While less expensive vinyl siding might offer a quicker payback, it may not increase home value as much as higher-end materials such as fiber cement or brick. The longevity and durability of the chosen material also play a crucial role. A longer-lasting siding system will require less maintenance over time, resulting in long-term cost savings and a potentially higher ROI.

    The condition of the existing siding and the overall state of the home influence the return. Replacing severely damaged or outdated siding will yield a greater increase in home value than simply replacing relatively new siding. Addressing other home improvements simultaneously, such as window replacements or landscaping, can further enhance the impact of the siding upgrade. A comprehensive approach to home improvement can result in a synergistic effect, maximizing the return on investment.

    Location and market conditions play a significant role. In a competitive real estate market, a well-maintained home with attractive siding will likely command a higher price than a comparable home with outdated or damaged siding. Conversely, in a buyer’s market, the return on investment might be lower. Consulting with a real estate agent can provide valuable insights into local market trends and the potential impact of siding replacement on home value in your specific area.

    For example, let’s consider two homes in the same neighborhood. Home A has outdated vinyl siding, while Home B undergoes a complete siding replacement with high-quality fiber cement. Assuming all other factors are equal, Home B is likely to sell for a significantly higher price due to the improved curb appeal and perceived higher quality. The higher cost of fiber cement siding would be offset by the increased market value. Similarly, a home in a highly desirable area with updated siding will see a larger increase in its value compared to a similar home in a less desirable area.

    Appraisal Impact

    A professional appraisal can provide a quantifiable assessment of the increase in home value resulting from the siding replacement. An appraiser will consider factors such as the type of siding, the quality of the installation, and the overall condition of the property. The appraisal report will provide a clear indication of the return on investment and can be used to support financing applications or insurance claims. This objective assessment provides valuable data for informed decision-making.

    Creating a Comprehensive Budget Spreadsheet

    A well-organized budget spreadsheet is crucial for managing the costs associated with a full home siding replacement project. This spreadsheet will allow you to track expenses, compare bids, and ensure you stay within your financial limits. A detailed and organized approach will minimize surprises and help you make informed decisions throughout the process.

    Spreadsheet Design and Categories

    The following table outlines a suggested structure for your siding replacement budget spreadsheet. Each category should have its own column, allowing for easy tracking and comparison of costs from different contractors or material suppliers. Remember to update the spreadsheet regularly as the project progresses.

    Category Description Estimated Cost Actual Cost Notes
    Material Costs Siding, trim, flashing, fasteners, etc. Include detailed breakdown of materials and quantities.
    Labor Costs Contractor fees, labor for demolition, installation, etc. Specify hourly rates or lump sum payments.
    Permits and Inspections Building permits, inspection fees Include all relevant permit applications and inspection costs.
    Contractor Selection Bid comparisons, contractor fees, contract review List multiple bids and the reasons for selection.
    Hidden Costs Unexpected repairs, material adjustments, etc. Allocate a contingency for unforeseen expenses.
    Contingency Buffer for unexpected costs (typically 10-20% of total estimated cost) This is crucial for managing risk.
    Financing Options Loan interest, down payment, monthly payments Specify loan terms and repayment schedule.
    Project Timeline and Scheduling Project start and completion dates, milestones Track progress against planned timeline.
    Waste Removal and Disposal Dumpster rental, debris removal fees Include costs for proper waste disposal.
    Insurance and Warranties Contractor’s insurance, material warranties Verify insurance coverage and warranty details.
    Total Estimated Cost Sum of all estimated costs This is your initial project budget.
    Total Actual Cost Sum of all actual costs This will be updated as the project progresses.

    Using Formulas for Accurate Calculations

    The spreadsheet should utilize formulas to automatically calculate totals. For example, the “Total Estimated Cost” can be calculated by summing all the estimated costs in the “Estimated Cost” column. Similarly, the “Total Actual Cost” should be calculated automatically as the project progresses. This will ensure accuracy and reduce the risk of manual calculation errors. For instance, a simple formula for the total estimated cost would be: =SUM(B2:B11) (assuming estimated costs are in column B, rows 2 through 11).

    Visual Aids for Tracking Progress

    Consider adding a visual representation of the budget, such as a bar chart or pie chart, to track progress and identify areas where costs are exceeding or falling short of the estimates. This visual aid can provide a clear and concise overview of the budget’s status at a glance. For example, a bar chart could show the allocated budget for each category versus the actual spent amount. A pie chart could illustrate the proportion of the total budget allocated to each cost category.

    Closure

    Replacing your home’s siding is a significant investment, but with careful planning and budgeting, it can be a rewarding experience. By understanding the various cost components—materials, labor, permits, and potential unforeseen expenses—and exploring available financing options, you can create a realistic budget that aligns with your financial capabilities. Remember to factor in contingency funds for unexpected issues and choose reputable contractors with clear contracts and warranties. The result will be a beautiful, durable, and valuable upgrade to your home, enhancing its curb appeal and potentially increasing its market value.

  • Is Insulated Siding Worth the Extra Cost?

    Is Insulated Siding Worth the Extra Cost?

    Is Insulated Siding Worth the Extra Cost? This question sits at the heart of many home improvement decisions. Weighing the initial investment against potential long-term savings and increased home value requires careful consideration of various factors. This exploration delves into the financial aspects, energy efficiency gains, maintenance needs, and aesthetic considerations to help you make an informed choice that aligns with your budget and home improvement goals. We will examine the total cost of ownership, including installation, maintenance, and potential energy savings, providing a comprehensive analysis to guide your decision.

    From comparing upfront costs of insulated versus traditional siding to analyzing long-term energy savings and the impact on your home’s resale value, this guide provides a detailed breakdown. We’ll explore the installation process, maintenance requirements, environmental impact, and aesthetic options, ultimately empowering you to determine if the added expense of insulated siding is a worthwhile investment for your specific circumstances.

    Initial Cost Comparison

    Choosing between insulated and traditional siding involves a significant upfront investment. Understanding the cost differences between various materials and labor is crucial for making an informed decision. This section will break down the initial costs associated with each type of siding for a 1500 sq ft house, providing a clear comparison to aid in your decision-making process. Remember that these are estimates, and actual costs can vary depending on location, labor rates, and specific material choices.

    Cost Breakdown of Insulated and Traditional Siding

    The initial cost of siding is comprised of two main components: materials and labor. Material costs vary greatly depending on the type of siding chosen, its quality, and the supplier. Labor costs are influenced by factors such as the complexity of the installation, the size of the house, and the contractor’s rates. Generally, insulated siding requires more specialized labor, potentially leading to higher labor costs.

    Comparative Costs for a 1500 sq ft House

    The following table presents a comparative analysis of the initial investment required for different siding types for a 1500 sq ft house. These figures are estimates based on average costs in the United States as of late 2023 and should be considered a starting point for your own cost assessment. It is highly recommended to obtain multiple quotes from reputable contractors in your area to get a more accurate estimate.

    Siding Material Material Cost Labor Cost Total Cost Cost per sq ft
    Vinyl (Traditional) $5,000 – $8,000 $4,000 – $6,000 $9,000 – $14,000 $6 – $9.33
    Fiber Cement (Traditional) $10,000 – $15,000 $6,000 – $9,000 $16,000 – $24,000 $10.67 – $16
    Insulated Vinyl Siding $8,000 – $12,000 $5,000 – $7,000 $13,000 – $19,000 $8.67 – $12.67
    Insulated Fiber Cement Siding $15,000 – $22,000 $7,000 – $10,000 $22,000 – $32,000 $14.67 – $21.33

    Energy Efficiency Benefits

    Insulated siding offers significant long-term energy savings by reducing the amount of heat transferred between your home and the outside environment. This translates to lower heating and cooling bills, contributing to a more comfortable and cost-effective living space. The effectiveness of this insulation is directly related to its R-value.

    The R-value is a measure of a material’s resistance to heat flow. A higher R-value indicates better insulation. Insulated siding typically boasts a significantly higher R-value compared to traditional vinyl or wood siding, meaning it effectively acts as a thermal barrier, preventing heat loss in winter and heat gain in summer. This improved insulation performance leads to a reduction in the energy required to maintain a comfortable indoor temperature. The amount of energy saved will depend on factors such as climate, home size, and existing insulation levels.

    R-Value’s Impact on Heating and Cooling Costs

    The R-value of insulated siding directly influences heating and cooling costs. A higher R-value means less energy is needed to heat or cool your home. For example, a home with insulated siding possessing an R-value of 4 might require 20% less energy for heating compared to a similar home with non-insulated siding. This percentage can vary based on the specific R-value, climate, and other factors. This translates to tangible savings on your monthly energy bills, adding up to substantial cost reductions over the lifetime of the siding. This energy efficiency not only saves money but also reduces your carbon footprint.

    Potential Energy Savings Over 10 Years

    The following table illustrates the potential energy savings over a 10-year period for different climate zones, comparing insulated siding to non-insulated siding. These figures are estimates based on average energy costs and typical climate conditions. Actual savings may vary depending on specific factors such as home size, energy efficiency of other building components, and individual energy consumption habits.

    Climate Zone Annual Savings (Insulated Siding) Annual Savings (Non-Insulated Siding) Total Savings Difference Over 10 Years
    Mild (e.g., Southern California) $150 $50 $1000
    Moderate (e.g., Mid-Atlantic) $300 $100 $2000
    Cold (e.g., New England) $500 $150 $3500
    Severe (e.g., Northern Plains) $700 $200 $5000

    Maintenance and Lifespan

    Choosing siding involves considering not only initial costs and energy efficiency but also long-term maintenance needs and the material’s lifespan. Understanding these factors is crucial for making a financially sound and practical decision. Insulated siding, while more expensive upfront, often requires less maintenance over its lifetime compared to some alternatives, potentially offsetting the initial investment.

    Insulated siding and other common siding types exhibit varying maintenance requirements and lifespans. These differences significantly impact the overall cost of homeownership. Understanding these differences is crucial for making an informed decision about your home’s exterior.

    Insulated Siding Maintenance and Lifespan

    Insulated siding, typically made of vinyl or fiber cement with an integrated foam insulation layer, generally requires minimal maintenance. Its robust construction resists damage from weather and pests. Regular cleaning with soap and water is usually sufficient to maintain its appearance and functionality.

    • Cleaning: Annual cleaning with a mild detergent and water removes dirt and grime, preventing build-up and maintaining the siding’s aesthetic appeal. This is a relatively inexpensive maintenance task, requiring only basic cleaning supplies.
    • Repairing minor damage: While durable, insulated siding can be susceptible to minor damage from impacts. Repairing small dents or cracks may involve patching or replacing individual panels, depending on the extent of the damage. The cost of repairs is typically modest, and DIY repair is often feasible.
    • Lifespan: Insulated siding typically boasts a lifespan of 30-50 years, depending on the quality of the materials and installation. This longevity contributes to long-term cost savings by reducing the frequency of replacement.

    Vinyl Siding Maintenance and Lifespan

    Vinyl siding is a popular and relatively inexpensive option. However, it requires more frequent maintenance than insulated siding.

    • Cleaning: Regular cleaning is necessary to prevent dirt and mildew buildup, which can affect its appearance and potentially damage the material over time. Power washing should be done cautiously to avoid damage.
    • Repairing minor damage: Vinyl siding can crack or warp under extreme temperature fluctuations or impact. Repairing these issues often involves replacing damaged panels, which can be costly if extensive damage occurs.
    • Lifespan: Vinyl siding typically lasts 20-30 years, significantly shorter than insulated siding. This shorter lifespan necessitates replacement sooner, adding to the long-term cost.

    Wood Siding Maintenance and Lifespan

    Wood siding offers a classic aesthetic but demands significant ongoing maintenance.

    • Cleaning and staining/painting: Wood siding needs regular cleaning to remove dirt and debris. Periodic repainting or restaining is essential to protect it from weather damage and maintain its appearance. This can be a labor-intensive and costly process.
    • Repairing damage: Wood is susceptible to rot, insect infestation, and damage from harsh weather. Repairs can range from minor patching to extensive board replacement, significantly impacting costs.
    • Lifespan: With proper maintenance, wood siding can last 30-50 years, but neglecting maintenance significantly reduces its lifespan. The high maintenance costs contribute to a higher overall cost of ownership.

    Fiber Cement Siding Maintenance and Lifespan

    Fiber cement siding is a durable and low-maintenance option, offering a good balance between cost and longevity.

    • Cleaning: Regular cleaning is recommended to remove dirt and grime, preserving its appearance. Power washing is generally acceptable.
    • Repairing damage: Fiber cement is relatively resistant to damage, but repairs may be necessary for cracks or chips. Repairing is generally straightforward, although replacing large sections can be costly.
    • Lifespan: Fiber cement siding has a lifespan of 25-50 years, depending on the quality of installation and environmental conditions. This makes it a solid long-term investment.

    Home Value Impact

    Insulated siding can significantly influence a home’s resale value, often resulting in a higher selling price compared to homes with traditional siding. This increase is primarily due to the combined benefits of improved energy efficiency, enhanced curb appeal, and reduced maintenance needs. While the exact impact varies depending on location, home features, and market conditions, studies and real estate trends consistently demonstrate a positive correlation.

    The perceived value increase associated with insulated siding stems from several key factors. Buyers are increasingly aware of the long-term cost savings associated with energy efficiency, and insulated siding offers a tangible demonstration of this commitment. Moreover, the improved aesthetics, often featuring a cleaner, more modern look, contribute to a higher perceived value. The reduced maintenance requirements also appeal to buyers seeking a low-maintenance property.

    Factors Influencing Perceived Value Increase

    Several factors interact to determine the extent to which insulated siding boosts a home’s resale value. These include the overall quality of the siding material, the professional installation, and the prevailing market conditions. For example, in a competitive market with many comparable homes, the added value of energy-efficient features like insulated siding becomes more pronounced.

    Market Data and Examples

    While precise figures vary widely based on location and market dynamics, numerous real estate studies indicate a positive return on investment for home improvements that enhance energy efficiency. For instance, a 2023 study by the National Association of Realtors (NAR) – although not specific to insulated siding – found that energy-efficient upgrades generally recoup a significant portion of their cost at resale. A hypothetical example: In a market where the average home sells for $300,000, a home with high-quality insulated siding might command a premium of $5,000 to $15,000, reflecting the added value of energy savings and enhanced curb appeal. This premium could be higher in areas with higher energy costs or a strong preference for energy-efficient homes. It is crucial to consult with local real estate professionals for the most accurate and up-to-date market data specific to your region.

    Installation Process

    Insulated siding installation is a more involved process than traditional vinyl or fiber cement siding, demanding specialized tools and expertise. The added layer of insulation requires careful attention to detail to ensure proper fit, thermal performance, and longevity. Understanding the process can help homeowners make informed decisions about whether the added complexity is worthwhile for their specific project.

    The installation process generally begins with thorough preparation of the existing wall surface. This involves removing old siding, repairing any damaged sheathing or framing, and ensuring the wall is clean, dry, and level. Next, the insulated siding panels are installed, usually starting at a corner and working horizontally. Each panel is carefully fitted and secured using specialized fasteners. Proper flashing and caulking are crucial to prevent water penetration. Finally, trim pieces are installed to finish the edges and corners, creating a neat and professional appearance. The specific techniques and materials may vary depending on the type of insulated siding used (e.g., foam-backed vinyl, insulated fiber cement).

    Installation Time and Complexity Compared to Other Siding Options

    Insulated siding installation typically takes longer than installing traditional vinyl or fiber cement siding. The added layer of insulation and the need for precise fitting increases both labor time and the overall project duration. For example, installing traditional vinyl siding on a 1,500 square foot house might take a crew of two experienced installers three to four days, while insulated siding installation for the same house could extend the timeframe to five to seven days, depending on the complexity of the existing wall structure and any necessary repairs. This increased installation time translates to a higher overall labor cost. Furthermore, the installation of insulated siding often requires more specialized skills and tools than installing other siding types, potentially leading to higher labor costs due to the need for experienced installers. The complexity of the installation also increases the likelihood of potential issues if not installed by a qualified professional, leading to potentially costly repairs or replacements down the line.

    Environmental Considerations

    Choosing siding involves more than just aesthetics and cost; it also carries significant environmental implications. The production, transportation, and eventual disposal of siding materials all contribute to our carbon footprint. Understanding these impacts is crucial for making an informed and environmentally responsible decision. This section will explore the environmental impact of insulated siding compared to other common options, focusing on the resources used and the energy consumed throughout their lifecycles.

    Insulated siding, while offering energy efficiency benefits, requires a careful assessment of its overall environmental impact. The manufacturing process for insulated siding, typically involving vinyl, fiber cement, or engineered wood, consumes energy and resources. The extraction and processing of raw materials, the energy used in manufacturing, and transportation all contribute to the product’s overall carbon footprint. Comparing this to other siding options, such as wood, requires considering the sourcing and processing of those materials as well. For instance, sustainably harvested wood has a lower environmental impact than wood from unsustainable logging practices.

    Embodied Carbon of Different Siding Materials

    The embodied carbon of a building material refers to the total greenhouse gas emissions associated with its entire lifecycle, from raw material extraction to manufacturing, transportation, installation, and eventual disposal. Different siding materials have varying embodied carbon footprints. For example, vinyl siding, while often affordable, typically has a higher embodied carbon footprint than fiber cement or sustainably sourced wood. This is due to the energy-intensive process of manufacturing vinyl from petroleum-based products. Fiber cement, on the other hand, often utilizes readily available materials like cement and cellulose fibers, potentially leading to a lower embodied carbon footprint, though its manufacturing still involves energy consumption. Sustainably harvested wood siding boasts a comparatively low embodied carbon footprint, particularly when sourced locally, reducing transportation emissions. However, the embodied carbon of wood siding can vary significantly depending on the type of wood and the harvesting and processing methods employed. A life cycle assessment (LCA) can provide a comprehensive comparison of the embodied carbon of different siding materials, taking into account all stages of their lifecycles. Such assessments are increasingly used to inform sustainable building practices. For example, a study conducted by the University of California, Berkeley, found that sustainably sourced wood siding had a significantly lower embodied carbon footprint compared to vinyl siding, highlighting the importance of material sourcing and manufacturing processes.

    Curb Appeal and Aesthetics

    Insulated siding offers a compelling blend of functionality and aesthetics, significantly impacting a home’s curb appeal. The enhanced energy efficiency is a major benefit, but the visual improvements can also add considerable value and enhance the overall attractiveness of your property. The wide variety of styles and finishes available allows for customization to suit diverse architectural styles and personal preferences.

    The aesthetic options available with insulated siding are surprisingly diverse. Homeowners are not limited to a few basic choices. Instead, they can select from a broad spectrum of colors, textures, and styles to create a truly personalized look. This versatility allows for seamless integration with existing architectural features or the opportunity to create a completely new and striking facade.

    Color and Texture Variety

    Insulated siding manufacturers offer a wide range of colors, often mirroring the color palettes of traditional wood, vinyl, or fiber cement siding. Popular choices include classic neutrals like white, beige, and gray, as well as bolder options such as deep blues, greens, and reds. The availability of various shades allows for subtle or dramatic contrasts, enhancing the home’s architectural features. Furthermore, the textures mimic natural materials effectively. Options range from smooth, sleek finishes to those that replicate the look of wood grain, stucco, or even stone, providing a level of visual depth and realism that is often difficult to achieve with other materials. For example, a homeowner might choose a deep gray siding with a wood-grain texture to complement a craftsman-style home, or a crisp white with a smooth finish for a modern design.

    Visual Appeal Compared to Other Siding Materials

    Compared to other siding materials, insulated siding often presents a more refined and consistent appearance. Traditional wood siding, while aesthetically pleasing, requires significant maintenance to prevent rot, warping, and insect infestation. Vinyl siding, though low-maintenance, can sometimes appear less sophisticated and may fade or become brittle over time. Fiber cement siding offers a more durable and aesthetically pleasing option, but it is typically heavier and more expensive to install. Insulated siding, in many cases, provides a happy medium, offering the durability and low-maintenance benefits of vinyl or fiber cement, but with a wider range of colors and textures that can rival or surpass the aesthetic appeal of wood. For instance, high-quality insulated siding can mimic the richness and depth of natural wood without the associated upkeep. The consistent color and texture across panels also contribute to a cleaner, more modern look compared to the potential variations in wood or older vinyl siding.

    Warranty and Guarantees

    Choosing siding is a significant investment, and understanding the warranty and guarantee offered is crucial for protecting that investment. Different siding materials, including insulated siding, come with varying levels of protection against defects and failures. This section compares the typical warranty offerings and explains their implications for homeowners.

    Manufacturers of insulated siding typically offer warranties covering defects in materials and workmanship. These warranties often span a period of several decades, with some extending for as long as 50 years. However, it’s important to carefully review the specific terms and conditions, as limitations may apply. For example, certain types of damage, such as that caused by severe weather events or improper installation, might not be covered. In contrast, warranties for other siding materials, such as vinyl or fiber cement, generally offer shorter coverage periods, often ranging from 10 to 30 years.

    Warranty Types and Their Implications

    Understanding the different types of warranties is key to making an informed decision. Limited warranties typically cover defects in materials and workmanship, but often exclude damage caused by external factors. Full warranties, on the other hand, offer broader coverage, sometimes including damage from certain external sources. Furthermore, some manufacturers provide transferable warranties, meaning the coverage can be passed on to future homeowners, adding value to the property. Conversely, non-transferable warranties only protect the original purchaser. The length of the warranty period significantly impacts the long-term cost-effectiveness of the siding. A longer warranty period indicates greater manufacturer confidence in the product’s durability and longevity, reducing the potential for expensive repairs or replacements in the future.

    Comparing Warranty Offerings

    Let’s consider a hypothetical comparison. Company A offers insulated siding with a 50-year limited warranty covering manufacturing defects, while Company B provides vinyl siding with a 20-year limited warranty covering the same. While the initial cost of the insulated siding might be higher, the significantly longer warranty period suggests a lower long-term risk of needing costly repairs or replacements within the warranty period. This extended coverage can be a significant factor in justifying the higher upfront investment. It is essential to obtain written copies of all warranties before making a purchasing decision and to fully understand the limitations of the coverage provided. A thorough comparison of warranties from different manufacturers and siding types is highly recommended before making a final choice.

    Regional Considerations

    The cost-effectiveness and suitability of insulated siding are significantly influenced by regional climate and weather patterns. Areas with extreme temperature fluctuations or harsh weather conditions often see the greatest return on investment from this type of siding. Conversely, regions with moderate climates might find the added expense less justifiable.

    The benefits of insulated siding are most pronounced in regions experiencing significant temperature swings throughout the year, leading to higher heating and cooling costs. These regions will experience a more noticeable reduction in energy consumption and a faster return on the initial investment in insulated siding. Furthermore, areas prone to extreme weather events, such as heavy snow, hail, or strong winds, will benefit from the added protection and durability that insulated siding provides.

    Climate Impact on Energy Savings

    The effectiveness of insulated siding in reducing energy costs directly correlates with the severity of the regional climate. In areas with long, cold winters and hot, humid summers, such as the northern United States or Canadian provinces, the insulating properties of the siding will significantly reduce the burden on heating and cooling systems. For example, a home in Minnesota with insulated siding might see a reduction in heating costs of 15-20% compared to a similar home with traditional vinyl siding. Conversely, in milder climates like those found in parts of California or the southern United States, the energy savings might be less substantial, potentially negating the higher initial cost of installation.

    Regional Cost Variations

    The cost of insulated siding installation can vary depending on the region. Labor costs, material availability, and local regulations all contribute to price fluctuations. Areas with a high concentration of skilled labor might have higher installation costs, while regions with readily available materials could experience lower prices. For instance, a home in a densely populated urban area might face higher installation costs compared to a similar project in a rural area due to factors like transportation costs and labor demand. Additionally, government incentives or tax credits available in some regions can offset the initial cost, making insulated siding more financially attractive in certain locations.

    Examples of Suitable Regions

    Regions with extreme temperature variations and harsh weather conditions are prime candidates for insulated siding. The Northeastern United States, experiencing harsh winters and humid summers, would significantly benefit from the energy efficiency and protection offered. Similarly, areas in the Midwest and Canada, with prolonged cold winters, would see substantial returns on investment. Conversely, regions with consistently mild temperatures, such as parts of Southern California or Florida, might find the added cost less worthwhile, unless other factors, such as increased durability and protection from extreme weather events (like hurricanes in Florida), are prioritized.

    Return on Investment (ROI)

    Determining the return on investment for insulated siding requires a careful consideration of several factors. The initial cost of installation, the annual savings in energy bills, and the potential increase in your home’s value all contribute to the overall ROI. While it’s impossible to provide a universally applicable figure, a thorough analysis can illuminate whether insulated siding is a worthwhile financial undertaking for your specific circumstances.

    Calculating the ROI involves comparing the total cost of the investment against the total benefits received over a set period. This typically involves projecting energy savings and increases in home value over several years, then comparing these benefits to the initial investment cost. The longer the timeframe considered, the more significant the potential ROI.

    ROI Calculation Methodology

    The formula for calculating ROI is straightforward: ROI = (Net Profit / Cost of Investment) x 100. In the context of insulated siding, the “Net Profit” represents the cumulative energy savings and increased home value over the chosen timeframe, minus the initial cost of installation. The “Cost of Investment” is simply the total cost of purchasing and installing the insulated siding.

    Illustrative ROI Scenarios

    The following table illustrates potential ROI scenarios for different property values and annual energy savings. These are illustrative examples and actual results may vary based on factors like climate, energy prices, and the specific type of insulated siding installed. It is crucial to obtain personalized quotes and energy audits for accurate projections.

    Scenario Initial Investment Annual Savings ROI over 10 Years
    Small Home, Moderate Savings $10,000 $500 50% ([$500/year * 10 years – $10,000] / $10,000) * 100 = 50%
    Medium Home, Significant Savings $15,000 $1,000 66.7% ([$1,000/year * 10 years – $15,000] / $15,000) * 100 = 66.7%
    Large Home, High Savings & Value Increase $25,000 $1,500 40% (Assuming a $5,000 increase in home value after 10 years. [($1,500/year * 10 years) + $5,000 – $25,000] / $25,000) * 100 = 40%

    Note: These calculations do not include potential tax credits or other financial incentives that might further improve the ROI. Furthermore, the increase in home value is a subjective estimate and will vary depending on the local real estate market. A professional appraisal would be needed for a precise determination.

    Closing Notes

    Ultimately, the decision of whether or not insulated siding is worth the extra cost is a personalized one. While the initial investment is higher, the potential for significant long-term savings on energy bills, increased home value, and reduced maintenance costs can make it a financially sound choice for many homeowners. By carefully weighing the factors discussed—including energy efficiency, lifespan, maintenance, and aesthetic preferences—alongside a thorough ROI calculation, you can confidently determine if insulated siding is the right investment for your home and your budget. Remember to consult with qualified contractors for accurate cost estimates and professional installation.

  • Best Insulated Siding Options for Extreme Climates

    Best Insulated Siding Options for Extreme Climates

    Best Insulated Siding Options for Extreme Climates: Protecting your home from the harshest weather conditions requires careful consideration of your siding choice. This guide explores various insulated siding materials, highlighting their thermal performance, durability, and cost-effectiveness in extreme climates. We’ll delve into installation techniques, maintenance strategies, and the long-term energy savings associated with each option, ensuring you make an informed decision for years of comfort and protection.

    From frigid winters to scorching summers, the right siding can significantly impact your home’s energy efficiency and longevity. Understanding the unique challenges posed by extreme temperatures, humidity, and intense sunlight is crucial. This exploration will equip you with the knowledge to choose the best insulated siding for your specific climate, minimizing maintenance needs and maximizing your investment.

    Types of Insulated Siding

    Choosing the right insulated siding for extreme climates is crucial for both energy efficiency and long-term durability. Several materials offer varying levels of insulation and performance characteristics, each with its own set of advantages and disadvantages. Understanding these differences is key to making an informed decision.

    Vinyl Insulated Siding

    Vinyl siding, often incorporating a foam insulation layer, is a popular choice due to its affordability and ease of installation. The foam backing enhances its insulating properties compared to traditional non-insulated vinyl. However, the R-value of vinyl siding with foam backing is generally lower than other insulated siding options. Its relatively low cost and ease of maintenance make it attractive, but its susceptibility to damage from impact and extreme temperature fluctuations should be considered in harsh climates. The color can fade over time with prolonged sun exposure.

    Fiber Cement Insulated Siding

    Fiber cement siding, a composite material of cement, cellulose fibers, and other additives, offers superior durability and fire resistance compared to vinyl. When combined with a foam insulation layer, it provides excellent thermal performance. Fiber cement is known for its longevity and ability to withstand extreme weather conditions, including high winds, heavy rain, and snow. While more expensive than vinyl, its extended lifespan and reduced maintenance requirements can offset the higher initial investment. However, it’s heavier than vinyl and requires more professional installation.

    Foam Insulated Siding

    Foam siding, typically made from polyurethane or polyisocyanurate, offers exceptional thermal performance with high R-values. Its lightweight nature makes it easier to install than fiber cement, but its susceptibility to damage from impact and UV degradation necessitates careful consideration in extreme climates. It is also more vulnerable to moisture damage if not properly installed and sealed. While its initial cost might be competitive, potential for damage and the need for careful installation must be factored in.

    Insulated Metal Siding

    Metal siding, often steel or aluminum, with a foam core provides a durable and energy-efficient option for extreme climates. The metal exterior offers excellent resistance to fire, impact, and insect damage. The foam core provides significant insulation, resulting in lower energy bills. However, metal siding can be prone to dents and scratches and may experience thermal expansion and contraction, potentially leading to noise issues in extreme temperatures. The higher initial cost is offset by its long lifespan and low maintenance needs.

    Comparison Table

    Siding Type R-Value (per inch) Approximate Lifespan (Years) Approximate Cost per Square Foot
    Vinyl (with foam backing) 1-2 20-30 $3-$8
    Fiber Cement (with foam backing) 2-4 50-80 $8-$15
    Foam (Polyurethane/Polyisocyanurate) 4-7 20-30 $5-$12
    Metal (with foam core) 3-5 50+ $10-$20

    Installation Methods and Considerations

    Proper installation of insulated siding is crucial for maximizing its energy efficiency and longevity, especially in extreme climates. Factors such as temperature fluctuations, high winds, heavy snowfall, and intense sunlight all significantly impact the installation process and the long-term performance of the siding. Careful planning and execution are essential to ensure a successful and durable installation.

    Best Practices for Extreme Climates

    Installing insulated siding in extreme climates requires specific considerations to mitigate the effects of harsh weather conditions. In extremely cold climates, it’s vital to ensure the materials are compatible with low temperatures and that the installation is completed before freezing temperatures set in. This might involve using specialized adhesives or fasteners designed for cold weather applications. Conversely, in hot climates, the focus shifts to preventing overheating and expansion of materials. Using appropriate sealants and fasteners that can withstand high temperatures is crucial. Proper ventilation behind the siding is also important in both hot and cold climates to prevent moisture buildup. This might involve incorporating ventilation channels or using breathable underlayments. Careful attention to expansion and contraction of materials due to temperature fluctuations is vital to prevent cracking or damage.

    Vapor Barriers and Air Sealing

    A properly installed vapor barrier is paramount to prevent moisture from entering the wall assembly. The vapor barrier should be installed continuously without gaps or tears, and all seams should be carefully sealed with appropriate tape. The placement of the vapor barrier depends on the climate and wall construction; in cold climates, it is typically placed on the warm side of the insulation to prevent moisture from condensing within the wall cavity. In hot and humid climates, it might be placed on the exterior side to prevent moisture intrusion from the outside. Air sealing is equally critical to minimize drafts and energy loss. All gaps and cracks around windows, doors, and other penetrations should be carefully sealed with caulk or sealant. This helps to maintain a consistent temperature within the building and reduce the load on the heating and cooling systems.

    Climate-Specific Installation Challenges

    High winds pose a significant challenge during installation, requiring the use of extra fasteners and reinforcement to prevent the siding from being blown off. Heavy snowfall can also put extra stress on the siding, so proper anchoring and snow load considerations are essential. In areas prone to hurricanes or tornadoes, impact-resistant siding should be considered, and the installation must be robust enough to withstand high winds and potential debris impact. In coastal areas, the siding should be chosen for its resistance to salt spray and moisture.

    Step-by-Step Installation of Insulated Vinyl Siding

    This guide outlines the installation of insulated vinyl siding, a popular choice for its durability and energy efficiency. Always refer to the manufacturer’s specific instructions for detailed guidance.

    Tools and Materials

    • Insulated vinyl siding panels
    • J-channel
    • Start and finish pieces
    • Fasteners (nails or screws)
    • Measuring tape
    • Level
    • Drill
    • Caulk
    • Safety glasses
    • Work gloves

    Safety Precautions

    Always wear safety glasses and work gloves during installation. Use caution when working at heights and use appropriate fall protection if necessary. Be mindful of power lines and other potential hazards.

    Installation Steps

    1. Prepare the wall surface: Ensure the wall is clean, dry, and free of any loose debris. Repair any damaged areas.
    2. Install the J-channel: Install the J-channel at the corners and around windows and doors.
    3. Install the starting piece: Attach the starting piece to the bottom of the wall, ensuring it is level.
    4. Install the siding panels: Snap the siding panels into place, starting from the bottom and working your way up. Use fasteners to secure the panels to the wall studs.
    5. Install the finish pieces: Install the finish pieces at the top of the wall and around windows and doors.
    6. Caulk all seams and joints: Caulk all gaps and seams to ensure a watertight seal.

    Impact of Climate on Siding Choice

    The choice of exterior siding is critically influenced by the prevailing climate. Extreme temperatures, high humidity, and intense sunlight all place significant stress on siding materials, impacting their longevity, aesthetic appeal, and energy efficiency. Understanding these impacts is crucial for selecting a siding system that will provide optimal performance and minimize maintenance over the lifespan of a structure.

    Extreme temperatures, both high and low, cause materials to expand and contract. This cyclical stress can lead to cracking, warping, and ultimately, failure of the siding. High humidity and rainfall contribute to moisture penetration, fostering the growth of mold and mildew and accelerating material degradation. Intense sunlight can cause fading and discoloration, diminishing the aesthetic value of the siding. The selection of appropriate siding must consider these factors to ensure long-term durability and performance.

    Temperature Effects on Siding Materials

    Different siding materials react differently to extreme temperatures. For instance, vinyl siding can become brittle and crack in extremely cold climates, while it may warp or sag under intense heat. Wood siding, while aesthetically pleasing, is susceptible to expansion and contraction, leading to gaps and potential moisture intrusion. Fiber cement siding generally offers better resistance to temperature fluctuations but is more prone to cracking if not properly installed. Metal siding, particularly aluminum and steel, demonstrates good dimensional stability across a wide temperature range but can experience thermal expansion and contraction, requiring careful consideration of expansion joints during installation. In arctic climates, materials like engineered wood or insulated vinyl siding might be more suitable due to their better resistance to cold-weather brittleness, while in desert climates, materials with high heat reflectivity, such as light-colored metal or fiber cement, are preferable to minimize heat absorption.

    Challenges Posed by High Humidity, Rainfall, and Sunlight

    High humidity and heavy rainfall create conditions conducive to moisture damage. Wood siding, if not properly treated, is highly susceptible to rot and decay. Vinyl siding, while generally moisture-resistant, can still trap moisture behind it if not properly installed, leading to mold growth. Fiber cement siding, being more resistant to moisture, is a popular choice in humid climates. However, prolonged exposure to moisture can still affect its performance. Intense sunlight can lead to fading and degradation of many siding materials. Darker-colored sidings absorb more heat, accelerating this process. The use of UV-resistant pigments in siding materials can mitigate this effect. In areas with frequent heavy rainfall, the use of water-resistant underlayment and proper flashing around windows and doors is critical, regardless of the siding material selected.

    Material Expansion and Contraction in Extreme Climates

    The expansion and contraction of siding materials due to temperature fluctuations is a major factor affecting their longevity. This is particularly pronounced in climates with significant temperature swings between day and night or across seasons. Materials with high coefficients of thermal expansion, such as vinyl, will expand and contract more than materials with lower coefficients, such as fiber cement. Proper installation techniques, including the use of expansion joints and fasteners designed to accommodate movement, are essential to minimize stress on the siding and prevent damage. Failure to account for expansion and contraction can lead to cracking, buckling, and premature failure of the siding system. For example, in areas with significant temperature swings, using a siding material with a lower coefficient of thermal expansion, such as fiber cement, might be more beneficial than vinyl, which is more prone to movement.

    Siding Suitability for Specific Extreme Climates

    Arctic climates demand siding materials with excellent resistance to cold temperatures and freeze-thaw cycles. Engineered wood siding, treated for moisture resistance, or insulated vinyl siding, offering better thermal performance, could be suitable options. Desert climates require materials that can withstand intense heat and sunlight. Light-colored metal siding or fiber cement siding with high reflectivity are generally preferred to minimize heat absorption and reduce the risk of fading. Coastal areas with high humidity and salt spray necessitate siding materials with exceptional resistance to moisture damage and corrosion. Fiber cement or properly treated wood siding may be considered in such environments. The choice of siding should always be made considering the specific challenges posed by the local climate to ensure long-term durability and performance.

    Energy Efficiency and Cost Savings

    Investing in insulated siding offers significant long-term financial benefits, particularly in regions experiencing extreme climates. The enhanced thermal performance translates directly into reduced energy consumption for heating and cooling, leading to substantial savings on utility bills and a faster return on the initial investment. This section will detail the financial aspects of choosing insulated siding, focusing on energy savings calculations, return on investment comparisons, and a breakdown of the overall installation costs.

    The energy savings achieved through insulated siding are directly related to the reduction in heat transfer through the exterior walls of a building. In extreme climates, this reduction can be substantial. For example, a home in a region with average winter temperatures of -10°C and summer temperatures of 35°C will experience a significantly lower energy demand with insulated siding compared to a home with traditional siding. This is because insulated siding creates a thermal barrier, minimizing the transfer of heat in both winter and summer, reducing the load on the heating and cooling systems.

    Energy Savings Calculations

    Calculating the precise energy savings depends on several factors, including the specific type of insulated siding, the climate, the size and orientation of the house, and the existing insulation levels. However, we can illustrate the potential savings with a simplified example. Let’s consider a 2,000 square foot home in a region with a high heating degree-day (HDD) and cooling degree-day (CDD) value. Assume the home currently uses a traditional siding system and has an annual energy cost of $3,000 for heating and cooling. Installing insulated siding with an R-value of 10 might reduce energy consumption by 20-30%, depending on the overall building envelope. This translates to annual savings of $600-$900 (20% of $3000 = $600; 30% of $3000 = $900). Over a 20-year period, this could accumulate to savings between $12,000 and $18,000.

    Annual Savings = (Percentage Reduction in Energy Consumption) x (Annual Energy Cost)

    Return on Investment (ROI) Comparison

    The initial cost of insulated siding varies significantly depending on the material chosen (e.g., vinyl, fiber cement, foam), the complexity of the installation, and regional labor costs. However, a general comparison can be made. Let’s assume the installation cost of insulated vinyl siding is $10,000, while insulated fiber cement siding might cost $15,000. Using the previously calculated annual savings of $600-$900, the ROI can be estimated. For vinyl siding, the payback period would range from 11 to 17 years ($10,000/$600 = 16.7 years; $10,000/$900 = 11.1 years). For fiber cement siding, the payback period would range from 17 to 25 years ($15,000/$600 = 25 years; $15,000/$900 = 16.7 years). This demonstrates that while the initial investment is higher for fiber cement, its superior durability and longer lifespan might offset the longer ROI period.

    Factors Influencing the Overall Cost of Insulated Siding Installation

    Several factors contribute to the total cost of insulated siding installation. Understanding these factors allows for better budgeting and informed decision-making.

    • Material Costs: The price of insulated siding varies widely depending on the material (vinyl, fiber cement, engineered wood, etc.), its thickness, and the manufacturer.
    • Labor Costs: Labor costs are significantly influenced by the size of the house, the complexity of the installation (e.g., removal of existing siding, repairs to underlying sheathing), and regional wage rates. Highly skilled labor may command a premium.
    • Permitting Fees: Building permits are typically required for exterior renovations, and the associated fees vary depending on local regulations and the scope of the project.
    • Preparation and Repair Costs: Existing siding removal, necessary repairs to underlying sheathing or framing, and the cost of any additional insulation may add to the overall expense.
    • Waste Disposal Fees: Disposal of old siding and other construction debris can incur additional costs.

    Financial Benefits of Choosing Insulated Siding

    The financial advantages of selecting insulated siding for extreme climates are compelling. These benefits extend beyond immediate cost savings and encompass long-term value and increased property value.

    • Reduced energy bills leading to significant long-term savings.
    • Faster return on investment compared to non-insulated siding options.
    • Increased home comfort due to better temperature regulation.
    • Potential increase in property value due to improved energy efficiency and curb appeal.
    • Lower maintenance costs due to the durability of many insulated siding materials.

    Maintenance and Lifespan

    Proper maintenance significantly extends the lifespan of insulated siding, especially in extreme climates where it faces harsh weather conditions. Regular care prevents costly repairs and ensures your home retains its curb appeal and energy efficiency for years to come. Neglecting maintenance can lead to premature deterioration and compromise the structural integrity of your siding.

    Potential Issues in Extreme Climates

    Extreme temperatures, heavy snowfall, intense sunlight, and strong winds all contribute to potential damage to insulated siding. For instance, extreme cold can cause cracking in certain materials, while intense heat can lead to warping or fading. Heavy snowfall can put extra stress on the siding, potentially causing it to buckle or break. Strong winds can dislodge poorly installed panels or damage vulnerable seams. Prolonged exposure to ultraviolet (UV) radiation from the sun can cause fading and discoloration, reducing the aesthetic appeal and potentially compromising the material’s protective properties. Salt spray in coastal areas accelerates corrosion and deterioration.

    Maintenance Practices for Extended Lifespan

    Regular cleaning and inspections are crucial for preventing costly repairs. A thorough cleaning removes dirt, debris, and pollutants that can accelerate weathering and damage. Regular inspections allow for the early detection of minor issues, such as cracks or loose panels, before they escalate into more significant problems. Addressing small problems promptly is significantly less expensive than dealing with extensive repairs later. For example, a small crack ignored can allow moisture to penetrate, leading to rot and the need for panel replacement.

    Maintenance Schedule for Insulated Siding

    A tailored maintenance schedule depends on the climate and the type of insulated siding installed. However, a general guideline includes:

    Task Frequency (Depending on Climate) Notes
    Inspection for damage (cracks, loose panels, etc.) Twice yearly (Spring and Fall) Pay close attention to corners, seams, and areas exposed to direct sunlight or wind.
    Cleaning (gentle wash with water and mild detergent) Annually or as needed Avoid harsh chemicals or high-pressure washers that can damage the siding.
    Repair of minor damage (caulking, patching) As needed Address any cracks or loose panels promptly to prevent further damage.
    Professional inspection and maintenance Every 5-10 years A professional can identify potential problems and perform necessary repairs.

    In regions with extreme weather, such as areas with frequent heavy snowfall or intense sun exposure, more frequent inspections and cleaning may be necessary. For example, areas prone to severe hailstorms should be checked more often for damage. Coastal areas should be inspected more frequently for signs of salt corrosion. This proactive approach significantly extends the lifespan of the siding and protects the investment made in home improvement.

    Sustainability and Environmental Impact

    Choosing insulated siding involves more than just aesthetics and energy efficiency; it also carries significant environmental implications. The manufacturing process, material sourcing, lifespan, and eventual disposal of siding all contribute to its overall environmental footprint. Understanding these factors allows for informed decision-making, enabling homeowners to minimize their environmental impact while improving their homes’ energy performance.

    The environmental impact of insulated siding varies greatly depending on the chosen material. Factors such as embodied carbon (the total greenhouse gas emissions associated with a product’s entire life cycle), recyclability, and the use of sustainable materials all play a crucial role. This section explores these factors in detail, providing a comparative analysis of different siding options to help consumers make environmentally conscious choices.

    Embodied Carbon of Different Siding Materials

    The embodied carbon of insulated siding materials differs significantly. For example, fiber cement siding generally has a lower embodied carbon footprint compared to vinyl siding due to the use of readily available natural materials in its production. However, the manufacturing process of fiber cement still involves energy consumption and the release of greenhouse gases. Vinyl siding, while often less expensive initially, typically possesses a higher embodied carbon footprint due to its reliance on fossil fuels during manufacturing and its limited recyclability. Wood siding, especially sustainably sourced and responsibly harvested wood, can present a lower embodied carbon footprint than vinyl, but this depends heavily on the specific wood species and forestry practices. Metal siding, such as aluminum or steel, also carries an environmental impact associated with its extraction and processing. The embodied carbon of each option can vary based on manufacturing processes, transportation distances, and the specific materials used. A comprehensive life-cycle assessment is necessary for an accurate comparison.

    Sustainable and Recycled Materials in Insulated Siding

    Several manufacturers are incorporating sustainable and recycled materials into their siding products. For instance, some vinyl siding manufacturers are utilizing recycled PVC content in their products, reducing reliance on virgin materials. Similarly, some fiber cement siding manufacturers are exploring the use of recycled materials in their formulations. The use of reclaimed wood in wood siding offers another avenue for sustainable construction, reducing the demand for newly harvested timber. The use of recycled aluminum in metal siding also contributes to reduced environmental impact. Choosing siding options with a high percentage of recycled content significantly reduces the overall environmental burden associated with its production.

    Certifications and Standards for Environmentally Friendly Siding

    Several certifications and standards exist to guide consumers towards environmentally friendly siding options. Look for certifications such as those from organizations focusing on sustainable forestry practices (e.g., Forest Stewardship Council – FSC) for wood siding, or those that verify recycled content percentages in other siding types. Additionally, certifications that address the entire life-cycle assessment, including manufacturing, transportation, and disposal, can provide a more holistic view of a product’s environmental impact. While specific certifications vary by region, checking for these labels can help consumers make informed choices that align with their sustainability goals.

    Warranty and Manufacturer Information

    Choosing insulated siding involves a significant investment, and understanding the warranty offered by the manufacturer is crucial for protecting that investment. A comprehensive warranty provides assurance regarding the product’s quality and longevity, offering recourse in case of defects or premature failure. This section details common warranty provisions and provides guidance on interpreting warranty terms to make informed purchasing decisions.

    Insulated siding warranties typically cover defects in materials and workmanship. Examples of common warranty clauses include coverage for fading, cracking, delamination, and damage from extreme weather conditions. The duration of these warranties varies significantly between manufacturers and product lines, ranging from 10 to 50 years or even lifetime warranties with specific conditions. Some warranties might be prorated, meaning the manufacturer’s responsibility for repair or replacement decreases over time. Others may be limited to the original purchaser or transferrable under specific conditions.

    Warranty Terms and Conditions

    Before purchasing insulated siding, meticulously review the warranty document provided by the manufacturer. Pay close attention to the specific details of what is covered and what is excluded. Common exclusions might include damage caused by improper installation, acts of God (e.g., hurricanes, tornadoes), or normal wear and tear. Understanding these limitations is crucial to avoid disappointment and disputes later on.

    Tips for Understanding Warranty Coverage

    To effectively assess a siding warranty, consider the following tips:

    • Duration: Note the length of the warranty and whether it covers the entire product or specific components. A longer warranty generally indicates greater confidence in the product’s durability.
    • Coverage: Carefully read the description of what is covered (e.g., material defects, labor costs, transportation). Some warranties might only cover the cost of materials, requiring you to pay for installation.
    • Exclusions: Identify any specific situations or types of damage that are not covered by the warranty. This information is often found in a separate section of the document.
    • Transferability: Determine if the warranty is transferable to a subsequent homeowner if you sell your property. This is a valuable consideration for long-term investment.
    • Process for Claiming: Understand the procedures involved in filing a warranty claim, including required documentation and timelines.

    Sample Warranty Comparison

    The following table provides a simplified comparison of warranties from three hypothetical manufacturers. Note that actual warranty terms and conditions will vary significantly based on the specific product and manufacturer.

    Manufacturer Warranty Duration Coverage Limitations
    ABC Siding 25 years Materials and workmanship; fading, cracking, delamination Excludes damage from improper installation, acts of God
    XYZ Cladding 30 years (prorated after 15 years) Materials only; fading, cracking Excludes labor costs, damage from impact, normal wear and tear
    123 Exterior Lifetime (limited) Materials; cracking, delamination Excludes fading, damage from improper installation, acts of God; Transferable only with proof of purchase

    Case Studies of Successful Installations

    Insulated siding has proven its effectiveness in various extreme climates, offering superior protection and energy efficiency. The following case studies highlight successful installations, emphasizing the crucial roles of proper material selection and installation techniques in achieving optimal results. These examples demonstrate the transformative impact of insulated siding, showcasing both improved energy performance and enhanced aesthetic appeal.

    Insulated Siding in a High-Altitude, Cold Climate (Colorado)

    A homeowner in a mountainous region of Colorado, experiencing extreme winter temperatures regularly dropping below -20°F (-29°C), opted for a high-density fiber cement insulated siding system. The installation team carefully addressed the challenges posed by the steep roof pitch and uneven terrain, employing specialized scaffolding and fastening techniques to ensure secure attachment. Prior to installation, the existing wood siding was assessed for rot and damage, with necessary repairs completed before the new siding was applied. The before-and-after visual transformation was dramatic; the previously drab and weathered exterior was replaced with a clean, modern look that significantly improved curb appeal. The homeowner reported a substantial reduction in heating costs, exceeding initial projections by approximately 15%, directly attributable to the superior insulation properties of the new siding. The improved energy efficiency also reduced the strain on the home’s heating system, extending its lifespan.

    Insulated Siding in a Coastal, High-Humidity Climate (Florida)

    A beachfront property in Florida, facing the challenges of intense sun, salt spray, and high humidity, was retrofitted with insulated vinyl siding. The selection of vinyl was strategic, as this material is highly resistant to moisture damage and UV degradation. To mitigate the impact of salt spray, the installers meticulously sealed all seams and joints, ensuring a watertight barrier. Prior to installation, existing aluminum siding was removed, and any underlying damage to the sheathing was repaired. The visual impact of the project was remarkable. The new insulated vinyl siding not only provided a more modern aesthetic but also offered superior protection against the harsh coastal elements. The homeowner reported a noticeable decrease in energy consumption, coupled with reduced maintenance needs compared to the previous aluminum siding. The lighter color of the new siding also helped reflect sunlight, further reducing the impact of the intense Florida sun on interior temperatures.

    Insulated Siding in an Arid, Hot Climate (Arizona)

    A home in the Sonoran Desert of Arizona, subjected to extreme heat and intense UV radiation, benefited from the installation of insulated stucco siding. The selection of light-colored stucco was crucial in minimizing heat absorption. The installers paid particular attention to proper ventilation behind the siding to prevent moisture buildup. Before installing the new siding, the existing stucco, which was showing significant signs of cracking and deterioration, was carefully removed. The improved energy efficiency was substantial, resulting in a significant reduction in cooling costs. The before-and-after visual transformation was evident, with the previously dull and faded exterior replaced by a crisp, clean, and modern facade that reflected the desert landscape. The homeowner also noted a significant reduction in the interior temperature fluctuations, creating a more comfortable living environment.

    Future Trends in Insulated Siding Technology

    The field of insulated siding is constantly evolving, driven by the increasing demand for energy-efficient and sustainable building materials, particularly in regions with extreme climates. Innovations in material science and manufacturing processes are leading to significant advancements in performance, durability, and environmental impact. These trends promise to reshape the insulated siding market in the coming years.

    Several key factors are driving these advancements. The growing awareness of climate change and the need to reduce carbon emissions are pushing the development of more sustainable materials and manufacturing processes. Simultaneously, the increasing cost of energy is incentivizing homeowners and builders to invest in energy-efficient building products, like high-performance insulated siding. Technological advancements are also playing a crucial role, enabling the creation of novel materials and improved manufacturing techniques.

    Advancements in Material Science

    The development of new composite materials is a significant trend. For instance, research is ongoing into using recycled materials in the production of insulated siding, reducing reliance on virgin resources and minimizing environmental impact. This includes exploring the use of recycled plastics and fibers in the core insulation layer and the outer cladding. Furthermore, advancements in polymer chemistry are leading to the development of more durable and weather-resistant cladding materials, extending the lifespan of the siding and reducing the need for frequent replacements. Examples include self-healing polymers that can repair minor damage, and coatings that provide superior UV resistance and protection against fading.

    Enhanced Energy Efficiency and Sustainability

    Insulated siding is already a key component of energy-efficient building envelopes. Future trends point towards even greater improvements in thermal performance. This includes the development of high-performance insulation materials with lower thermal conductivity, such as vacuum insulated panels (VIPs), which offer significantly better insulation than traditional foam insulation. The integration of phase-change materials (PCMs) into the siding’s design is another promising avenue. PCMs absorb and release heat as they change phase, effectively buffering temperature fluctuations and reducing energy consumption for heating and cooling. Additionally, the use of bio-based materials, such as rapidly renewable plant fibers, in the manufacturing process is gaining traction, further enhancing the sustainability profile of insulated siding.

    Impact on Cost and Availability

    The introduction of new materials and technologies will likely impact the cost and availability of insulated siding. Initially, some innovative products may be more expensive due to higher manufacturing costs and limited production scale. However, as these technologies mature and economies of scale are achieved, prices are expected to decrease, making them more accessible to a wider range of consumers. Increased competition among manufacturers will also contribute to price reductions. The availability of these advanced products will initially be limited, but as demand increases and production capacity expands, wider distribution is anticipated.

    Future Outlook for Insulated Siding in Extreme Climates

    The future outlook for insulated siding in extreme climates is positive. Advancements in material science, coupled with a growing focus on energy efficiency and sustainability, will lead to the development of even more effective and environmentally friendly products. These improvements will translate into significant energy savings, reduced environmental impact, and improved comfort for homeowners in regions experiencing extreme temperatures. The increased availability and affordability of high-performance insulated siding will make it an increasingly attractive option for new construction and renovations, contributing to a more sustainable and resilient built environment.

    Closing Notes

    Choosing the right insulated siding for extreme climates is a significant investment that pays off in energy savings, enhanced comfort, and increased home value. By carefully considering factors such as material properties, installation techniques, and long-term maintenance, you can protect your home from the elements and enjoy lasting peace of mind. This guide has provided a comprehensive overview to empower you to make the best decision for your unique needs and climate.

  • How Often Should You Repaint or Stain Your Wood Siding?

    How Often Should You Repaint or Stain Your Wood Siding?

    How Often Should You Repaint or Stain Your Wood Siding? This question is crucial for maintaining the beauty and longevity of your home’s exterior. Understanding the factors that influence the lifespan of wood siding, from climate and wood type to the choice of finish, is key to making informed decisions about upkeep. This guide will explore these factors, offering practical advice on assessing your siding’s condition, preparing for repainting or staining, and choosing the right products for a long-lasting, beautiful finish.

    Proper maintenance not only enhances the aesthetic appeal of your home but also protects your investment. Neglecting your wood siding can lead to costly repairs down the line. By understanding the signs of deterioration and following best practices for application and maintenance, you can ensure your wood siding remains a source of pride for years to come.

    Factors Affecting Wood Siding Lifespan

    The longevity of your wood siding is significantly influenced by a combination of factors, primarily environmental conditions, the type of wood used, and the chosen finish. Understanding these factors allows for informed decisions regarding maintenance and repainting or restaining schedules, ultimately extending the life and beauty of your home’s exterior.

    Climate Conditions and Wood Siding

    Climate plays a crucial role in determining how quickly wood siding deteriorates. High humidity promotes the growth of mold and mildew, leading to premature decay and discoloration. Extreme temperature fluctuations cause the wood to expand and contract, potentially cracking the paint or stain and allowing moisture penetration. Prolonged exposure to intense sunlight leads to fading and degradation of the wood fibers, weakening the siding and reducing its lifespan. Coastal areas, with their high salt content in the air, present an even more aggressive environment for wood siding, accelerating the deterioration process. For example, wood siding in a humid, subtropical climate might require repainting every 5-7 years, whereas in a dry, temperate climate, it could last 10-15 years or longer.

    Wood Type and Repainting/Staining Frequency

    Different wood species possess varying levels of natural resistance to decay and insect infestation. Cedar and redwood are known for their naturally high oil content and inherent resistance to rot, allowing them to withstand harsh weather conditions better than other species. These woods generally require less frequent maintenance than softer woods like pine, which is more susceptible to damage from moisture and insects. Pine siding, therefore, will typically need repainting or restaining more often. For instance, cedar siding might require repainting every 8-12 years, while pine siding may need it every 5-7 years, depending on the climate and finish.

    Lifespan of Different Wood Siding Finishes

    The type of finish applied to the wood siding significantly impacts its lifespan. Paint offers the best protection against the elements, creating a durable barrier against moisture, UV rays, and insect damage. However, paint requires more frequent repainting than stain. Stains, while allowing the natural beauty of the wood grain to show through, provide less protection than paint. Sealants primarily protect against moisture, but offer less protection from UV damage than paint or stain. A high-quality paint might last 10-15 years, while a good quality stain might need reapplication every 5-7 years. Sealants often require more frequent reapplication, potentially every 2-3 years.

    Expected Lifespan of Various Wood Types and Finishes

    Wood Type Paint Stain Sealant
    Cedar 10-15 years 7-10 years 2-3 years
    Redwood 10-15 years 7-10 years 2-3 years
    Pine 7-10 years 5-7 years 1-2 years

    Signs Your Wood Siding Needs Repainting or Staining

    Knowing when your wood siding requires repainting or staining is crucial for maintaining its beauty and protecting your home from the elements. Ignoring the signs can lead to more extensive and costly repairs down the line. By regularly inspecting your siding and understanding the key indicators of deterioration, you can schedule maintenance proactively and extend the life of your investment.

    Visual inspection is the first step in assessing the condition of your wood siding. Several visual cues can signal the need for repainting or restaining. These indicators often appear gradually, so regular monitoring is essential for early detection.

    Visual Indicators of Deterioration

    Fading, cracking, peeling paint or stain, and mildew growth are common visual signs of deterioration. Faded siding loses its original color and vibrancy, becoming dull and washed out. This indicates that the protective layer is weakening and needs to be refreshed. Cracking and peeling paint or stain expose the bare wood to moisture, insects, and UV damage. Mildew, a common fungal growth, appears as dark spots or streaks, often in damp or shaded areas. These visual defects not only compromise the aesthetic appeal but also weaken the siding’s protective barrier. For example, imagine a once vibrant red siding now showing patches of faded pink and noticeable cracks. This is a clear sign that repainting is necessary. Similarly, a dark, fuzzy growth on sections of the siding indicates mildew and requires immediate attention.

    Tactile Indicators of Deterioration

    Beyond visual cues, the texture of your wood siding can also reveal its condition. Roughness and splintering are tactile indicators of deterioration. Running your hand across the siding should reveal a smooth surface; if it feels rough, splintery, or uneven, it’s a strong indication that the protective layer is compromised and needs attention. This roughness might be caused by the wood expanding and contracting due to moisture fluctuations, leading to cracking and flaking of the paint or stain. For instance, if you notice splinters or rough patches when lightly touching the siding, it’s time for a fresh coat of paint or stain.

    Assessing Structural Integrity

    Assessing the structural integrity of your wood siding involves looking beyond surface-level issues. Check for signs of significant damage, such as rot, warping, or insect infestation. Rotting wood is typically soft and spongy, easily indented with finger pressure. Warping is characterized by uneven surfaces or bending of the siding boards. Insect infestation may be evident through small holes or tunnels in the wood. These problems are more serious and may require repairs beyond repainting or staining; you might need to replace damaged sections of siding. For example, if you find areas of soft, decaying wood, immediate action is needed to prevent further structural damage.

    Common Problems Indicating the Need for Repainting or Staining

    A summary of common problems that indicate the need for repainting or staining is provided below. Addressing these issues promptly prevents more extensive damage and maintains the longevity of your wood siding.

    • Significant fading of the original color.
    • Extensive cracking or peeling of the paint or stain.
    • Visible mildew or mold growth.
    • Rough or splintery texture of the wood.
    • Signs of wood rot, warping, or insect infestation.

    Preparation for Repainting or Staining

    Proper preparation is crucial for a long-lasting and beautiful finish on your wood siding. Neglecting this step can lead to premature peeling, chipping, and overall degradation of the paint or stain. Thorough cleaning, repair of damaged areas, and careful surface preparation will ensure the new coat adheres properly and provides maximum protection.

    Cleaning Wood Siding

    Effective cleaning removes dirt, mildew, and loose paint, allowing for better adhesion of the new coating. Begin by rinsing the siding with a pressure washer set to a low pressure setting to avoid damaging the wood. For stubborn mildew or dirt, a solution of mild detergent and water can be applied, scrubbing gently with a soft-bristled brush. Always rinse thoroughly afterward to remove all traces of cleaning solution. Allow the siding to dry completely before proceeding to the next step. For heavily soiled areas, a solution of trisodium phosphate (TSP) can be used, following the manufacturer’s instructions carefully, and remembering to wear appropriate protective gear.

    Repairing Damaged Wood Siding

    Damaged areas, such as cracks, splits, or rotten boards, must be addressed before repainting or staining. Small cracks can be filled with exterior-grade wood filler, ensuring it’s applied smoothly and allowed to dry completely before sanding. Rotten boards should be replaced entirely. This involves carefully removing the damaged board, measuring and cutting a replacement to the exact size, and securing it in place with exterior-grade screws or nails. Caulk any gaps between the new board and surrounding siding to prevent moisture intrusion.

    Surface Preparation: Sanding and Priming

    Once repairs are complete and the siding is clean and dry, surface preparation is essential for optimal adhesion. Lightly sand the entire surface using fine-grit sandpaper (120-150 grit) to smooth any rough areas and create a better surface for the paint or stain to adhere to. Remove any sanding dust with a brush or tack cloth. For bare wood or heavily weathered surfaces, applying a quality exterior primer is crucial. This creates a uniform surface and improves the paint or stain’s adherence, resulting in a longer-lasting finish. Follow the primer manufacturer’s instructions regarding drying time before applying the final coat.

    1. Clean the siding: Rinse with a pressure washer (low pressure), then scrub with a detergent solution if needed. Rinse thoroughly and allow to dry completely.
    2. Repair damaged areas: Fill small cracks with wood filler; replace rotten boards. Caulk any gaps.
    3. Sand the surface: Use fine-grit sandpaper (120-150 grit) to smooth rough areas. Remove dust.
    4. Prime (if necessary): Apply an exterior-grade primer to bare wood or heavily weathered surfaces. Allow to dry completely.

    Choosing the Right Paint or Stain

    Selecting the appropriate paint or stain is crucial for ensuring the longevity and aesthetic appeal of your wood siding. The choice depends on several factors, including your budget, desired finish, and the specific climate you live in. Understanding the properties of different products will help you make an informed decision.

    Exterior Wood Paint Types

    Exterior wood paints are available in various formulations, each with its own set of advantages and disadvantages. Oil-based, water-based, and acrylic paints are the most common choices. Oil-based paints offer excellent durability and weather resistance, creating a hard, protective film. However, they have a strong odor, require longer drying times, and are more challenging to clean up. Water-based paints, also known as latex paints, are low-odor, dry quickly, and are easy to clean with soap and water. They are generally less durable than oil-based paints but provide a good balance of performance and convenience. Acrylic paints combine some of the best features of both oil-based and water-based paints, offering good durability, relatively quick drying times, and ease of cleanup. They are a popular choice for their versatility and performance.

    Stain Versus Paint for Wood Siding

    The decision between using stain or paint depends on your priorities. Paints create a solid, opaque coating that completely covers the wood grain, offering superior protection from the elements. Stains, on the other hand, penetrate the wood, enhancing its natural grain and color while providing some protection. Stains allow the wood texture to show through, offering a more natural look. However, stains generally offer less protection from UV damage and moisture compared to paints, requiring more frequent reapplication. The choice often comes down to a balance between protection and aesthetic preference.

    Factors Influencing Paint or Stain Color Selection

    Choosing a color for your wood siding involves more than just personal preference. Light reflectance is a critical consideration. Lighter colors reflect more sunlight, reducing the temperature of the siding and potentially lowering energy costs. Darker colors absorb more heat, potentially leading to increased energy consumption for cooling. Additionally, consider the environmental impact of the paint or stain. Look for low-VOC (volatile organic compound) options to minimize air pollution. Choosing colors that complement your home’s architectural style and surrounding landscape is also important for creating a cohesive and visually appealing exterior.

    Selecting Durable and Weather-Resistant Paint or Stain

    Durability and weather resistance are paramount when choosing exterior wood paints or stains. Look for products specifically formulated for exterior use and boasting high ratings for UV resistance, mildew resistance, and water resistance. Check the manufacturer’s specifications for expected lifespan and warranty information. Consider the climate in your region; areas with harsh winters or intense sun exposure require paints and stains with superior durability. For example, in coastal areas with high humidity and salt spray, a paint or stain with excellent mildew resistance is essential. Always follow the manufacturer’s instructions for application to ensure optimal performance and longevity.

    Application Techniques for Paint and Stain

    Proper application is crucial for achieving a long-lasting, beautiful finish on your wood siding. The method you choose – brush, roller, or sprayer – will impact the final look and the longevity of the paint or stain job. Careful attention to detail during application ensures even coverage, prevents defects, and maximizes the lifespan of your protective coating.

    Brush Application

    Brushes offer excellent control, especially in areas with intricate details or trim. Natural bristle brushes are generally preferred for oil-based stains, while synthetic brushes work well with water-based paints and stains. Begin by loading the brush with a moderate amount of paint or stain, avoiding oversaturation. Apply the paint or stain in smooth, even strokes, working with the grain of the wood. Overlap each stroke slightly to ensure complete coverage and avoid visible brush marks. For larger surfaces, work in manageable sections to maintain a wet edge and prevent lap marks. Regularly clean the brush to remove dried paint or stain to maintain its effectiveness.

    Roller Application

    Rollers are efficient for covering large, flat areas of siding. Choose a roller with a nap length appropriate for the texture of your siding – a shorter nap for smooth siding and a longer nap for rougher surfaces. Load the roller with paint or stain, ensuring it’s evenly coated but not dripping. Apply the paint or stain in smooth, overlapping strokes, maintaining a wet edge. Use a back-and-forth motion, working in sections to prevent the paint or stain from drying before you can blend it seamlessly. A paint tray and roller screen help to ensure even paint distribution and prevent splattering.

    Sprayer Application

    Sprayers provide the fastest application method, especially for large projects. However, they require more preparation and skill to avoid runs and drips. Before spraying, protect surrounding areas with drop cloths or plastic sheeting. Adjust the sprayer nozzle to the appropriate setting for your paint or stain and the surface texture. Maintain a consistent distance from the siding and apply the paint or stain in smooth, even coats, using overlapping passes. Avoid overspray by working methodically and maintaining a consistent speed. Clean the sprayer thoroughly immediately after use to prevent clogging.

    Achieving Even Application and Avoiding Drips and Runs

    Regardless of the application method, even application is paramount. Avoid overloading your brush, roller, or sprayer. Work in small sections, maintaining a wet edge to prevent lap marks. Apply thin, even coats rather than trying to achieve full coverage with a single heavy coat. Allow each coat to dry completely before applying the next. If drips or runs occur, gently smooth them out with a brush or roller before they dry. For significant runs, carefully scrape them off with a putty knife before reapplying the paint or stain.

    Applying Multiple Coats and Allowing Adequate Drying Time

    Most wood siding projects require at least two coats of paint or stain. Allow each coat to dry completely according to the manufacturer’s instructions before applying the next. This ensures proper adhesion and prevents peeling or chipping. In humid or cold conditions, drying times may be longer. Check the weather forecast before starting your project to avoid unexpected delays. Proper drying time between coats is essential for a durable and aesthetically pleasing finish. Ignoring this step can lead to problems such as peeling or uneven color.

    Maintenance After Repainting or Staining

    Proper maintenance is crucial for extending the life and beauty of your freshly painted or stained wood siding. Regular care prevents premature deterioration and keeps your home looking its best. By following a simple maintenance plan, you can significantly increase the time between costly repainting or restaining projects.

    Regular Cleaning and Inspection

    Cleaning your siding removes dirt, mildew, and other debris that can dull the finish and damage the wood over time. A yearly inspection allows for early detection of any problems, such as peeling paint, cracks, or insect infestation, enabling timely intervention before they become major issues. For cleaning, use a soft-bristled brush and a solution of mild detergent and water. Always rinse thoroughly to avoid residue buildup. During inspections, pay close attention to areas prone to moisture damage, such as corners and around windows and doors.

    Addressing Minor Issues

    Promptly addressing minor issues prevents them from escalating into more extensive and costly repairs. Small cracks in the paint or stain can be easily filled with appropriate caulk and then repainted or restained to match the existing finish. Loose or damaged siding should be repaired or replaced as soon as possible to prevent further water damage. For peeling paint, gently scrape away loose areas before applying a touch-up coat. Regularly inspect for signs of insect infestation, such as wood-boring insects, and address these immediately with appropriate treatment. Failing to address minor problems can lead to more extensive and expensive repairs later. For example, a small crack in the caulk around a window, left unaddressed, can allow water to penetrate, leading to rot and requiring costly siding replacement.

    Maintenance Checklist

    To simplify the maintenance process, consider using this checklist:

    • Spring Cleaning: Inspect siding for damage, clean with mild detergent and water, and rinse thoroughly.
    • Summer Inspection: Check for any signs of insect infestation, loose paint or stain, or water damage.
    • Fall Inspection: Check for any damage caused by severe weather such as high winds or hail.
    • Winter Inspection: Check for ice damage, especially in areas prone to ice buildup.
    • Annual Touch-ups: Address any minor imperfections, such as small cracks or peeling paint, with appropriate caulk and paint/stain.
    • Every 3-5 years (depending on climate and exposure): Consider a full cleaning with a pressure washer (low pressure setting) to remove more stubborn dirt and mildew. Always test in an inconspicuous area first.

    Cost Considerations for Repainting or Staining

    Repainting or staining your wood siding is an investment that protects your home’s exterior and enhances its curb appeal. Understanding the associated costs is crucial for budgeting and making informed decisions. Several factors significantly impact the final price, from the size of your house to the type of paint or stain chosen.

    Labor Costs

    Labor costs represent a significant portion of the overall expense. Hiring professional painters or stainers typically involves hourly rates or a per-square-foot pricing structure. Hourly rates can range from $30 to $75 or more depending on location, experience, and the complexity of the job. Per-square-foot pricing might range from $1 to $5, again varying by location and project specifics. Factors such as the height of your house, the need for scaffolding, and the intricacy of the trim work all influence labor costs. For example, a two-story house with extensive detailing will cost considerably more than a single-story ranch.

    Material Costs

    Material costs encompass the paint or stain itself, primers (if necessary), wood fillers, cleaning solutions, brushes, rollers, and other tools. The quality of paint or stain directly correlates with its price; high-quality, long-lasting options are more expensive but may offer better protection and longevity. The quantity of materials required depends on the surface area to be covered and the number of coats needed. For instance, a high-quality exterior paint might cost between $30 and $80 per gallon, while a premium stain could range from $50 to $150 per gallon. These prices are estimates and can vary based on brand and retailer.

    Preparation Costs

    Preparation is a crucial step that often gets overlooked in cost estimations. It involves tasks like power washing the siding to remove dirt, mildew, and loose paint; scraping off peeling paint; and repairing any damaged wood. The extent of preparation work needed will significantly impact the cost. If the siding is in relatively good condition, preparation costs might be minimal. However, if significant repairs or extensive cleaning are required, these costs can add up considerably. Consider the potential need for specialized equipment rentals (e.g., pressure washer) or the cost of purchasing necessary supplies.

    Professional vs. DIY Cost Comparison

    Hiring professionals offers convenience and expertise, but comes with a higher price tag. DIY projects can save on labor costs, but require time, effort, and the purchase or rental of tools and equipment. Weigh the pros and cons of each approach based on your skills, time availability, and budget. A professional will typically provide a more accurate and reliable finish, potentially extending the lifespan of the paint or stain. However, a DIY project, while potentially more time-consuming, can be a cost-effective option for those with the necessary skills and tools.

    Estimated Costs

    Scenario House Size (sq ft) Labor Cost Material Cost
    Small House, DIY 1000 $0 $300 – $600
    Medium House, DIY 1500 $0 $450 – $900
    Large House, Professional 2500 $1500 – $3750 $750 – $1500
    Small House, Professional 1000 $500 – $1250 $300 – $600

    Environmental Impact of Repainting or Staining

    Repainting or staining wood siding presents both opportunities and challenges concerning environmental responsibility. The choices made regarding paint and stain types, application methods, and waste disposal significantly impact the overall environmental footprint of this home maintenance task. Understanding these impacts allows homeowners to make informed decisions that minimize negative effects.

    The environmental impact of paints and stains varies considerably depending on their chemical composition. Traditional oil-based paints often contain volatile organic compounds (VOCs), which contribute to air pollution and smog formation. These VOCs can also have adverse health effects. Conversely, water-based paints and stains generally have lower VOC content, resulting in a smaller environmental impact. However, even water-based products may contain other chemicals that can affect water quality if improperly disposed of. Similarly, the type of wood preservative used in stains can influence environmental impact. Some preservatives contain biocides that can be harmful to aquatic life if they leach into waterways.

    Environmental Impact of Different Paint and Stain Types

    Oil-based paints, while offering durability, release significant VOCs during application and curing. These VOCs contribute to ground-level ozone formation, a key component of smog. In contrast, water-based paints, often labeled as “low-VOC” or “zero-VOC,” significantly reduce these emissions. However, it’s crucial to note that “zero-VOC” typically means less than 5 grams of VOCs per liter, not a complete absence. Oil-based stains, particularly those containing preservatives, may present similar VOC and biocide concerns as oil-based paints. Water-based stains generally pose a lower environmental risk but still require careful consideration of their ingredients. Natural oil-based stains, derived from plant sources like linseed oil or tung oil, offer a more environmentally friendly alternative, although they may require more frequent reapplication.

    Environmentally Friendly Options and Sustainable Practices

    Choosing environmentally friendly paints and stains is a crucial step in minimizing the environmental impact of repainting or staining wood siding. Look for products certified by reputable organizations like Green Seal or SCS Global Services, indicating that they meet specific environmental standards. These certifications often consider factors such as VOC content, the use of recycled materials, and the biodegradability of the product. Furthermore, employing sustainable practices during application, such as using drop cloths to minimize spills and overspray, contributes to reducing waste and environmental contamination.

    Minimizing Waste and Responsible Disposal

    Proper waste disposal is essential to mitigate the environmental impact of repainting or staining. Leftover paint and stain should never be poured down the drain or into the garbage. Many communities offer hazardous waste collection centers or programs where these materials can be disposed of safely and responsibly. Recycling programs for paint cans may also be available. Furthermore, careful planning and accurate estimation of the required paint or stain quantity can help minimize waste generation.

    Environmentally Conscious Choices for Repainting or Staining

    • Select low-VOC or zero-VOC paints and stains.
    • Opt for water-based products whenever possible.
    • Consider natural oil-based stains derived from renewable resources.
    • Look for paints and stains with certifications from reputable environmental organizations.
    • Use drop cloths and other protective measures to minimize spills and overspray.
    • Properly dispose of leftover paint and stain through designated hazardous waste collection programs.
    • Recycle paint cans whenever feasible.
    • Plan carefully to minimize waste generation by accurately estimating material needs.

    Warranty Considerations for Wood Siding and Finishes

    Understanding warranties for wood siding and associated paints or stains is crucial for planning repainting or restaining schedules and protecting your investment. Warranties offer a degree of protection against defects in materials and workmanship, influencing how frequently you might need to undertake these maintenance tasks. Knowing what your warranties cover can save you significant time and money in the long run.

    Warranties typically provided by manufacturers offer varying levels of coverage and duration. This coverage can extend to the wood siding itself, the applied paint or stain, or both. The specific terms and conditions are detailed within the warranty document, which should be carefully reviewed upon purchase. Failure to understand the terms could lead to disputes about coverage should problems arise.

    Warranty Information Typically Included

    Manufacturer warranties usually include details on the covered product, the duration of the warranty (often expressed in years), the specific defects covered (e.g., peeling paint, rot, splitting), and the process for filing a claim. They may also specify limitations, such as excluding damage caused by improper installation, normal wear and tear, or acts of nature. For instance, a paint warranty might cover peeling or fading due to a manufacturing defect, but not damage resulting from a severe hail storm. Similarly, a siding warranty might cover rot caused by a manufacturing flaw, but not rot caused by improper water management around the house. Many warranties will require proof of purchase and proper installation to validate a claim.

    Understanding and Utilizing Warranties

    To effectively utilize your warranties, keep all relevant documentation in a safe and accessible place. This includes the original purchase receipts, installation records (if applicable), and the warranty certificates themselves. Familiarize yourself with the warranty terms and conditions before any issues arise. If you notice a problem covered under the warranty, promptly contact the manufacturer according to the instructions outlined in the warranty document. Be prepared to provide necessary documentation, such as photos of the damage and proof of purchase. Responding promptly is crucial; most warranties have time limits for filing claims.

    Key Warranty Terms

    • Warranty Period: The length of time the warranty is valid, typically expressed in years.
    • Covered Defects: Specific issues or problems covered under the warranty (e.g., peeling paint, rot, cracking).
    • Exclusions: Situations or damages not covered by the warranty (e.g., damage from natural disasters, improper installation, normal wear and tear).
    • Claim Process: The steps required to file a claim, including required documentation and contact information.
    • Limitations: Any restrictions or conditions that might affect the warranty’s coverage (e.g., limitations on the amount of reimbursement).
    • Prorated Warranty: A warranty where the coverage decreases over time. For example, a 20-year prorated warranty might cover 100% of the cost of repair in the first 5 years, decreasing to 50% in the next 10 years, and so on.

    Troubleshooting Common Problems During Repainting/Staining

    Repainting or staining wood siding can present several challenges. Understanding common issues and their solutions is crucial for a successful and long-lasting finish. Proper preparation and technique are key to preventing many problems, but even with careful work, some issues may arise. This section addresses common problems, their solutions, and preventative measures.

    Uneven Application

    Uneven application of paint or stain often results in a patchy or streaky appearance. This can stem from several factors, including inconsistent application pressure, using improper tools, or applying too thick a coat. The solution involves careful and consistent application, using the right tools (brushes, rollers, or sprayers), and following the manufacturer’s instructions regarding coat thickness. Preventative measures include practicing on a scrap piece of wood before tackling the entire siding and ensuring proper thinning of the paint or stain if necessary.

    Peeling

    Peeling paint or stain is a significant problem indicating underlying issues. Common causes include inadequate surface preparation (failure to remove old, loose paint or failing to properly clean the surface), application over a damp surface, or using an incompatible product. Addressing peeling requires removing all loose paint or stain, cleaning the surface thoroughly, and then applying a primer suited for the existing surface before repainting or restaining. Preventative measures involve proper surface preparation, including cleaning, scraping, and sanding, and selecting appropriate primers and paints for the existing surface.

    Blistering

    Blistering is often caused by moisture trapped beneath the existing paint or stain. This can be due to poor ventilation, application over a damp surface, or underlying wood rot. Solutions include scraping away blisters, cleaning the affected area, allowing it to dry completely, and then repainting or restaining. Preventative measures include ensuring the wood is completely dry before application, providing adequate ventilation, and addressing any underlying wood rot or moisture problems before painting or staining.

    Troubleshooting Guide

    Problem Cause Solution Prevention
    Uneven Application Inconsistent application pressure, improper tools, too thick a coat Consistent application, proper tools, appropriate coat thickness Practice on scrap wood, proper thinning
    Peeling Inadequate surface preparation, application over damp surface, incompatible product Remove loose paint/stain, clean surface, apply primer, repaint/restain Proper surface preparation, dry surface, compatible products
    Blistering Moisture trapped beneath paint/stain, poor ventilation, damp surface, wood rot Scrape blisters, clean, dry, repaint/restain Dry surface, ventilation, address wood rot
    Runny Paint/Stain Paint/stain too thin, excessive heat, improper application technique Apply thicker coats, work in cooler temperatures, use proper application technique Follow manufacturer instructions for thinning, work in shade, avoid excessive heat

    Last Recap

    Maintaining your wood siding involves more than just aesthetics; it’s about protecting your home and preserving its value. By understanding the factors that affect siding lifespan, recognizing the signs of needed attention, and employing proper preparation and application techniques, you can extend the life of your siding and enhance your home’s curb appeal. Remember regular inspection and maintenance are key to preventing costly repairs and ensuring your wood siding remains a beautiful and durable feature of your home for many years.

  • How Insulated Siding Can Lower Your Energy Bills

    How Insulated Siding Can Lower Your Energy Bills

    How Insulated Siding Can Lower Your Energy Bills is a compelling proposition for homeowners seeking both energy efficiency and aesthetic upgrades. This article explores the multifaceted benefits of insulated siding, from its material composition and diverse types to its significant impact on reducing heating and cooling costs. We’ll delve into the science behind its effectiveness, examining how it minimizes heat transfer and air infiltration, ultimately leading to substantial long-term savings and a smaller environmental footprint.

    We will cover various aspects, including the different types of insulated siding available, their R-values, and the potential for energy savings based on factors such as climate and home size. Furthermore, we will address cost considerations, maintenance requirements, and the lifespan of insulated siding, providing a comprehensive guide to help you make an informed decision.

    Introduction to Insulated Siding

    Insulated siding offers a compelling solution for homeowners seeking to improve their home’s energy efficiency and curb appeal. By combining an attractive exterior finish with built-in insulation, it provides a cost-effective way to reduce energy consumption and lower heating and cooling bills. This section will explore the composition, types, and advantages of insulated siding compared to traditional options.

    Insulated siding materials typically consist of a weather-resistant outer layer, an insulating core, and sometimes a vapor barrier. The outer layer is usually made of materials like vinyl, fiber cement, or engineered wood, chosen for their durability and aesthetic appeal. The core provides the insulation, commonly made from expanded polystyrene (EPS), extruded polystyrene (XPS), polyurethane foam, or polyiso foam. These materials offer varying levels of R-value, a measure of thermal resistance. A vapor barrier, often incorporated within the siding panel, helps prevent moisture from entering the wall cavity and causing damage.

    Types of Insulated Siding

    The choice of insulated siding depends on factors such as budget, aesthetic preferences, and climate. Several common types exist, each with its own set of characteristics.

    • Vinyl Insulated Siding: This is a popular choice due to its affordability, low maintenance, and wide range of colors and styles. The vinyl outer layer is bonded to a foam insulation core, providing a combined system for both protection and energy efficiency. It’s relatively easy to install, making it a cost-effective option for many homeowners.
    • Fiber Cement Insulated Siding: Offering superior durability and fire resistance compared to vinyl, fiber cement insulated siding is a more premium option. The fiber cement exterior layer is combined with a foam core, resulting in a robust and long-lasting siding system. While more expensive initially, its longevity and performance often justify the higher cost.
    • Insulated Metal Siding: This type of siding combines the strength and durability of metal with the energy-saving benefits of insulation. Often incorporating a foam core sandwiched between metal panels, it is particularly well-suited for climates with extreme temperature fluctuations. Its resilience to impact and weather makes it a good choice for areas prone to harsh conditions.

    Insulated Siding vs. Traditional Siding

    A key advantage of insulated siding is its integrated insulation, which eliminates the need for separate insulation installation within the wall cavity. This simplifies the construction process and reduces labor costs. Traditional siding, such as wood or vinyl without insulation, requires additional insulation to achieve comparable energy efficiency. This leads to increased material and installation expenses.

    Feature Insulated Siding Traditional Siding
    Installation Cost Potentially lower due to integrated insulation Higher due to separate insulation installation
    Energy Efficiency Higher due to built-in insulation Lower unless supplemented with additional insulation
    Maintenance Generally low maintenance Can vary depending on the material; wood requires more maintenance
    Longevity Varies depending on the material; some types are very durable Varies depending on the material and maintenance

    The table above highlights the key differences between insulated and traditional siding. While the initial cost of insulated siding might be higher in some cases, the long-term savings on energy bills and reduced maintenance often outweigh the initial investment. For example, a homeowner in a region with significant temperature variations might see a considerable return on investment over the lifespan of the siding due to reduced heating and cooling costs. This is especially true when comparing to the cost of adding insulation to traditional siding after installation.

    How Insulation Works to Reduce Energy Costs

    Insulation plays a crucial role in minimizing energy consumption by reducing heat transfer between the inside and outside of your home. Understanding how insulation works is key to appreciating the energy savings provided by insulated siding. This involves understanding the principles of heat transfer and how insulation effectively mitigates these processes.

    Insulation works primarily by slowing down the rate at which heat moves through the walls of your home. Heat transfer occurs through three primary mechanisms: conduction, convection, and radiation. Conduction is the transfer of heat through direct contact; convection involves the movement of heated air or fluids; and radiation is the transfer of heat through electromagnetic waves. Insulation materials are designed to resist these processes, thereby reducing the overall heat transfer.

    The Role of R-Value in Insulation Effectiveness

    The R-value is a measure of a material’s resistance to heat flow. A higher R-value indicates better insulation. The R-value is expressed in units of “R-hours-square feet per British thermal unit (BTU).” For example, an R-13 wall provides more insulation than an R-7 wall. When selecting insulation for your home, it’s important to consider the climate and the desired level of energy efficiency. Higher R-values are generally preferred in colder climates to minimize heat loss during winter, and lower R-values may suffice in milder climates. Building codes often specify minimum R-values for different climate zones. The R-value of insulated siding significantly contributes to the overall thermal resistance of the building envelope.

    Air Infiltration and Energy Loss

    Air infiltration, the movement of outside air into a building, is a major source of energy loss. Cracks and gaps in walls, windows, and around doors allow cold air to enter during winter and warm air to escape during summer. This constant air exchange forces your heating and cooling systems to work harder, resulting in increased energy consumption and higher bills. Insulated siding acts as a barrier, effectively sealing gaps and cracks in the exterior wall, significantly reducing air infiltration. This improved air sealing leads to a more stable indoor temperature, minimizing the need for frequent heating and cooling adjustments, thus contributing to substantial energy savings. For example, a home with poorly sealed walls might experience a 20% increase in energy costs compared to a similar home with properly insulated siding, representing significant savings over the lifetime of the home.

    Energy Savings from Insulated Siding

    Insulated siding offers significant potential for reducing your home’s energy consumption and lowering your utility bills. By creating a thermal barrier, it minimizes heat transfer between your home’s interior and the outside environment, resulting in less energy needed for both heating and cooling. The extent of these savings depends on several factors, including the R-value of the siding, the climate you live in, and the existing insulation levels of your home.

    The potential percentage reduction in heating and cooling costs with insulated siding can be substantial. In many cases, homeowners report savings ranging from 10% to 25%, or even more, depending on the specific circumstances. For example, a home in a colder climate with inadequate existing insulation might see a much larger reduction than a home in a milder climate with good existing insulation. This improvement in energy efficiency translates directly into lower energy bills, offering a tangible return on investment.

    Annual Energy Savings with Insulated Siding

    The following table illustrates potential annual energy savings based on different insulated siding materials and their associated R-values. These figures are estimates and can vary depending on factors such as home size, climate, and energy prices. The installation cost is also included to illustrate the return on investment. Note that these are illustrative examples and actual costs and savings may differ.

    Material R-Value Estimated Annual Savings Installation Cost (Estimate)
    Fiber Cement with Foam Insulation 5-7 $300 – $500 $10,000 – $15,000
    Vinyl Siding with Foam Backing 4-6 $200 – $400 $8,000 – $12,000
    Polyurethane Insulated Siding 6-8 $400 – $600 $12,000 – $18,000

    Long-Term Return on Investment

    The long-term return on investment for insulated siding is often substantial. While the initial installation cost can be significant, the cumulative energy savings over the lifespan of the siding (typically 20-30 years) can easily offset the upfront expense. For example, using the figures in the table above, a homeowner installing vinyl siding with foam backing at the lower end of the cost range ($8,000) and experiencing annual savings of $200 could recoup their initial investment within 40 years. However, higher annual savings or lower installation costs would shorten the payback period considerably. Furthermore, increased home value due to improved energy efficiency is an additional benefit not reflected in these calculations.

    Factors Affecting Energy Savings

    The energy savings you realize from insulated siding are influenced by a variety of factors, working in concert to determine the overall impact on your energy bills. Understanding these factors allows for a more realistic expectation of the return on investment and helps homeowners make informed decisions. While insulated siding offers significant potential for energy efficiency improvements, its effectiveness isn’t uniform across all situations.

    Several key elements interact to define the ultimate energy savings. These include climatic conditions, the size and design of the home, the pre-existing insulation levels, and the quality of the installation. Furthermore, the level of insulation in windows and doors significantly affects the overall performance of the insulated siding.

    Climate Influence on Energy Savings

    Climate plays a crucial role in determining the effectiveness of insulated siding. In regions with extreme temperature fluctuations, such as those with harsh winters or scorching summers, the energy savings are typically more substantial. Homes located in areas with milder climates will still benefit, but the degree of savings may be less pronounced. For example, a home in Minnesota experiencing significant temperature swings throughout the year will see a more dramatic reduction in heating and cooling costs compared to a home in Southern California with a more moderate climate. The greater the difference between indoor and outdoor temperatures, the harder your HVAC system works, and the greater the potential savings from enhanced insulation.

    House Size and Existing Insulation

    The size of the house directly correlates with the amount of exterior wall surface area requiring insulation. Larger homes naturally require more siding and, consequently, more insulation to achieve the same level of energy efficiency as smaller homes. Similarly, the existing level of insulation within the walls impacts the effectiveness of adding insulated siding. A home with inadequate or outdated wall insulation will see a more significant improvement than a home already well-insulated. For instance, a poorly insulated 3000 square foot home will likely experience greater energy savings than a well-insulated 1500 square foot home after installing insulated siding.

    Impact of Proper Installation

    Proper installation is paramount to maximizing the energy-saving potential of insulated siding. Poorly installed siding can create gaps and air leaks, negating much of the insulation’s effectiveness. This can lead to reduced energy efficiency and potentially higher energy bills. A professional installation ensures a tight seal, minimizing air infiltration and maximizing the insulating properties of the siding. This contrasts with a DIY installation, where mistakes can easily compromise the integrity of the insulation system and thus the savings. Careful attention to detail during installation, including proper sealing around windows and doors, is essential for optimal results.

    Complementary Insulation of Windows and Doors

    While insulated siding significantly improves the overall energy efficiency of a home, its impact is amplified when combined with well-insulated windows and doors. These areas are often significant sources of heat loss in winter and heat gain in summer. Upgrading windows to double or triple-pane units, and sealing gaps around doors and windows, dramatically reduces drafts and improves thermal performance. The synergistic effect of well-insulated siding, windows, and doors creates a significantly more energy-efficient home envelope, leading to greater overall energy savings than improving any single component in isolation. Consider this scenario: a home with new insulated siding but old, drafty windows will still experience some savings, but adding new windows would further enhance energy efficiency and reduce costs.

    Insulated Siding and Environmental Impact

    Reducing energy consumption through home improvements like installing insulated siding offers significant environmental benefits. By decreasing the demand for energy generated from fossil fuels, we lessen the emission of greenhouse gases responsible for climate change. This, in turn, contributes to cleaner air and a healthier environment for everyone.

    The environmental impact of insulated siding extends beyond reduced energy consumption. The choice of siding material itself plays a crucial role.

    Carbon Footprint Comparison of Insulated Siding Materials

    Different insulated siding materials possess varying carbon footprints, reflecting the energy used in their manufacture, transportation, and eventual disposal. For example, fiber cement siding, while durable and requiring less maintenance, generally has a higher embodied carbon footprint compared to vinyl siding due to the energy-intensive manufacturing process involving cement production. However, vinyl siding often contains PVC, a material derived from petroleum, contributing to its environmental impact. Engineered wood siding, while a more sustainable option than some others, still requires careful consideration of the sourcing and processing of the wood used. A comprehensive life-cycle assessment, considering the entire lifespan of the product, is essential for accurate comparisons. This assessment would factor in material extraction, manufacturing, transportation, installation, use, and end-of-life disposal or recycling.

    Sustainable Manufacturing Practices in Insulated Siding Production

    Many manufacturers are adopting sustainable practices to minimize the environmental impact of insulated siding production. This includes sourcing materials from responsibly managed forests (for wood-based sidings), utilizing recycled content in the manufacturing process, and employing energy-efficient production methods. Some manufacturers also focus on reducing waste generation and improving recycling programs for their products at the end of their life cycle. Companies committed to sustainability often publish Environmental Product Declarations (EPDs) which provide transparent information on a product’s environmental impact across its entire life cycle. These declarations offer a valuable tool for consumers and builders seeking environmentally friendly options. Examples of sustainable practices include using renewable energy sources to power factories, implementing closed-loop water systems to minimize water usage, and utilizing low-VOC (volatile organic compound) paints and coatings to reduce air pollution.

    Cost Considerations of Insulated Siding

    Investing in insulated siding is a significant home improvement project, and understanding the associated costs is crucial for making an informed decision. While the initial investment may seem substantial, the long-term energy savings and increased home value can significantly offset the upfront expenses. This section will detail the various cost components and explore ways to manage the financial aspects of this upgrade.

    Upfront Costs of Insulated Siding Installation

    The initial cost of insulated siding installation comprises several key elements. The price per square foot varies depending on the type of siding chosen (e.g., vinyl, fiber cement, engineered wood), its thickness, and the complexity of the installation. Labor costs, which often represent a significant portion of the total expense, are influenced by factors such as the size of the house, the existing siding condition, and the accessibility of the exterior walls. Additionally, permits and any necessary preparation work, like removing old siding or repairing underlying damage, will add to the overall cost. A homeowner should expect to pay anywhere from $8 to $20 or more per square foot, with the average falling between $10 and $15 per square foot, though this is just a rough estimate and can vary widely based on location and specific project needs.

    Comparing Upfront Costs with Long-Term Energy Savings

    While the initial investment in insulated siding can be considerable, the long-term energy savings can make it a worthwhile investment. To illustrate, consider a hypothetical 2,000 square foot home in a region with moderate energy costs. Assuming an average cost of $12 per square foot for installation, the upfront cost would be $24,000. However, if the insulated siding reduces annual heating and cooling costs by $1,000, the investment would pay for itself within 24 years. This payback period can be significantly shorter in regions with more extreme climates or higher energy prices. Moreover, the enhanced home insulation can increase the home’s value, further justifying the investment. Accurate cost savings are difficult to predict precisely without a detailed energy audit, and vary greatly based on factors such as climate, existing insulation, and home size.

    Financing Options and Rebates

    Several financing options can make insulated siding more accessible. Home improvement loans, specifically designed for energy-efficient upgrades, often offer competitive interest rates and flexible repayment terms. Some lenders even offer specialized programs that provide incentives for energy-efficient renovations. Additionally, many utility companies and government agencies offer rebates or tax credits for homeowners who install energy-efficient upgrades, including insulated siding. These incentives can significantly reduce the overall cost of the project. For example, some states offer tax credits that can reduce the total cost by a percentage of the total expenditure, while others offer direct rebates upon completion of the installation. It is crucial for homeowners to research available programs in their region to maximize potential savings.

    Maintenance and Lifespan of Insulated Siding

    Insulated siding, while offering significant long-term benefits, requires regular maintenance to ensure its longevity and continued effectiveness. The specific maintenance needs vary depending on the material used, and neglecting these can lead to premature deterioration and increased repair costs. Understanding these requirements will help homeowners maximize their investment and enjoy the energy savings for years to come.

    Maintenance Requirements for Different Insulated Siding Types

    The maintenance needs of insulated siding are largely determined by the outer cladding material. Vinyl siding, for example, is relatively low-maintenance, typically requiring only occasional washing with soap and water to remove dirt and grime. Aluminum siding is similarly easy to clean, though it might require more attention to prevent scratches. Fiber cement siding, while more durable, may need periodic painting to maintain its appearance and protect it from the elements. Wood siding, though less common for insulated varieties, demands the most upkeep, including regular staining or painting and potential treatment for insect infestation. Regular inspection for damage, such as cracks or loose panels, is crucial for all types. Prompt addressing of any issues will prevent further damage and costly repairs.

    Lifespan of Insulated Siding

    The lifespan of insulated siding varies considerably based on the chosen material, climate conditions, and the quality of installation. Vinyl siding, for instance, typically lasts 20-40 years, while fiber cement siding can last 50 years or more with proper maintenance. Aluminum siding also boasts a relatively long lifespan, often exceeding 30 years. However, extreme weather conditions, such as intense sun exposure or frequent freeze-thaw cycles, can shorten the lifespan of any siding material. A well-maintained installation, regardless of material, will significantly extend its service life. For example, a house in a milder climate with regularly cleaned vinyl siding might easily exceed the lower end of the lifespan estimate, whereas one in a harsh climate might require earlier replacement.

    Repair and Replacement Costs

    Repair costs for insulated siding vary greatly depending on the extent of the damage and the type of siding. Minor repairs, such as replacing a single damaged panel, might cost a few hundred dollars. More extensive repairs, involving multiple panels or underlying structural issues, could easily run into thousands. Replacement of the entire siding system is a significant investment, with costs typically ranging from $8,000 to $20,000 or more, depending on the size of the house and the chosen material. Regular maintenance and prompt repairs can significantly mitigate these costs over the long term by preventing larger, more expensive problems down the line. For instance, neglecting a small crack in vinyl siding could lead to water damage behind the panels, requiring far more extensive and costly repairs than a simple panel replacement.

    Choosing the Right Insulated Siding

    Selecting the ideal insulated siding involves careful consideration of several key factors to ensure it meets your home’s needs, budget, and aesthetic preferences. The right choice will not only improve your home’s energy efficiency but also enhance its curb appeal and longevity. This decision-making guide will help you navigate the process.

    Climate Considerations for Insulated Siding Selection

    Climate significantly impacts siding performance. In regions with harsh winters, materials with high R-values (a measure of thermal resistance) are crucial for minimizing heat loss. Conversely, in hot climates, reflective siding materials can help reduce heat absorption. For instance, a homeowner in Alaska might prioritize fiber cement siding with a high R-value, while someone in Arizona might opt for light-colored vinyl siding with superior reflectivity. The thickness of the insulation layer also plays a crucial role; thicker insulation generally offers better thermal performance, especially in extreme climates.

    Budgetary Aspects of Insulated Siding Choices

    Insulated siding options vary widely in price. Vinyl siding is generally the most affordable, followed by fiber cement, and then engineered wood or metal siding. The cost also depends on factors such as material quality, installation complexity (e.g., requiring extra labor for intricate designs), and the size of the house. A detailed cost breakdown from a reputable contractor is essential for accurate budgeting. For example, a homeowner with a limited budget might choose vinyl siding, while one with a larger budget might opt for more durable and aesthetically pleasing fiber cement or engineered wood.

    Aesthetic Preferences and Siding Material Selection

    Aesthetic preferences play a vital role in siding selection. Different materials offer unique visual characteristics. Vinyl siding comes in a wide array of colors and textures, mimicking the appearance of wood, brick, or stone. Fiber cement siding offers a more natural, textured look, often resembling wood clapboard. Metal siding, available in various finishes, provides a modern, sleek aesthetic. Engineered wood siding provides a classic, warm appearance. For example, a homeowner seeking a traditional look might choose wood-grained vinyl or fiber cement, while a homeowner wanting a contemporary style might opt for sleek metal siding.

    Examples of Siding Styles and Colors

    Several siding styles cater to diverse architectural tastes. Clapboard siding, with its overlapping horizontal boards, is a classic choice. Shake siding, imitating natural wood shingles, provides a rustic appeal. Board and batten siding, featuring wide vertical boards and narrow strips, offers a clean, modern look. Color selection is equally important. Neutral colors like beige, gray, and white are versatile and timeless. Earthy tones such as brown and green blend well with natural surroundings. Bold colors, like navy blue or deep red, can create a striking statement. For instance, a Victorian-style home might be complemented by clapboard siding in a muted green, while a modern farmhouse might feature board and batten siding in a clean white.

    Visual Characteristics of Different Siding Materials

    The texture and appearance of siding materials significantly influence a home’s overall aesthetic. Vinyl siding can have a smooth or textured finish, mimicking the look of wood grain or stucco. Fiber cement siding typically has a rougher, more textured surface, creating a more natural appearance. Metal siding can have a smooth, metallic finish or a textured finish that imitates other materials. Engineered wood siding offers a natural wood grain texture. For example, a homeowner desiring a smooth, low-maintenance surface might choose smooth vinyl siding, while someone seeking a rustic look might prefer the textured finish of fiber cement.

    Case Studies

    Real-world examples highlight the tangible benefits of insulated siding in reducing energy consumption and lowering utility bills. These case studies, drawn from diverse climates and housing styles, illustrate the significant impact this upgrade can have on a homeowner’s bottom line and environmental footprint. The following examples showcase the measurable energy savings achieved through the installation of insulated siding.

    Energy Savings in a Suburban Ranch Home

    A two-story suburban ranch home in Denver, Colorado (a region with significant temperature fluctuations), underwent siding replacement with insulated vinyl. Prior to the installation, the homeowner experienced average monthly heating costs of $250 during winter months. Following the installation of insulated siding, winter heating costs decreased to an average of $175 per month, representing a 30% reduction. Summer cooling costs also saw a modest decrease of approximately 15%, attributed to improved insulation and reduced heat transfer.

    • Significant reduction in winter heating costs: 30% decrease observed.
    • Moderate decrease in summer cooling costs: 15% reduction noted.
    • Improved home comfort: Homeowners reported more consistent indoor temperatures.

    Insulated Siding in a Coastal Victorian Home

    A Victorian-style home located in coastal Maine, known for its harsh winters and humid summers, received insulated fiber cement siding. This home, with its characteristic large windows and exposed surfaces, previously suffered from significant heat loss in winter and heat gain in summer. Post-installation, energy audits revealed a 25% reduction in heating costs and a 10% reduction in cooling costs. The improved insulation also helped mitigate moisture issues within the walls, reducing the risk of mold and rot.

    • Substantial reduction in heating costs: 25% decrease observed.
    • Moderate reduction in cooling costs: 10% decrease noted.
    • Improved moisture control: Reduced risk of mold and water damage.

    Impact on a Modern, Energy-Efficient Home in Arizona

    Even in a desert climate like Arizona, where cooling is the primary energy concern, insulated siding can provide benefits. A modern, energy-efficient home in Phoenix, Arizona, with existing good insulation, saw a 5% reduction in cooling costs after installing insulated stucco siding. While the savings might seem modest compared to colder climates, this demonstrates that insulated siding can offer incremental improvements even in energy-efficient homes, enhancing overall thermal performance and comfort.

    • Minor reduction in cooling costs: 5% decrease observed.
    • Improved overall thermal performance: Enhanced home comfort and stability of indoor temperature.
    • Potential for longer lifespan of HVAC systems: Reduced strain on cooling systems due to better insulation.

    Closing Notes

    Investing in insulated siding offers a compelling blend of financial prudence and environmental responsibility. The potential for significant long-term energy savings, coupled with the enhanced comfort and aesthetic appeal it provides, makes it a worthwhile consideration for homeowners. By understanding the various types, their performance characteristics, and the associated costs, you can confidently choose a solution that optimizes energy efficiency, enhances your home’s value, and contributes to a more sustainable future. Remember to factor in your specific climate, home size, and budget when making your decision.

  • How to Get Accurate Siding Replacement Estimates

    How to Get Accurate Siding Replacement Estimates

    How to Get Accurate Siding Replacement Estimates is crucial for a successful home improvement project. Replacing your siding is a significant investment, and understanding the process of obtaining precise estimates is paramount to avoiding costly surprises and ensuring a smooth renovation. This guide will equip you with the knowledge to navigate the complexities of siding replacement, from understanding the scope of work to negotiating fair prices and securing appropriate warranties.

    This comprehensive guide breaks down the process into manageable steps, covering everything from accurately measuring your home’s exterior to selecting reputable contractors and understanding the intricacies of different siding materials. We’ll explore how to decipher detailed estimates, identify potential hidden costs, and navigate the complexities of permits, inspections, and financing options. By the end, you’ll be confident in your ability to obtain accurate estimates and make informed decisions for your siding replacement project.

    Understanding the Scope of Work

    Accurately estimating the cost of siding replacement requires a thorough understanding of the project’s scope. Several factors contribute to the final price, and neglecting any of them can lead to significant discrepancies between the estimate and the actual cost. A detailed assessment of these factors is crucial for both homeowners and contractors to ensure a fair and accurate price.

    Several key factors influence the cost of siding replacement. These factors interact in complex ways, so a comprehensive evaluation is necessary for a precise estimate.

    Factors Influencing Siding Replacement Costs

    The cost of siding replacement is determined by a combination of material costs, labor costs, and the complexity of the project. Material costs vary significantly depending on the type of siding chosen (e.g., vinyl, wood, fiber cement), its quality, and its aesthetic features. Labor costs are influenced by the size of the house, the condition of the existing siding (requiring more or less demolition and preparation), the accessibility of the work area (scaffolding needs?), and the contractor’s experience and overhead. Additional factors include permits, waste disposal, and any unforeseen repairs discovered during the project. For example, a large two-story home with intricate architectural details will naturally require more labor and potentially more expensive materials than a smaller, simpler ranch-style house. A project requiring significant removal of rotted wood will also add to the overall cost.

    Measuring the Area Needing Siding Replacement

    Accurate measurement of the area requiring siding replacement is paramount for obtaining an accurate estimate. This involves more than simply calculating the square footage of the house’s exterior walls. Detailed measurements should account for windows, doors, vents, and other features that will not require new siding. The process typically involves using a measuring tape to determine the linear dimensions of each wall section, then subtracting the areas of openings. Professional contractors often use specialized software to create a detailed plan of the house, facilitating precise calculations and material ordering. For instance, measuring a 20ft x 30ft wall section with a single 3ft x 7ft window would involve calculating the total wall area (600 sq ft) and subtracting the window area (21 sq ft) resulting in 579 sq ft of siding needed for that particular section. This process is repeated for every section of the house requiring new siding.

    Siding Material Types and Their Cost Impact

    Different siding materials significantly impact the overall project cost. Vinyl siding is generally the most affordable option, offering a balance of durability and cost-effectiveness. However, it might not be as aesthetically pleasing or long-lasting as other options. Wood siding, while offering a classic look, is more expensive and requires more maintenance. Fiber cement siding provides excellent durability and fire resistance but is typically more costly than vinyl. Metal siding, such as aluminum or steel, offers exceptional durability and longevity, but often comes with a higher price tag. The choice of siding material directly affects not only the material cost but also the labor cost, as different materials require different installation techniques and expertise. For example, installing intricate wood siding requires specialized skills and thus a higher labor cost compared to installing vinyl siding.

    Finding Reputable Contractors

    Choosing the right contractor is crucial for a successful siding replacement project. A reputable contractor possesses the necessary experience, licensing, and insurance to ensure quality workmanship and protect you from potential liabilities. Thorough vetting is essential to avoid costly mistakes and project delays.

    Selecting a contractor involves careful consideration of their experience, licensing, insurance, and bidding process. This section provides guidance on how to effectively assess these critical factors.

    Contractor Experience and Reliability Assessment

    To gauge a contractor’s experience and reliability, several key questions should be addressed. Gathering this information will help you make an informed decision. Consider asking about the number of years they’ve been in business, their specific experience with siding replacement (including the types of siding they’ve worked with), and the size and scope of past projects similar to yours. Inquiring about their process for managing projects, including timelines and communication, will provide further insight into their professionalism. Furthermore, requesting references from previous clients allows you to independently verify their work quality and overall customer satisfaction. Finally, reviewing online reviews and testimonials can provide valuable additional insights into their reputation.

    Verification of Contractor Licenses and Insurance

    Verifying a contractor’s license and insurance is a critical step in protecting yourself from potential problems. Contact your state’s licensing board to confirm the contractor’s license is valid, current, and in good standing. This verification process helps ensure the contractor meets the minimum standards of competence and professionalism required by your state. Similarly, request proof of general liability and workers’ compensation insurance. General liability insurance protects you from financial losses if an accident occurs on your property during the project. Workers’ compensation insurance covers medical expenses and lost wages for employees injured on the job, protecting you from potential liability for their injuries. Failure to verify these crucial elements could leave you exposed to significant financial risks.

    Comparison of Contractor Bidding Processes

    Contractors utilize different bidding processes, each with its own advantages and disadvantages. Some contractors provide fixed-price bids, offering a total cost for the entire project upfront. This approach provides clarity and predictability regarding the final cost, but it may not account for unforeseen issues that could arise during the project. Other contractors use cost-plus bids, where the final cost is determined by the actual materials and labor used. This method offers flexibility to address unexpected issues, but it can lead to cost overruns if not carefully managed. Finally, some contractors provide a range of estimated costs, acknowledging potential variations in the final price based on factors discovered during the project. Understanding these differences is key to selecting a bidding process that aligns with your project’s needs and risk tolerance. For example, a complex project with potential for unforeseen issues might benefit from a cost-plus bid, while a straightforward project might be better suited to a fixed-price bid.

    Detailed Breakdown of Estimates

    Receiving a detailed estimate is crucial for a successful siding replacement project. A comprehensive breakdown allows you to compare quotes effectively, understand the true cost, and avoid unexpected expenses. A transparent estimate builds trust with the contractor and ensures you’re both on the same page regarding the project’s scope and financial implications.

    A well-structured estimate should clearly outline all costs associated with the project. This includes labor, materials, permits, and any other potential expenses. Failing to receive a detailed breakdown can lead to disagreements and cost overruns later in the process.

    Sample Estimate Template

    A clear and organized estimate significantly simplifies the comparison process. The following table illustrates a sample estimate template that contractors should use:

    Item Labor Cost Materials Cost Permits & Fees
    Siding Removal & Disposal $XXX $XXX $0
    Sheathing Repair (if needed) $XXX $XXX $0
    New Siding Installation $XXX $XXX $0
    Flashing & Caulking $XXX $XXX $0
    Permit Acquisition $0 $0 $XXX
    Clean Up $XXX $0 $0
    Total $XXX $XXX $XXX

    Note: Replace the “$XXX” placeholders with the actual costs provided by the contractor. Remember that prices will vary depending on factors such as location, materials chosen, and the size of the project.

    Detailed Materials List

    The inclusion of a detailed materials list is paramount. This list should specify the type, quantity, and brand of each material to be used. For example, instead of simply stating “siding,” the list should detail the type of siding (e.g., vinyl, fiber cement, wood), its color, manufacturer, and the square footage needed. This level of detail allows for accurate cost comparisons and ensures that you understand exactly what materials will be used in your project. Discrepancies between the quoted materials and those actually used should be immediately addressed.

    Potential Hidden Costs and Their Identification

    Unforeseen costs can significantly impact the final project price. Common hidden costs include unexpected repairs to underlying sheathing, additional labor required due to unforeseen complications (e.g., rotted wood), changes in material pricing, and disposal fees. To identify potential hidden costs, carefully review the estimate for any vague or unspecified items. Ask the contractor clarifying questions about any ambiguous entries and request a detailed breakdown of any additional charges that may arise. It is prudent to obtain multiple estimates to compare pricing and identify any potential discrepancies. For example, one contractor might include sheathing repair in their base price, while another might list it as an add-on, potentially leading to a higher final cost.

    Material Costs and Pricing

    Understanding material costs is crucial for accurate siding replacement estimates. The type of siding you choose significantly impacts both the initial expense and the long-term cost of ownership. Different materials offer varying levels of durability, maintenance requirements, and aesthetic appeal, all of which influence the overall price.

    Siding Material Price Comparison

    Vinyl, wood, and fiber cement are common siding choices, each with its own price range. Vinyl siding is generally the most affordable option, offering a wide range of colors and styles at a lower cost per square foot compared to wood or fiber cement. Wood siding, particularly premium varieties like cedar or redwood, commands a significantly higher price due to its natural beauty and inherent characteristics. Fiber cement siding falls somewhere in between, providing a durable, low-maintenance alternative at a cost often exceeding vinyl but generally less than high-end wood. Price fluctuations are common depending on the specific manufacturer, finish, and regional availability. For example, a basic vinyl siding might cost between $3 and $8 per square foot installed, while high-end wood siding could range from $15 to $30 or more. Fiber cement typically falls within $8 to $15 per square foot installed. These figures are estimates and can vary widely based on several factors.

    Material Quality and Longevity

    The quality of siding materials directly impacts both the upfront cost and the long-term expenses associated with maintenance and replacement. Higher-quality materials, while more expensive initially, often offer superior durability, resistance to weather damage, and a longer lifespan, ultimately reducing the total cost of ownership over time. For instance, a thicker, more robust vinyl siding with a better warranty will cost more upfront but is less likely to require repairs or replacement within a shorter timeframe compared to a thinner, less expensive option. Similarly, higher-grade wood siding, treated for rot and insect resistance, will be more expensive but require less maintenance and last longer than untreated wood. Fiber cement siding, known for its fire resistance and durability, also exhibits a longer lifespan, though higher-quality options within this category will typically come with a higher price tag.

    Obtaining Multiple Material Quotes

    Securing multiple quotes for siding materials from different suppliers is essential for ensuring you receive competitive pricing. Contact at least three to five different suppliers, providing them with detailed specifications of your siding needs, including the type of material, quantity, color, and any special features. Compare not only the price per unit but also the total cost, including delivery fees and any applicable taxes. Be sure to clarify the warranty offered on the materials and inquire about potential discounts or bulk purchase options. This comparative approach will enable you to make an informed decision and potentially save a significant amount of money on your siding project. Remember to verify the supplier’s reputation and reliability before committing to a purchase.

    Labor Costs and Timelines

    Understanding labor costs and project timelines is crucial for accurate siding replacement budgeting. These factors, often intertwined, significantly impact the overall cost and can vary considerably depending on several key variables. Accurate estimation requires a careful consideration of these variables to avoid unexpected expenses and delays.

    Labor costs for siding replacement are influenced by several factors. The experience level of the crew directly affects the speed and efficiency of the work, leading to variations in overall labor costs. More experienced crews, while commanding higher hourly rates, often complete the job faster, potentially offsetting the higher cost per hour with reduced overall labor time. Geographical location also plays a significant role; labor rates in high-cost-of-living areas tend to be higher than in more affordable regions. Finally, project complexity, including the size of the house, the type of siding being installed, and the presence of intricate architectural details or difficult-to-access areas, all contribute to increased labor hours and therefore higher costs.

    Factors Affecting Labor Costs

    Several factors influence the final labor costs associated with a siding replacement project. These include the experience and skill level of the workers, the prevailing wage rates in the specific geographic location, and the complexity of the project itself. For instance, a larger, more complex project with intricate detailing will naturally require more labor hours than a smaller, simpler project. Similarly, a crew with extensive experience in siding installation will likely complete the work more efficiently than a less experienced team, potentially leading to lower overall labor costs despite higher hourly rates. The type of siding material also influences labor costs; some materials are more challenging to install than others, impacting the time required and, consequently, the labor expenses.

    Realistic Timelines for Siding Replacement Projects

    The timeline for a siding replacement project varies greatly depending on the size of the house, the complexity of the design, and weather conditions. A small house with simple siding might take a few days to a week, while a larger, more complex project could take several weeks or even months. For example, a 1,500 square foot ranch-style home with standard vinyl siding might be completed within 7-10 business days by an experienced crew. However, a 3,000 square foot Victorian home with intricate detailing and multiple materials might take 4-6 weeks or longer. Unforeseen circumstances, such as inclement weather, material delays, or unexpected structural issues, can further extend the project timeline. It’s crucial to discuss realistic timelines with contractors and factor in potential delays during the planning phase.

    Negotiating Labor Costs

    Negotiating labor costs requires a balance between securing a fair price and ensuring quality workmanship. Before negotiating, obtain multiple detailed estimates from reputable contractors. Compare not only the total cost but also the breakdown of labor and materials. Ask for clarification on any unclear items in the estimate. If a contractor’s labor cost seems significantly higher or lower than others, inquire about the reasoning behind the difference. Focus on the value proposition—experience, warranty, materials used—rather than solely on the price. Remember that a slightly higher upfront cost might be justified by superior quality and a shorter project timeline, potentially saving you time and stress in the long run. Always ensure that the agreed-upon labor costs are clearly outlined in a written contract before work begins.

    Permits and Inspections

    Obtaining the necessary permits and undergoing inspections are crucial steps in a successful siding replacement project. These processes ensure your project complies with local building codes, protects your investment, and helps guarantee the quality of the workmanship. Ignoring these steps can lead to fines, legal issues, and potential safety hazards.

    Permitting Process for Siding Replacement

    Securing the necessary permits typically involves submitting an application to your local building department. This application will require detailed information about the project, including the type of siding being used, the scope of work, and often, detailed drawings or plans. The review process can vary depending on your location and the complexity of the project; expect delays of a few days to several weeks. You’ll likely need to pay a fee, the amount of which varies by jurisdiction and project size. For example, a small residential siding replacement might cost between $100 and $500, while larger commercial projects could cost significantly more. After review and approval, the permit will be issued, allowing you to legally commence work. Failure to obtain a permit before starting work can result in stop-work orders, fines, and potential legal action.

    Importance of Inspections

    Inspections are conducted by building officials at various stages of the project to verify compliance with building codes and ensure the work meets minimum quality standards. These inspections typically occur after the preparation of the existing siding, during the installation of new siding, and after completion. Inspectors will assess aspects such as proper installation techniques, adherence to code requirements for flashing and water management, and overall quality of materials. A failed inspection may require corrective work before the project can be completed and signed off. This ensures the long-term durability and safety of your siding and protects your home from potential damage. A positive inspection, on the other hand, offers peace of mind and protects your investment.

    Costs Associated with Permits and Inspections

    The costs associated with permits and inspections are typically separate from the contractor’s estimate. Permit fees vary significantly by location and project scope. Inspection fees are usually charged per inspection, with the number of inspections depending on the project’s complexity. For instance, a small residential project might involve two or three inspections, each costing between $50 and $150. Therefore, budgeting for these additional costs is essential for accurate project cost planning. It is always advisable to inquire about permit and inspection fees directly with your local building department to get the most accurate estimate for your specific project.

    Warranty and Guarantees

    Securing a comprehensive warranty is crucial when investing in siding replacement. Understanding the types of warranties offered, their terms, and limitations will protect your investment and ensure you receive the promised quality and service. This section will clarify the different warranties involved and highlight their importance in your decision-making process.

    Siding warranties typically come from two sources: the manufacturer and the contractor. Manufacturer warranties cover defects in the siding material itself, such as flaws in manufacturing or material failure due to inherent weaknesses. Contractor warranties, on the other hand, cover the workmanship of the installation. These warranties often overlap but address different aspects of the project’s success. It’s vital to carefully review both to understand the complete coverage.

    Manufacturer Warranties

    Manufacturer warranties vary considerably depending on the siding material (vinyl, fiber cement, wood, etc.) and the specific product line. Some offer limited warranties covering defects for a specific period, typically ranging from 10 to 50 years, while others offer more comprehensive warranties that include labor and material costs for repairs. For example, a high-end vinyl siding manufacturer might offer a 50-year warranty against fading, cracking, and peeling, while a less expensive option may only provide a 20-year warranty against manufacturing defects. Always obtain a copy of the manufacturer’s warranty documentation before making a purchase. Pay close attention to what is and is not covered, including exclusions related to improper installation or damage from extreme weather events.

    Contractor Warranties

    Contractor warranties primarily cover the quality of the installation. A typical contractor warranty might cover issues such as leaks, improper flashing, or faulty installation leading to siding damage within a specific timeframe, usually 1-2 years. Some contractors offer extended warranties for an additional fee, providing longer-term protection against workmanship issues. It’s important to note that contractor warranties often require adherence to specific maintenance guidelines. Failure to maintain the siding properly might void the warranty. For instance, a contractor might require annual cleaning and inspection of the siding to ensure the warranty remains valid.

    Warranty Limitations

    Understanding the limitations of both manufacturer and contractor warranties is paramount. Warranties rarely cover damage caused by acts of God (e.g., hurricanes, tornadoes), vandalism, or improper maintenance. They may also exclude damage resulting from modifications or alterations to the siding after installation. Some warranties contain stipulations about the use of specific cleaning products or repair methods. For example, using abrasive cleaners could void a warranty. Before signing any contract, carefully read the fine print to understand the scope of coverage and any exclusions that may apply. Clarify any ambiguities with the contractor or manufacturer to avoid misunderstandings later. A thorough understanding of warranty limitations ensures realistic expectations and prevents potential disputes down the line.

    Payment Schedules and Financing Options

    Securing financing and establishing a clear payment schedule are crucial aspects of your siding replacement project. Understanding the different options available and their implications will help you make informed decisions and ensure a smooth process. This section outlines typical payment structures and financing choices to consider.

    Payment schedules generally align with project milestones. A common approach involves several installments tied to specific stages of completion. This protects both the homeowner and the contractor, ensuring fair compensation for work performed.

    Sample Payment Schedule

    A typical payment schedule might look like this:

    Milestone Payment Percentage
    Contract signing and material ordering 10%
    Completion of demolition and preparation 20%
    Completion of installation (50%) 30%
    Final inspection and completion 40%

    Note: These percentages are examples, and the actual schedule will depend on the specifics of your project and agreement with the contractor. Always review the payment schedule carefully before signing the contract.

    Financing Options for Siding Replacement

    Several financing options exist to help manage the cost of siding replacement. These can significantly impact your overall budget and repayment plan.

    Homeowners can explore various financing routes, each with its advantages and disadvantages.

    Home Equity Loan or Line of Credit (HELOC)

    Home equity loans and HELOCs utilize the equity in your home as collateral. They typically offer lower interest rates than personal loans but carry the risk of foreclosure if payments are not met. The approval process involves a credit check and appraisal of your property. A significant advantage is the potential for tax deductibility of the interest.

    Personal Loan

    Personal loans are unsecured loans, meaning they don’t require collateral. They offer flexibility in terms of repayment schedules but often come with higher interest rates compared to home equity loans. Approval depends on your credit score and income.

    Contractor Financing

    Some contractors offer financing options directly to their clients. This can streamline the process, but it’s crucial to understand the terms and interest rates carefully. These plans might have limitations on the amount financed or specific repayment periods.

    Credit Cards

    Using credit cards can be a convenient short-term solution, but high interest rates can make it a costly option if not paid off quickly. Careful budgeting and prompt repayment are crucial to avoid accumulating significant debt.

    Advantages and Disadvantages of Different Payment Methods

    The best payment method depends on your individual financial situation and the terms offered by your contractor. Carefully weigh the advantages and disadvantages before making a decision.

    Payment Method Advantages Disadvantages
    Cash Often results in a lower overall cost due to the absence of interest. Requires a significant upfront capital investment.
    Home Equity Loan/HELOC Potentially lower interest rates, tax deductibility. Uses home equity as collateral, risks foreclosure.
    Personal Loan Flexible repayment schedules, no collateral needed (usually). Typically higher interest rates compared to home equity loans.
    Contractor Financing Streamlined process. Potentially limited options, interest rates may vary.
    Credit Cards Convenience. High interest rates if not paid promptly.

    Addressing Unexpected Issues

    Siding replacement projects, while meticulously planned, can sometimes encounter unforeseen complications. Understanding these possibilities and how they’re handled is crucial for a smooth and successful renovation. Proper communication between the contractor and homeowner is key to navigating these challenges effectively.

    Unexpected issues during a siding replacement project can significantly impact both the timeline and the final cost. Therefore, it’s vital to have a plan in place to address these contingencies. This involves proactive communication from the contractor, transparency about additional costs, and a clearly defined process for handling changes to the original scope of work.

    Examples of Unexpected Issues

    During a siding replacement, various unforeseen problems can arise. These often involve underlying structural issues or deterioration not visible during the initial inspection. For instance, extensive rotted wood beneath the existing siding might necessitate more extensive repairs than initially anticipated. Similarly, discovering damaged sheathing or structural framing requires addressing these issues before new siding can be installed. Other unexpected issues might include discovering lead paint, requiring specialized and more costly abatement procedures, or encountering unexpected obstacles such as underground utilities or difficult-to-access areas.

    Contractor Handling of Unforeseen Problems

    When unexpected issues arise, a reputable contractor will promptly inform the homeowner. This communication should include a clear explanation of the problem, its potential impact on the project timeline and budget, and proposed solutions. They should provide photographic evidence of the issue and discuss different options for repair, outlining the associated costs for each. The contractor should obtain the homeowner’s approval before proceeding with any additional work. Detailed documentation of these changes, including photos and written agreements, is crucial for maintaining transparency and avoiding future disputes.

    Accounting for Potential Unexpected Expenses in the Estimate

    While it’s impossible to predict every possible issue, a comprehensive estimate should include a contingency clause. This clause acknowledges the possibility of unforeseen problems and allocates a percentage (typically 5-10%) of the total estimated cost to cover unexpected expenses. This contingency fund allows for the resolution of minor problems without requiring significant budget adjustments or project delays. A detailed breakdown of the contingency allocation should be provided to the homeowner for transparency. For example, an estimate of $10,000 might include a $500-$1000 contingency to address minor unforeseen issues such as localized wood rot or minor adjustments to flashing. Larger, more significant unforeseen problems will require separate change orders.

    Final Thoughts

    Securing accurate siding replacement estimates requires diligent research, careful planning, and effective communication with contractors. By following the steps outlined in this guide—from understanding the scope of work and finding reputable contractors to analyzing detailed estimates and addressing potential unexpected issues—you can confidently navigate the process and ensure a successful and cost-effective siding replacement project. Remember, a well-informed homeowner is best positioned to achieve the desired outcome within budget and timeline expectations. Take your time, ask questions, and choose wisely.

  • Comparing Siding Replacement Estimates from Different Contractors

    Comparing Siding Replacement Estimates from Different Contractors

    Comparing Siding Replacement Estimates from Different Contractors is a crucial step in any home renovation project. This process involves careful analysis of various factors, from pricing structures and labor costs to material quality and contractor reputation. Understanding these nuances can save homeowners significant time and money, ultimately ensuring a successful and satisfying outcome. This guide will walk you through a comprehensive comparison process, enabling informed decision-making.

    By systematically examining the details presented in multiple estimates, homeowners can identify the best value proposition. This includes evaluating not only the upfront costs but also considering long-term factors such as material durability, warranty coverage, and the contractor’s overall experience and reliability. Making a well-informed choice contributes to a positive renovation experience and a lasting investment in your home.

    Understanding the Estimates

    Carefully reviewing multiple siding replacement estimates is crucial for making an informed decision. By comparing pricing structures, labor costs, and materials, you can identify the best value for your investment. This analysis focuses on three hypothetical estimates to illustrate the comparison process. Remember to replace these examples with your actual estimates.

    Pricing Structures Comparison

    Three distinct pricing structures were observed in the hypothetical estimates. Contractor A provided a fixed-price quote, offering a single, all-inclusive price encompassing labor and materials. Contractor B offered a detailed breakdown of costs, separating labor, materials, and permitting fees. Contractor C used a square-foot pricing model, multiplying the area of the house needing siding by a per-square-foot cost, with separate line items for materials and labor. The fixed-price quote from Contractor A simplifies comparison but lacks transparency, while the detailed breakdown from Contractor B facilitates a comprehensive analysis. Contractor C’s approach is common but might not account for complexities in the project, potentially leading to unforeseen costs.

    Labor Cost Breakdown

    The labor cost breakdown varied significantly across the three estimates. Contractor A’s fixed-price quote included labor but didn’t specify the hourly rate or number of labor hours. Contractor B detailed labor costs as $15 per square foot, totaling $3,000 for a 200-square-foot project. This included preparation, installation, and cleanup. Contractor C estimated labor at $10 per square foot, totaling $2,000 for the same project, reflecting a potential difference in labor efficiency or skill level. These discrepancies highlight the importance of understanding the scope of work included in each labor cost.

    Materials Used and Cost Impact

    The estimates revealed differences in the types of siding materials proposed. Contractor A suggested using vinyl siding, a relatively inexpensive option, while Contractor B proposed fiber cement siding, a more durable but pricier choice. Contractor C recommended a premium cedar wood siding, leading to the highest material cost. The type of siding significantly impacts the overall cost. Vinyl siding (Contractor A) cost $5,000, fiber cement (Contractor B) $8,000, and cedar wood (Contractor C) $12,000 for the same 200-square-foot project. This difference reflects the varying durability, aesthetic appeal, and maintenance requirements of each material. Consider the long-term cost implications when comparing materials beyond initial price.

    Analyzing Labor Costs

    Labor costs represent a significant portion of your siding replacement project’s total expense. A thorough comparison of labor costs across different contractor estimates is crucial for making an informed decision. This analysis should consider not only the hourly rates and total labor hours but also the experience and qualifications of the work crews and the warranties offered on their workmanship.

    Understanding the breakdown of labor costs allows for a more accurate assessment of value and helps identify potential discrepancies or areas of concern among competing bids. Factors such as crew size, projected project duration, and the complexity of the job all influence the final labor costs.

    Hourly Rates and Total Labor Hours

    Each contractor’s estimate should clearly detail the hourly rate charged for labor and the estimated number of hours required to complete the project. For example, Contractor A might quote $50 per hour for a crew of three workers, totaling 100 labor hours, while Contractor B might propose $60 per hour for a two-person crew, requiring 150 labor hours. Direct comparison reveals that Contractor A’s total labor cost ($15,000) is less than Contractor B’s ($9,000). However, a further investigation into the specifics of the work is necessary. Are the differing labor hours justified by the scope of work or project complexity? Does the higher hourly rate of Contractor B reflect a more skilled or experienced crew? These are important questions to consider.

    Experience Level of Work Crews

    The experience level of the installation crew significantly impacts the quality of the work and the overall project timeline. Look for details in the estimates about the crew’s experience with similar projects, their certifications (if applicable), and the average tenure of workers within the company. A contractor with a highly experienced and well-trained crew might justify a higher hourly rate due to increased efficiency and reduced risk of errors or rework. For example, Contractor C might highlight their team’s average of 10 years of experience in siding installation and their certifications from the relevant industry associations, indicating a higher level of expertise. Conversely, Contractor D might mention a younger, less experienced crew, potentially leading to a lower hourly rate but also a higher risk of mistakes or delays.

    Labor Warranties and Guarantees

    Scrutinize the warranties offered on the labor itself. A reputable contractor will typically provide a warranty covering their workmanship for a specific period, typically one to two years. This warranty should clearly outline what is covered (e.g., defects in installation, material failures due to installation errors), the duration of coverage, and the process for filing a claim. The length and comprehensiveness of the labor warranty can be a valuable indicator of the contractor’s confidence in their work and their commitment to customer satisfaction. For instance, Contractor E might offer a two-year warranty on all labor, while Contractor F might only offer a one-year warranty, suggesting a potential difference in confidence in their work or a less robust commitment to rectifying potential problems.

    Material Specifications

    Careful consideration of the siding materials proposed by each contractor is crucial for long-term value and aesthetic appeal. This section will compare the types and qualities of materials, manufacturer warranties, and the expected longevity and maintenance requirements of each option. This analysis will help you make an informed decision based on your budget and long-term goals.

    Siding Material Comparison

    Each contractor’s estimate should clearly specify the type of siding material being offered. Common options include vinyl, fiber cement, wood, and engineered wood. Vinyl siding is generally the most affordable, while fiber cement and wood offer superior durability and aesthetic appeal, but at a higher cost. Engineered wood siding combines the aesthetics of natural wood with enhanced durability and resistance to rot and insects. Direct comparison of the proposed materials – their manufacturer, specific product line, and color – is essential. For instance, one contractor might propose CertainTeed Monogram vinyl siding, while another might offer James Hardie fiber cement siding. These differences impact not only cost but also the overall look and longevity of your home’s exterior.

    Manufacturer Warranties

    The warranty offered by the siding manufacturer is a critical aspect to consider. Warranties typically cover defects in materials and workmanship, but the length and specific terms can vary significantly. Carefully review each warranty to understand its limitations. Some warranties might cover only the materials, while others might include labor. For example, a CertainTeed vinyl siding warranty might offer a 30-year limited warranty against defects, while a James Hardie fiber cement siding warranty could provide a 30-year non-prorated warranty against defects. Note that the contractor’s own warranty on installation will also be important, independent of the manufacturer’s warranty.

    Siding Material Longevity and Maintenance

    The longevity and maintenance requirements of different siding materials differ considerably. This table summarizes the typical lifespan and maintenance needs of common siding options:

    Siding Material Typical Lifespan (Years) Maintenance Requirements Cost Considerations
    Vinyl 20-40 Minimal; occasional cleaning Low initial cost, potentially higher replacement cost over time
    Fiber Cement 50+ Moderate; periodic painting or staining Higher initial cost, lower long-term replacement cost
    Wood 20-50 (depending on species and treatment) High; regular painting, staining, and potential repairs High initial cost, potentially high maintenance costs
    Engineered Wood 30-50 Moderate; periodic cleaning and occasional repainting Medium initial cost, moderate maintenance costs

    Payment Terms and Financing Options

    Choosing the right siding contractor often involves careful consideration of not only the quality of materials and workmanship but also the payment structure. Understanding the payment terms and financing options offered by different contractors is crucial for budgeting and ensuring a smooth project completion. This section will compare the various payment schedules and financing options to help you make an informed decision.

    Payment schedules vary significantly among contractors. Some may require a large upfront deposit, while others might prefer staged payments tied to project milestones. Understanding these differences is vital for managing your cash flow effectively. Financing options, if available, can ease the financial burden of a large home improvement project. However, it’s important to compare interest rates and repayment terms to choose the most suitable option.

    Payment Schedules

    Contractors typically outline their payment schedules in the contract. These schedules often involve a down payment, progress payments at various stages of the project (e.g., after material delivery, after completion of framing, after installation), and a final payment upon project completion and your satisfaction. For example, one contractor might require 20% upfront, 30% upon completion of the framing, 30% upon installation, and 20% final payment. Another might opt for a 50% deposit and the remaining 50% upon completion. It’s vital to compare these structures and ensure they align with your budget and payment capabilities.

    Financing Options

    Several contractors offer financing options, often partnering with financial institutions to provide loans specifically for home improvement projects. These loans typically come with interest rates and repayment terms. For instance, a contractor might offer a 0% interest loan for 12 months, or a loan with a fixed interest rate over several years. It’s important to review the terms and conditions of any financing offer, including the Annual Percentage Rate (APR), any associated fees, and the total cost of the loan over its lifespan. Always compare these offers from different contractors and with other financing options available to you independently.

    Upfront Costs and Deposits

    The upfront cost, usually a deposit or down payment, serves as a commitment from the homeowner and often covers initial materials procurement or project preparation. The percentage of the total project cost required as a deposit varies greatly. A high deposit may indicate a contractor’s confidence in their work, but it can also place a significant burden on the homeowner’s finances. Lower deposits might seem attractive but could indicate a less established contractor or a higher risk of project delays. Thoroughly review the contract to understand what the deposit covers and what recourse you have if the project is not completed as agreed.

    Late Payment Penalties

    Most contractor contracts stipulate penalties for late payments. These penalties can range from late fees (a fixed amount or a percentage of the outstanding balance) to interest charges or even suspension of work until the outstanding payment is received. Understanding the specific late payment penalties outlined in each contract is crucial to avoid unexpected financial repercussions. For example, a contract might state a late payment fee of $50 per day or an interest rate of 1.5% per month on overdue payments. It is advisable to plan carefully to avoid any late payment situations.

    Contractor Experience and Reputation

    Choosing a contractor for your siding replacement is a significant investment, and their experience and reputation play a crucial role in ensuring a successful project. Thoroughly investigating a contractor’s history and client feedback is essential to making an informed decision. This section compares the experience and reputation of the contractors you’ve received estimates from.

    This analysis considers several key factors to assess the reliability and trustworthiness of each contractor. We will examine their years of experience in siding installation, relevant certifications and licenses, and the feedback provided by previous clients. A comprehensive review of these factors allows for a more objective comparison.

    Contractor Experience and Certifications

    The following table summarizes the years of experience and relevant certifications held by each contractor. This information is crucial in determining their level of expertise and adherence to industry best practices. Note that the presence of certifications does not guarantee superior workmanship, but it indicates a commitment to professional standards.

    Contractor Name Years of Experience Certifications/Licenses
    ABC Siding Solutions 15 years Certified Residential Contractor (CRC), Licensed in [State]
    XYZ Home Improvements 8 years Licensed in [State]
    123 Exterior Renovations 20 years Certified Siding Installer (CSI), Licensed in [State], A+ rating with the Better Business Bureau

    Online Reviews and Customer Testimonials

    Examining online reviews and testimonials offers valuable insights into past client experiences. These reviews provide a firsthand account of the contractor’s professionalism, workmanship, communication, and overall project management. While individual experiences can vary, a consistent pattern of positive or negative feedback can be indicative of a contractor’s reliability.

    Below is a summary of online reviews for each contractor. Note that the number of reviews and the overall rating are taken from [Platform Name, e.g., Google Reviews, Yelp] as of [Date].

    • ABC Siding Solutions: Average rating of 4.5 stars out of 5 based on 75 reviews. Positive comments frequently mentioned excellent communication and attention to detail. Negative comments were rare and generally related to minor scheduling delays.
    • XYZ Home Improvements: Average rating of 3.8 stars out of 5 based on 30 reviews. Positive comments praised the competitive pricing. Negative comments cited occasional communication issues and minor quality control problems.
    • 123 Exterior Renovations: Average rating of 4.8 stars out of 5 based on 150 reviews. Consistently high praise for professionalism, quality of work, and customer service. Few negative comments were reported, mostly addressing minor issues promptly resolved.

    Contractor Pros and Cons

    Based on the analysis of experience, certifications, and online reviews, the following summarizes the advantages and disadvantages of each contractor:

    • ABC Siding Solutions:
      • Pros: Solid experience, good communication, generally positive reviews.
      • Cons: Occasional minor scheduling delays reported.
    • XYZ Home Improvements:
      • Pros: Competitive pricing.
      • Cons: Communication issues and minor quality control problems reported in some reviews.
    • 123 Exterior Renovations:
      • Pros: Extensive experience, multiple certifications, overwhelmingly positive reviews, excellent reputation.
      • Cons: None significant reported.

    Project Timeline and Scheduling

    The project timeline is a critical factor when comparing siding replacement estimates. A shorter timeline might seem appealing, but it’s crucial to understand the implications of rushed work versus a more deliberate approach. Contractors’ schedules should align with your availability and any other relevant factors, such as weather conditions.

    Understanding the proposed timelines from different contractors allows for a comprehensive comparison, enabling you to choose the contractor best suited to your needs and preferences. Delays can significantly impact your budget and overall project satisfaction. Careful consideration of potential delays is essential for a smooth and successful siding replacement.

    Estimated Project Timelines

    Each contractor’s estimate should clearly outline the expected project duration, broken down into phases if possible (e.g., demolition, installation, cleanup). Compare these timelines directly. For example, Contractor A might estimate completion in 7 days, while Contractor B proposes 10 days. These differences may be due to various factors including crew size, project complexity, and scheduling efficiency. A detailed breakdown of each phase’s duration can provide a more nuanced understanding.

    Potential Delays and Unforeseen Circumstances

    Several factors can cause delays. Unexpected weather conditions (heavy rain, extreme heat, or snow) can significantly impact outdoor work. Discovering unforeseen issues during demolition, such as rotted wood or damaged sheathing, may require additional time for repairs. Supply chain disruptions could delay the arrival of materials. Finally, unforeseen scheduling conflicts within the contractor’s team could also lead to delays. A reputable contractor will proactively communicate potential delays and offer solutions to mitigate their impact. For example, a delay caused by material shortage might be offset by prioritizing other tasks.

    Project Timeline Comparison Chart

    Contractor Total Project Time (Days) Demolition (Days) Installation (Days) Cleanup (Days)
    Contractor A 7 1 5 1
    Contractor B 10 2 7 1
    Contractor C 9 1.5 6.5 1
    Contractor D 12 2 8 2

    Permits and Licenses

    Obtaining the necessary permits and ensuring your contractor is properly licensed and insured are crucial steps in a successful siding replacement project. These aspects significantly impact the legality, safety, and overall quality of the work. A thorough comparison of these elements across different contractor estimates is essential before making a final decision.

    Permit costs and licensing information should be clearly outlined in each estimate. The absence of these details can indicate a potential lack of professionalism or even illegal operation. Understanding the implications of missing permits and licenses is vital to avoid future complications and potential legal liabilities.

    Permit Costs and Inclusion

    Each estimate should explicitly state the costs associated with obtaining the necessary permits. These costs can vary depending on your location, the scope of the project, and the specific permits required. For example, a larger project involving significant structural changes might require more permits and incur higher costs compared to a smaller, simpler job. Compare the breakdown of permit fees provided by each contractor. Discrepancies should prompt further investigation to ensure accuracy and transparency. Some contractors may include permit fees in their overall price, while others may list them separately. Clarify this detail with each contractor to avoid unexpected expenses.

    Contractor Licensing and Insurance

    Verify that each contractor holds the necessary licenses and insurance to perform the work. This typically includes a general contractor’s license and liability insurance. Request copies of these documents to confirm their validity and coverage. Estimates should clearly state the contractor’s licensing information and insurance policy details, including the policy number and the insurance company’s contact information. The absence of proper licensing and insurance exposes you to significant risks, including potential liability for accidents or damages during the project. Insufficient insurance coverage could leave you financially responsible for unforeseen events.

    Obtaining Necessary Permits

    The process of obtaining building permits generally involves submitting an application to your local building department along with detailed plans and specifications for the project. This application often requires information about the materials being used, the scope of work, and the contractor’s licensing information. The building department will review the application and plans to ensure compliance with local building codes and regulations. Once approved, you will receive a permit that allows the contractor to legally commence the work. The timeline for permit approval can vary depending on the complexity of the project and the efficiency of the local building department. In some cases, the contractor may handle the permit application process, while in others, the homeowner may be responsible. Clarify who is responsible for obtaining the permits and the associated timeline with each contractor. Delays in obtaining permits can significantly impact the project timeline, so factor this into your decision-making process.

    Warranties and Guarantees

    Understanding the warranties offered by different siding contractors is crucial for protecting your investment. A comprehensive warranty provides peace of mind and safeguards against potential defects or issues that may arise after installation. Comparing warranties allows you to make an informed decision based on the level of protection each contractor provides.

    Thoroughly reviewing the warranty documents provided by each contractor is essential. Pay close attention to the specific terms, conditions, and limitations of each warranty to ensure you understand the extent of coverage. Note that warranties often vary in their length and the types of issues they cover.

    Warranty Duration and Coverage

    The duration of warranties varies significantly between contractors and even between the materials and labor components of the project. Some manufacturers offer lifetime warranties on their siding products, while others provide shorter, limited warranties, typically ranging from 10 to 20 years. Labor warranties usually cover a shorter period, often ranging from 1 to 5 years. It’s vital to note whether these warranties are transferable to future homeowners if you plan to sell your property in the near future. For example, Contractor A might offer a 25-year warranty on their vinyl siding and a 2-year warranty on their labor, while Contractor B might offer a 15-year warranty on their fiber cement siding and a 1-year warranty on their labor.

    Warranty Limitations and Exclusions

    Warranties are not always absolute. Many contain specific limitations and exclusions that restrict their coverage. Common exclusions include damage caused by acts of God (such as hurricanes or floods), improper maintenance by the homeowner, or damage resulting from modifications or alterations made to the siding after installation. Some warranties might also exclude certain types of defects, such as minor cosmetic imperfections. For example, a warranty might cover major structural defects but exclude minor scratches or discoloration. Carefully reviewing these limitations is essential to avoid misunderstandings or disputes later. Understanding these limitations will help you assess the true value and protection offered by each warranty.

    Comparison of Contractor Warranties

    To facilitate comparison, consider creating a table summarizing the key features of each contractor’s warranty. This table could include columns for contractor name, material used, material warranty duration, material warranty exclusions, labor warranty duration, and labor warranty exclusions. This organized comparison will highlight the differences and allow for a clearer understanding of the overall value proposition of each contractor’s offer. For instance, a table might show that Contractor A’s warranty covers material defects for 25 years and labor for 2 years, excluding damage from extreme weather events, while Contractor B’s warranty covers material defects for 15 years and labor for 1 year, with similar exclusions.

    Cleanup and Waste Disposal

    Careful consideration of cleanup and waste disposal procedures is crucial when comparing siding replacement estimates. Contractors should detail their methods for managing debris and ensuring a clean worksite throughout and after the project. Differences in these approaches can significantly impact the overall cost and the level of disruption to your property.

    Waste and debris removal methods vary considerably between contractors. Some may use dumpsters placed strategically on your property, while others might opt for smaller, more frequent pickups. The frequency of waste removal directly affects the cleanliness of your property during the project. Furthermore, the method of disposal itself—landfill versus recycling—can impact both cost and environmental responsibility. It is important to ascertain whether the contractor’s methods align with your preferences and local environmental regulations.

    Waste Removal Methods

    Contractors should clearly outline their plan for handling construction debris. This should include details on the type of containers used (dumpsters, smaller bins), the frequency of removal, and the disposal method employed. For example, one contractor might describe using a large dumpster for the duration of the project, while another might detail a system of daily or bi-daily smaller container removal. This information allows for a direct comparison of approaches and associated costs. Inquire about the contractor’s commitment to recycling and responsible waste management practices. A responsible contractor will clearly state their commitment to minimizing environmental impact.

    Responsibility for Cleanup

    The contract should explicitly state the contractor’s responsibility for cleanup and waste disposal. This typically includes the removal of all construction debris, including scrap siding, packaging materials, and leftover building supplies. However, it’s important to clarify whether the contractor is responsible for cleaning areas beyond the immediate project site, such as driveways or walkways. Some contractors may offer additional cleaning services at an extra cost. A clear understanding of these responsibilities prevents misunderstandings and potential disputes after the project’s completion. A detailed breakdown of these responsibilities should be included in the written contract.

    Addressing Project-Related Damage

    Any damage incurred during the siding replacement process should be addressed by the contractor. This might include damage to landscaping, gutters, or other exterior features. Reputable contractors will have procedures in place to document, assess, and repair any accidental damage. The contractor’s estimate should ideally include a contingency for unforeseen damage, or at least clearly outline the process for handling such situations. For instance, a contractor might provide photographic documentation of existing conditions before commencing work, serving as a baseline for comparison after project completion. If damage does occur, a responsible contractor will promptly address it to the homeowner’s satisfaction.

    Total Project Cost and Value

    Comparing siding replacement estimates requires a thorough analysis of the total project cost and the value each proposal offers. This involves not only looking at the bottom line price but also understanding what contributes to that price and the long-term benefits each option provides. A lower upfront cost might seem attractive, but it could ultimately prove more expensive if the materials are inferior or the warranty inadequate.

    The total cost encompasses materials, labor, permits, and any other associated fees. The value proposition, however, considers the quality of materials, the experience and reputation of the contractor, the length and comprehensiveness of the warranty, and the overall expected lifespan of the new siding. By carefully weighing these factors, you can determine which estimate offers the best combination of cost and value.

    Comparative Analysis of Estimates

    To effectively compare, organize the information from each estimate into a clear format. This will help you easily identify key differences and advantages. Consider creating a table like the one below, which summarizes the key aspects of each estimate received. Remember to replace the example data with your own.

    Contractor Total Cost Material Type Warranty Length
    ABC Siding $15,000 Vinyl Siding – Premium Grade 25 Years
    XYZ Construction $12,000 Vinyl Siding – Standard Grade 10 Years
    123 Home Improvements $18,000 Fiber Cement Siding 30 Years

    Value Proposition Assessment

    Each estimate’s value proposition depends on individual priorities. For example, ABC Siding offers a premium-grade vinyl siding with a long warranty, suggesting higher quality and longer lifespan, justifying the higher price. XYZ Construction’s lower price reflects the use of standard-grade vinyl siding and a shorter warranty, implying a potentially shorter lifespan and higher risk of future repairs. 123 Home Improvements offers a higher initial investment but uses durable fiber cement siding with an extended warranty, indicating superior long-term value despite the higher upfront cost. The choice depends on your budget and your desired balance between initial cost and long-term durability.

    End of Discussion

    Ultimately, comparing siding replacement estimates requires a multifaceted approach. By carefully considering the elements discussed – pricing, labor, materials, contractor reputation, timelines, and warranties – homeowners can make a confident and informed decision. Choosing the right contractor and siding materials will not only enhance your home’s curb appeal but also ensure long-term value and peace of mind. Remember, a thorough comparison empowers you to make the best choice for your home and budget.

  • How Much Does Aluminum Siding Cost Per Square Foot?

    How Much Does Aluminum Siding Cost Per Square Foot?

    How Much Does Aluminum Siding Cost Per Square Foot? This question is crucial for homeowners considering this durable and attractive exterior cladding. The cost, however, isn’t a single number; it’s a range influenced by several key factors. Understanding these factors – from material quality and labor costs to regional pricing and project complexity – is essential for accurate budgeting and informed decision-making. This guide will delve into each aspect, providing a comprehensive overview of the costs associated with aluminum siding installation.

    We’ll explore the various types of aluminum siding available, examining the differences in price per square foot based on thickness, finish, color, and texture. We’ll also break down labor costs, comparing professional installation to DIY approaches and highlighting potential hidden expenses like permits and the removal of existing siding. By the end, you’ll have a clear understanding of the potential costs involved and be better equipped to plan your project effectively.

    Average Cost Range

    The cost of aluminum siding installation varies considerably, depending on several factors. A homeowner can expect to pay anywhere from $3 to $15 per square foot for a complete installation. This wide range reflects the differences in material quality, labor costs, and the complexity of the project.

    Factors such as the homeowner’s location, the size and complexity of the house, and the chosen type of aluminum siding significantly impact the overall cost. Higher labor costs in certain regions will naturally increase the final price. A house with intricate architectural details, such as many dormers or complex angles, will require more time and expertise, thus increasing the cost per square foot. Similarly, the selection of premium siding with advanced features will increase the material cost.

    Factors Influencing Cost Variation

    Several key factors contribute to the variability in aluminum siding installation costs. These factors interact to determine the final price, making it crucial to consider each aspect when budgeting for the project.

    • Labor Costs: Labor rates vary significantly by geographic location. Urban areas generally have higher labor costs than rural areas. The experience level of the installer also plays a crucial role; experienced and reputable installers command higher fees.
    • Material Costs: The type of aluminum siding chosen greatly affects the overall cost. Basic aluminum siding is less expensive than premium options with added features such as insulation or enhanced durability. The thickness and finish of the siding also contribute to the price.
    • Project Complexity: Houses with complex designs, multiple gables, or unusual architectural features require more time and labor, resulting in higher installation costs. Simple, rectangular houses are typically less expensive to side.
    • Existing Siding Removal: If the homeowner needs to remove existing siding before installing the aluminum siding, this adds to the labor and disposal costs, increasing the overall expense.
    • Permits and Inspections: Building permits and inspections are necessary in many areas, adding to the total project cost. The cost of permits can vary by location and the complexity of the project.

    Basic vs. Premium Aluminum Siding

    The difference between basic and premium aluminum siding is significant, impacting both the initial cost and the long-term value. Basic aluminum siding is typically thinner and offers fewer features, resulting in a lower price point. However, it may not be as durable or energy-efficient as premium options. Premium aluminum siding often includes features like thicker gauge aluminum, insulation backing for improved energy efficiency, and enhanced color retention. For example, a basic aluminum siding might cost $3-$5 per square foot, while a premium option could range from $8-$15 per square foot. This price difference reflects the superior quality and performance of the premium material. The increased upfront cost of premium siding may be offset by long-term savings on energy bills and reduced maintenance needs.

    Factors Affecting Cost

    Several key factors influence the final cost of aluminum siding per square foot, resulting in a wide range of prices across different projects. Understanding these factors allows homeowners to better budget for their siding projects and make informed decisions about material choices and contractors.

    Labor Costs

    Labor costs constitute a significant portion of the overall expense. The hourly rate of skilled installers varies depending on geographic location, experience level, and the complexity of the project. For instance, a simple installation on a single-story home with uncomplicated features will generally require less labor than a multi-story home with intricate architectural details or extensive repairs needed before siding installation. Furthermore, the need for specialized equipment or scaffolding can increase labor costs. A project requiring specialized techniques, such as working around complex window arrangements or dealing with difficult terrain, will command a higher labor rate. These increased labor costs directly translate to a higher price per square foot.

    Material Quality

    The quality of aluminum siding significantly impacts the price. Higher-quality siding typically features thicker aluminum, a more durable finish (e.g., Kynar 500 paint system), and enhanced features like improved insulation or enhanced weather resistance. These superior materials often come with a higher price tag. For example, a basic aluminum siding panel might cost significantly less than a premium panel with a thicker gauge of aluminum and a longer warranty against fading and damage. The increased durability and longevity offered by premium materials might justify the higher initial cost over the life of the siding.

    Regional Variations in Pricing

    Regional differences in labor costs, material availability, and local market conditions all contribute to variations in aluminum siding prices per square foot. Areas with a high cost of living or a shortage of skilled labor will likely have higher installation costs. Similarly, regions with limited access to aluminum siding suppliers might experience higher material prices due to transportation costs. For example, a project in a densely populated urban area with a high demand for skilled tradespeople may have significantly higher labor costs compared to a similar project in a rural area with more readily available labor.

    Project Complexity and Permits

    The complexity of the project and the need for permits also influence the final cost. Projects requiring extensive preparation work, such as removing existing siding, repairing underlying sheathing, or addressing significant structural issues, will naturally increase the overall expense. The need for permits and inspections adds to the overall project cost. For instance, a project involving the removal of asbestos-containing materials before siding installation will require specialized handling and disposal, significantly increasing the cost. Furthermore, obtaining the necessary permits and inspections from local authorities can add a substantial administrative fee to the project.

    Material Costs Breakdown

    Understanding the cost of aluminum siding involves breaking down the price into its component parts: the material itself and the associated labor. The material cost is significantly influenced by the type of aluminum siding chosen, including its thickness, finish, and color.

    Aluminum Siding Types and Costs

    The price per square foot of aluminum siding varies considerably depending on the specific type. Thicker siding generally offers greater durability and longevity, but comes at a higher cost. Similarly, different finishes impact both the aesthetic appeal and the price. The following table illustrates a typical cost range for various aluminum siding options. Note that these prices are estimates and can fluctuate based on location, supplier, and current market conditions.

    Siding Type Thickness (inches) Finish Type Cost per Square Foot (USD)
    Standard .024 Painted $2.00 – $3.50
    Heavy-Duty .032 Painted $3.00 – $4.50
    Premium .040 Painted $4.00 – $6.00
    Standard .024 Powder-coated $3.00 – $4.50
    Heavy-Duty .032 Powder-coated $4.00 – $5.50
    Premium .040 Powder-coated $5.00 – $7.00

    Color and Texture Options and Pricing

    The color and texture of your aluminum siding also influence the overall cost. While basic colors might be included in the standard pricing, more unique or specialized colors and textures often command a premium. For instance, wood-grain finishes generally cost more than solid colors. The following table provides examples of potential price differences. Remember that these are estimates, and actual costs may vary depending on the supplier and specific options available.

    Color/Texture Description Cost per Square Foot (USD) (Added to Base Cost) Example
    Solid Color Standard colors like white, beige, or gray. $0.00 – $0.50 Classic white aluminum siding
    Metallic Finish Colors with a metallic sheen. $0.50 – $1.50 Bronze or brushed aluminum
    Wood Grain Imitates the look of natural wood. $1.00 – $2.50 Cedar or oak-like patterns
    Specialty Colors Unique or less common colors. $1.50 – $3.00+ Deep reds, blues, or greens

    Labor Costs Breakdown

    Labor costs represent a significant portion of the overall expense when installing aluminum siding. Understanding these costs, which vary based on several factors, is crucial for accurate budgeting. This section details the components of labor costs and provides insights into typical pricing.

    Labor costs for aluminum siding installation are primarily determined by the hourly rates of the professionals involved and the total number of hours required to complete the project. Several skilled tradespeople may contribute to the process, each with their own specialized expertise and associated hourly rates. The complexity of the project, such as the presence of intricate architectural details or the need for extensive preparation work, will significantly impact the total labor hours and, consequently, the overall cost.

    Hourly Rates for Professionals

    The hourly rates for professionals involved in aluminum siding installation vary geographically and based on experience and specialization. Generally, you can expect the following ranges:

    It’s important to note that these are average ranges. Highly experienced and specialized installers in high-demand areas may command higher rates. Conversely, smaller, less established companies might offer slightly lower rates. Always obtain multiple quotes to compare pricing and ensure you’re getting a fair price for the services rendered.

    Profession Hourly Rate Range
    Siding Installer $40 – $75
    Project Manager/Supervisor $50 – $100
    Helpers/Laborers $25 – $45

    Project Size and Complexity Impact on Labor Costs

    The size and complexity of the project directly influence the total labor costs. A larger house with more surface area to cover will naturally require more labor hours than a smaller one. Similarly, a project with intricate architectural details, such as many dormers, gables, or complex trim work, will demand more time and skill, increasing the overall labor expense.

    For example, a simple, single-story ranch house might require a crew of two to three installers for a week, while a large, multi-story home with complex features could necessitate a larger crew for two or three weeks. Factors such as the condition of the existing siding (requiring more demolition and preparation time), the need for repairs to underlying structures, and the presence of obstacles (such as trees or difficult terrain) also significantly affect the total labor hours and costs. A detailed quote from a reputable contractor should explicitly outline these factors and their associated costs.

    Installation Process

    Professional installation of aluminum siding is a multi-step process that ensures a durable and aesthetically pleasing finish. Proper preparation and execution are crucial for a long-lasting result, minimizing the risk of future problems like water damage or warping. The following steps outline a typical installation procedure.

    1. Preparation and Measurement: This initial stage involves meticulous site preparation. Existing siding must be removed, and the underlying structure inspected for any damage that needs repair before installation begins. Accurate measurements of the house’s exterior are taken to determine the precise amount of siding needed, minimizing waste and ensuring a seamless fit.
    2. Installation of Flashing and J-Channel: Flashing, a thin metal strip, is installed around windows, doors, and other openings to prevent water from penetrating the wall. J-channel, a shaped piece of aluminum, provides a neat finish at the edges of the siding panels and helps guide the installation. Correct placement of flashing and J-channel is crucial for water management.
    3. Siding Panel Installation: Aluminum siding panels are typically installed horizontally, starting from the bottom and working upwards. Each panel is carefully overlapped with the one below, ensuring a watertight seal. Special attention is paid to aligning the panels and maintaining consistent spacing for a professional look.
    4. Corner and Trim Installation: Corner posts and trim pieces are installed to provide a finished look at the corners and edges of the house. These components are designed to complement the siding and protect the edges from the elements. Proper installation ensures a clean, consistent appearance.
    5. Finishing Touches: Once the siding is installed, any necessary caulking or sealing is applied to ensure a watertight seal around windows, doors, and other openings. A final inspection is performed to ensure that all panels are properly installed and the overall appearance is satisfactory. This step is crucial for long-term protection and aesthetic appeal.

    Importance of Professional Installation

    Professional installation ensures the proper use of specialized tools and techniques, leading to a superior, longer-lasting result. Improper installation can lead to problems such as gaps, leaks, and premature deterioration of the siding. A professional installer has the experience and knowledge to address any unforeseen challenges during the process, ensuring a smooth and efficient installation. For example, they can identify and rectify underlying structural issues before siding installation, preventing future problems. The cost of professional installation is a worthwhile investment in the long-term durability and appearance of the aluminum siding.

    Comparison with Other Materials

    Choosing the right siding material involves careful consideration of cost, durability, and aesthetic preferences. Aluminum siding, while a popular option, isn’t the only contender. This section compares its cost per square foot to that of vinyl and wood siding, highlighting the advantages and disadvantages of each.

    Aluminum siding offers a balance between cost and durability, but vinyl and wood present alternative options with their own sets of pros and cons. Understanding these differences is crucial for making an informed decision that aligns with your budget and long-term goals.

    Cost Comparison of Siding Materials

    The cost per square foot of siding can vary significantly based on factors like material quality, regional pricing, and labor costs. However, a general comparison can provide a useful benchmark. The following table presents average cost ranges; actual costs may vary depending on your specific project.

    Siding Material Cost Per Square Foot (Material Only) Cost Per Square Foot (Installed) Longevity (Years)
    Aluminum $2 – $8 $8 – $15 30-50+
    Vinyl $1 – $5 $5 – $12 20-30
    Wood $4 – $15+ $12 – $30+ 20-50+ (depending on wood type and maintenance)

    Advantages and Disadvantages of Each Siding Material

    Each siding material presents a unique combination of advantages and disadvantages regarding cost and longevity.

    Aluminum Siding: Aluminum siding is relatively inexpensive compared to wood, boasting excellent durability and resistance to weather damage, insects, and fire. However, it can dent more easily than vinyl and may not offer the same aesthetic appeal as wood. Its longevity is substantial, often exceeding 50 years with proper maintenance. For example, a well-maintained aluminum-sided home in a moderate climate could easily last for several generations.

    Vinyl Siding: Vinyl siding is typically the most affordable option, offering low maintenance and a wide variety of styles and colors. Its longevity is shorter than aluminum or high-quality wood siding, however, and it can be susceptible to damage from extreme temperatures or strong impacts. A common example of vinyl siding’s vulnerability is its potential for cracking under intense cold or heat. The lifespan of vinyl siding often depends on the quality of the product and its installation.

    Wood Siding: Wood siding provides a classic and aesthetically pleasing look. High-quality wood siding can be very durable and long-lasting, particularly if properly maintained with regular painting or staining. However, it is the most expensive option, requiring significant ongoing maintenance to prevent rot, insect infestation, and weathering. The longevity of wood siding can vary widely depending on the type of wood used (e.g., cedar vs. pine) and the climate. A well-maintained cedar home might last for decades, whereas pine siding in a humid climate may require more frequent maintenance.

    Hidden Costs

    While the upfront cost of aluminum siding per square foot is a significant factor, several hidden expenses can significantly inflate the total project cost. Failing to account for these can lead to budget overruns and project delays. Understanding these potential additional expenses is crucial for accurate budgeting and realistic project planning.

    Permitting Fees and Inspections

    Securing the necessary permits from your local municipality is a crucial step before starting any exterior home renovation project, including aluminum siding installation. Permitting fees vary widely depending on location, the size of your home, and the complexity of the project. For instance, a larger home requiring more extensive siding work might incur permit fees exceeding $500, while a smaller project could cost closer to $100. Furthermore, these fees often don’t include the cost of inspections, which are usually required at various stages of the installation process to ensure compliance with building codes. Failure to obtain the necessary permits can result in hefty fines and potential project shutdowns.

    Removal of Existing Siding

    If your home already has siding (wood, vinyl, etc.), its removal is a necessary step before installing aluminum siding. This process adds to the labor costs and may also reveal unforeseen issues like underlying damage to the sheathing or the presence of asbestos-containing materials. The cost of removing existing siding can vary significantly based on the type of siding, its condition, and the square footage of your home. Removing old wood siding, for example, is often more labor-intensive and costly than removing vinyl siding. Unexpected discoveries during removal, such as rotted wood requiring extensive repair, can dramatically increase the project’s overall expense. In one case, the removal of old asbestos-containing siding on a 1,500 sq ft home added approximately $2,000 to the overall cost due to the specialized handling and disposal requirements.

    Repair of Underlying Structure

    The installation of new aluminum siding often necessitates the repair or replacement of damaged underlying structures, such as rotting fascia boards, damaged sheathing, or deteriorated window and door trim. These issues may not be apparent until the old siding is removed. The cost of these repairs can be substantial, ranging from a few hundred dollars for minor repairs to thousands of dollars for extensive work. For example, replacing sections of rotten wood sheathing can quickly add several hundred dollars to the project, while extensive repairs to damaged fascia boards could cost over a thousand dollars. Failing to account for these potential repairs can lead to significant cost overruns.

    Unexpected Material Needs

    While a precise material estimate is typically provided upfront, unforeseen circumstances can arise during installation that require additional materials. For instance, unexpected damage to the existing structure might necessitate extra sheathing or flashing. Similarly, variations in the home’s dimensions or complex architectural features could require more siding panels than initially anticipated. These extra materials add to the project’s cost, potentially pushing the final bill higher than the original estimate. A common example is discovering more damaged areas requiring additional flashing or sealant than originally assessed, adding a few hundred dollars to the material costs.

    Waste Disposal Fees

    The removal of old siding and other construction debris generates significant waste. Disposal fees for this waste can add up, particularly if specialized disposal is required for hazardous materials like asbestos. These fees vary widely based on location and the amount of waste generated. In areas with stringent environmental regulations, the cost of properly disposing of construction waste can be substantial, adding several hundred dollars to the overall project cost.

    DIY vs. Professional Installation

    Choosing between DIY and professional installation for aluminum siding significantly impacts both the final cost and the outcome of your project. While a DIY approach might seem appealing for budget-conscious homeowners, it’s crucial to weigh the potential savings against the risks involved. This section compares the costs and associated benefits and drawbacks of each approach.

    The primary difference lies in labor costs. Professional installers possess the experience, specialized tools, and knowledge to complete the job efficiently and correctly. DIY projects, on the other hand, require significant time investment, tool acquisition or rental, and the potential for costly mistakes.

    Cost Comparison

    Professional installation typically adds substantially to the overall cost of aluminum siding. Labor charges can range from $2 to $5 per square foot, depending on factors such as project complexity, geographic location, and the installer’s experience. This means that for a 1000 square foot house, labor alone could cost between $2000 and $5000. In contrast, a DIY approach eliminates these labor costs, allowing homeowners to focus solely on material expenses. However, unforeseen complications or mistakes during a DIY installation could easily negate any initial savings.

    Potential Savings and Risks of DIY Installation

    A significant potential saving with DIY installation is the elimination of labor costs. Homeowners can purchase materials directly from suppliers, often at lower prices than those offered to contractors. For example, a homeowner might purchase aluminum siding panels for $2 per square foot directly from a supplier, whereas a contractor might pay $2.50 per square foot due to bulk purchasing discounts not available to individuals. However, this cost saving is contingent on successful project completion. Improper installation can lead to damage, leaks, and the need for costly repairs or even complete re-installation, significantly outweighing the initial savings. Furthermore, DIY projects often take considerably longer to complete, potentially leading to lost time and opportunity costs.

    Potential Savings and Risks of Professional Installation

    Professional installation offers peace of mind. Experienced installers guarantee proper installation, ensuring longevity, structural integrity, and protection against the elements. Their expertise minimizes the risk of mistakes that could lead to future repairs or replacements. While more expensive upfront, professional installation often comes with warranties, offering protection against defects in materials or workmanship. For example, a reputable installer might offer a 5-year warranty on their labor, mitigating the risk of costly repairs due to installation errors. The time saved is also a significant advantage, allowing homeowners to focus on other tasks. However, the higher initial cost can be a significant barrier for some homeowners.

    Warranty and Maintenance

    Aluminum siding offers a durable and low-maintenance exterior cladding option, but understanding the warranty and long-term maintenance is crucial for budgeting and planning. Manufacturers typically provide warranties covering defects in materials and workmanship, offering homeowners peace of mind regarding the initial quality of their investment. However, the specifics of maintenance significantly impact the siding’s lifespan and overall cost.

    Aluminum siding warranties generally cover defects in materials and workmanship for a period ranging from 10 to 50 years, depending on the manufacturer and specific product line. Some warranties may be prorated, meaning the manufacturer’s responsibility decreases over time. It’s essential to carefully review the warranty documentation provided by the manufacturer before installation to understand the exact terms and conditions, including what is and isn’t covered. For example, damage caused by severe weather events may not be included, while defects in the manufacturing process would likely be covered. Understanding these nuances helps homeowners make informed decisions and prepare for potential future expenses.

    Warranty Coverage Details

    Warranties usually cover issues such as peeling paint, cracking, or significant fading of the factory-applied finish. However, damage resulting from impact, improper installation, or neglect is typically excluded. Some manufacturers offer extended warranties for an additional fee, providing further protection against unforeseen circumstances. This extended coverage might include protection against hail damage or other weather-related issues. Reading the fine print of the warranty is crucial to understand the limitations and expectations. For instance, a warranty might cover the replacement of defective panels but not the associated labor costs for reinstallation.

    Long-Term Maintenance Requirements

    Aluminum siding requires minimal maintenance compared to other siding materials. Regular cleaning, typically once or twice a year, is sufficient to remove dirt, debris, and mildew buildup. A simple solution of mild detergent and water, applied with a soft brush or sponge, is usually all that’s needed. Pressure washing should be avoided as it can damage the siding’s finish. Periodic inspections for any signs of damage, such as dents or loose panels, are also recommended. Addressing minor issues promptly can prevent more extensive and costly repairs later. For instance, a small dent might be easily repaired with a putty, while a loose panel requires professional attention to avoid further damage or water ingress.

    Cost of Long-Term Maintenance

    The long-term maintenance costs associated with aluminum siding are relatively low. The annual cleaning can be done with readily available supplies, minimizing expense. Occasional repairs, such as replacing damaged panels, might incur additional costs, depending on the extent of the damage and the need for professional assistance. However, the infrequent need for repairs and the overall durability of aluminum siding make it a cost-effective option in the long run compared to materials requiring more frequent replacements or extensive maintenance. For example, a homeowner might spend around $50-$100 annually on cleaning supplies and minor repairs, significantly less than the maintenance costs associated with wood or vinyl siding.

    Example Project Cost Breakdown

    To illustrate the cost of aluminum siding installation, let’s consider a hypothetical project for a single-family home. This example will detail the breakdown of costs, allowing for a clearer understanding of the total expense involved. Remember that actual costs can vary significantly based on location, contractor, and project specifics.

    Project Details: A 1,500 Square Foot Home

    This example focuses on a 1,500 square foot home requiring new aluminum siding installation. We will assume a relatively standard design with minimal complexities, such as few dormers or unusual architectural features. More complex designs will naturally increase the cost.

    Material Costs

    The cost of materials is a significant portion of the overall project expense. The price per square foot of aluminum siding varies depending on the quality, thickness, and style chosen. For this example, we’ll assume a mid-range aluminum siding costing $3.00 per square foot. Additional materials like trim, flashing, and fasteners are also included in the estimate.

    Material Cost per Square Foot Total Square Footage Total Cost
    Aluminum Siding $3.00 1500 $4500
    Trim & Flashing $1.50 200 (estimated) $300
    Fasteners & Other $0.50 1500 $750
    Total Material Cost $5550

    Labor Costs

    Labor costs represent a considerable portion of the total project cost. The hourly rate for skilled siding installers varies by region and contractor experience. We’ll assume an average labor cost of $50 per hour for a two-person crew. The estimated labor hours for a 1500 square foot home are 40 hours.

    Labor Item Hourly Rate Hours Total Cost
    Installation $50/hour (per crew) 40 $4000
    Total Labor Cost $4000

    Total Project Cost

    The total project cost is the sum of the material and labor costs, plus any additional costs such as permits and disposal fees. For this example, we’ll assume $500 for permits and disposal.

    Total Project Cost = Material Costs + Labor Costs + Additional Costs

    Total Project Cost = $5550 + $4000 + $500 = $10050

    Therefore, the estimated total cost for aluminum siding installation on a 1500 square foot home in this example is $10,050. This is an estimate, and actual costs may vary depending on several factors as previously discussed.

    Last Word

    Ultimately, the cost of aluminum siding per square foot is highly variable. While a range can be provided, your specific project’s cost will depend on numerous factors. Careful consideration of these factors—material selection, labor costs, regional pricing, and potential hidden expenses—is paramount for accurate budgeting. By weighing the advantages and disadvantages against your budget and needs, you can make an informed decision about whether aluminum siding is the right choice for your home improvement project. Remember to obtain multiple quotes from reputable contractors to ensure you get the best price for your specific needs.

  • How Insulated Siding Improves Home Comfort and Efficiency

    How Insulated Siding Improves Home Comfort and Efficiency

    How Insulated Siding Improves Home Comfort and Efficiency: Investing in insulated siding offers a multifaceted approach to enhancing your home’s energy performance and overall living experience. This upgrade not only contributes significantly to reduced energy bills but also creates a more comfortable and quieter living environment. We’ll explore the various types of insulated siding, their installation, maintenance, and the long-term benefits they provide, including increased home value and curb appeal.

    From understanding the composition of different insulated siding materials to analyzing the return on investment, this comprehensive guide equips homeowners with the knowledge needed to make informed decisions about improving their home’s comfort and efficiency. We will delve into the science behind how insulated siding minimizes heat transfer, reduces drafts, and even dampens noise pollution. We’ll also examine the environmental considerations and the long-term cost-effectiveness compared to traditional siding options. By the end, you’ll have a clear understanding of whether insulated siding is the right choice for your home.

    Introduction to Insulated Siding

    Insulated siding offers a compelling alternative to traditional siding, enhancing both the aesthetic appeal and energy efficiency of your home. It combines the protective outer layer of traditional siding with an integrated layer of insulation, creating a more comfortable and cost-effective living environment. This integrated design streamlines installation and reduces the need for separate insulation measures, resulting in a more efficient and streamlined construction process.

    Insulated siding materials typically consist of an outer layer designed for weather resistance and aesthetic appeal, a core layer providing insulation, and sometimes a backing layer for added protection and structural support. The outer layer is often made of materials like vinyl, fiber cement, or engineered wood, each offering unique benefits in terms of durability, maintenance, and appearance. The core insulation is commonly made of rigid foam insulation, such as expanded polystyrene (EPS) or extruded polystyrene (XPS), known for their excellent thermal resistance. These materials contribute significantly to the overall energy efficiency of the siding system.

    Insulated Siding Types

    The choice of insulated siding depends on several factors, including budget, aesthetic preferences, and the specific climate. Different types of insulated siding offer varying levels of performance and longevity.

    • Vinyl Insulated Siding: This is a popular choice due to its affordability, low maintenance, and wide range of colors and styles. The vinyl outer layer is durable and easy to clean, while the foam core provides effective insulation. Vinyl insulated siding is often a good option for homeowners seeking a balance between cost and performance.
    • Fiber Cement Insulated Siding: Offering superior durability and fire resistance compared to vinyl, fiber cement insulated siding is a more premium option. It’s known for its long lifespan and ability to withstand harsh weather conditions. However, it is typically more expensive than vinyl siding and requires more careful installation.
    • Engineered Wood Insulated Siding: Engineered wood siding combines the natural beauty of wood with enhanced durability and moisture resistance. The insulation core helps to prevent moisture damage and improve energy efficiency. This type of siding often provides a more sophisticated aesthetic appeal but may require more maintenance than vinyl.

    Insulated Siding vs. Traditional Siding

    A key difference lies in the integrated insulation. Traditional siding requires separate installation of insulation, often within the wall cavity. This can lead to thermal bridging—heat loss through areas where the insulation is not continuous—and potential gaps in the insulation layer. Insulated siding, on the other hand, eliminates this issue by incorporating insulation directly within the siding panel.

    Feature Insulated Siding Traditional Siding
    Insulation Integrated within siding panel Installed separately in wall cavity
    Installation Often faster and simpler More complex, requiring separate insulation installation
    Energy Efficiency Generally higher due to reduced thermal bridging Can be less efficient due to potential thermal bridging and installation inconsistencies
    Maintenance Varies depending on material; generally low to moderate Varies depending on material; may require more frequent repainting or repairs
    Cost Generally more expensive upfront Typically less expensive upfront, but may have higher long-term energy costs

    Energy Efficiency Benefits

    Insulated siding offers significant advantages in improving a home’s energy efficiency, leading to both increased comfort and lower energy bills. By creating an effective barrier against heat transfer, it helps maintain a consistent indoor temperature year-round, reducing the strain on your heating and cooling systems.

    Insulated siding reduces heat transfer in both summer and winter months. During summer, the insulating layer prevents the outside heat from penetrating the walls, keeping the interior cooler and reducing the workload on your air conditioning system. Conversely, in winter, the insulation minimizes heat loss from the interior, helping to keep your home warmer and reducing the demand on your heating system. This two-way protection translates directly into substantial energy savings.

    Impact on Energy Bills

    The impact of insulated siding on energy bills is demonstrably positive. By reducing the energy needed to heat and cool your home, you can expect a noticeable decrease in your monthly utility costs. The exact amount of savings will vary depending on factors such as climate, home size, existing insulation, and the type of insulated siding installed. However, studies consistently show significant reductions in energy consumption. For example, a study by the Oak Ridge National Laboratory indicated that homes with insulated siding experienced an average reduction of 15-25% in heating and cooling costs compared to homes with traditional siding. This translates to substantial savings over the lifespan of the siding.

    Energy Savings Data

    Several studies and real-world examples support the energy-saving claims of insulated siding. Independent testing by organizations like the National Fenestration Rating Council (NFRC) provides data on the thermal performance of various siding materials. This data is often expressed in terms of R-value, which measures the material’s resistance to heat flow. A higher R-value indicates better insulation. For instance, a typical insulated vinyl siding might have an R-value of 4 or higher, significantly exceeding the R-value of traditional wood or aluminum siding. This improved R-value directly contributes to lower energy consumption and reduced utility bills. Homeowners who have installed insulated siding often report savings ranging from 10% to 30% on their annual energy bills, depending on factors such as climate and home size. These savings not only offset the initial cost of installation but also provide long-term financial benefits.

    Improved Home Comfort

    Insulated siding significantly enhances your home’s comfort by creating a more stable and pleasant indoor environment. This improvement stems from its ability to regulate temperature, reduce drafts, and minimize external noise intrusion.

    Insulated siding minimizes temperature fluctuations by acting as a barrier against heat transfer. In the summer, it prevents the sun’s heat from penetrating the walls, keeping your home cooler and reducing the strain on your air conditioning system. Conversely, during winter, it effectively insulates your home, retaining heat and reducing the amount of energy needed to maintain a comfortable temperature. This results in a more consistent internal temperature, regardless of external weather conditions. The improved thermal mass provided by the siding helps to moderate temperature swings, preventing sudden temperature drops or spikes.

    Reduced Drafts and Air Leaks

    Drafts and air leaks are common culprits behind discomfort in homes, leading to uneven temperatures and energy waste. Insulated siding effectively seals gaps and cracks in your exterior walls, preventing cold air from entering in winter and warm air from escaping in summer. This creates a tighter building envelope, minimizing drafts and improving the overall comfort level within your home. The reduction in air infiltration also contributes to better indoor air quality by preventing the entry of pollutants and allergens from the outside.

    Noise Reduction

    Noise pollution is a significant factor affecting home comfort. Insulated siding plays a crucial role in sound dampening, reducing the amount of external noise that penetrates your home. The added insulation layer acts as a sound barrier, absorbing and deflecting sound waves, creating a quieter and more peaceful indoor environment. This is particularly beneficial for homes located near busy roads, airports, or other noisy areas.

    Noise Level (dB) Without Insulated Siding With Insulated Siding
    Traffic Noise 75-85 60-70
    Construction Noise 90-100 75-85
    Neighbor Noise 55-65 40-50

    Installation Process and Considerations

    Insulated siding installation is a multifaceted process requiring careful planning and execution. While it can be a DIY project for experienced homeowners, professional installation is often recommended, especially for larger homes or complex designs. Understanding the process, potential challenges, and necessary precautions is crucial for a successful outcome.

    The typical installation of insulated siding involves several key steps, beginning with the preparation of the existing exterior walls. This includes removing old siding, repairing any damaged areas, and ensuring the underlying structure is sound. Next, the installation of furring strips or other fastening systems provides a level surface for the new siding and helps to create a proper air gap for insulation. The insulated siding panels are then installed, overlapping appropriately and secured using appropriate fasteners. Finally, trim pieces and accessories are installed to complete the project, ensuring a clean and professional finish. This process varies slightly depending on the specific type of insulated siding used, but the core steps remain consistent.

    Potential Installation Challenges and Solutions

    Several challenges can arise during insulated siding installation. These can range from unforeseen structural issues to difficulties with fitting panels around complex architectural features. Careful planning and preparation can mitigate many of these problems. For instance, improperly prepared surfaces can lead to uneven siding and compromised insulation. Solutions include addressing structural issues before starting installation and using appropriate shims and fasteners to ensure a level surface. Working with difficult angles or curves requires precise measurements and cuts, which may necessitate specialized tools and techniques. In such cases, utilizing pre-fabricated components or seeking professional assistance may prove advantageous.

    DIY Installation Step-by-Step Guide

    For homeowners considering a DIY approach, careful planning and preparation are paramount. A step-by-step guide, coupled with a realistic assessment of one’s skills, is essential. Attempting installation without sufficient knowledge or experience can lead to costly mistakes and potentially compromise the integrity of the home’s exterior.

    1. Thorough Assessment and Planning: Carefully measure the area requiring siding and purchase sufficient materials. This includes siding panels, fasteners, trim, and any necessary underlayment. Account for waste and potential errors. Consider creating detailed diagrams to visualize the installation process.
    2. Surface Preparation: Remove existing siding, ensuring a clean and level surface. Repair any damaged areas of the underlying wall structure. This might involve patching holes, replacing rotten wood, or addressing any other structural issues. A properly prepared surface is critical for a successful installation.
    3. Installation of Furring Strips (if necessary): Install furring strips to create a level surface and air gap behind the siding. Ensure they are properly spaced and securely fastened to the wall. This step improves insulation and ventilation.
    4. Siding Panel Installation: Begin installing the siding panels from the bottom, working upwards. Follow the manufacturer’s instructions carefully regarding overlap and fastening. Ensure proper alignment and spacing between panels. Utilize appropriate tools to ensure accurate cuts and clean lines.
    5. Trim and Accessory Installation: Install trim pieces around windows, doors, and corners, ensuring a neat and professional finish. This adds to the overall aesthetic appeal and protects the edges of the siding.
    6. Final Inspection: Once the installation is complete, conduct a thorough inspection to ensure all panels are securely fastened and there are no gaps or visible imperfections. Address any issues before the project is considered finished.

    Maintenance and Longevity

    Insulated siding, while offering significant long-term benefits, requires some maintenance to ensure its continued performance and aesthetic appeal. Understanding these requirements and the lifespan of different materials will help homeowners make informed decisions and maximize their investment. Proper care can significantly extend the life of your siding and prevent costly repairs down the line.

    Proper maintenance significantly impacts the longevity and performance of insulated siding. Regular cleaning and prompt attention to any damage are key to preserving its energy efficiency and aesthetic value. Neglecting maintenance can lead to premature deterioration and compromise the investment.

    Insulated Siding Maintenance Requirements

    Regular cleaning is crucial to maintain the appearance and performance of insulated siding. This typically involves washing the siding with a mild detergent and water solution using a soft brush or sponge. Power washing should be avoided as it can damage the siding’s surface. Annual inspections are recommended to check for any signs of damage, such as cracks, dents, or loose panels. Promptly addressing any damage will prevent further deterioration and potential water intrusion. For example, a small crack left unrepaired can allow moisture to penetrate, leading to rot or mold growth. Additionally, it’s advisable to trim back any overhanging branches that might scratch or damage the siding during storms.

    Lifespan and Durability of Insulated Siding Types

    The lifespan of insulated siding varies depending on the material used, the quality of installation, and the level of maintenance provided. Vinyl insulated siding, for example, is known for its durability and can last for 30-50 years with proper care. Fiber cement insulated siding, while more expensive initially, offers an even longer lifespan, often exceeding 50 years. Aluminum insulated siding is also quite durable and can last for several decades, but it’s more susceptible to dents and scratches. Wood insulated siding, while aesthetically pleasing, requires more frequent maintenance and has a shorter lifespan than vinyl or fiber cement, typically ranging from 20-30 years depending on the type of wood and the climate. The choice of material should consider the local climate, budget, and desired aesthetic.

    Long-Term Cost-Effectiveness of Insulated Siding

    While the initial cost of insulated siding might be higher than that of non-insulated options, the long-term cost-effectiveness is undeniable. The energy savings resulting from improved insulation can significantly offset the higher upfront investment over the siding’s lifespan. For example, a homeowner might spend an extra $5,000 on insulated siding compared to non-insulated alternatives. However, the reduced energy bills over 30 years could easily exceed this amount, leading to substantial savings. Furthermore, the increased lifespan of insulated siding reduces the need for frequent replacements, further contributing to its long-term cost-effectiveness compared to options requiring more frequent maintenance or replacement. This makes insulated siding a sound financial investment for homeowners seeking both energy efficiency and long-term value.

    Environmental Impact

    Insulated siding offers significant environmental advantages compared to traditional siding options, contributing to a more sustainable building practice and reduced carbon footprint. The benefits extend from the manufacturing process to the long-term energy savings it provides for homeowners.

    The sustainability of insulated siding hinges on the materials used in its production. Many manufacturers utilize recycled content in their products, reducing reliance on virgin materials and minimizing landfill waste. Furthermore, the use of materials with high recycled content contributes to a smaller carbon footprint throughout the product lifecycle. For example, some insulated siding manufacturers incorporate recycled plastic or wood fibers into their formulations, diverting waste from landfills and reducing the demand for new raw materials. The selection of sustainably sourced wood for certain types of insulated siding further enhances its environmental profile.

    Material Sustainability in Insulated Siding Production

    The environmental impact of insulated siding production is significantly influenced by the materials employed. Common materials include vinyl, fiber cement, and engineered wood. Vinyl siding, while often criticized for its reliance on fossil fuels, can incorporate recycled PVC content, reducing its overall environmental impact. Fiber cement siding, a composite material, typically contains a mix of cement, cellulose fibers, and other additives, offering a more sustainable alternative to some traditional siding options. Engineered wood siding often utilizes recycled wood fibers, further minimizing environmental impact. The selection of materials with high recycled content and sustainable sourcing practices directly impacts the overall sustainability of the product.

    Comparison of Carbon Footprint: Insulated vs. Traditional Siding

    A life-cycle assessment comparing insulated siding to traditional options reveals significant differences in carbon footprint. Traditional siding materials, such as wood, often require extensive harvesting and processing, resulting in higher greenhouse gas emissions. Furthermore, the lack of insulation in traditional siding necessitates increased energy consumption for heating and cooling, adding to the overall carbon footprint of the building over its lifetime. Insulated siding, by contrast, reduces energy consumption through improved insulation, thereby offsetting some of the emissions associated with its manufacturing. While the initial manufacturing process of insulated siding may have a slightly higher carbon footprint compared to some traditional options, the long-term energy savings from reduced heating and cooling needs significantly decrease the overall environmental impact over the siding’s lifespan. Studies comparing life-cycle assessments of various siding types often demonstrate that insulated siding presents a lower overall carbon footprint when considering the entire building lifecycle.

    Cost Analysis and Return on Investment

    Investing in insulated siding represents a significant home improvement, and understanding the associated costs and potential return on investment (ROI) is crucial for making an informed decision. This section will analyze the initial investment and demonstrate how to calculate the potential long-term financial benefits of this upgrade.

    The initial cost of purchasing and installing insulated siding varies considerably depending on several factors. These factors include the size of your home, the type of siding chosen (vinyl, fiber cement, etc.), the complexity of the installation (e.g., requiring significant repairs or removal of existing siding), regional labor costs, and the chosen contractor’s pricing. A rough estimate for a mid-sized home might range from $10,000 to $30,000 or more, but it’s essential to obtain multiple quotes from reputable contractors for an accurate assessment specific to your project.

    Calculating Return on Investment for Insulated Siding

    Calculating the ROI for insulated siding involves comparing the initial investment cost to the long-term savings generated through reduced energy consumption. This calculation requires estimating both the upfront costs and the anticipated annual energy savings. Several factors influence the accuracy of this calculation, including your current energy consumption, local energy prices, the R-value of the chosen insulated siding, and climate conditions.

    Sample ROI Calculation

    Let’s consider a hypothetical example: A homeowner invests $15,000 in installing insulated siding on a 1,500 square foot home. Assume their current annual heating and cooling costs are $2,000. After installation, they experience a 20% reduction in energy bills, resulting in annual savings of $400 ($2,000 x 0.20).

    To calculate the simple payback period, divide the initial investment by the annual savings: $15,000 / $400 = 37.5 years. This indicates that it would take approximately 37.5 years to recoup the initial investment through energy savings alone.

    However, a more comprehensive ROI calculation would also consider factors such as increased home value and potential tax credits. For instance, if the insulated siding increases the home’s value by $5,000, this should be added to the total return. Additionally, some regions offer tax incentives for energy-efficient home improvements. These factors can significantly improve the overall ROI, potentially shortening the payback period considerably. Therefore, it is crucial to factor in all relevant financial aspects for a realistic assessment.

    A thorough ROI calculation requires considering not only energy savings but also potential increases in home value and any applicable tax credits or rebates.

    Home Value and Curb Appeal

    Investing in insulated siding offers a significant return, not just in energy savings, but also in increased home value and enhanced curb appeal. A visually appealing and energy-efficient home is highly desirable in the real estate market, leading to a faster sale and a potentially higher selling price. Furthermore, improved curb appeal can positively impact a homeowner’s enjoyment of their property.

    Insulated siding dramatically improves a home’s aesthetic appeal by providing a clean, modern, and well-maintained look. The variety of colors and styles available allows homeowners to personalize their homes to reflect their individual tastes and complement their landscaping. This improved appearance not only enhances the property’s visual attractiveness but also contributes significantly to its market value. Appraisers often consider curb appeal a key factor when assessing a home’s worth.

    Siding Styles and Colors that Enhance Curb Appeal

    The selection of siding style and color significantly impacts a home’s overall curb appeal. Choosing the right combination can transform a house from ordinary to extraordinary. Consider the architectural style of your home when making your selection.

    • Classic Vinyl Siding: Available in a wide range of colors, including traditional earth tones like beige, brown, and gray, as well as bolder options like navy blue or deep red. This style offers a timeless appeal and requires minimal maintenance. Imagine a two-story colonial home with crisp white trim and deep charcoal vinyl siding – a classic and elegant combination.
    • Modern Fiber Cement Siding: Fiber cement offers a sophisticated, low-maintenance alternative to wood siding. Its sleek lines and ability to mimic the look of wood, stone, or stucco makes it ideal for contemporary or craftsman-style homes. Consider a sleek, gray fiber cement siding on a modern ranch-style home, accented with black windows and a dark gray front door.
    • Traditional Wood Siding: While requiring more maintenance, wood siding offers unparalleled natural beauty and character. Natural wood tones like cedar or redwood can create a warm and inviting aesthetic, especially for homes with a rustic or farmhouse design. Picture a charming cabin-style home with stained cedar siding, complementing its stone foundation and surrounding trees.

    Choosing the Right Insulated Siding

    Selecting the ideal insulated siding involves careful consideration of several key factors to ensure optimal performance, longevity, and aesthetic appeal for your home. The right choice depends on your climate, budget, and personal preferences. Understanding these factors will guide you towards a decision that maximizes both energy efficiency and curb appeal.

    Factors Influencing Insulated Siding Selection

    Several critical factors should be evaluated when choosing insulated siding. These include climate conditions, budget constraints, home style, and desired maintenance levels. The interplay of these factors will ultimately determine the most suitable material for your specific needs.

    • Climate: Homes in colder climates will benefit from siding with higher R-values (a measure of thermal resistance), offering superior insulation against freezing temperatures. Conversely, warmer climates might prioritize siding with better ventilation properties to prevent moisture buildup. For example, fiber cement siding might be preferred in a humid coastal climate due to its resistance to moisture damage, while vinyl siding, with its lower cost, might be suitable in a dry, desert climate.
    • Budget: Insulated siding options vary significantly in price. Vinyl siding is generally the most affordable, while fiber cement and engineered wood siding represent higher initial investments. It’s crucial to balance cost with long-term energy savings and durability.
    • Home Style: The architectural style of your home should influence your siding choice. Certain materials complement specific styles better than others. For example, traditional homes might pair well with clapboard siding, while modern homes might look better with sleek, smooth-surface options.
    • Maintenance Requirements: Different siding materials require varying levels of maintenance. Vinyl siding is generally low-maintenance, while wood siding requires regular painting or staining to protect against rot and insect damage. Fiber cement requires less maintenance than wood but more than vinyl.

    Material Comparison and Climate Suitability

    Various materials offer unique properties impacting their suitability for different climates. Understanding these differences is key to making an informed decision.

    Material Climate Suitability Pros Cons
    Vinyl Mild to moderate climates; less suitable for extreme temperatures or high humidity. Affordable, low maintenance, variety of colors and styles. Can be easily damaged, less durable than other options, may fade in intense sunlight.
    Fiber Cement Most climates; durable and resistant to fire, insects, and moisture. Durable, low maintenance, fire-resistant, resists insects and rot. Higher initial cost, heavier than vinyl, requires professional installation.
    Engineered Wood Moderate climates; less suitable for extremely wet or dry conditions. Aesthetically pleasing, relatively durable, can be painted or stained. More susceptible to moisture damage than fiber cement, requires regular maintenance.

    Insulated Siding Selection Decision-Making Flowchart

    A structured approach simplifies the decision-making process. The following flowchart provides a step-by-step guide.

    Begin by assessing your budget and climate. If budget is limited and climate is mild, consider vinyl siding. If budget allows and climate is extreme, consider fiber cement. If aesthetic appeal is prioritized and climate is moderate, consider engineered wood. Finally, factor in maintenance requirements and home style before making a final decision.

    Case Studies and Real-World Examples

    Illustrating the tangible benefits of insulated siding requires looking beyond theoretical data. This section presents real-world examples showcasing the impact of insulated siding on homes, highlighting homeowner experiences and the visual transformations achieved. We’ll explore specific cases to demonstrate the practical advantages and long-term value this upgrade provides.

    Successful Insulated Siding Installations

    The following examples demonstrate the successful application of insulated siding across various home styles and climates. These cases highlight the versatility and effectiveness of this home improvement solution.

    Example 1: A Colonial-Style Home in New England. A 1920s Colonial home in Massachusetts, originally clad in aging clapboard, underwent a complete exterior renovation. The installation of insulated vinyl siding not only dramatically improved the home’s curb appeal—transforming its faded, weathered exterior into a crisp, clean white—but also significantly reduced energy consumption. Before the renovation, the homeowners reported high heating bills during winter. After installation, they experienced a 30% reduction in their annual heating costs. The new siding’s robust construction also provided better protection against harsh New England weather, reducing maintenance needs. The visual transformation involved replacing the aged, uneven clapboard with smooth, uniformly colored vinyl siding, enhancing the home’s architectural details. The before image showed a home with noticeable discoloration and damage, while the after image showcased a revitalized home with a clean, updated appearance.

    Example 2: A Ranch-Style Home in the Southwest. A ranch-style home in Arizona, initially faced with stucco showing signs of cracking and fading, benefited from the installation of insulated fiber cement siding. The light-colored siding reflected sunlight, significantly reducing the interior temperature and lowering cooling costs. The homeowners reported a 20% decrease in their annual cooling bills. Furthermore, the fiber cement siding proved highly resistant to the intense desert sun and high temperatures, maintaining its appearance and structural integrity for years without requiring significant maintenance. The before image displayed the cracked and faded stucco, highlighting its deteriorated condition. The after image showcased the smooth, uniformly colored fiber cement siding, which improved the home’s aesthetic appeal and provided a more modern look.

    Homeowner Testimonials

    Direct feedback from homeowners who have experienced the benefits of insulated siding provides compelling evidence of its effectiveness.

    “We were hesitant about the investment at first, but the energy savings from our new insulated siding have already paid for a significant portion of the installation cost. Beyond that, our home is so much more comfortable year-round,” said Mrs. Johnson, a homeowner from Maine who opted for insulated vinyl siding.

    “The upgrade was a game-changer for our home in Phoenix. The insulated siding kept the interior significantly cooler during the scorching summers, drastically reducing our energy bills and improving our comfort level,” stated Mr. Rodriguez, a homeowner in Arizona who chose insulated fiber cement siding.

    Before-and-After Visual Transformations

    The visual impact of insulated siding is often as striking as its functional benefits.

    Many homes, particularly older ones, exhibit signs of wear and tear, such as peeling paint, damaged siding, and uneven surfaces. The installation of insulated siding not only addresses these issues but also offers a chance to refresh the home’s exterior color and style. Before-and-after photos commonly reveal a dramatic transformation, showcasing the updated appearance of the home. For instance, a weathered wood-sided home might be transformed into a modern, sleek structure with a new color scheme, while a home with outdated vinyl siding can be updated with a more contemporary style and color. The improvement is often so dramatic that it can add significantly to the overall aesthetic appeal and curb appeal of the property. In many cases, the renewed appearance not only improves the home’s value but also enhances the neighborhood’s aesthetic.

    Summary

    Ultimately, the decision to install insulated siding represents a significant investment in your home’s future. By weighing the initial costs against the long-term energy savings, increased comfort, enhanced curb appeal, and improved home value, homeowners can confidently assess the return on investment. The enhanced energy efficiency, reduced noise levels, and improved comfort contribute to a more enjoyable and valuable living space, making insulated siding a worthwhile consideration for any homeowner seeking to upgrade their property.