Essential Wood Siding Maintenance Tips for Longevity: Protecting your home’s exterior is crucial for both its curb appeal and structural integrity. Wood siding, while beautiful, requires consistent care to withstand the elements and prevent costly repairs. This guide provides a comprehensive approach to maintaining your wood siding, extending its lifespan, and preserving its natural charm. We’ll explore everything from initial inspections and cleaning techniques to advanced repairs and preventative measures, ensuring your siding remains a source of pride for years to come.
Understanding the nuances of wood siding maintenance is key to preventing premature deterioration. This involves regular inspections to identify potential problems early, employing appropriate cleaning methods to remove dirt and grime, and using the correct sealants and paints to protect the wood from moisture and pests. By following a proactive maintenance schedule, you can significantly extend the life of your siding, saving money on costly replacements and preserving the beauty of your home.
Initial Inspection and Assessment
A thorough initial inspection is the cornerstone of effective wood siding maintenance. By systematically evaluating your siding’s condition, you can identify potential problems early, preventing minor issues from escalating into costly repairs. This proactive approach ensures the longevity and aesthetic appeal of your home’s exterior.
Regular inspections allow for timely intervention, minimizing the extent of damage and the associated repair costs. Early detection of issues like rot, insect infestation, or water damage can significantly extend the lifespan of your wood siding and save you money in the long run. A well-documented inspection provides a valuable baseline for future assessments, allowing you to track changes over time and make informed decisions about maintenance and repairs.
Systematic Inspection Approach
A systematic approach ensures a comprehensive evaluation of your wood siding. Begin by visually inspecting the siding from the ground, noting any obvious damage or discoloration. Then, use a ladder to examine areas that are difficult to see from the ground, paying close attention to corners, joints, and areas near the ground where moisture accumulation is common. Inspect each section methodically, moving from top to bottom and side to side to ensure no area is missed. Finally, examine the areas around windows and doors, where water penetration is most likely to occur.
Checklist of Common Issues
Before beginning your inspection, it is helpful to have a checklist of common issues to look for. This will help ensure a thorough and efficient inspection. This checklist should include:
- Rot and Decay: Look for soft, spongy areas, discoloration (often dark brown or black), or crumbling wood. This is often a sign of water damage or fungal growth.
- Insect Infestation: Check for signs of wood-boring insects, such as exit holes, sawdust, or frass (insect droppings). Termites and carpenter ants are common culprits.
- Water Damage: Look for stains, swelling, or blistering of the wood. Pay close attention to areas around windows, doors, and flashing.
- Cracks and Splits: Inspect for any cracks or splits in the siding boards. These can allow water penetration and compromise the structural integrity of the siding.
- Loose or Missing Siding: Check for any siding boards that are loose, detached, or missing entirely. This is often a sign of underlying structural problems or weathering.
- Paint or Stain Degradation: Examine the paint or stain for peeling, blistering, cracking, or fading. This indicates a need for repainting or restaining.
- Caulk Failure: Inspect caulking around windows, doors, and other areas where siding meets other building materials. Look for cracks, gaps, or missing caulk.
Importance of Documentation
Documenting your findings is crucial for effective maintenance planning and future reference. Photographs provide visual evidence of the condition of your siding at the time of inspection. These images are invaluable for tracking progress, demonstrating the extent of any damage, and providing a record for insurance claims if necessary. A written report summarizing your findings, including specific locations and descriptions of damage, provides a comprehensive record of the siding’s condition. This report can be used to create a prioritized maintenance plan and track repairs over time. Consider using a spreadsheet or a simple numbered list to note the location and severity of each issue. For example, “South-facing wall, section 3, moderate rot near window frame” provides clear and concise information.
Cleaning Wood Siding
Maintaining the cleanliness of your wood siding is crucial for preserving its beauty and extending its lifespan. Regular cleaning removes dirt, mildew, and other debris that can damage the wood and diminish its aesthetic appeal. Choosing the right cleaning method and solution is essential to avoid harming the siding or the surrounding environment.
Methods for Cleaning Wood Siding
Effective cleaning of wood siding involves a choice between power washing and manual cleaning, each with its own advantages and disadvantages. Power washing offers a faster and more thorough cleaning for larger areas, effectively removing ingrained dirt and mildew. However, it carries the risk of damaging the wood if the pressure is too high or if the nozzle is held too close to the surface. Manual cleaning, using brushes, sponges, and cleaning solutions, provides more control and minimizes the risk of damage, making it ideal for delicate siding or intricate detailing. However, it is more time-consuming and may not be as effective in removing stubborn stains.
Effectiveness and Safety of Cleaning Solutions
A variety of cleaning solutions can be used for wood siding, each with varying degrees of effectiveness and safety. Mild detergent solutions mixed with water are generally safe and effective for removing surface dirt and grime. For mildew and algae removal, a solution of bleach and water (typically a 1:10 ratio of bleach to water) can be effective, but should be used cautiously and rinsed thoroughly to prevent damage to the wood. Commercial wood cleaners are also available, and their specific instructions should be carefully followed. It’s crucial to always test any cleaning solution on a small, inconspicuous area first to check for adverse reactions. Strong chemicals or abrasive cleaners should be avoided as they can damage the wood’s finish and surface.
Protecting Surrounding Landscaping
Protecting your landscaping during the cleaning process is vital to prevent damage from cleaning solutions or high-pressure water. Before beginning, cover delicate plants and shrubs with tarps or plastic sheeting to prevent them from being sprayed with cleaning solutions or damaged by water pressure. If using a power washer, maintain a safe distance from plants and adjust the pressure accordingly to avoid damage. Carefully direct the water away from flowerbeds and other sensitive areas. Consider using a nozzle with a wider spray pattern to reduce the intensity of the water stream. After cleaning, thoroughly rinse the siding to remove all traces of cleaning solution and prevent any lingering residue from harming plants.
Caulk and Sealant Application
Proper caulking and sealing are crucial steps in maintaining the longevity and integrity of your wood siding. These materials prevent water intrusion, a major cause of wood rot and damage. By addressing gaps and cracks effectively, you significantly extend the lifespan of your siding and maintain its aesthetic appeal.
Identifying Areas Requiring Caulking or Sealant
Inspecting your wood siding for areas needing caulking or sealant involves a thorough visual examination. Look for gaps around windows, doors, and other openings where the siding meets trim or other building components. Pay close attention to areas where siding boards butt together, checking for cracks or gaps. Also, examine the areas around any penetrations in the siding, such as vents or pipes. Any visible cracks, gaps, or spaces larger than 1/8 inch generally require caulking or sealant. Remember to check corners and edges of the siding, as these are particularly vulnerable to water penetration. A helpful tool for this inspection is a putty knife; using it to gently probe suspected areas can reveal hidden gaps.
Selecting the Appropriate Caulk or Sealant
Choosing the right caulk or sealant depends on several factors. Exterior-grade acrylic latex caulk is a popular and versatile option for many applications, offering good adhesion and flexibility. Silicone caulk provides superior water resistance and is ideal for areas constantly exposed to moisture, such as around windows and doors. However, silicone caulk can be more challenging to apply and may not adhere as well to certain surfaces. For larger gaps or cracks, a polyurethane sealant may be necessary, providing excellent filling capacity and durability. Always check the manufacturer’s specifications to ensure the product is suitable for exterior use and compatible with your type of wood siding. Consider the color of the caulk or sealant to ensure it blends seamlessly with your siding.
Proper Application Techniques for a Long-Lasting Seal
Before applying any caulk or sealant, ensure the surface is clean, dry, and free of loose debris. Use a putty knife or similar tool to remove any old, cracked, or loose caulk. For best results, apply the caulk or sealant in a continuous bead, using a caulking gun. The bead should be slightly larger than the gap to be filled, allowing for shrinkage as the material cures. Smooth the bead using a wet finger or a caulking tool, creating a neat and even finish. Avoid creating a large, bulging bead; this can lead to cracking and premature failure. Allow the caulk or sealant to cure completely according to the manufacturer’s instructions before painting or otherwise finishing the area. Regularly inspect the caulking and sealant, and reapply as needed to maintain a continuous protective barrier. This prevents water penetration and helps to extend the life of your wood siding.
Repairing Damaged Wood Siding
Regular maintenance is crucial for extending the lifespan of your wood siding, but even with diligent care, damage can occur. Understanding how to repair this damage effectively will prevent further deterioration and maintain the aesthetic appeal of your home. This section details techniques for addressing common issues, from minor cracks to significant rot.
Repairing Minor Damage
Minor damage, such as small cracks, splits, or loose boards, can often be repaired without complete replacement. Prompt attention to these issues prevents them from worsening and leading to more extensive repairs. The key is to stabilize the damaged area and prevent moisture penetration.
For small cracks, a high-quality wood filler designed for exterior use is the ideal solution. Apply the filler, ensuring it’s pressed firmly into the crack and slightly beyond its edges for a seamless finish. Once dry, sand smooth and paint or stain to match the surrounding area. For loose boards, carefully check the underlying fastening. If the nails or screws are loose, simply retighten them. If the wood is damaged near the fastener, you may need to add new fasteners, ensuring they penetrate solid wood. For small splits, carefully clean the split, apply exterior-grade wood glue, and clamp the pieces together until the glue sets. Then, fill any remaining gaps with wood filler and finish as described above.
Replacing Damaged or Rotten Wood Siding Sections
More extensive damage, such as rot or significant structural compromise, requires replacing the affected section. This process involves removing the damaged piece and installing a new one that matches the existing siding. Accurate measurements are essential to ensure a proper fit. Using a pry bar, carefully remove the damaged section, taking care not to damage surrounding boards. Then, cut a replacement piece to the exact dimensions, ensuring it’s made from the same type of wood and treated for exterior use. Install the new piece, securing it with appropriate nails or screws. Finally, fill any gaps with wood filler and finish with paint or stain to match the existing siding. Remember to always wear appropriate safety gear, including gloves and eye protection, during this process.
Choosing Appropriate Wood Fillers and Matching Paint/Stain
The selection of appropriate wood fillers and matching paint or stain is crucial for a successful repair. Using the wrong materials can compromise the longevity of the repair and detract from the overall appearance. Exterior-grade wood fillers are specifically formulated to withstand weathering and moisture, ensuring the repair remains intact. When selecting a filler, choose one that closely matches the color and texture of your existing siding. Similarly, paint or stain should be chosen to provide a seamless blend with the surrounding area. Consider using a high-quality, exterior-grade paint or stain designed for wood siding. This will offer superior protection against the elements and enhance the durability of the repair. For best results, always test the paint or stain in an inconspicuous area first to ensure a proper color match.
Painting and Staining Wood Siding
Protecting your wood siding with a fresh coat of paint or stain is crucial for maintaining its beauty and extending its lifespan. Regular painting or staining not only enhances the aesthetic appeal but also provides a vital protective barrier against the elements, preventing damage from sun, rain, and pests. Choosing the right product and applying it correctly are key to achieving long-lasting results.
Proper preparation is paramount to ensuring a successful and long-lasting paint or stain job. Neglecting this step can lead to peeling, chipping, and premature failure of the finish. Thorough cleaning and surface preparation will allow the paint or stain to adhere properly, maximizing its protective qualities and enhancing the overall appearance.
Surface Preparation for Painting or Staining
Before applying any paint or stain, the wood siding must be meticulously cleaned to remove dirt, mildew, and loose paint. Power washing is often recommended, but care should be taken to avoid damaging the wood. A lower pressure setting and a wide-angle nozzle are ideal. After washing, allow the siding to dry completely. Any damaged or rotten wood should be repaired or replaced before proceeding. Finally, lightly sand the surface to create a smooth, even texture for better paint or stain adhesion. This ensures a uniform finish and prevents uneven absorption.
Paint and Stain Types for Exterior Wood Siding
Several types of paint and stain are suitable for exterior wood siding, each with its own advantages and disadvantages. Oil-based paints offer excellent durability and water resistance, but they have a strong odor and require longer drying times. Latex paints are low-odor, water-based, and dry quickly, making them a popular choice. However, they may not be as durable as oil-based paints in harsh climates. Solid stains provide complete color coverage, similar to paint, while semi-transparent stains allow the wood grain to show through. Semi-transparent stains offer a balance between protection and the natural beauty of the wood. The choice ultimately depends on personal preference, budget, and the specific needs of the siding. For example, a high-traffic area might benefit from a more durable oil-based paint, while a more rustic look might be achieved with a semi-transparent stain.
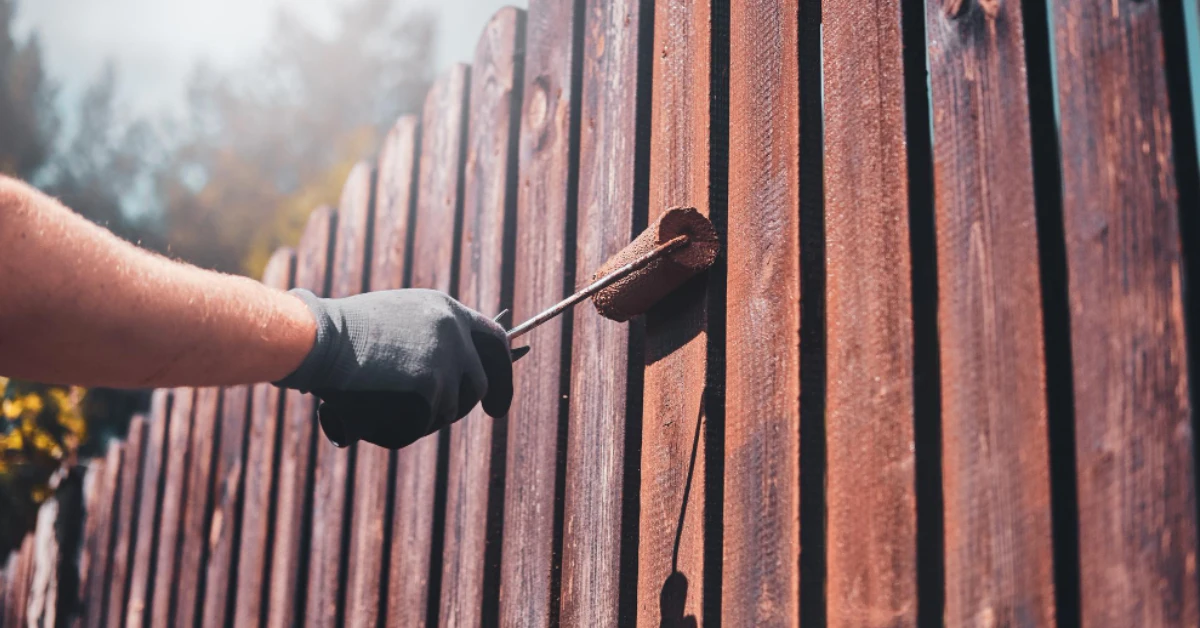
Applying Paint or Stain
Applying paint or stain evenly and efficiently requires careful planning and technique. Begin by applying a thin, even coat using a high-quality brush, roller, or sprayer. Work in small sections to avoid lap marks and ensure complete coverage. Allow adequate drying time between coats, as specified by the manufacturer’s instructions. Typically, two coats are recommended for optimal protection and color saturation. For stain applications, applying a second coat might enhance the color and deepen the wood tone. Remember to protect surrounding areas, such as windows and landscaping, using drop cloths or masking tape. A well-ventilated area is recommended when working with oil-based products. For large areas, a sprayer can significantly speed up the process, but it requires practice to avoid runs and drips. Proper technique and attention to detail will result in a professional-looking finish that enhances the curb appeal of your home and protects your investment.
Protecting Wood Siding from Pests and Insects
Protecting your wood siding from pests and insects is crucial for maintaining its structural integrity and aesthetic appeal. Untreated infestations can lead to significant damage, requiring costly repairs or even complete siding replacement. Regular inspection and proactive measures are key to preventing infestations and minimizing the impact of any existing problems.
Common Wood Siding Pests and Insects
Several pests and insects pose a threat to wood siding. Termites, carpenter ants, and wood-boring beetles are among the most destructive. Termites, known for their subterranean colonies, can silently tunnel through wood structures, causing extensive internal damage often unseen until significant weakening occurs. Carpenter ants, while not directly consuming wood like termites, excavate nests within the wood, creating channels and weakening the structure. Various wood-boring beetles, such as powderpost beetles and old house borers, bore into the wood, leaving behind characteristic exit holes and frass (wood dust). Other insects, such as wood wasps, can also weaken the wood, though generally less severely than the previously mentioned pests.
Preventative Measures Against Pests and Insects
Prevention is the most cost-effective approach to managing wood-siding pests. Maintaining good ventilation around the house helps reduce moisture buildup, a key attractant for many insects. Properly grading the soil away from the foundation prevents ground moisture from reaching the siding. Regular inspections, ideally twice a year, allow for early detection of infestations. Using treated lumber during construction significantly reduces the risk of infestation, although even treated lumber is not completely immune. Additionally, keeping woodpiles and other debris away from the house eliminates potential breeding grounds and access points for insects.
Treating Existing Infestations
Treatment for existing infestations depends on the type and severity of the infestation. For termite infestations, professional termite control is generally necessary. These professionals typically use a combination of methods, including targeted insecticide treatments and baiting systems, to eliminate the colony and prevent future infestations. For carpenter ants, locating and treating the nest is crucial. This may involve removing sections of siding or other structural elements to access the nest and apply insecticides. For wood-boring beetles, treating the affected wood with borate-based insecticides can be effective, often applied through injection or surface treatment. In severe cases, replacement of heavily infested sections of siding may be required. It’s important to consult with a pest control professional for accurate identification and appropriate treatment strategies.
Preventing Moisture Damage
Maintaining dry wood siding is crucial for its longevity. Excess moisture leads to rot, warping, and the growth of mold and mildew, significantly reducing the lifespan of your siding and diminishing its aesthetic appeal. Proper ventilation and effective drainage systems are essential components of a comprehensive maintenance plan.
Proper ventilation is key to preventing moisture buildup within the wall system. Moisture that penetrates the outer layer of siding needs a pathway to escape to avoid saturating the wood. This is achieved through adequate air circulation within the wall cavity, allowing moisture to evaporate naturally. Insufficient ventilation traps moisture, creating an environment ripe for decay.
Ventilation Strategies
Effective ventilation requires a balanced approach. Consider the type of siding installed; some designs naturally promote better air flow than others. Properly spaced sheathing, appropriate soffit and fascia vents, and adequate ridge vents are essential. The installation of continuous ventilation systems, running the entire length of the wall cavity, can be particularly effective. A qualified contractor can assess your home’s ventilation system and identify any deficiencies that need addressing. Remember, good airflow helps regulate temperature and humidity levels within the wall cavity, further reducing the risk of moisture-related damage.
Addressing Gutter and Drainage Problems
Gutter systems and proper drainage are critical for diverting water away from the foundation and siding. Clogged gutters allow water to overflow, running down the siding and causing saturation. Regular cleaning of gutters and downspouts, at least twice a year, is essential. Ensure downspouts extend sufficiently away from the foundation (at least 5-10 feet) to prevent water from pooling near the house. Proper grading around the foundation also helps direct water away from the house. Consider installing splash blocks at the end of downspouts to further protect the siding. Repairing any leaks or damage to gutters and downspouts is crucial to prevent water damage. Ignoring these issues can lead to significant and costly repairs down the line, including replacing damaged siding sections.
The Impact of Moisture on Wood Siding Longevity
The impact of moisture on wood siding’s lifespan is substantial. Prolonged exposure to moisture weakens the wood fibers, making the siding susceptible to rot, decay, and insect infestation. This can lead to structural damage, requiring costly repairs or even complete siding replacement. Wood absorbs moisture, expanding and contracting with changes in humidity. This cyclical process creates stress on the wood, eventually leading to cracking, warping, and deterioration. Furthermore, moisture provides an ideal breeding ground for mold and mildew, which not only compromise the siding’s integrity but also pose health risks to the occupants. Therefore, implementing effective moisture prevention strategies is paramount for preserving the beauty and longevity of your wood siding.
Regular Maintenance Schedule
Developing a regular maintenance schedule is crucial for preserving the beauty and longevity of your wood siding. A proactive approach will minimize the need for extensive repairs in the future and help maintain the overall curb appeal of your home. This schedule provides a guideline; adjustments may be needed depending on your climate and the specific type of wood used.
Sample Wood Siding Maintenance Schedule
A well-structured maintenance plan helps prevent significant damage and extends the lifespan of your wood siding. This table outlines a suggested schedule, but remember to adapt it based on your local climate and the condition of your siding. Regular inspections are key to catching small problems before they become major issues.
| Task | Frequency | Notes |
|---|---|---|
| Initial Inspection & Assessment | Annually (Spring) | Check for loose siding, cracks, insect damage, and signs of moisture. Photograph any significant issues for future reference. |
| Cleaning | Annually (Spring or Fall) | Use a gentle cleaner and soft brush to remove dirt, mildew, and cobwebs. Avoid high-pressure washers which can damage the wood. |
| Caulk and Sealant Application | Every 2-3 years | Inspect and reapply caulk around windows, doors, and other areas where gaps might allow moisture intrusion. Choose a high-quality, paintable sealant. |
| Repairing Damaged Siding | As needed | Address any damaged boards promptly. Replace rotted or severely damaged sections; minor repairs can often be made with wood filler and paint. |
| Painting or Staining | Every 3-5 years (depending on paint/stain type and climate) | Regular painting or staining protects the wood from the elements and enhances its appearance. Choose a high-quality exterior paint or stain designed for wood siding. |
| Pest and Insect Inspection | Twice yearly (Spring & Fall) | Check for signs of infestation, such as insect holes, sawdust, or unusual activity. Address any infestations promptly with appropriate treatment. |
| Moisture Damage Prevention | Ongoing | Ensure proper ventilation around the house, trim overhanging branches, and address any drainage issues promptly. Regularly inspect for signs of moisture. |
Understanding Wood Types and Their Maintenance Needs
Choosing the right type of wood for your siding significantly impacts its lifespan and the maintenance it requires. Different wood species possess varying levels of natural resistance to decay, insects, and weathering, influencing the frequency and intensity of necessary upkeep. Understanding these differences is crucial for making informed decisions and ensuring the longevity of your investment.
Different wood species exhibit varying degrees of natural durability and resistance to the elements. This inherent characteristic significantly influences the maintenance schedule and the type of treatments required to prolong the life of your wood siding.
Cedar Siding Maintenance
Cedar, particularly Western Red Cedar, is a popular choice for siding due to its natural beauty and inherent resistance to decay and insects. Its tight grain and high oil content contribute to its durability. However, even cedar benefits from regular cleaning to remove dirt and debris, preventing the buildup of mildew. Periodic application of a high-quality water-repellent sealant will further enhance its protection against moisture damage and extend its lifespan. While generally low-maintenance, neglecting cedar siding can lead to premature graying and potential rot in areas with prolonged moisture exposure. Regular inspection for any signs of damage, such as cracks or insect infestation, is recommended.
Redwood Siding Maintenance
Redwood, similar to cedar, boasts natural resistance to decay and insects. Its rich color and straight grain make it an attractive option for siding. Like cedar, redwood benefits from periodic cleaning and the application of a water-repellent sealant. However, redwood’s natural oils can eventually leach out over time, potentially reducing its resistance to the elements. Regular inspections for any signs of damage and timely repairs are essential to maintain its longevity and aesthetic appeal. The higher cost of redwood compared to other wood types should be weighed against its long-term durability and minimal maintenance requirements.
Pine Siding Maintenance
Pine, a more affordable option compared to cedar and redwood, is less naturally resistant to decay and insects. Its softer wood structure makes it more susceptible to damage from impacts and weathering. Therefore, pine siding requires more frequent maintenance, including more regular cleaning, sealant application, and potential repainting or staining. Preventive measures, such as prompt repairs of any damage and regular inspections for signs of insect infestation, are crucial for extending the life of pine siding. The higher maintenance demands of pine siding need to be considered when weighing the initial cost savings against the long-term maintenance expenses.
Identifying Signs of Serious Damage Requiring Professional Help
Regular maintenance is crucial for extending the lifespan of your wood siding, but some damage requires the expertise of a professional. Ignoring significant problems can lead to costly repairs down the line and compromise the structural integrity of your home. Knowing when to call in a professional is a key aspect of responsible homeownership.
Recognizing the signs of serious wood siding damage that necessitate professional intervention is essential for preventing further deterioration and ensuring the long-term health of your home’s exterior. Several indicators suggest the need for expert assessment and repair, ranging from visible structural issues to subtle signs of underlying problems.
Extensive Rot or Decay
Extensive rot or decay in the wood siding is a clear indication that professional help is needed. This type of damage often goes beyond superficial issues and compromises the structural integrity of the siding. The affected areas may feel soft and spongy to the touch, and may show significant discoloration or crumbling wood. Advanced decay can create voids in the siding, making it vulnerable to further damage from moisture and insects. A professional can assess the extent of the damage, determine the cause, and recommend appropriate repair or replacement strategies, potentially involving the removal and replacement of large sections of siding. For example, significant rot near a window frame might indicate water intrusion requiring not just siding repair, but also attention to flashing and caulking around the window.
Severe Insect Infestation
A severe infestation of wood-boring insects, such as termites or carpenter ants, requires immediate professional attention. These insects can cause extensive damage to the structural integrity of the wood siding, weakening it and making it susceptible to collapse. Signs of infestation might include visible insect activity (such as tunnels or sawdust), hollow-sounding areas when tapping on the siding, and the presence of mud tubes (common with termites). A professional pest control specialist can accurately identify the insects, assess the extent of the infestation, and implement effective treatment and preventative measures to protect your home. Failure to address a severe infestation can result in extensive and costly repairs.
Significant Structural Damage
Significant structural damage, such as cracks, warping, or bowing of the siding, often necessitates professional intervention. These issues can indicate underlying problems with the house’s framing or foundation, and attempting DIY repairs might mask the true cause of the damage. For example, large cracks running vertically along the siding boards could suggest foundation settlement, requiring a structural engineer’s assessment before any siding repairs are attempted. Similarly, extensive warping might indicate moisture problems within the wall assembly itself, necessitating a more comprehensive approach to remediation than simple siding replacement. A professional contractor can accurately diagnose the problem and recommend appropriate solutions.
Water Damage Beyond Superficial Issues
Water damage that extends beyond surface staining or minor discoloration warrants professional assessment. Persistent moisture penetration can lead to rot, mold growth, and structural weakening. Signs of extensive water damage include significant swelling of the wood, persistent dampness, or the presence of mold or mildew. A professional can determine the source of the water intrusion (leaky roof, faulty flashing, etc.) and recommend appropriate repair strategies to prevent further damage. Ignoring extensive water damage can lead to costly repairs and even compromise the safety and habitability of your home.
Summary
By implementing these Essential Wood Siding Maintenance Tips for Longevity, you can transform the upkeep of your home’s exterior from a daunting task into a manageable and rewarding process. Regular attention to detail, combined with the right techniques and materials, will ensure your wood siding remains a stunning and durable feature of your property for many years. Remember, proactive maintenance is far more cost-effective than reactive repairs, saving you both time and money in the long run. Invest in your home’s beauty and longevity – invest in proper wood siding care.
Leave a Reply