Best Siding Repair Services for Storm Damage Restoration: Navigating the aftermath of a storm and the subsequent damage to your home’s siding can be overwhelming. This guide provides a comprehensive resource for homeowners, offering expert advice on identifying reputable contractors, understanding the assessment process, choosing appropriate repair methods, and navigating insurance claims. We’ll explore various siding materials, cost estimations, and preventative measures to ensure your home’s exterior remains resilient against future storms.
From understanding the different types of storm damage to siding—wind damage, hail damage, and water damage—to selecting the right materials for repair, like vinyl, fiber cement, or wood, this guide will empower you to make informed decisions. We will also cover essential steps such as filing insurance claims, negotiating with adjusters, and ensuring your contract with a contractor protects your interests. By following the steps outlined here, you can effectively restore your home’s siding and protect your investment.
Identifying Reputable Siding Repair Companies
Choosing the right siding repair company after storm damage is crucial for ensuring the long-term integrity of your home and avoiding costly mistakes. A thorough vetting process is essential to protect your investment and peace of mind. This section will guide you through identifying reputable companies specializing in storm damage restoration.
Selecting a reputable siding repair company requires careful consideration of several key factors. Failing to do so can lead to subpar repairs, inflated costs, and potential legal issues. Therefore, a diligent approach is necessary to ensure you’re working with a qualified and trustworthy professional.
Criteria for Evaluating Reputation
A comprehensive evaluation of a siding repair company’s reputation should include several key criteria. These criteria provide a framework for assessing the company’s trustworthiness, expertise, and commitment to customer satisfaction. Consider these factors when making your selection:
- Licensing and Insurance: Verify that the company holds the necessary licenses and insurance coverage to operate legally and protect you from potential liabilities. Confirm the licenses are current and valid.
- Years of Experience: Look for companies with a proven track record in siding repair and storm damage restoration. Experience often translates to better workmanship and problem-solving capabilities.
- Customer Reviews and Testimonials: Thoroughly research online reviews on platforms like Google, Yelp, and the Better Business Bureau. Pay attention to both positive and negative feedback to gain a balanced perspective.
- Warranty and Guarantees: Reputable companies typically offer warranties on their work, demonstrating confidence in the quality of their services and their commitment to customer satisfaction.
- Professional Affiliations and Certifications: Check if the company is affiliated with any relevant professional organizations or holds industry certifications, indicating adherence to standards and best practices.
Red Flags to Watch Out For
Several warning signs can indicate a potentially unreliable siding repair company. Being aware of these red flags can help you avoid costly mistakes and potential scams.
- Unlicensed or Uninsured: Operating without proper licensing and insurance is a major red flag, suggesting a lack of accountability and potential legal risks.
- High-Pressure Sales Tactics: Legitimate companies will provide you with time to consider their proposals. Aggressive sales tactics often indicate a company more interested in profit than quality.
- Unclear or Vague Contracts: Contracts should clearly outline the scope of work, payment terms, and warranty information. Avoid companies that provide vague or incomplete contracts.
- Lack of Online Presence or Negative Reviews: A company with little to no online presence or a history of negative reviews should raise concerns about their reputation and trustworthiness.
- Unreasonable Pricing: While it’s important to compare prices, significantly lower quotes than competitors could be a sign of using inferior materials or cutting corners.
Comparison of Reputable Companies
The following table compares various aspects of hypothetical reputable siding repair companies. Remember to conduct your own research to find companies in your area.
| Company Name | Licensing & Insurance | Years of Experience | Online Reviews (Average Rating) |
|---|---|---|---|
| ABC Siding Solutions | Fully Licensed and Insured | 20+ years | 4.8 stars |
| XYZ Restoration | Licensed and Insured, A+ BBB rating | 15 years | 4.6 stars |
| 123 Storm Repair | Fully Licensed and Insured, Multiple Certifications | 10 years | 4.5 stars |
Understanding Storm Damage Assessment
Accurately assessing storm damage to your siding is crucial for effective repairs and insurance claims. A thorough assessment identifies the extent of the damage, allowing for a precise repair plan and cost estimate. This process involves a careful examination of your home’s exterior, noting all affected areas and the type of damage sustained.
Understanding the different types of storm damage and their impact on your siding is vital for effective communication with repair professionals. A comprehensive assessment ensures you receive the appropriate repairs and protects your investment in your home.
Types of Storm Damage to Siding
Storms can inflict various types of damage on your siding, each requiring a specific approach to repair. Wind damage often manifests as loosened or detached siding panels, broken or cracked pieces, and damage to underlying sheathing. Hail damage typically results in dents, cracks, and punctures, especially on vinyl or aluminum siding. Water damage, often a consequence of wind-driven rain or roof leaks, can lead to rot, warping, and discoloration of the siding material. The severity of the damage will vary depending on the intensity of the storm and the type of siding material. For example, a strong wind might rip off sections of older, less secure siding, while hail might leave numerous small dents on a more resilient material. Water damage might be more pronounced in areas with compromised flashing or poor drainage around the foundation.
Questions to Ask a Siding Repair Company During a Damage Assessment
Before engaging a siding repair company, it is essential to clarify their assessment process and obtain comprehensive information. The following points represent critical areas of inquiry to ensure a transparent and effective assessment.
- What is your process for assessing storm damage to siding?
- What types of siding damage are you experienced in repairing?
- Will you provide a detailed written report outlining the identified damage and recommended repairs?
- Will the assessment include an inspection of the underlying structure for any secondary damage?
- What is your approach to determining the cause of the damage (e.g., wind, hail, water)?
- Will you provide photographic documentation of the damage during the assessment?
- How will you handle communication throughout the assessment and repair process?
- What is your experience with working with insurance companies on storm damage claims?
- Can you provide references from previous clients who have experienced similar storm damage?
- What is your estimated timeframe for completing the assessment and providing a quote for repairs?
Repair Methods and Materials
Choosing the right repair methods and materials is crucial for restoring your home’s siding after storm damage. The selection process depends on the extent of the damage, the type of siding, and your budget. A thorough assessment by a qualified contractor is essential to ensure long-lasting and aesthetically pleasing results.
Siding Repair Methods for Various Storm Damages
Different types of storm damage require specific repair techniques. For instance, minor dents or scratches on vinyl siding can often be repaired with simple patching and caulking. More extensive damage, such as cracks or holes, might necessitate replacing individual panels or sections. With wood siding, rotted areas need to be carefully cut out and replaced with matching wood, ensuring proper sealing to prevent further water damage. Fiber cement siding, known for its durability, may require more extensive repairs involving specialized patching compounds and possibly the replacement of larger sections if severely damaged. In cases of significant damage affecting multiple panels, complete siding replacement might be the most cost-effective solution.
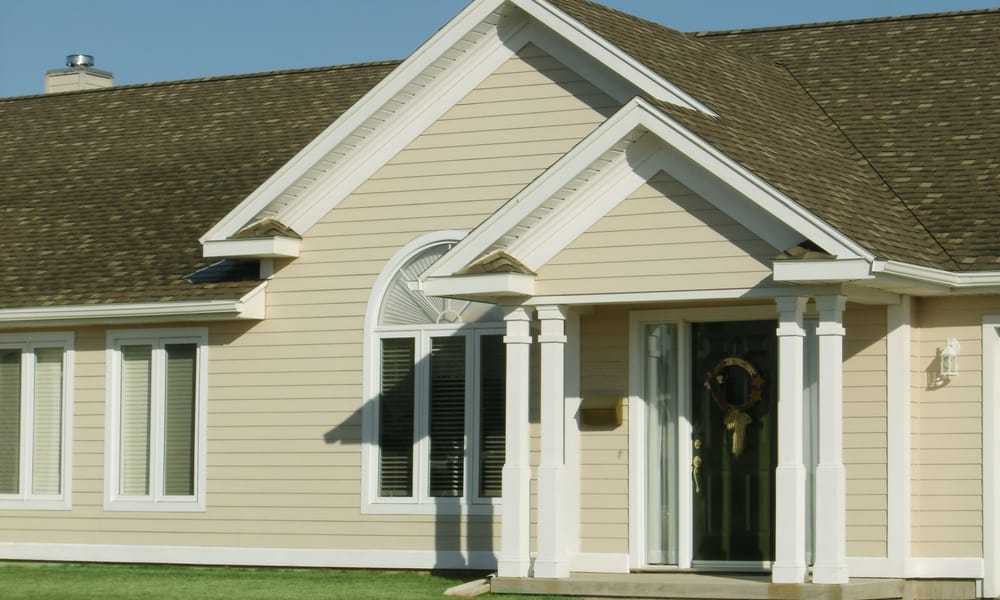
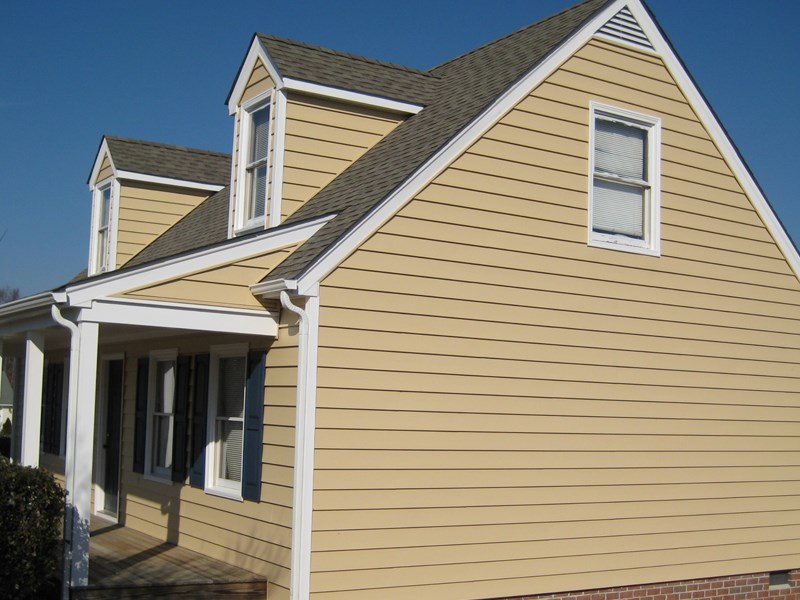
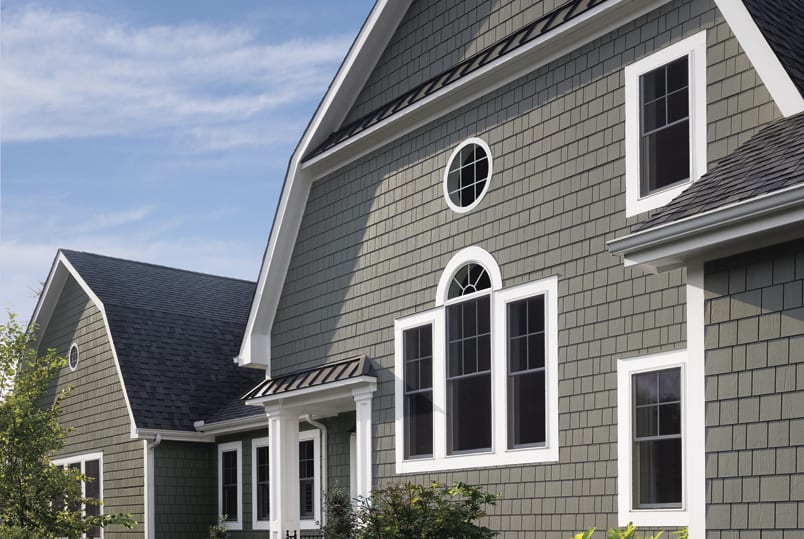
Advantages and Disadvantages of Different Siding Materials
The choice of siding material significantly impacts the longevity, maintenance requirements, and overall cost of your repair. Vinyl siding, while affordable and easy to maintain, is less durable than other options and can be susceptible to damage from hail or strong winds. Fiber cement siding offers superior durability and fire resistance, but it’s more expensive and requires professional installation. Wood siding, while aesthetically pleasing, necessitates regular maintenance to prevent rot and insect infestation. Aluminum siding is durable and low-maintenance but can dent easily and may not be as aesthetically appealing as other options. Each material presents a unique balance between cost, durability, and aesthetic appeal, demanding careful consideration based on individual needs and preferences.
Comparison of Siding Materials
The following table compares common siding materials based on cost, durability, and aesthetic appeal. Note that prices are estimates and can vary significantly based on location, material quality, and labor costs.
| Siding Material | Cost (per square foot) | Durability | Aesthetic Appeal |
|---|---|---|---|
| Vinyl | $1-$5 | Moderate; susceptible to dents and fading | Wide variety of colors and styles; can mimic other materials |
| Fiber Cement | $3-$8 | High; resistant to fire, rot, and insects | Clean, modern look; available in various textures and colors |
| Wood | $4-$15+ | Moderate to high; requires regular maintenance | Classic and versatile; can be painted or stained |
| Aluminum | $2-$6 | High; resistant to rot and insects | Limited color options; often associated with a more utilitarian look |
Insurance Claims and Procedures
Navigating insurance claims after storm damage can feel overwhelming, but a methodical approach can significantly improve your chances of receiving fair compensation for siding repairs. Understanding the process and documenting everything thoroughly are crucial steps. This section outlines the steps involved in filing a claim and offers tips for successful negotiation with insurance adjusters.
Filing an insurance claim for storm-damaged siding requires careful attention to detail and prompt action. A well-documented claim increases the likelihood of a smooth and successful resolution.
Filing a Storm Damage Siding Claim: A Step-by-Step Guide
Promptly reporting the damage to your insurance company is the first crucial step. Afterward, gather comprehensive documentation, and cooperate fully with the adjuster’s investigation. Failure to follow these steps may delay or jeopardize your claim.
- Report the Damage: Contact your insurance company immediately after the storm to report the damage. Note the date and time of the storm, and the specific details of the damage to your siding. Obtain a claim number for reference in all future communications.
- Document the Damage: Thoroughly document the damage with photographs and videos. Capture wide shots showing the overall extent of the damage, as well as close-up shots of specific areas. Include images showing the damaged siding before any attempts at repair or cleanup. If possible, obtain estimates from multiple siding contractors before contacting the insurance company.
- File the Claim: Follow your insurance company’s instructions for filing a claim. This typically involves completing a claim form and providing supporting documentation, such as photos, videos, and contractor estimates. Keep copies of all submitted documents.
- Cooperate with the Adjuster: Schedule an appointment with the insurance adjuster to inspect the damage. Be present during the inspection and answer any questions honestly and thoroughly. Provide the adjuster with all relevant documentation, including photos, videos, and contractor estimates.
- Review the Claim Settlement: Carefully review the claim settlement offer from your insurance company. If you disagree with the amount offered, you have the right to negotiate or appeal the decision. Understand your policy’s coverage limits and deductibles.
Negotiating with Insurance Adjusters
Effective communication and preparation are key to successful negotiation with insurance adjusters. Understanding your policy and presenting a strong case based on factual evidence will significantly enhance your negotiating position. Remember to remain professional and courteous throughout the process.
- Know Your Policy: Thoroughly review your homeowner’s insurance policy to understand your coverage for storm damage. Pay close attention to deductibles, coverage limits, and any exclusions.
- Gather Supporting Documentation: Present the adjuster with comprehensive documentation, including photos, videos, contractor estimates, and receipts for any temporary repairs. The more evidence you provide, the stronger your case will be.
- Be Prepared to Negotiate: Insurance adjusters often start with a lower offer. Be prepared to negotiate for a fair settlement that covers the full cost of repairs. If necessary, consult with a public adjuster who specializes in helping homeowners negotiate with insurance companies.
- Maintain Professionalism: Even if you disagree with the adjuster’s assessment, maintain a professional and courteous demeanor. A respectful approach is more likely to lead to a positive outcome.
- Consider Legal Counsel: If you are unable to reach a fair settlement through negotiation, consider consulting with an attorney specializing in insurance claims. They can help you understand your rights and pursue legal action if necessary.
The Importance of Thorough Documentation
Comprehensive documentation is paramount in ensuring a successful insurance claim. This includes not only photographic evidence but also detailed records of all communications and transactions related to the claim. Lack of proper documentation can significantly weaken your claim.
“Meticulous documentation serves as your strongest defense against disputes with the insurance company.”
Detailed records of all communications with the insurance company, including emails, letters, and phone calls, are crucial. Retain copies of all submitted documents, including the claim form, supporting documentation, and the final settlement agreement. This detailed record ensures transparency and aids in resolving any discrepancies that may arise. Maintaining a well-organized record also protects your rights and facilitates efficient claim processing.
Cost Estimation and Budgeting
Accurately estimating the cost of siding repair after storm damage is crucial for effective budgeting and financial planning. Understanding the factors that influence the final price allows homeowners to prepare adequately and avoid unexpected expenses. This section will outline the key components of a realistic budget for siding repair.
A realistic budget considers various factors, including the extent of the damage, the type of siding, labor costs, and the cost of materials. Ignoring any of these elements can lead to significant underestimation and subsequent financial strain. It’s always advisable to obtain multiple quotes from reputable contractors to compare pricing and services.
Factors Influencing Siding Repair Costs
Several factors significantly impact the overall cost of siding repair. These factors should be carefully considered when creating a budget.
- Extent of Damage: The severity of the storm damage is the most significant factor. Minor repairs, such as replacing a few damaged panels, will be considerably less expensive than extensive repairs involving large areas or complete siding replacement. For example, repairing damage to a small section of vinyl siding might cost a few hundred dollars, while replacing all the siding on a large house could cost tens of thousands.
- Type of Siding: Different siding materials have varying costs. For instance, wood siding is generally more expensive than vinyl or fiber cement, reflecting differences in material cost and installation complexity. Replacing damaged wood siding might involve specialized carpentry skills, leading to higher labor costs.
- Labor Costs: Labor costs vary depending on the contractor’s experience, location, and the complexity of the repair. Highly skilled contractors with extensive experience in storm damage restoration might charge higher hourly rates. The time required to complete the repair also impacts the overall labor cost. A large repair project naturally demands more labor hours.
- Material Costs: The cost of siding materials fluctuates depending on the market and the specific type of siding chosen. High-quality, durable materials will naturally be more expensive than cheaper alternatives. It’s important to consider the long-term benefits of investing in high-quality materials that offer superior protection and longevity. For example, choosing impact-resistant vinyl siding might increase the initial cost but reduce the likelihood of future damage.
- Additional Costs: Contingency planning for unforeseen issues is essential. During the repair process, hidden damage or unexpected complications may arise, necessitating additional materials and labor. Including a buffer of 10-15% in the budget accounts for such possibilities. For example, discovering rotted wood beneath the siding necessitates additional work and material costs.
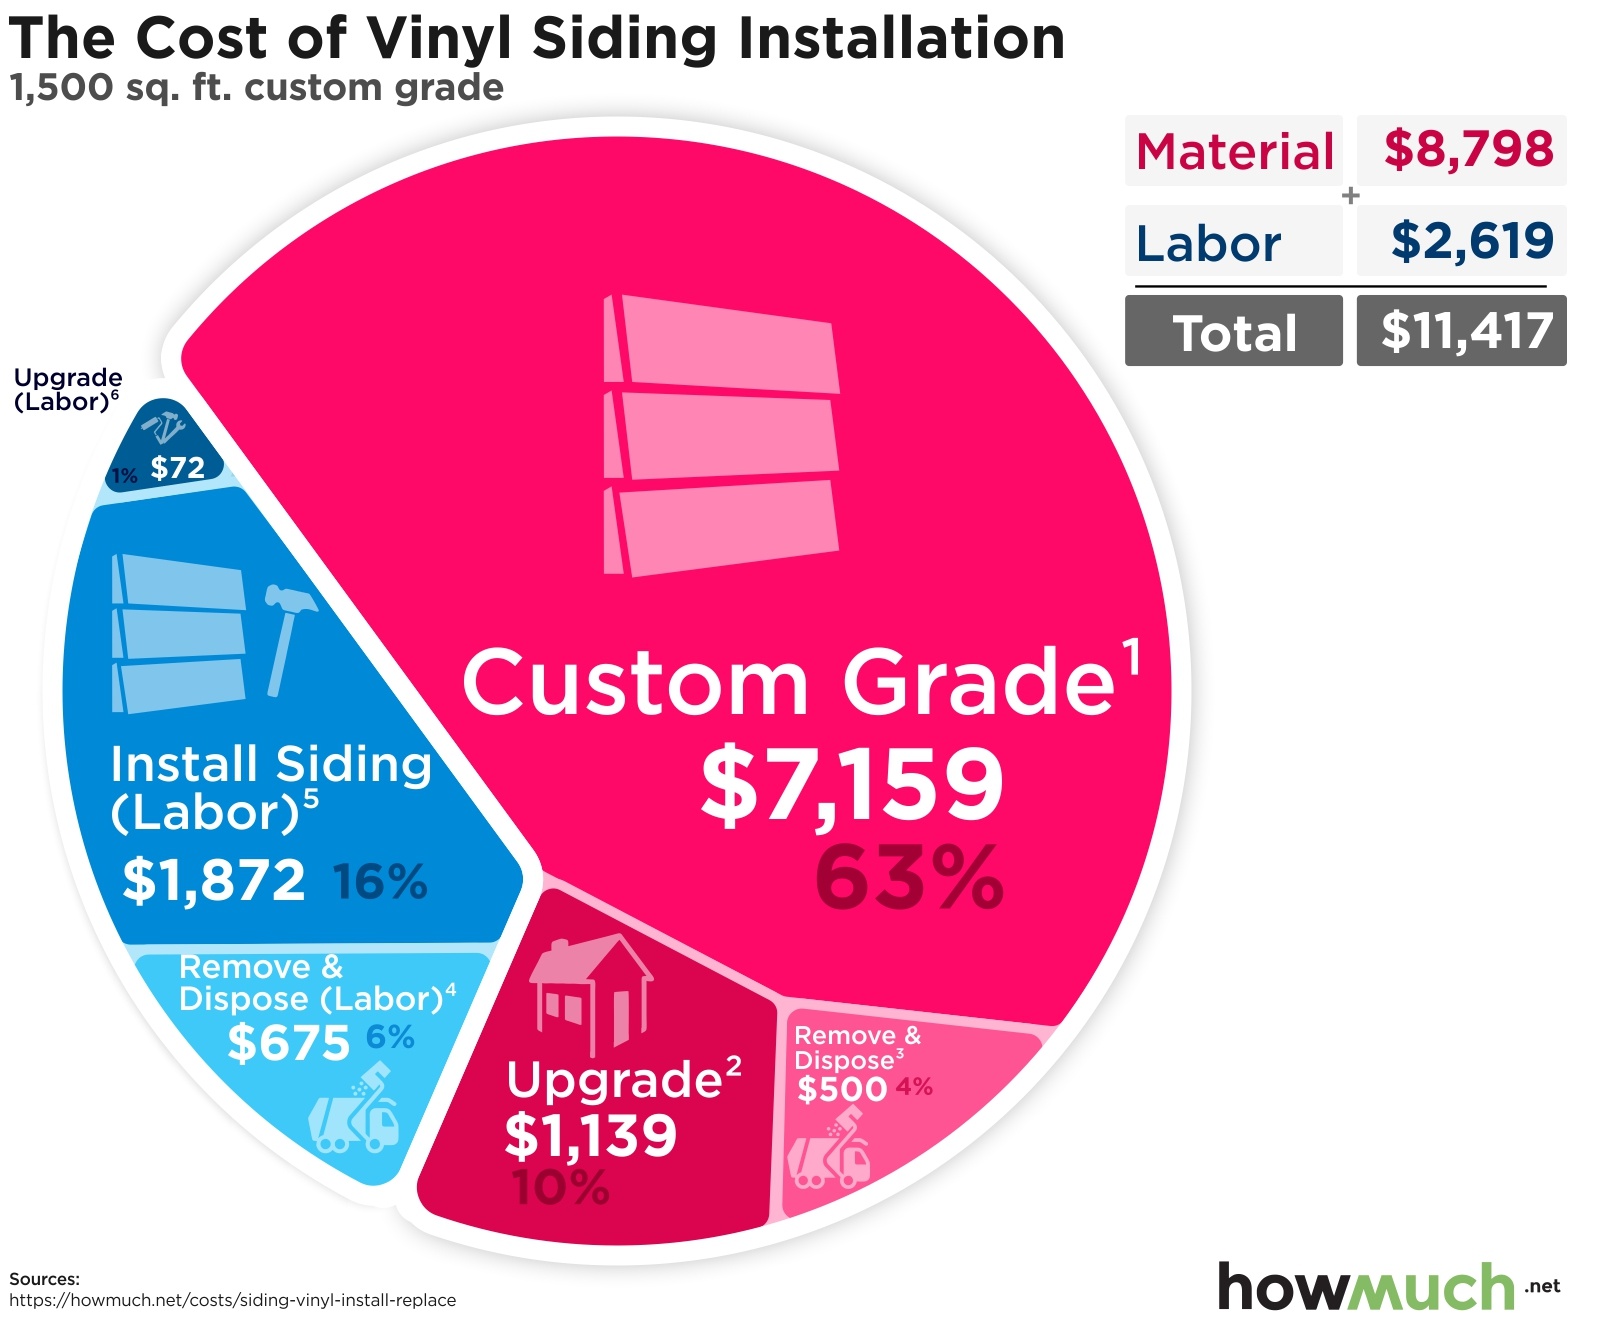
Sample Cost Breakdown
A clear cost breakdown helps in effective budgeting. This example demonstrates a potential cost structure for a medium-sized siding repair project. Note that these are estimates and actual costs can vary.
- Material Costs: $5,000 (This includes the cost of new siding, fasteners, and other necessary materials)
- Labor Costs: $4,000 (This is based on an estimated number of labor hours and the contractor’s hourly rate)
- Permitting and Inspection Fees: $500 (These fees vary depending on local regulations)
- Contingency (10%): $900 (This covers unforeseen issues or additional work)
- Total Estimated Cost: $10,400
Remember that this is just a sample estimate. Actual costs will vary depending on the specific circumstances of your repair project. It is crucial to obtain detailed quotes from multiple reputable contractors to ensure accurate cost estimation.
Contractor Selection and Contract Negotiation
Choosing the right contractor is crucial for a successful siding repair project after storm damage. A thorough selection process, coupled with careful contract review, protects your investment and ensures the work meets your expectations. This section details key considerations for selecting a qualified contractor and negotiating a fair and comprehensive contract.
Selecting a qualified and reliable siding repair contractor requires diligent research and due diligence. This involves more than simply checking online reviews; it requires a multi-faceted approach to ensure you’re working with a reputable and skilled professional.
Contractor Selection Criteria
Several key factors should guide your contractor selection. Consider their licensing, insurance, experience, and customer reviews. Verifying licensing ensures they operate legally and adhere to industry standards. Adequate insurance protects you from liability in case of accidents or damages during the project. Experience in handling storm damage specifically is beneficial, as it demonstrates familiarity with the unique challenges involved. Finally, thorough review of online and personal references can offer valuable insights into their work quality and customer service. A reputable contractor will readily provide references and licensing information upon request.
Contract Review and Essential Clauses
Thoroughly reviewing the contract before signing is paramount. It is a legally binding agreement, and understanding its terms prevents future disputes and ensures your protection. Don’t hesitate to seek legal counsel if needed, particularly if the contract includes complex or ambiguous language.
Essential Contract Clauses
A comprehensive siding repair contract should include several key clauses. These clauses protect your interests and ensure clarity throughout the project.
- Scope of Work: A detailed description of the repairs, including materials to be used and the extent of the work. This should include specifics like the type of siding, number of panels to be replaced, and any additional repairs such as fascia board or trim work.
- Payment Schedule: A clear outline of payment milestones tied to specific stages of completion. Avoid paying the full amount upfront; instead, stagger payments to coincide with progress. A common practice is a down payment followed by installments upon completion of key phases.
- Project Timeline: A realistic timeframe for completing the project, including start and end dates. Unexpected delays can happen, but a well-defined timeline provides a benchmark for monitoring progress.
- Warranty and Guarantees: Details on the warranty provided for both materials and workmanship. A reputable contractor will offer a warranty covering defects in materials and workmanship for a specified period, typically one to two years.
- Dispute Resolution: A method for resolving disputes that may arise during the project. This could involve mediation or arbitration as an alternative to costly litigation.
- Permitting and Inspections: Clarification of who is responsible for obtaining necessary permits and scheduling inspections. This ensures compliance with local building codes and regulations.
- Insurance and Licensing Information: Confirmation of the contractor’s insurance coverage and licensing details. This information should be readily available and verifiable.
The Repair Process
Repairing storm-damaged siding is a multi-stage process requiring coordination between various professionals. A successful repair ensures both structural integrity and aesthetic appeal, restoring your home’s value and curb appeal. The timeline and specific steps may vary depending on the extent of the damage and the chosen materials.
Initial Assessment and Damage Survey
A thorough assessment is the foundation of any successful siding repair. This involves a detailed inspection of the affected areas by a qualified professional, often a roofing or siding contractor, or a licensed insurance adjuster. They will identify the extent of the damage, noting broken or missing siding, underlying structural damage, and any potential water intrusion. Photographs and detailed notes are crucial for documenting the damage and supporting insurance claims. This initial survey helps determine the scope of work and the necessary materials.
Insurance Claim Submission and Review
Once the damage assessment is complete, the homeowner typically files a claim with their insurance provider. The claim should include detailed documentation from the initial survey, including photographs and a comprehensive description of the damage. The insurance company may send their own adjuster to verify the damage and assess the claim. This process can involve negotiations to determine the extent of coverage and the approved repair costs. It’s advisable to keep detailed records of all communication and documentation related to the insurance claim.
Material Selection and Procurement
Following insurance approval (if applicable), the homeowner and contractor select the necessary repair materials. This may involve choosing siding that matches the existing material, considering factors such as color, texture, and material type (vinyl, fiber cement, wood, etc.). The contractor will then order the necessary materials, ensuring sufficient quantities to complete the repair. Accurate material selection is vital for a seamless and aesthetically pleasing repair.
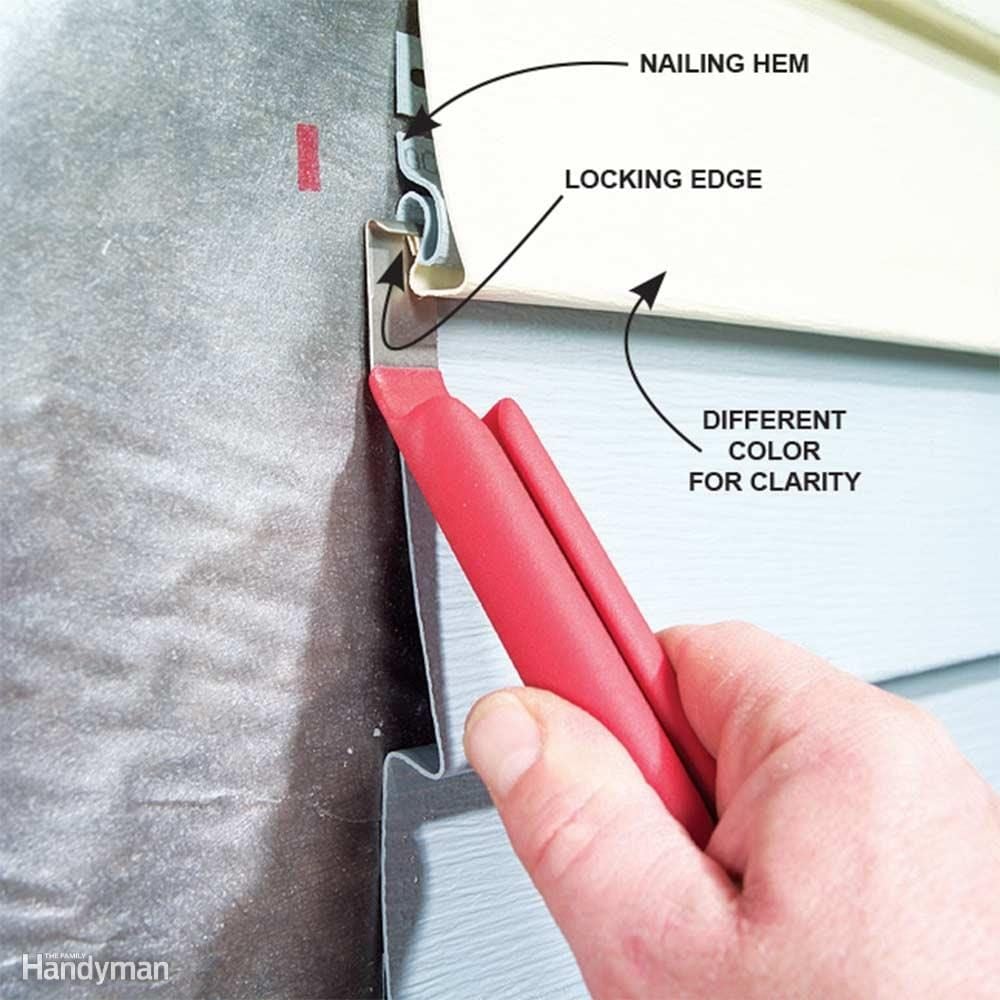
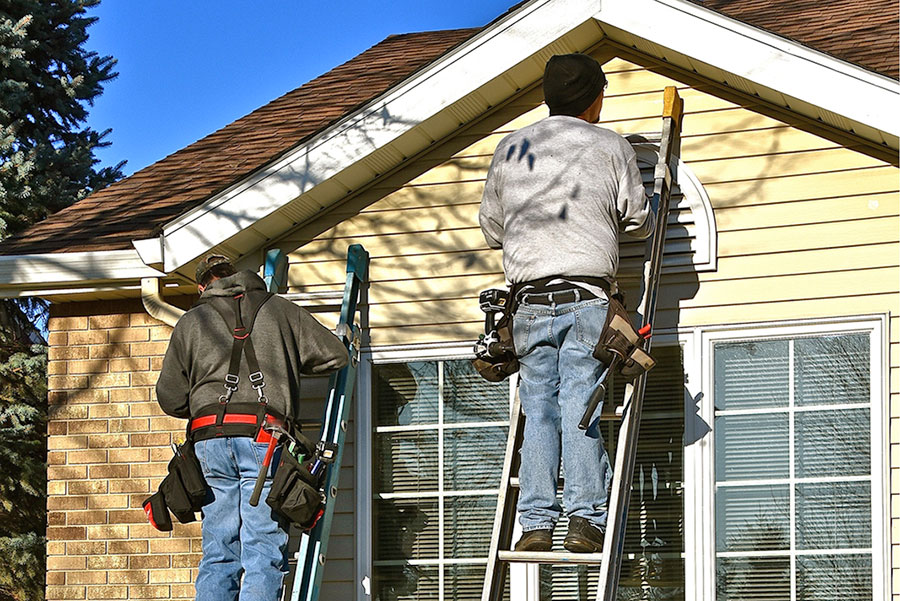
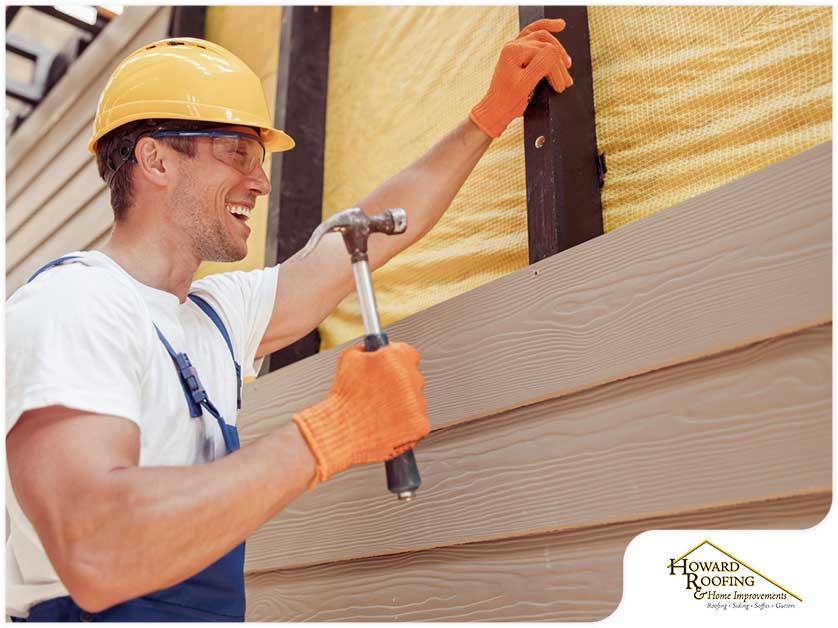
Siding Repair and Installation
This stage involves the actual repair or replacement of the damaged siding. Experienced contractors and their crews will carefully remove damaged sections, repair or replace underlying sheathing or framing as needed, and install new siding, ensuring proper alignment and fastening. This may involve specialized tools and techniques depending on the siding material. For instance, working with fiber cement requires different tools and safety precautions than working with vinyl siding. Quality workmanship is essential to prevent future problems.
Final Inspection and Cleanup
Upon completion of the siding repair, a final inspection is conducted to ensure that all repairs meet the required standards. This often involves checking for proper alignment, secure fastening, and the overall aesthetic quality of the repair. Any necessary adjustments are made before final approval. The final stage involves a thorough cleanup of the worksite, removing debris, and restoring the area to its pre-repair condition. A satisfied homeowner is the ultimate goal.
Roles of Professionals
Several professionals play key roles in the repair process. The homeowner is responsible for initiating the process, managing communication with insurance companies, and selecting the contractor. The insurance adjuster assesses the damage and determines insurance coverage. The general contractor manages the entire project, overseeing subcontractors and ensuring the work is completed to the required standards. Subcontractors, such as electricians or roofers, may be needed depending on the extent of the damage. Finally, a building inspector might be required to ensure compliance with building codes. Effective communication and coordination among these professionals are crucial for a successful outcome.
Warranty and Guarantees
Protecting your investment in siding repair after storm damage is crucial, and a significant part of that protection comes from understanding and securing appropriate warranties and guarantees. These assurances provide recourse should unforeseen issues arise with the materials or workmanship after the repairs are complete. A comprehensive warranty can safeguard you from unexpected costs and ensure the longevity of your repaired siding.
Warranties and guarantees offered by siding repair companies vary significantly in scope and duration. Understanding these differences is essential for making an informed decision. A thorough review of the warranty details before signing a contract is vital to protect your interests.
Types of Warranties
Several types of warranties are commonly offered, each covering different aspects of the repair work. These may include warranties on the materials used, the labor involved in the installation, or a combination of both. Some companies may offer extended warranties for an additional fee. It is important to understand the specifics of each warranty offered to make a well-informed choice.
Material Warranties
Material warranties cover defects in the siding materials themselves. For example, a manufacturer might offer a 20-year warranty against defects like cracking, fading, or rotting. These warranties typically specify the conditions under which the warranty is valid and what is covered. A reputable contractor will readily provide copies of these manufacturer warranties.
Workmanship Warranties
Workmanship warranties cover the quality of the installation performed by the contractor. These warranties typically cover issues resulting from improper installation, such as leaks, gaps, or premature failure of the siding due to the contractor’s errors. The duration of these warranties can vary considerably, ranging from one year to several years. Longer warranties generally indicate greater confidence in the contractor’s skills and the quality of their work.
Examples of Questions Regarding Warranties
Before committing to a contract, it is crucial to clarify several key aspects of the warranty. For instance, it is important to determine the specific length of the warranty for both materials and workmanship. It is also essential to understand what constitutes a valid claim under the warranty, what types of damage are covered, and what is the process for filing a claim. Understanding the limitations of the warranty is equally important. For example, some warranties may exclude damage caused by acts of nature (beyond the initial storm damage) or improper maintenance. Finally, inquire about the warranty transferability in case you sell your property. A clear and comprehensive understanding of the warranty details will help you make a confident decision.
Preventing Future Storm Damage
Protecting your home’s siding from future storm damage requires a proactive approach combining preventative measures and regular maintenance. By implementing these strategies, you can significantly reduce the risk of costly repairs and ensure the longevity of your home’s exterior. This section outlines key steps to safeguard your investment.
Taking preventative measures is crucial in minimizing the impact of future storms on your siding. Regular maintenance and inspections, coupled with thoughtful landscaping, contribute significantly to the resilience of your home’s exterior. These actions not only reduce the likelihood of damage but also extend the lifespan of your siding, saving you money in the long run.
Preventative Measures to Minimize Siding Damage
Several actions can significantly reduce the risk of storm damage to your siding. These preventative measures should be considered a crucial part of home maintenance, contributing to both the safety and aesthetic appeal of your property.
- Regularly inspect your siding for any signs of damage, such as cracks, loose pieces, or areas of deterioration. Address minor issues promptly to prevent them from escalating.
- Clean your siding regularly to remove dirt, debris, and algae buildup. This prevents the accumulation of moisture, which can weaken the siding and make it more susceptible to damage.
- Caulk and seal any gaps or cracks around windows, doors, and other openings in your siding. This prevents water from penetrating the exterior walls, leading to damage.
- Ensure your gutters and downspouts are clean and functioning properly to divert rainwater away from your foundation and siding. Clogged gutters can lead to water damage and potential structural issues.
- Consider installing storm shutters or impact-resistant windows to protect your siding from high winds and debris during severe weather events. This provides an added layer of protection, particularly in areas prone to hurricanes or strong storms.
Benefits of Regular Siding Maintenance and Inspection
Regular maintenance and inspection are not merely preventative measures; they are vital for extending the life of your siding and preserving your home’s value. Early detection of problems allows for timely repairs, preventing minor issues from becoming major, costly problems.
- Early detection of problems allows for less expensive repairs. Addressing minor issues promptly is significantly cheaper than dealing with extensive damage later.
- Regular maintenance prevents costly replacements. By catching and addressing small problems before they escalate, you avoid the need for complete siding replacement.
- Improved curb appeal and home value. Well-maintained siding enhances your home’s aesthetic value, increasing its market value should you decide to sell.
- Enhanced home protection. Proper maintenance ensures your siding provides adequate protection against the elements, maintaining the structural integrity of your home.
Importance of Proper Landscaping and Tree Trimming to Protect Siding
Landscaping and tree maintenance play a critical role in protecting your siding from storm damage. Overgrown trees and poorly planned landscaping can exacerbate the impact of strong winds and falling debris.
- Trim trees and shrubs regularly to keep them away from your home’s exterior. Overhanging branches can easily break off during storms, damaging your siding and windows.
- Remove dead or decaying trees that pose a risk of falling onto your home. These trees are particularly vulnerable during storms and can cause significant damage.
- Properly grade your landscaping to ensure water drains away from your foundation and siding. Poor drainage can lead to moisture buildup, weakening your siding and increasing the risk of damage.
- Consider installing windbreaks using strategically placed shrubs or trees to help deflect strong winds and reduce their impact on your siding. This is especially beneficial in exposed areas.
Dealing with Unreliable Contractors
Dealing with unreliable siding repair contractors can be a frustrating and costly experience. Homeowners need to be proactive in protecting themselves from unscrupulous individuals and companies. This section outlines strategies for handling issues, legal recourse options, and steps to take if a contractor fails to meet their obligations. Understanding your rights and responsibilities is crucial in navigating these challenging situations.
Unfortunately, not all contractors operate with integrity and professionalism. Some may provide substandard work, inflate prices, fail to obtain necessary permits, or even disappear after receiving payment. Recognizing the signs of an unreliable contractor early on can save you significant time, money, and stress. This includes thoroughly vetting potential contractors before signing a contract and carefully reviewing the terms of the agreement.
Legal Recourse for Unsatisfactory Work
Several legal avenues are available to homeowners who experience unsatisfactory work from siding repair contractors. These options vary depending on the specific circumstances, the severity of the problem, and the location. Generally, homeowners can pursue legal action based on breach of contract, negligence, or fraud. A breach of contract occurs when the contractor fails to fulfill the terms of the written agreement. Negligence claims arise when the contractor’s actions fall below the accepted standard of care for professionals in their field, resulting in damage or injury. Fraud claims are more complex and require proof of intentional misrepresentation or deception. In some cases, homeowners may be able to file a complaint with their state’s contractor licensing board or pursue mediation or arbitration as a less costly alternative to litigation. Seeking legal counsel is strongly recommended to determine the best course of action. For example, if a contractor uses substandard materials leading to premature siding failure, a breach of contract and potentially a negligence claim could be pursued. Similarly, if a contractor misrepresents their qualifications or experience, a fraud claim may be viable.
Steps to Take if a Contractor Fails to Deliver
Taking swift and decisive action is crucial when a contractor fails to deliver on their promises. Documenting every interaction and detail is paramount.
- Thoroughly document all communication: This includes emails, text messages, contracts, and any other written or recorded evidence of agreements, deadlines, and payments made. Keep copies of all receipts and invoices.
- Send a formal written notice: Clearly outline the contractor’s breaches of contract, specifying the unmet obligations and requesting immediate corrective action. Send this via certified mail with return receipt requested for proof of delivery.
- Attempt to resolve the issue amicably: Contact the contractor directly and attempt to negotiate a fair resolution. Consider offering a reasonable compromise, such as a partial refund or a revised timeline for completion.
- File a complaint with relevant authorities: If amicable resolution fails, file a complaint with your state’s contractor licensing board or the Better Business Bureau. This will help protect other consumers from the same contractor.
- Seek legal counsel: If all other avenues fail, consult with an attorney specializing in construction law. They can advise you on your legal options and represent your interests in court.
Last Word
Restoring your home’s siding after storm damage requires careful planning and execution. By following the steps outlined in this guide—from identifying reputable contractors and assessing the damage to navigating insurance claims and selecting appropriate repair methods—you can ensure a smooth and successful repair process. Remember, proactive measures, such as regular maintenance and preventative landscaping, can significantly reduce the risk of future storm damage. With the right information and preparation, you can protect your home and your peace of mind.