Emergency Siding Repair Services: What to Expect. Facing unexpected siding damage can be stressful, but understanding the process can alleviate anxiety. This guide navigates you through every step, from identifying the need for emergency repairs to ensuring a quality outcome. We’ll cover common causes of damage, finding qualified contractors, navigating insurance claims, and maintaining your siding to prevent future issues. Preparing for the unexpected is key, and this comprehensive overview will empower you to handle any siding emergency effectively.
From assessing the extent of the damage and choosing the right contractor to understanding repair methods and costs, we provide clear, concise information to guide you through each stage. We’ll explore various siding materials, their costs, and common repair techniques, ensuring you’re well-informed throughout the entire process. We also offer practical advice on dealing with insurance companies and preventing future damage.
Understanding Emergency Siding Repair Needs
Siding is a crucial element of your home’s exterior, protecting it from the elements and enhancing its curb appeal. However, unforeseen damage can occur, sometimes requiring immediate attention. Understanding the causes and urgency of siding damage is vital to ensuring timely repairs and preventing further, more costly problems. This section will explore common causes of emergency siding damage and explain why swift action is often necessary.
Damage to your home’s siding can stem from a variety of sources, many of which can escalate quickly into significant problems if left unaddressed. The severity of the damage and the potential for further deterioration will determine the urgency of the repair.
Common Causes of Emergency Siding Damage
Several factors can lead to urgent siding repair needs. Strong winds, for instance, can dislodge siding panels, leaving your home vulnerable to water intrusion and structural damage. Severe storms, including hail and high winds, often cause significant siding damage, requiring immediate attention to prevent further deterioration. Other causes include impacts from falling trees or debris, accidental damage during construction or home improvement projects, and even the gradual effects of age and weathering, which can weaken siding and lead to sudden failure.
Urgency Associated with Different Types of Siding Damage
The urgency of siding repair is directly related to the extent and type of damage. For example, a single, loose panel might not require immediate attention, but significant gaps or widespread damage, especially in areas exposed to the elements, demands prompt action to prevent water damage. Water damage can lead to mold growth, structural weakening, and costly repairs far exceeding the cost of timely siding repair. Similarly, severe cracks or holes in the siding, particularly if they expose underlying insulation or sheathing, should be addressed immediately to prevent further damage.
Examples of Situations Requiring Immediate Siding Repair
Several scenarios highlight the need for immediate siding repair. Imagine a severe storm causing significant damage, with multiple panels torn away, exposing the interior walls to the elements. This requires immediate action to prevent water damage and protect the home’s structure. Another example is a large hole in the siding caused by a fallen tree branch. This exposes the interior to the elements and needs prompt repair to prevent moisture infiltration and potential structural damage. Finally, extensive cracking or warping of the siding, particularly if accompanied by visible water damage or mold growth, signifies a serious problem that demands immediate professional attention to prevent further deterioration and significant financial losses.
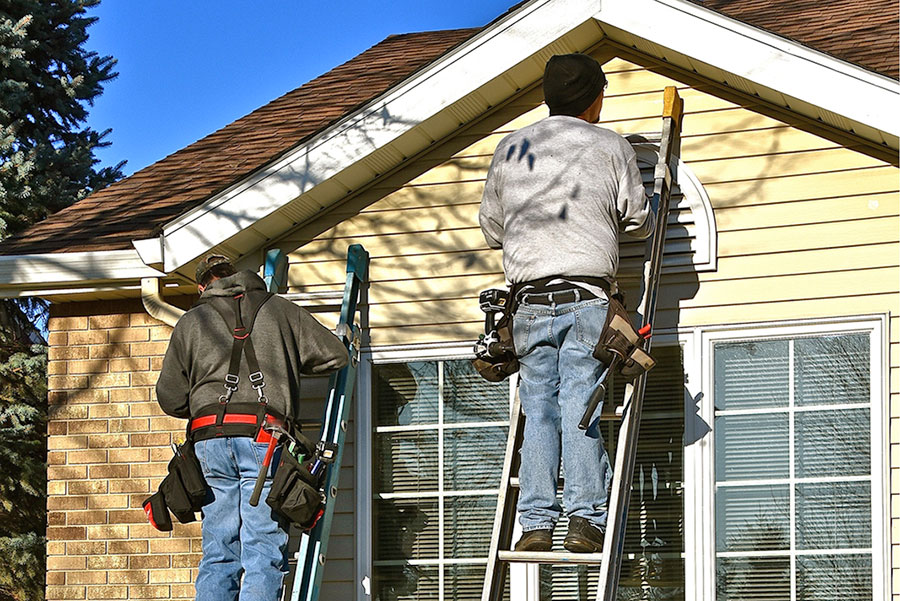
Finding and Choosing a Qualified Contractor
Choosing the right contractor for your emergency siding repair is crucial for a successful and lasting solution. A poorly chosen contractor can lead to further damage, costly repairs, and significant inconvenience. Taking the time to thoroughly vet potential contractors will save you from future headaches and ensure the best possible outcome for your property.
Selecting a qualified siding repair contractor involves careful consideration of several key factors. A systematic approach, using a checklist and understanding the importance of specific credentials, will help you make an informed decision.
Contractor Qualification Checklist
Before engaging any contractor, it’s essential to compile a comprehensive checklist to ensure their qualifications meet your needs and expectations. This checklist should be used to evaluate each potential contractor fairly and consistently.
- Years of Experience: Consider contractors with a proven track record of at least 5-10 years in siding repair and installation. More experience often translates to greater expertise and problem-solving capabilities.
- References and Testimonials: Request a list of recent clients and contact them to inquire about their experience with the contractor. Look for consistent positive feedback regarding quality of work, professionalism, and timeliness.
- Portfolio of Completed Projects: Review photos or videos of past projects to assess the contractor’s craftsmanship and attention to detail. Pay close attention to the quality of the finished product and the overall aesthetic appeal.
- Detailed Estimates: Obtain detailed written estimates from multiple contractors. Compare the scope of work, materials used, and the overall cost. Avoid contractors who provide vague or incomplete estimates.
- Warranty Information: Inquire about the warranty offered on both workmanship and materials. A comprehensive warranty demonstrates the contractor’s confidence in their work and provides you with recourse should issues arise.
Licensing, Insurance, and Certifications
Licensing, insurance, and certifications are critical indicators of a contractor’s legitimacy and professionalism. These measures protect both the contractor and the homeowner.
Licensing ensures the contractor has met minimum competency standards set by the relevant governing body. Insurance, particularly liability and workers’ compensation insurance, protects you from financial responsibility in case of accidents or damages during the repair process. Certifications from reputable organizations, such as those related to specific siding materials or installation techniques, demonstrate a commitment to ongoing professional development and adherence to industry best practices. Always verify the validity of licenses and insurance certificates.
Contractor Contract Types
Different types of contractor contracts exist, each with its own implications for payment schedules, liability, and dispute resolution. Understanding the differences is crucial for protecting your interests.
- Fixed-Price Contracts: These contracts specify a fixed price for the entire project. This offers certainty in budgeting but requires a detailed scope of work to avoid disputes if unforeseen issues arise.
- Time-and-Materials Contracts: These contracts charge based on the time spent and materials used. This offers flexibility for unforeseen repairs but can lead to higher-than-anticipated costs if the project takes longer than expected. Clear hourly rates and material pricing should be established upfront.
- Cost-Plus Contracts: Similar to time-and-materials contracts, but the contractor’s fee is a percentage of the total cost. This can incentivize cost control but requires careful monitoring to prevent overspending.
Always thoroughly review the contract before signing. Ensure you understand all terms and conditions, including payment schedules, dispute resolution mechanisms, and warranty provisions. If unsure about anything, seek legal advice before signing.
The Repair Process
Emergency siding repair requires a systematic approach to ensure the longevity and effectiveness of the repair. A thorough assessment of the damage is the crucial first step, followed by a carefully developed repair plan. This process minimizes further damage and ensures a successful outcome.
The process begins with a detailed evaluation of the damaged area, followed by the creation of a comprehensive repair plan that outlines the necessary steps, materials, and timeline. This plan ensures a smooth and efficient repair process, minimizing disruption and maximizing the effectiveness of the repair.
Siding Damage Assessment
A thorough assessment of siding damage involves a systematic examination of the affected area to determine the extent of the problem. This includes identifying the type and cause of damage, assessing the structural integrity of the underlying wall, and determining the necessary repair methods. The assessment should consider factors such as the size and location of the damage, the type of siding material, and the presence of any underlying water damage. For example, a small crack in vinyl siding might require a simple patch, while extensive damage from a storm may necessitate replacing several sections of siding. The assessment also considers the surrounding area to ensure that the repair blends seamlessly with the existing siding.
Repair Plan Development and Material Selection
Once the damage assessment is complete, a detailed repair plan is developed. This plan outlines the sequence of steps required to complete the repair, including material selection, tools, and estimated timeframe. The choice of materials is critical and should match the existing siding to ensure a cohesive and aesthetically pleasing result. For example, if the existing siding is cedar, cedar replacement boards should be used, while damaged vinyl siding would be replaced with matching vinyl. The plan should also address safety precautions, waste disposal, and any potential challenges. A sample repair plan is outlined below.
Sample Repair Plan
This sample plan outlines a repair for damage to a section of vinyl siding caused by a fallen tree branch. This is a simplified example, and more complex damage may require a more extensive plan.
- Safety Precautions: Secure the damaged area to prevent further damage or injury. This may involve removing loose debris or supporting weakened sections of siding.
- Damage Assessment: Measure the affected area and identify the extent of the damage, noting any underlying damage to the sheathing or house wrap.
- Material Selection: Order replacement vinyl siding panels that match the existing color and texture. Obtain necessary fasteners and sealant.
- Preparation: Carefully remove the damaged siding panels, taking care not to damage adjacent panels. Repair or replace any damaged underlying sheathing or house wrap.
- Installation: Install the new siding panels, ensuring proper alignment and fastening. Apply sealant to prevent water intrusion.
- Cleanup: Remove all debris and dispose of it properly.
- Inspection: Inspect the completed repair to ensure it is watertight and aesthetically pleasing.
Repair Methods and Techniques
Effective siding repair necessitates understanding the specific material and the nature of the damage. Different siding types—vinyl, wood, and aluminum—require distinct repair approaches. Choosing the correct method ensures a lasting and aesthetically pleasing result. Improper repair can lead to further damage and compromise the overall integrity of your home’s exterior.
Common Siding Repair Techniques
Repair techniques vary considerably depending on the siding material. Vinyl siding, often repaired with patching or replacement, is relatively straightforward. Wood siding, however, may require more extensive carpentry skills, possibly involving the replacement of entire sections. Aluminum siding repairs frequently involve patching or the application of specialized sealants. The severity of the damage will also dictate the chosen method. Minor damage might only require a simple patch, while extensive damage necessitates complete section replacement.
Vinyl Siding Repair
Vinyl siding repairs typically involve replacing damaged panels. Severe damage, such as large cracks or holes, usually necessitates panel replacement. Minor damage, like small scratches or dents, may be addressed with patching compounds designed specifically for vinyl. These compounds often come in colors to match common vinyl siding shades. Before applying any patch, the damaged area must be thoroughly cleaned and dried. For larger repairs, careful cutting and fitting of the replacement panel is crucial to maintain a seamless look.
Wood Siding Repair
Wood siding repair is more complex and often requires advanced carpentry skills. Rotting or damaged sections must be carefully removed and replaced with matching wood. The new wood should be treated with appropriate preservatives to prevent future rot. This often requires precision cutting and fitting to ensure a tight seal and prevent water intrusion. Careful attention must be paid to matching the grain and color of the replacement wood to the existing siding. In cases of severe damage, entire sections of siding might need replacement.
Aluminum Siding Repair
Aluminum siding, known for its durability, is often repaired using patching compounds or sealants. Minor dents or scratches can be filled and smoothed using specialized aluminum repair putty. For more extensive damage, replacement panels are often the best solution. Similar to vinyl and wood repairs, thorough cleaning of the affected area is critical before commencing repairs. The chosen repair method will depend on the extent of the damage and the desired aesthetic outcome.
Step-by-Step Siding Repair Procedure (Vinyl Siding)
The following steps outline a common procedure for repairing damaged vinyl siding:
| Step | Description |
|---|---|
| 1. Assessment | Carefully assess the extent of the damage to determine if repair or replacement is necessary. |
| 2. Preparation | Clean the damaged area thoroughly with soap and water. Allow it to dry completely. |
| 3. Removal (if necessary) | If replacing a panel, carefully remove the damaged section using a putty knife or similar tool, taking care not to damage surrounding panels. |
| 4. Repair/Replacement | Apply a vinyl patch or install a replacement panel, ensuring a tight fit and proper alignment. |
| 5. Caulking | Apply exterior-grade caulk around the edges of the repaired or replaced section to seal against moisture. |
| 6. Cleaning | Clean any excess caulk or debris. |
Preparing the Damaged Area
Proper preparation is crucial for successful siding repair. This involves thoroughly cleaning the damaged area to remove dirt, debris, and loose paint. Any loose or damaged material should be carefully removed before commencing the repair. The surface should be completely dry before applying any patching compound or sealant. For wood siding, this might involve sanding the damaged area to create a smooth surface for the repair material. For aluminum or vinyl, a clean, dry surface is sufficient before patching or replacement.
Materials and Costs
Understanding the materials and associated costs involved in emergency siding repair is crucial for budgeting and managing expectations. The final cost will depend heavily on the extent of the damage, the chosen materials, and the contractor’s labor rates. This section will provide a general overview of common siding materials and a cost breakdown for typical repair scenarios.
Common Siding Materials and Their Costs
Siding material costs vary significantly depending on the type, quality, and region. Prices are typically quoted per square foot and can fluctuate based on market conditions and availability. The following are some of the most common siding materials used in residential repairs:
| Siding Material | Cost per Square Foot (USD, approximate) | Durability | Maintenance |
|---|---|---|---|
| Vinyl | $1-$5 | Moderate to High | Low |
| Fiber Cement | $2-$8 | High | Moderate |
| Wood | $3-$15+ | Moderate (depending on type and treatment) | High |
| Aluminum | $2-$6 | High | Low |
| Steel | $3-$7 | High | Low |
Note: These are approximate costs and may vary based on location, supplier, and specific product features.
Cost Breakdown for a Typical Emergency Siding Repair
A typical emergency siding repair cost can be broken down into several key components:
| Cost Component | Cost (USD, approximate) | Description |
|---|---|---|
| Materials | $100 – $1000+ | This includes the cost of the siding itself, as well as any necessary fasteners, flashing, and sealant. The cost varies significantly depending on the size of the repair and the type of siding used. For example, replacing a small section of damaged vinyl siding might cost around $100, while replacing a large area of fiber cement siding could cost $1000 or more. |
| Labor | $50 – $150+ per hour | Labor costs depend on the complexity of the repair, the contractor’s experience, and the prevailing wage rates in the area. A simple repair might take a few hours, while a more extensive repair could take several days. |
| Disposal Fees | $25 – $100+ | This covers the cost of disposing of the damaged siding materials. The fee depends on the volume of waste generated and local disposal regulations. |
| Permitting (if required) | $50 – $200+ | Some localities require permits for siding repairs, especially for larger projects. The cost of the permit varies by location and the scope of work. |
Material Costs and Labor Estimates for Different Repair Scenarios
The following table provides estimated material and labor costs for various common emergency siding repair scenarios:
| Repair Scenario | Material Cost (USD, estimate) | Labor Cost (USD, estimate) | Total Estimated Cost (USD) |
|---|---|---|---|
| Small hole repair (vinyl siding) | $25 | $75 | $100 |
| Repair of damaged section (approx. 4 sq ft, vinyl) | $50 | $150 | $200 |
| Replacement of several damaged boards (approx. 10 sq ft, fiber cement) | $200 | $400 | $600 |
| Extensive wind damage repair (approx. 50 sq ft, various materials) | $500 – $1000 | $1000 – $2000 | $1500 – $3000 |
Note: These are estimates only, and actual costs may vary significantly based on specific circumstances. It’s always recommended to obtain multiple quotes from qualified contractors before proceeding with any repairs.
Dealing with Insurance Claims
Filing an insurance claim for siding damage can seem daunting, but understanding the process and preparing necessary documentation can significantly streamline the procedure. This section outlines the steps involved and offers tips for effective communication with your insurance adjuster to ensure a smooth and successful claim resolution.
The process typically begins by contacting your insurance company to report the damage. Provide details about the incident, including the date and time of the event (if applicable), a brief description of the damage, and the estimated extent of the repair needed. Your insurance provider will then likely assign an adjuster to assess the damage. The adjuster will inspect the affected area, taking photos and documenting the damage. They will then determine the extent of coverage based on your policy and the cause of the damage. Remember, accurate and thorough documentation is key to a successful claim.
Filing an Insurance Claim for Siding Damage
After reporting the damage to your insurance company, you’ll receive instructions on how to formally file a claim. This usually involves completing a claim form, providing details about the damage, and submitting supporting documentation. Be prepared to provide information about your policy, the date of the incident, and a detailed description of the damage, including the affected area and the estimated cost of repairs. You should also keep records of all communication with your insurance company, including dates, times, and the names of individuals you spoke with.
Communicating with Insurance Adjusters
Effective communication with your insurance adjuster is crucial for a smooth claim process. Be polite, professional, and provide clear and concise information. Maintain detailed records of all conversations and correspondence. If you disagree with the adjuster’s assessment, calmly explain your reasoning and provide supporting evidence, such as photos or contractor estimates. Remember to be patient; the claims process can take time. If you have difficulty reaching a resolution, consider contacting your insurance company’s customer service department or your insurance agent.
Documentation Needed to Support an Insurance Claim
Supporting your claim with comprehensive documentation is vital. This documentation can significantly influence the adjuster’s assessment and the claim’s outcome. Necessary documentation typically includes photographs of the damaged siding from various angles, showing the extent of the damage. A detailed description of the damage, including the affected area and the type of damage (e.g., wind damage, hail damage, or impact damage), is also crucial. Obtain multiple written estimates from qualified siding contractors detailing the necessary repairs and the associated costs. This provides the adjuster with independent verification of the repair requirements and costs. Copies of your insurance policy and any relevant communication with your insurance company should also be included. Finally, if applicable, provide any evidence related to the cause of the damage, such as weather reports or police reports. For example, if a tree fell on your house causing siding damage, a police report documenting the incident would be beneficial.
Post-Repair Maintenance and Prevention
Investing in emergency siding repair is a significant step towards protecting your home’s exterior. However, the longevity and continued protection of your siding depend heavily on proactive maintenance and preventative measures. Regular inspection and timely attention to minor issues can prevent costly repairs and even structural damage down the line. This section outlines essential practices to ensure your siding remains in excellent condition for years to come.
Proactive maintenance is key to extending the lifespan of your siding and preventing future emergencies. By regularly inspecting and addressing minor issues promptly, you can significantly reduce the likelihood of more extensive and costly repairs. This approach not only saves money but also ensures the continued aesthetic appeal and structural integrity of your home.
Identifying and Addressing Minor Siding Issues
Regularly inspecting your siding allows for the early detection of minor problems before they escalate into major repairs. Small cracks, loose panels, or areas of discoloration can be easily addressed with simple fixes, preventing water damage, pest infestations, and structural compromise. For example, a small crack in a vinyl siding panel can be sealed with caulk, preventing water intrusion that could lead to rot and the need for panel replacement. Similarly, a loose panel can be re-secured with appropriate fasteners before it becomes dislodged entirely.
Recommended Maintenance Practices
A comprehensive maintenance program includes both routine inspections and targeted cleaning. Regular cleaning removes dirt, debris, and mold that can accumulate over time and damage the siding’s protective layer. Power washing is effective but should be done carefully to avoid damaging the siding material. The recommended frequency depends on the climate and environment; areas with heavy rainfall or high pollen counts might require more frequent cleaning. For instance, a home located near a wooded area may need cleaning twice a year, while a home in a drier climate might only require cleaning once a year.
Regular Siding Inspection Checklist
A systematic inspection is crucial for identifying potential problems. The following checklist provides a comprehensive guide for regular siding inspections:
A thorough inspection should be performed at least twice a year, ideally in spring and fall. This allows for the detection of issues caused by seasonal changes, such as expansion and contraction of materials due to temperature fluctuations, or damage from harsh weather events.
- Visually inspect all sides of the house, paying close attention to areas prone to damage such as corners, edges, and around windows and doors.
- Check for cracks, holes, or loose or damaged siding panels.
- Look for signs of water damage, such as discoloration, swelling, or rot.
- Examine caulking around windows, doors, and other openings for cracks or gaps.
- Inspect for signs of pest infestation, such as insect holes or droppings.
- Check the flashing around chimneys and other roof penetrations for damage or leaks.
- Note any loose or damaged trim or fascia boards.
Common Problems and Solutions
Emergency siding repair often involves addressing unforeseen issues. Understanding common problems and their solutions is crucial for homeowners to manage expectations and ensure a successful repair. This section details frequently encountered problems and provides effective strategies for resolution. Proactive identification and prompt action can minimize damage and prevent further complications.
Many siding problems stem from water damage, impact damage, or general wear and tear. The type of siding material, its age, and the climate all play significant roles in determining the frequency and severity of these issues. Proper maintenance, regular inspections, and prompt repairs are key to extending the lifespan of your siding and avoiding costly emergency repairs.
Water Damage and Leaks
Water intrusion is a primary cause of siding failure. This can manifest as rotted wood, damaged insulation, mold growth, or warping of siding panels. Effective solutions involve identifying the source of the leak (e.g., damaged flashing, cracked caulking, gaps around windows or doors), repairing the leak, and addressing any resulting water damage. This often requires replacing affected siding sections, insulation, and potentially underlying sheathing. Drying out the affected area thoroughly is crucial to prevent further damage and mold growth.
Impact Damage and Punctures
Impacts from hail, falling branches, or accidental damage can create holes or cracks in siding. These need immediate attention to prevent further water damage. Solutions involve replacing the damaged section with a matching piece of siding. For minor punctures, patching materials may suffice, but larger holes necessitate full panel replacement to maintain structural integrity and aesthetics. In severe cases, underlying structural damage may also require repair.
Siding Material Degradation
Over time, siding materials degrade due to sun exposure, temperature fluctuations, and moisture. This can lead to cracking, fading, warping, or peeling paint. Solutions depend on the type of siding and the extent of damage. For minor issues, cleaning, repainting, or caulking may be sufficient. However, severely damaged sections often require complete replacement. Choosing durable, weather-resistant siding materials during initial installation significantly mitigates this problem.
Troubleshooting Tips for Common Siding Issues
Regular inspection and prompt action are vital for preventing minor issues from escalating into major problems. The following tips can help homeowners identify and address common siding issues early on:
- Inspect your siding regularly, especially after severe weather events, looking for cracks, holes, loose panels, or signs of water damage.
- Check caulking around windows, doors, and other openings for cracks or gaps. Reapply caulking as needed.
- Clean your siding periodically to remove dirt, debris, and mold growth. Use a soft brush and a gentle cleaning solution.
- Address any signs of water damage immediately. Dry out affected areas and repair any leaks promptly.
- Replace damaged or deteriorated siding panels as soon as possible to prevent further damage.
- Consider using weather-resistant paints or sealants to protect your siding from the elements.
Ensuring a Quality Repair
A successful siding repair isn’t just about fixing the immediate damage; it’s about ensuring the longevity and structural integrity of your home’s exterior. Thorough inspection and clear communication with your contractor are crucial for achieving a high-quality, lasting repair. This section details methods for evaluating the completed work and maintaining effective communication throughout the process.
Careful inspection and proactive communication are vital for ensuring the contractor meets the agreed-upon standards and delivers a quality repair that protects your investment. Remember, a well-executed repair not only addresses the immediate problem but also prevents future issues and maintains your home’s curb appeal.
Inspecting the Completed Repair Work
A systematic inspection is essential to verify that the repair meets the required standards. This involves a visual assessment of the repaired area and a check for any signs of incomplete work or potential problems. Begin by examining the repaired section from a distance to assess the overall appearance and consistency with the rest of the siding. Then, move closer to inspect the details. Check for even paint application, consistent caulking, and the proper alignment of siding panels. Look for any gaps, cracks, or loose sections. Pay close attention to the edges of the repaired area to ensure a seamless blend with the surrounding siding. Finally, run your hand along the repaired section to feel for any unevenness or rough spots.
Effective Communication with the Contractor
Maintaining open and consistent communication with the contractor throughout the repair process is key to a successful outcome. Before the work begins, ensure you have a clear written contract outlining the scope of work, materials to be used, timeline, and payment schedule. Regularly check in with the contractor during the process to address any questions or concerns. Document all communication, including emails and phone calls. If you notice any issues during the repair, immediately bring them to the contractor’s attention. Don’t hesitate to ask questions if anything is unclear. Remember, a collaborative approach ensures that both parties are on the same page and that the final result meets your expectations.
Quality Repair Verification Checklist
Before final payment, use this checklist to verify the quality of the completed siding repair:
This checklist provides a structured approach to ensure all aspects of the repair are satisfactory. Addressing each point helps avoid future problems and ensures the contractor’s work meets the required standards of quality and workmanship.
- All damaged siding has been completely removed and replaced.
- New siding matches the existing siding in color and texture.
- Siding is properly installed, aligned, and secured.
- Caulking is applied evenly and neatly, sealing all gaps and cracks.
- Paint or stain is applied evenly and completely, without streaks or drips.
- The repaired area blends seamlessly with the surrounding siding.
- There are no loose nails, gaps, or other imperfections.
- All debris has been cleaned up from the work area.
- The contractor has provided all necessary documentation, including warranties.
Summary
Successfully navigating an emergency siding repair involves proactive planning and informed decision-making. By understanding the process, from initial assessment to post-repair maintenance, you can ensure a swift and effective resolution. Remember, choosing a qualified contractor, documenting damage thoroughly (especially for insurance claims), and understanding the various repair methods are crucial steps towards restoring your home’s exterior and protecting your investment. With careful planning and the right information, you can confidently face any siding emergency.