How to Find Affordable Siding Repair Services Near Me is a question many homeowners face. The cost of repairing damaged siding can be significant, making it crucial to find reliable and reasonably priced contractors. This guide navigates the process of finding reputable local professionals, obtaining accurate estimates, and negotiating fair prices, ultimately ensuring a smooth and cost-effective repair experience for your home’s exterior.
From understanding the various types of siding and common damage to negotiating payment plans and securing warranties, we’ll cover every step. We’ll also explore resources for finding qualified contractors, helping you make informed decisions and avoid potential pitfalls. By following these steps, you can confidently tackle your siding repair project while keeping costs under control.
Understanding Local Siding Repair Options
Finding affordable siding repair services requires understanding the various factors involved. This includes recognizing common siding materials, identifying different types of damage, and considering the cost influences impacting repair projects. A well-informed homeowner is better equipped to negotiate fair prices and ensure quality workmanship.
Siding is a significant investment in your home’s exterior, protecting it from the elements and contributing to its overall curb appeal. Regular maintenance and prompt repairs are essential to preserving its longevity and value. Ignoring minor issues can lead to more extensive and costly damage down the line.
Common Siding Materials and Their Repair Needs
Different siding materials have varying vulnerabilities and require specific repair techniques. Understanding these differences is crucial for accurate cost estimation and effective repair planning.
- Vinyl Siding: Prone to cracking, warping, and fading due to extreme temperatures and impact damage. Repairs often involve replacing damaged panels.
- Wood Siding: Susceptible to rot, insect infestation, and damage from moisture. Repairs may involve replacing rotten boards, treating for insects, or applying sealant.
- Aluminum Siding: Relatively durable but can dent or become scratched. Repairs usually involve replacing damaged sections or repainting.
- Fiber Cement Siding: Highly resistant to damage but can crack or chip. Repairs typically involve replacing damaged sections.
- Brick Siding: Generally very durable but can crack or chip, especially in earthquake-prone areas. Repairs might involve patching or replacing individual bricks.
Examples of Siding Damage Requiring Repair
Recognizing the various types of siding damage is essential for effective communication with contractors and accurate cost assessment. Early detection and prompt repair prevent further deterioration and save money in the long run.
- Cracks: Appear as fissures in the siding material, often caused by impact or expansion/contraction due to temperature changes.
- Holes: Can result from impact damage, insect infestation, or weathering. These require patching or replacement.
- Water Damage: Manifests as rot, discoloration, or swelling, often indicating a leak or moisture intrusion.
- Loose or Missing Siding: Can be caused by wind damage, poor installation, or settling of the house. This compromises the building’s weather protection.
- Fading or Discoloration: Usually caused by prolonged sun exposure and can affect the aesthetic appeal of the siding. Repainting or replacement may be necessary.
Factors Influencing Siding Repair Costs
The total cost of siding repair is influenced by a number of variables, necessitating careful consideration and comparison of quotes from multiple contractors.
Labor costs vary depending on the extent of the damage, the accessibility of the area, and the contractor’s experience and location. Material costs are directly related to the type and quantity of siding needed for the repair. Geographical location also plays a role, with labor and material prices fluctuating based on regional factors. For instance, a repair in a densely populated urban area might be more expensive than a similar repair in a rural area due to higher labor costs and potentially increased material transportation fees. A complex repair requiring specialized skills and equipment will naturally command a higher price compared to a simple fix. For example, replacing a single damaged vinyl panel is less expensive than repairing extensive water damage requiring the removal and replacement of multiple sections of wood siding, including potential structural repairs.
Finding Reputable Local Contractors
Choosing the right contractor is crucial for a successful and affordable siding repair. A reputable contractor will not only provide quality workmanship but also ensure the project stays within budget and adheres to timelines. This section outlines methods for identifying trustworthy professionals and provides a framework for evaluating their suitability.
Finding licensed and insured siding contractors requires a multi-pronged approach. First, utilize online resources such as your state’s contractor licensing board website. These websites typically offer search functionalities allowing you to input a contractor’s name or license number to verify their credentials and check for any disciplinary actions. Secondly, check online review platforms like Yelp, Angie’s List, or Google Reviews to gauge customer satisfaction and identify potential red flags. Finally, request proof of insurance from any potential contractor. This insurance should cover both worker’s compensation and general liability, protecting you from financial responsibility in case of accidents or damages during the repair process. Remember, verifying licenses and insurance is a critical step in ensuring you’re working with a legitimate and responsible business.
Contractor Selection Checklist
Before committing to a contractor, a thorough vetting process is essential. This involves asking specific questions to assess their experience, qualifications, and approach to the job. The following checklist provides a framework for this crucial step.
- Years of experience in siding repair: Inquire about their tenure in the industry, specifically focusing on siding repair. Longer experience often indicates a higher level of expertise and familiarity with various siding materials and repair techniques. For example, a contractor with 15 years of experience likely possesses a broader skillset than one with only 2 years.
- References from previous clients: Request contact information for at least three past clients to verify their satisfaction with the contractor’s work and professionalism. Speaking directly to previous clients allows you to gain firsthand insights into the contractor’s work ethic and problem-solving capabilities.
- Detailed written estimate: A comprehensive estimate should include a detailed breakdown of all costs, materials, and labor involved. Avoid contractors who provide vague or incomplete estimates, as this could indicate a lack of transparency or potential for hidden costs.
- Warranty information: Inquire about the warranty offered on both the materials and the workmanship. A reputable contractor will stand behind their work and offer a reasonable warranty period.
- Licensing and insurance verification: As previously mentioned, confirm the contractor’s licensing and insurance coverage to protect yourself from potential liabilities.
- Project timeline and completion schedule: Discuss a realistic timeline for the project, considering factors such as weather conditions and material availability. A clear schedule helps manage expectations and avoids unnecessary delays.
Large Companies versus Smaller Local Businesses
Choosing between a large national company and a smaller, local business involves weighing several factors.
| Factor | Large Company | Smaller Local Business |
|---|---|---|
| Reputation and Track Record | Often have established reputations, potentially with standardized processes. | Reputation may be more localized, relying on word-of-mouth and community feedback. |
| Pricing | May have more standardized pricing, potentially higher due to overhead. | Pricing can be more flexible, potentially lower due to less overhead. |
| Customer Service | May have more established customer service channels, but potentially less personalized attention. | May offer more personalized attention and quicker response times. |
| Warranty and Guarantees | Often have established warranty procedures. | Warranty terms can vary significantly. |
| Project Management | May have dedicated project managers, ensuring smoother project execution. | Project management may be less structured, relying on the owner’s direct involvement. |
Obtaining Accurate Repair Estimates
Securing accurate estimates is crucial for managing the cost and timeline of your siding repair project. A thorough estimate will detail the necessary materials, labor, and any potential additional expenses. Obtaining multiple estimates from different contractors allows for comparison and helps ensure you’re receiving a fair price.
Getting multiple, detailed estimates involves contacting several reputable siding contractors, providing them with a clear description of the needed repairs, and requesting a written estimate. Be sure to schedule in-person inspections so the contractor can accurately assess the damage. Don’t hesitate to ask clarifying questions about the specifics of each estimate. A comprehensive estimate should include a detailed breakdown of costs, a list of materials to be used, and a projected timeline for completion.
Comparison of Contractor Estimates
The following table illustrates how estimates from different contractors might vary. Remember that these are examples and actual costs will vary depending on location, extent of damage, and materials used.
| Contractor Name | Estimated Cost | Materials Used | Timeline |
|---|---|---|---|
| ABC Siding Solutions | $2,500 | Vinyl siding, standard grade; nails, caulk | 5 days |
| Best Siding Repair | $3,000 | High-quality vinyl siding; specialized sealant, upgraded fasteners | 7 days |
| Reliable Home Improvements | $2,800 | Fiber cement siding; premium caulk, stainless steel fasteners | 6 days |
| Proficient Exterior Services | $2,700 | Vinyl siding, medium grade; standard nails, caulk | 4 days |
Potential Hidden Costs and Unexpected Expenses
While contractors strive for accuracy, unforeseen issues can arise during a siding repair project. These can lead to unexpected expenses. Potential hidden costs include discovering extensive rot beneath the surface requiring more extensive repairs than initially anticipated, uncovering underlying water damage that necessitates further repairs, or encountering difficulties during removal of damaged siding that slows down the process. It’s advisable to inquire about the possibility of such issues during the initial consultation and to ensure the estimate includes a contingency for unexpected expenses. Some contractors may include a small contingency in their initial estimate, while others may require a separate agreement for any unforeseen work. Always review the contract carefully before commencing any work.
Evaluating Contractor Credentials and Reviews
Choosing the right contractor for your siding repair is crucial for a successful and long-lasting outcome. Thorough vetting of potential contractors, encompassing their credentials and online reputation, is a vital step in this process. This section will guide you through the process of verifying contractor legitimacy and understanding online feedback to help you make an informed decision.
Verifying Contractor Licensing, Insurance, and Registration
Before engaging any contractor, it’s essential to verify their professional credentials. This ensures they operate legally and are adequately protected against potential liabilities. This verification process typically involves checking several key aspects of their business standing.
- Licensing: Contact your state’s licensing board or contractor’s state board to confirm the contractor holds a valid and current license. This often involves providing the contractor’s name and business information. The licensing board can verify the license’s status and any disciplinary actions taken against the contractor. For example, in many states, a contractor’s license number can be looked up online through the state’s website.
- Insurance: Request proof of general liability and workers’ compensation insurance. General liability insurance protects you from financial losses if the contractor causes damage to your property or injuries to third parties during the repair work. Workers’ compensation insurance covers medical expenses and lost wages for any contractor employees who get injured on the job. Ensure the policies are current and have adequate coverage.
- Business Registration: Check if the contractor is registered to do business in your state or locality. This can often be verified through the state’s Secretary of State website or a similar government agency. This confirms their legitimacy and helps you avoid dealing with unregistered or potentially fraudulent businesses.
Interpreting Online Reviews and Testimonials
Online reviews and testimonials offer valuable insights into a contractor’s reputation and work quality. However, it’s crucial to approach this information critically.
Look beyond the star rating. While a high average rating is positive, delve into the individual reviews to understand the specifics of the contractor’s work. Pay attention to recurring themes. Do many reviews mention professionalism, punctuality, and quality of work? Or are there consistent complaints about poor communication, delays, or shoddy workmanship? Consider the overall volume of reviews. A few exceptional reviews might be a good sign, but a large number of reviews provides a more comprehensive picture.
Be wary of suspiciously perfect reviews. If all reviews are glowing and lack any criticism, it could be a sign of fabricated or manipulated reviews. Look for reviews that mention both positive and negative aspects of the experience – this is often more realistic and trustworthy.
Red Flags Indicating Unreliable Contractors
Certain indicators can signal potential problems with a contractor. These warning signs should prompt further investigation or a decision to seek alternative services.
- Unlicensed or Uninsured: As previously mentioned, a lack of proper licensing and insurance is a major red flag, indicating a potential lack of accountability and professionalism.
- High-Pressure Sales Tactics: Legitimate contractors typically provide you with time to consider their proposal. Aggressive or high-pressure sales tactics should raise concerns.
- Unclear or Vague Contracts: The contract should clearly outline the scope of work, payment schedule, and timeline. Avoid contractors who are unwilling to provide a detailed and transparent contract.
- Unreasonable Pricing: While you want affordability, be wary of bids that are significantly lower than others. This could indicate a compromise on quality or materials.
- Poor Communication: Difficulty in contacting the contractor or slow responses to inquiries are also red flags. Effective communication is essential for a smooth repair process.
Negotiating Repair Costs and Payment Plans
Securing affordable siding repair often involves skillful negotiation and a clear understanding of payment options. This section details effective strategies to minimize costs and explore financing alternatives, ultimately ensuring a fair and manageable agreement with your chosen contractor.
Negotiating repair costs requires a balanced approach, combining informed preparation with respectful communication. It’s crucial to remember that a reasonable price reflects both the quality of materials and the expertise of the contractor, not simply the lowest bid.
Effective Negotiation Techniques
Before entering negotiations, thoroughly research average costs for similar repairs in your area. Armed with this information, you can confidently assess the contractor’s initial quote. Don’t hesitate to politely question individual line items in the estimate, seeking clarification on pricing discrepancies. For instance, if the cost of a specific material seems inflated, politely inquire about alternative, equally effective options. Consider bundling multiple repairs to potentially negotiate a lower overall price. Finally, remember that politeness and respect go a long way in fostering a collaborative negotiation process. A friendly and understanding approach often yields better results than an aggressive one.
Acceptable Payment Plans and Financing Options
Many reputable contractors offer flexible payment plans to accommodate diverse budgets. Common options include splitting the total cost into multiple installments, typically paid upon project milestones (e.g., material delivery, completion of specific phases of work, final completion). Some contractors may accept a percentage upfront to cover materials, with the remaining balance due upon project completion. A few contractors may also partner with financing companies, offering options like low-interest loans or payment plans extended over several months or even years. Always carefully review the terms and conditions of any financing option before committing. For example, a hypothetical payment plan might involve a 25% down payment, 50% upon completion of the framing, and the final 25% upon final inspection and completion.
Importance of a Written Contract
A comprehensive written contract is paramount. It should clearly detail all aspects of the repair job, including the scope of work, materials used, payment schedule, warranty information, and start and completion dates. This document serves as a legally binding agreement, protecting both you and the contractor. Ambiguities or omissions can lead to disputes later. Therefore, carefully review the contract before signing, ensuring you understand all terms and conditions. If anything is unclear, seek clarification from the contractor before proceeding. A well-drafted contract acts as a safeguard, minimizing the potential for misunderstandings and disputes throughout the repair process. For instance, a clause specifying penalties for delays or substandard workmanship would be beneficial. Similarly, a clause outlining the process for dispute resolution is advisable.
Understanding Warranty and Guarantees
Securing a warranty or guarantee for your siding repair is crucial for protecting your investment and ensuring the longevity of the repair work. A comprehensive warranty provides recourse should the repair fail to meet expectations or if defects emerge within a specified timeframe. Understanding the different types of warranties available and their implications is vital for making an informed decision.
A warranty essentially acts as an insurance policy for your siding repair. It safeguards you against unforeseen issues and provides a clear path for addressing any problems that might arise after the work is completed. Without a warranty, you may be left shouldering the costs of rectifying any future problems, potentially leading to significant additional expenses.
Types of Siding Repair Warranties
Contractors typically offer various warranty types, each with its own coverage and duration. These can vary significantly, so it’s essential to carefully review the terms and conditions before agreeing to any repair work.
- Material Warranty: This warranty covers defects in the siding materials themselves, such as manufacturing flaws or material degradation. The duration typically varies depending on the manufacturer and the specific siding material used. For example, a vinyl siding manufacturer might offer a 20-year warranty against defects, while a fiber cement manufacturer might provide a 50-year warranty.
- Labor Warranty: This warranty covers the workmanship of the contractor. It typically guarantees that the repair work will be free from defects in craftsmanship for a specified period. A common duration is 1-2 years, covering issues like improper installation or sealant failure.
- Combined Warranty: Some contractors offer a combined warranty that covers both materials and labor. This simplifies the process of claiming warranty coverage, as it addresses all aspects of the repair under a single warranty agreement. A combined warranty might cover both materials and labor for a period of 5 years, for instance.
- Limited Warranty: This type of warranty may restrict coverage to specific aspects of the repair or may have certain conditions that must be met to qualify for a claim. For example, a limited warranty might only cover defects in materials if proper maintenance procedures were followed by the homeowner.
Implications of a Lack of Warranty
The absence of a warranty leaves the homeowner entirely responsible for any future problems arising from the siding repair. This could result in significant unforeseen costs, especially if the repair fails prematurely or defects emerge. Without a warranty, resolving these issues would fall solely on the homeowner, potentially requiring them to find and pay for additional repairs from a different contractor, adding both financial and logistical burdens. In such scenarios, the homeowner might be required to pay for materials, labor, and any other associated costs in full. This lack of protection can make a seemingly affordable repair ultimately quite costly.
Preparing for the Repair Process
Preparing your home for siding repair ensures a smooth and efficient process, minimizing potential disruptions and protecting your property. Taking proactive steps before the contractor arrives will save time and prevent unforeseen complications. Careful preparation demonstrates your commitment to a successful project and fosters positive communication with your chosen contractor.
Before the repair work commences, a thorough preparation checklist is highly recommended. This ensures a smooth workflow and minimizes potential problems during the repair process. Proper preparation also protects your property and demonstrates professionalism to the contractor.
Homeowner Checklist Before Siding Repair
The following checklist outlines essential steps to take before your siding repair begins. Completing these tasks will help ensure a successful and efficient repair process.
- Clear the area around your home where the repair will take place. Remove any furniture, plants, or other obstructions that could interfere with the contractor’s work. This includes a perimeter of at least 10 feet from the house.
- Protect valuable items near the work area. Cover delicate landscaping, windows, and other features with drop cloths or plastic sheeting. Secure loose items that could be blown away by the wind.
- Inform your neighbors about the upcoming work. This courtesy helps avoid misunderstandings and potential conflicts. Consider providing them with estimated start and finish times.
- Ensure adequate access to water and electricity for the contractor. If necessary, mark the location of water shut-off valves and electrical breakers.
- Review the contract and payment schedule with the contractor. Ensure you understand all terms and conditions before the work begins.
Protecting Landscaping and Other Property
Protecting your landscaping and other property during siding repair is crucial to prevent damage. Careful preparation will minimize the risk of damage and ensure the overall beauty of your property is preserved.
Protecting your landscaping involves more than just moving plants. Consider using heavy-duty tarps to cover delicate plants and shrubs. For larger plants or trees, consider using protective barriers or wrapping vulnerable areas with padding. For patios or walkways, consider using plywood or other protective coverings to prevent scratches and damage from debris and tools. Protecting hardscaping, such as walkways, patios, and driveways, is equally important. Covering these areas with protective materials will prevent damage from dropped tools, debris, and the movement of equipment. Remember to carefully cover delicate plants or flowerbeds with thick plastic sheeting to avoid damage from flying debris and falling materials. Secure the sheeting firmly to prevent wind from blowing it away.
Effective Communication with the Contractor
Maintaining clear and consistent communication with the contractor is essential for a successful repair project. Open communication ensures mutual understanding and prevents misunderstandings.
Before the work begins, confirm the schedule and expected duration of the project. Establish a clear communication method, such as email or phone calls, for daily updates or to address any concerns that may arise. During the repair process, maintain regular communication with the contractor to monitor progress, address any issues promptly, and ensure that the work is proceeding as planned. Document all communication, including emails, texts, and phone calls. Keep a record of all agreements and changes made throughout the project. This documentation will be useful if any disputes arise. After the work is completed, conduct a final walkthrough with the contractor to inspect the repair and address any remaining concerns. This final inspection ensures that the work meets your expectations and that any necessary adjustments are made.
Post-Repair Inspection and Verification
Thorough inspection of completed siding repair work is crucial to ensure the contractor has met the agreed-upon standards and that the repairs are effective and long-lasting. A careful and systematic approach will help identify any potential problems early, preventing future complications and protecting your investment. This final step is vital for ensuring your satisfaction and the integrity of your home’s exterior.
A detailed post-repair inspection should be conducted once the contractor has declared the work complete and the area has been cleaned. This inspection serves as a final verification that all agreed-upon repairs have been executed correctly and to a high standard of workmanship. It also allows for the identification of any unexpected issues that may have arisen during the repair process.
Inspection Procedure
Begin the inspection by visually examining the entire repaired area from a distance, noting the overall appearance and alignment of the siding. Then, move closer for a detailed examination. Check for any inconsistencies in color, texture, or pattern. Verify that all damaged or deteriorated siding has been replaced or repaired effectively. Assess the caulking around windows and doors, checking for gaps or inconsistencies. Finally, check for any remaining debris or leftover materials. Take photographs of any discrepancies noted during this process. This documentation will be invaluable should any issues need to be addressed with the contractor.
Common Issues to Look For During Inspection
A list of potential problems to check for includes:
- Uneven gaps between siding panels.
- Mismatched siding colors or textures.
- Damaged or improperly installed flashing around windows and doors.
- Incomplete caulking or sealant application, leading to potential water leaks.
- Loose or improperly fastened siding panels.
- Visible nail holes or damage to the underlying structure.
- Remaining debris or leftover materials at the worksite.
These issues, if present, could compromise the effectiveness of the repair and potentially lead to further damage in the future. Therefore, it’s critical to thoroughly inspect all aspects of the repair.
Addressing Deficiencies or Unsatisfactory Work
If any deficiencies or unsatisfactory work is identified during the inspection, immediately document the findings with photographs and detailed notes. Then, contact the contractor to discuss the issues. Clearly communicate your concerns and provide them with the photographic and written documentation. Most reputable contractors will be willing to address any legitimate concerns and rectify any deficiencies. Review the contract to understand the process for addressing warranty claims or disputes. If the contractor is unresponsive or unwilling to address the issues, you may need to consider other avenues for resolution, such as mediation or legal action. However, clear communication and documentation are usually sufficient to resolve most issues amicably.
Maintaining Your Siding After Repair
Proper siding maintenance after repairs is crucial for extending its lifespan and preserving its aesthetic appeal. Neglecting maintenance can lead to premature deterioration, necessitating costly repairs down the line. A proactive approach will ensure your investment remains protected and your home looks its best.
A comprehensive maintenance schedule, combined with regular cleaning and inspections, will significantly contribute to the longevity of your siding. This preventative care is far more economical than addressing significant damage later. By following these guidelines, you can significantly reduce the risk of future problems and maintain the value of your property.
Siding Maintenance Schedule
Establishing a regular maintenance schedule is key to preventing problems. This schedule should be tailored to your specific siding material (vinyl, wood, fiber cement, etc.) and local climate conditions. However, a general guideline can serve as a starting point.
- Annual Inspection: A thorough visual inspection should be conducted at least once a year, preferably in the spring after winter’s harsh elements. This involves checking for any signs of damage, such as cracks, loose panels, or discoloration.
- Spring Cleaning: A thorough cleaning should be performed annually in the spring. This involves removing dirt, debris, and cobwebs using a soft brush, hose, and mild detergent. Avoid harsh chemicals that can damage the siding.
- Fall Inspection (Optional): A second inspection in the fall can be beneficial, particularly in areas prone to heavy leaf accumulation or harsh winter weather. This allows for addressing any potential issues before winter sets in.
Cleaning and Protecting Siding
Regular cleaning is essential to remove dirt, mildew, and other contaminants that can degrade siding over time. Different siding materials require different cleaning methods.
- Vinyl Siding: Can be cleaned with a solution of mild detergent and water, applied with a soft brush or sponge. Rinse thoroughly with a garden hose. Avoid high-pressure washers, which can damage the siding.
- Wood Siding: Requires more careful cleaning. Use a soft brush and a solution of mild detergent and water. For more stubborn stains, a pressure washer can be used with caution, maintaining a safe distance to avoid damage. Regular application of a high-quality wood sealant is recommended to protect against moisture damage.
- Fiber Cement Siding: Generally durable and low-maintenance. Cleaning is similar to vinyl siding, using a soft brush, mild detergent, and water. Avoid harsh chemicals.
Regular Inspections for Preventative Maintenance
Regular inspections are crucial for early detection of potential problems. Early detection allows for timely repairs, preventing minor issues from escalating into major, costly problems. Ignoring minor damage can lead to significant repairs and potentially compromise the structural integrity of your home.
- Focus Areas: Pay close attention to areas prone to damage, such as corners, seams, and areas exposed to direct sunlight or moisture. Look for cracks, loose panels, discoloration, or signs of insect infestation.
- Documentation: Taking photographs of any damage, no matter how minor, can be helpful when filing insurance claims or contacting contractors for repairs.
- Professional Inspections (Optional): For older homes or those with extensive siding, consider scheduling a professional inspection every few years. A qualified inspector can identify potential problems that may not be visible to the untrained eye.
Resources for Finding Local Contractors
Finding reliable siding repair contractors requires a strategic approach. Leveraging various resources and employing effective search techniques can significantly improve your chances of locating qualified professionals in your area. This section will explore several avenues for finding local contractors, highlighting their respective strengths and weaknesses.
Numerous online and offline resources exist to help homeowners connect with local siding repair contractors. Effective use of these resources is key to finding reputable professionals who offer competitive pricing and quality workmanship.
Online Directories and Resources
Several online platforms specialize in connecting homeowners with local service providers. These directories often allow users to filter results based on location, service type, and customer reviews. This allows for a more targeted search, saving time and effort.
Examples include Angie’s List (now Angi), HomeAdvisor, Yelp, and Nextdoor. Each platform has its own strengths and weaknesses. For instance, Angie’s List and HomeAdvisor often feature extensive contractor profiles with reviews and ratings, while Yelp focuses more on user-generated reviews across a broader range of businesses. Nextdoor is specifically geared towards local community recommendations, offering a more localized perspective.
Effective Use of Online Search Engines
Search engines like Google, Bing, and DuckDuckGo are invaluable tools for finding local contractors. However, employing effective search strategies is crucial to obtain relevant results. Instead of simply searching “siding repair,” try more specific queries such as “siding repair near me,” “siding repair [your city/zip code],” or “best siding repair contractors [your city/zip code].” Adding keywords like “reviews,” “licensed,” or “insured” can further refine your search.
Using location-based keywords is particularly important. Most search engines prioritize results based on geographical proximity. Adding your city, zip code, or even a specific neighborhood can significantly narrow down the results and ensure you find contractors within a reasonable distance. Experimenting with different keyword combinations can yield surprisingly different results.
Comparison of Search Methods
Each method of finding contractors offers unique advantages and disadvantages. Online directories often provide pre-vetted listings and customer reviews, but may not encompass all local businesses. Search engines offer a broader range of results but require more careful evaluation to identify reputable contractors. Word-of-mouth referrals from friends, family, or neighbors can be valuable, but may be limited in scope.
Ultimately, a multi-faceted approach is often most effective. Combining online directory searches with targeted search engine queries and leveraging personal recommendations can provide a comprehensive overview of available contractors and aid in making an informed decision. Remember to always verify credentials and read reviews thoroughly before engaging any contractor.
Illustrative Examples of Siding Repairs
Understanding the specifics of various siding repair types is crucial for homeowners to effectively communicate their needs to contractors and to assess the reasonableness of repair quotes. This section provides detailed examples of common siding repairs, outlining the materials, tools, and steps involved.
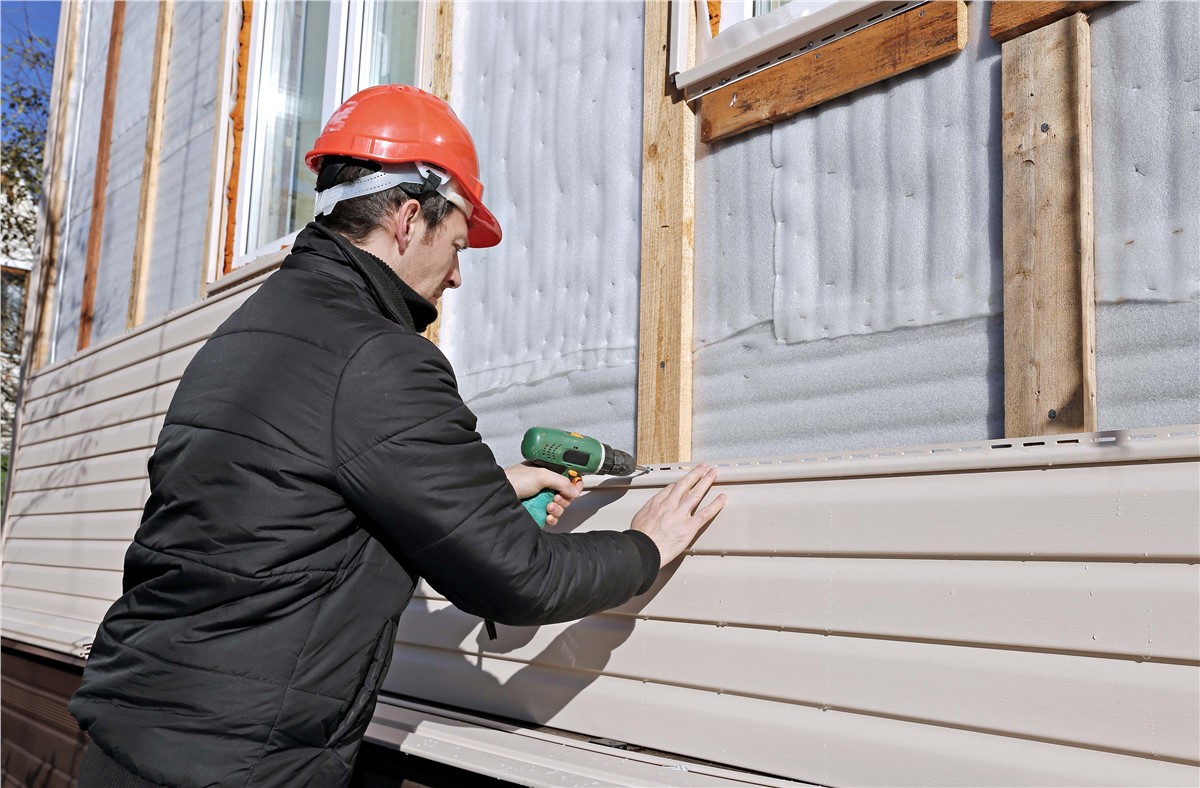
Replacing Damaged Siding Panels
Replacing damaged siding panels is a common repair, often necessary after storm damage or general wear and tear. The process varies slightly depending on the type of siding (vinyl, wood, fiber cement, etc.), but the general principles remain the same.
This repair typically involves removing the damaged panel(s), assessing the underlying structure for further damage, and then installing new panels that match the existing siding. Materials needed include replacement siding panels, appropriate nails or screws, caulk, and possibly wood backing if the underlying structure is damaged. Tools commonly used include a pry bar, hammer, measuring tape, saw (possibly a circular saw for cutting vinyl siding), and a nail gun or screwdriver. The steps involved are: 1) Carefully remove the damaged panel(s) using a pry bar, taking care not to damage surrounding panels. 2) Inspect the area behind the damaged panel for water damage or other structural issues. Repair any underlying problems before installing the new panel. 3) Measure and cut the replacement panel(s) to the correct size. 4) Install the new panel(s), ensuring proper alignment and nailing/screwing. 5) Apply caulk around the edges of the new panel(s) to seal them and prevent water infiltration.
Caulking Gaps and Cracks
Caulking is a relatively simple yet highly effective repair for addressing gaps and cracks in siding, preventing water intrusion and improving the home’s overall weather resistance. This is a preventative measure as much as a repair, and should be performed regularly as part of routine home maintenance.
Materials required for this repair are primarily high-quality exterior-grade caulk appropriate for the siding material and a caulking gun. Tools might include a putty knife for cleaning out existing caulk, a scraper, and rags for cleanup. The steps are straightforward: 1) Clean the area to be caulked thoroughly, removing any loose debris or old caulk. 2) Apply the caulk evenly into the gaps or cracks, using a smooth, continuous bead. 3) Smooth the caulk with a wet finger or a smoothing tool. 4) Allow the caulk to cure completely according to the manufacturer’s instructions.
Painting Siding
Painting siding can revitalize the appearance of a home and protect it from the elements. This is not strictly a repair, but it’s a crucial maintenance task that often addresses minor imperfections and extends the life of the siding. Proper preparation is key to a successful paint job.
Materials needed include exterior-grade paint appropriate for the siding material, primer (if necessary), brushes, rollers, paint trays, drop cloths, painter’s tape, and cleaning supplies. The process involves: 1) Thoroughly cleaning the siding to remove dirt, mildew, and loose paint. Pressure washing is often recommended. 2) Repairing any damaged areas before painting. 3) Applying primer to bare wood or areas that need better paint adhesion. 4) Applying paint in even coats, allowing each coat to dry completely before applying the next. 5) Cleaning up all materials and disposing of them properly.
End of Discussion
Repairing your home’s siding doesn’t have to be a daunting or expensive task. By carefully researching contractors, obtaining multiple estimates, and negotiating effectively, you can secure affordable and high-quality repairs. Remember to prioritize licensed and insured professionals, thoroughly review contracts, and perform a post-repair inspection to ensure the work meets your expectations. With a little planning and due diligence, you can protect your home’s value and curb appeal without breaking the bank.