What to Look for in a Reliable Siding Contractor is a crucial question for homeowners embarking on a siding replacement or installation project. Choosing the right contractor can mean the difference between a beautiful, long-lasting exterior and costly repairs down the line. This guide provides essential information to help you make an informed decision, ensuring a smooth and successful project from start to finish. We’ll explore key factors like licensing, experience, contract details, material selection, and communication strategies, empowering you to select a contractor who meets your needs and exceeds your expectations.
This comprehensive guide will walk you through the process of selecting a reliable siding contractor, covering everything from verifying their credentials and assessing their experience to understanding contract terms and managing the project timeline. We will delve into the importance of clear communication, obtaining necessary permits, and protecting yourself financially throughout the project. By the end, you’ll feel confident in your ability to find the perfect partner for your home improvement project.
Licensing and Insurance
Choosing a siding contractor involves significant financial investment and impacts the longevity and aesthetic appeal of your home. Therefore, verifying their licensing and insurance is crucial to protect your investment and mitigate potential risks. A licensed and insured contractor demonstrates a commitment to professional standards and provides a safety net in case of accidents or disputes.
Protecting yourself from potential problems is paramount when undertaking home improvement projects. A contractor’s licensing and insurance provide crucial layers of protection, ensuring both the quality of the work and your financial security. Licensing verifies their competency and adherence to industry standards, while insurance safeguards you against unforeseen events.
Licensing Verification
Confirming a contractor’s licensing involves checking with the relevant state or local licensing board. This process verifies that the contractor has met the necessary qualifications and passed background checks. Questions to ask should focus on the license number, expiration date, and the scope of work the license covers. For example, instead of asking “Do you have a license?”, you should state, “My understanding is that siding contractors in this area require a license. Could you please provide me with your license number and the issuing agency’s contact information, along with the expiration date to confirm this?” Similarly, instead of “What kind of work can you do?”, you should confirm, “Your license covers exterior siding installation, correct?”. Always verify the information provided independently through the licensing board’s official website.
Insurance Coverage Details
Insurance coverage is a critical aspect of choosing a reputable contractor. It protects you from financial liabilities in case of accidents on your property or damage to your home during the project. Essential insurance types include general liability and workers’ compensation. Asking questions such as, “What type of insurance coverage do you carry?” is less effective than stating, “Please provide proof of general liability and workers’ compensation insurance, including policy numbers and insurer details.” This approach ensures a clear understanding of the contractor’s insurance status. Furthermore, inquiring about the policy limits provides a clearer picture of the financial protection offered.
Insurance Coverage Comparison
| Insurance Type | Coverage Details | Benefits to Homeowner | Potential Gaps in Coverage |
|---|---|---|---|
| General Liability Insurance | Covers bodily injury or property damage caused by the contractor or their employees during the project. | Protects the homeowner from financial responsibility if someone is injured on their property or their property is damaged during the siding installation. | May not cover damage caused by faulty workmanship or pre-existing conditions. |
| Workers’ Compensation Insurance | Covers medical expenses and lost wages for employees injured on the job. | Protects the homeowner from liability for workers’ compensation claims. Ensures the contractor is responsible for the well-being of their employees. | Does not directly protect the homeowner’s property from damage. |
| Commercial Auto Insurance | Covers damages or injuries caused by the contractor’s vehicles while performing work on the homeowner’s property. | Protects the homeowner from liability if a contractor’s vehicle causes damage or injury. | May not cover damage to the homeowner’s property caused by the contractor’s vehicle. |
| Professional Liability Insurance (Errors and Omissions Insurance) | Covers claims of faulty workmanship or errors in the contractor’s professional services. | Protects the homeowner from financial losses due to poor workmanship or mistakes made by the contractor. | May have limitations on the amount of coverage or specific exclusions. |
Experience and Reputation
Choosing a siding contractor involves significant financial investment and impacts your home’s curb appeal and longevity. Therefore, thoroughly investigating a contractor’s experience and reputation is crucial to ensuring a successful project. A contractor’s track record directly reflects their ability to deliver quality workmanship and manage the project efficiently.
A contractor’s experience is directly correlated with the quality of their work and the likelihood of project completion without significant issues. Years of experience translate to honed skills in installation techniques, problem-solving, and material selection. Experienced contractors are more likely to have encountered and successfully resolved various challenges, minimizing the risk of unforeseen complications during your siding project. Furthermore, experienced contractors often have established relationships with suppliers, potentially leading to better pricing and material availability.
Researching Contractor Reputation
Verifying a contractor’s reputation is paramount. Several methods can provide valuable insights into their past performance and client satisfaction. Online platforms offer a readily accessible means of assessing a contractor’s reputation. Websites like Yelp, Angie’s List, and Google My Business often host customer reviews and ratings. These reviews can provide valuable information about the contractor’s professionalism, communication skills, adherence to timelines, and overall quality of work. Additionally, seeking testimonials directly from past clients can offer personalized insights into their experiences. Contacting previous clients and asking about their experience can provide valuable firsthand accounts, potentially uncovering details not found in online reviews.
Contractor Experience Checklist
Before committing to a contractor, it is essential to assess their experience with various aspects of siding installation. The following questions, rephrased as statements, provide a framework for this assessment.
The contractor’s experience with different siding materials (e.g., vinyl, fiber cement, wood, metal) should be explicitly detailed. Understanding their proficiency with specific materials ensures they can handle your chosen siding type effectively. The contractor should articulate their experience with various siding installation techniques, including the proper preparation of the substrate, flashing installation, and handling of intricate details around windows and doors. Inquiring about their familiarity with different fastening methods and their understanding of building codes related to siding installation is crucial for ensuring compliance and long-term durability. The contractor’s experience in managing projects of similar scope and complexity to yours should be explicitly stated. Understanding their ability to handle a project of your size and complexity helps gauge their capacity and potential challenges. The contractor should provide verifiable references from previous clients who can attest to the quality of their work and project management. This allows for independent verification of their claims and offers insights into their work ethic and client relations.
Estimating and Contract Details
Obtaining a detailed estimate and reviewing the contract carefully are crucial steps in ensuring a smooth and successful siding installation project. A comprehensive estimate protects you from unexpected costs, while a well-drafted contract safeguards your rights and clarifies the responsibilities of both you and the contractor.
A precise and thorough estimate is essential for budgeting and planning. It should not only reflect the total cost but also break down the individual components to provide transparency.
Estimate Components
A comprehensive siding installation estimate should include the following elements: The quantity and type of siding materials needed, including brand names and specifications; labor costs broken down by task (e.g., preparation, installation, cleanup); the cost of any necessary permits and inspections; costs associated with removing existing siding, if applicable; the price of any additional features or upgrades (e.g., trim, flashing, underlayment); a contingency amount to account for unforeseen issues; and a clearly stated timeline for project completion. A detailed breakdown prevents surprises and allows for informed decision-making. For example, an estimate might specify 150 square feet of James Hardie fiber cement siding at $12 per square foot, along with $500 for labor related to installation and $100 for permit fees.
Contract Clarity and Importance
A clearly written contract is the cornerstone of a successful project. It legally binds both parties and outlines all aspects of the agreement, preventing misunderstandings and disputes. The contract should specify the scope of work, payment schedule, warranty details, and dispute resolution mechanisms. Failing to have a comprehensive contract can lead to costly delays and legal battles. For example, a poorly defined contract might lead to disputes over whether additional work, such as repairing underlying sheathing, is included in the original price.
Sample Contract Key Clauses
A sample siding installation contract should include, but is not limited to, the following key clauses:
Project Description: A detailed description of the work to be performed, including materials, specifications, and quantities. This should be specific enough to leave no room for ambiguity.
Payment Schedule: A clear outline of payment milestones tied to specific stages of project completion (e.g., 25% upon signing, 50% upon completion of framing, 25% upon completion of siding installation). This protects both parties and ensures timely payment.
Warranty Information: The length and scope of the warranty provided on both materials and workmanship. This should explicitly state what is covered and under what conditions.
Dispute Resolution: A mechanism for resolving disputes, such as mediation or arbitration, to avoid costly litigation.
Start and Completion Dates: Realistic and agreed-upon start and completion dates for the project, allowing for reasonable delays due to unforeseen circumstances.
Permits and Inspections: Clarification of who is responsible for obtaining necessary permits and scheduling inspections.
Change Orders: A process for managing changes to the original scope of work, including how changes will be documented, priced, and approved.
Liability and Insurance: Confirmation that the contractor carries adequate liability insurance and worker’s compensation insurance.
Materials and Warranty
Choosing the right siding material is a crucial decision impacting your home’s curb appeal, energy efficiency, and longevity. The material’s durability, maintenance needs, and associated warranty directly influence the overall cost and lifespan of your siding project. Understanding these factors is key to making an informed choice.
Siding materials vary significantly in their properties, each offering a unique blend of advantages and disadvantages. Factors such as climate, budget, and aesthetic preferences should guide your selection. Warranties, offered by manufacturers, provide crucial protection against defects and premature failure, offering peace of mind and safeguarding your investment.
Siding Material Types and Their Characteristics
Several siding materials are commonly used in residential construction. Each presents a unique set of benefits and drawbacks concerning durability, cost, and maintenance requirements.
| Material Type | Durability | Cost | Maintenance Requirements |
|---|---|---|---|
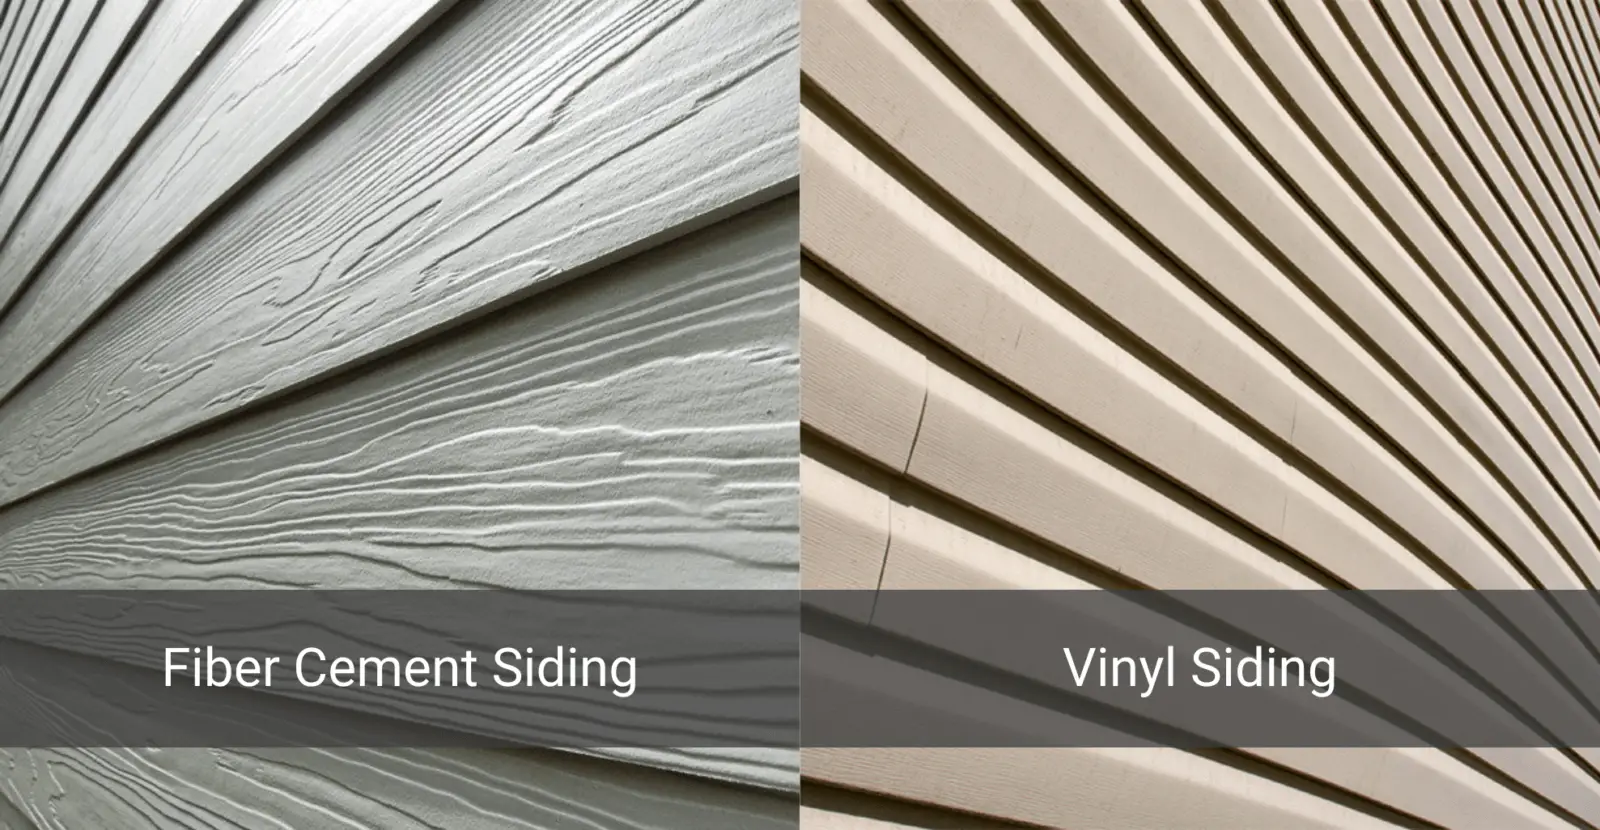
| Vinyl | Moderate to high; resistant to rot, insects, and moisture. Susceptible to impact damage. | Low to moderate | Low; typically requires occasional cleaning. |
| Fiber Cement | High; resistant to fire, rot, insects, and moisture. More susceptible to impact damage than brick or stone. | Moderate to high | Moderate; may require occasional painting or sealing. |
| Wood | Moderate; susceptible to rot, insects, and moisture damage if not properly treated and maintained. | Moderate to high (depending on type) | High; requires regular painting, staining, and potential repairs. |
| Aluminum | High; resistant to rot, insects, and moisture. Susceptible to dents and scratches. | Moderate | Low; typically requires occasional cleaning. |
| Steel | High; very durable and resistant to fire, rot, insects, and moisture. Susceptible to dents and scratches. | Moderate to high | Low; typically requires occasional cleaning. |
Siding Manufacturer Warranties
Siding manufacturers typically offer warranties covering defects in materials and workmanship. These warranties vary in length and coverage. For example, a manufacturer might offer a 50-year warranty against fading or cracking for a specific type of vinyl siding, while another might offer a 30-year warranty for fiber cement siding. It’s crucial to carefully review the warranty details before making a purchase, paying close attention to exclusions and limitations. Some warranties are transferable to subsequent homeowners, adding value to your investment.
Understanding the warranty terms is crucial for protecting your investment. A longer warranty period, coupled with comprehensive coverage, often indicates a higher level of confidence in the product’s quality and durability. Always compare warranties from different manufacturers before selecting your siding.
Project Timeline and Communication
A successful siding project relies heavily on clear communication and a realistic timeline. Establishing these elements upfront prevents misunderstandings and delays, ensuring a smooth and satisfactory experience for both homeowner and contractor. Open communication fosters trust and allows for proactive problem-solving.
Effective communication and a well-defined timeline are crucial for managing expectations and preventing project delays. A reliable contractor will provide a detailed schedule, outlining key milestones and anticipated completion dates. This schedule should be discussed and agreed upon before work commences, allowing for adjustments based on unforeseen circumstances. Regular updates, both written and verbal, will keep you informed of progress.
Establishing Realistic Project Timelines
Realistic project timelines are developed by considering several factors. These include the size and complexity of the project, the availability of materials, weather conditions (particularly important for exterior work), and the contractor’s current workload. A reputable contractor will not rush the process and will openly discuss potential delays due to unexpected circumstances. For example, a large Victorian home requiring intricate detailing will naturally take longer than a smaller, simpler ranch-style house. Similarly, inclement weather can cause significant delays, and a responsible contractor will factor this into the overall timeline. A detailed breakdown of each phase of the project – from initial site preparation to final cleanup – is essential for creating a reliable schedule. This breakdown might include specific tasks like demolition of old siding, installation of new sheathing, siding installation itself, and finishing touches.
Effective Communication Strategies
Effective communication involves regular updates from the contractor. These updates can be delivered through various methods such as weekly email reports summarizing completed tasks and upcoming plans, or brief phone calls to discuss progress and address any immediate concerns. Scheduled in-person meetings at key milestones are also beneficial. The contractor should be readily available to answer your questions and promptly address any concerns you might have. Maintaining a clear and open line of communication is essential for preventing misunderstandings and resolving issues promptly. A system for documenting communication, such as a shared online project folder or a detailed email chain, is helpful for keeping a record of all discussions and decisions.
Documenting Project Progress and Addressing Unforeseen Issues
A thorough documentation process is critical for tracking progress and resolving any unexpected problems. This documentation can include photographs of the work in progress, copies of invoices and receipts, and detailed records of any changes made to the original plan. A daily log maintained by the contractor detailing work performed, materials used, and any challenges encountered is also valuable. Should unforeseen issues arise, such as discovering rotted wood beneath the siding or encountering unexpected obstacles during installation, the contractor should promptly inform you of the situation, explain the potential solutions, and provide revised timelines and cost estimates as needed. These revisions should be documented in writing and agreed upon before proceeding. This transparent approach helps maintain trust and ensures that the project remains on track, despite any unforeseen complications.
References and Case Studies
Checking references and reviewing case studies are crucial steps in selecting a reliable siding contractor. These provide invaluable insights into the contractor’s past performance, work quality, and overall professionalism, supplementing the information gathered from other vetting processes. By actively seeking out and evaluating this information, you can significantly reduce the risk of encountering unforeseen problems during your siding project.
Requesting references from previous clients allows you to directly assess the contractor’s work ethic, communication skills, and ability to manage projects effectively. The feedback you receive provides a realistic picture of what to expect, going beyond the contractor’s self-reported claims. It allows you to gauge their responsiveness to client needs and their ability to resolve any issues that may arise. This firsthand perspective is invaluable in making an informed decision.
Contacting References and Gathering Feedback
Contacting references involves a straightforward process. Begin by obtaining a list of at least three to five recent references from the contractor. These should ideally include a mix of residential and commercial projects, if possible, to offer a broader perspective on their capabilities. It’s important to verify that the provided contact information is accurate and up-to-date.
When contacting references, be polite and professional. Clearly state your purpose and explain that you are considering hiring the contractor for a siding project. Prepare a list of questions beforehand to ensure you gather consistent information across all references. Examples of effective questions include: “Were you satisfied with the quality of the work?”, “How well did the contractor communicate throughout the project?”, “Were there any unexpected delays or cost overruns?”, and “Would you recommend this contractor to others?”. Record the responses carefully, noting any recurring themes or concerns.
Documenting Feedback from References
A structured approach to documenting feedback from references ensures that you can easily compare and contrast the responses. A simple template can greatly aid this process.
Consider using a table to organize the information. Each row could represent a different reference, with columns for the reference’s name, contact information, project details (type of project, size, completion date), and responses to your key questions. Include a final column for an overall assessment of their feedback (positive, neutral, or negative). This organized approach makes it easier to identify patterns and weigh the overall feedback you receive.
| Reference Name | Contact Information | Project Details | Quality of Work | Communication | Timeliness | Overall Assessment |
|---|---|---|---|---|---|---|
| John Smith | (555) 123-4567 | Residential, 2000 sq ft, 2022 | Excellent | Excellent | On time | Positive |
| Jane Doe | (555) 987-6543 | Commercial, 5000 sq ft, 2023 | Good | Good | Slight delay | Neutral |
| Robert Jones | (555) 555-5555 | Residential, 1500 sq ft, 2021 | Very Good | Excellent | On time | Positive |
Permits and Inspections
Choosing a reliable siding contractor involves more than just finding someone with experience and a good reputation. Ensuring your project adheres to local building codes and regulations is crucial for safety, property value, and avoiding potential legal issues. This section details the importance of permits and inspections in your siding installation project.
Obtaining the necessary permits and undergoing building inspections are vital steps in any home improvement project, especially one as significant as siding installation. Permits demonstrate compliance with local building codes, ensuring the safety and structural integrity of your home. Inspections verify that the work performed meets these standards, protecting both the homeowner and the contractor. Failing to obtain permits or pass inspections can lead to fines, delays, and even the need to redo work.
Permit Acquisition Process
The process of obtaining building permits typically begins with submitting an application to your local building department. This application usually requires detailed plans of the proposed siding installation, including materials specifications and a description of the work. The building department will review the application to ensure it complies with local building codes and zoning regulations. Once approved, you will receive a permit allowing the work to commence. The specific requirements and application process vary by location, so it’s essential to contact your local building department directly for detailed instructions and necessary forms. Expect potential delays if your application is incomplete or requires revisions. For example, a homeowner in a historic district might encounter more stringent review processes than one in a standard suburban area.
Building Inspection Procedures
Building inspections are conducted at various stages of the siding installation process to ensure compliance with building codes and safety standards. These inspections typically include initial inspections to verify proper preparation of the house’s exterior, inspections during the installation process to ensure proper installation techniques and material usage, and a final inspection upon completion to verify the overall quality and compliance of the finished work. The inspector will assess aspects such as proper flashing installation, adherence to fire codes, and the overall structural integrity of the new siding. Failure to pass an inspection may result in a “stop work” order until the necessary corrections are made. A common example of a failed inspection could involve improper installation of flashing around windows, potentially leading to water damage.
Scheduling Inspections and Permitting Timeline
Scheduling inspections typically involves contacting the building department after each relevant phase of the project is completed. The department will then schedule an inspection at a convenient time. The entire permitting and inspection process can take several weeks or even months, depending on the complexity of the project and the workload of the building department. A proactive contractor will communicate the timeline clearly and work with the homeowner to ensure timely submission of applications and scheduling of inspections. For example, a large-scale siding replacement project might require multiple inspections, extending the overall timeline significantly compared to a smaller repair job.
Payment Process and Protection
Choosing a payment plan that protects both you and the contractor is crucial for a successful siding project. Understanding different payment methods and implementing safeguards will help avoid potential financial disputes and ensure a smooth process. This section outlines various payment options, their associated risks, and strategies for protecting your investment.
Payment methods typically range from upfront cash payments to staged payments tied to project milestones. Each method carries distinct advantages and disadvantages that must be carefully weighed.
Payment Method Options and Associated Risks
Several payment methods exist, each with its own set of benefits and drawbacks. A common approach involves a down payment followed by progress payments at predetermined stages of completion. Another option is a single payment upon project completion, offering greater protection for the homeowner but potentially placing greater financial risk on the contractor. Financing options, such as those offered through home improvement loans, also exist but usually come with interest charges.
- Cash Payments: Offer simplicity but lack protection in case of contractor default or unsatisfactory work.
- Checks: Provide a paper trail but can be susceptible to fraud or loss.
- Credit Cards: Offer buyer protection through chargeback options, but may involve transaction fees and potentially higher interest charges if not paid off promptly.
- Financing: Can make larger projects more manageable but typically involves interest payments and increases the overall cost.
- Progress Payments: Reduce risk for the homeowner by tying payments to specific project milestones, ensuring work is completed before payment is released. However, careful monitoring is needed to ensure the contractor adheres to the agreed-upon schedule.
Strategies for Protecting Against Financial Losses
Protecting yourself financially during a siding project involves careful planning and documentation. This includes obtaining multiple bids, thoroughly reviewing contracts, and using secure payment methods.
- Detailed Contract: A comprehensive contract clearly outlines the scope of work, payment schedule, and dispute resolution process. It should specify the exact amounts for each payment and the milestones triggering each payment release.
- Secure Payment Methods: Utilizing methods like certified checks or escrow services can help mitigate risk by providing a level of protection against contractor default or fraudulent activity. Escrow services hold the payment until the work is completed to the homeowner’s satisfaction.
- Progress Inspections: Regularly inspect the progress of the work to ensure it meets the standards outlined in the contract. This allows for early identification and resolution of any issues.
- Retainage: Holding back a percentage of the final payment (typically 10-15%) until the project is fully completed and inspected can provide leverage to address any outstanding issues or deficiencies.
Step-by-Step Guide for Managing Payments
A structured payment plan minimizes risks and ensures a smooth project flow.
- Initial Deposit: A small deposit, typically 10-20%, secures the contractor’s commitment and covers initial materials procurement.
- Progress Payments: Subsequent payments are released upon completion of specific milestones, as defined in the contract. For example, a payment might be released after the removal of old siding, another after the installation of sheathing, and a final payment upon completion of the final inspection.
- Final Payment: The remaining balance, minus any retainage, is released after a final inspection confirms the project’s successful completion and adherence to the contract specifications.
- Documentation: Maintain thorough records of all payments, including dates, amounts, and descriptions of work completed. This documentation is vital in case of disputes.
Cleanup and Post-Project Procedures
A clean and organized job site is a hallmark of a professional siding contractor. Careful cleanup demonstrates respect for your property and ensures a smooth transition back to your normal routine after the project’s completion. Understanding what to expect regarding post-installation cleanup and the final walkthrough process is crucial for a positive experience.
The final stages of your siding project involve more than just the installation itself. A reputable contractor will meticulously clean the work area, removing debris, leftover materials, and protecting your landscaping. This commitment to cleanliness extends to the final inspection and walkthrough, ensuring all aspects of the project meet the agreed-upon specifications and your satisfaction. A clear understanding of these procedures will prevent misunderstandings and ensure a successful project conclusion.
Site Cleanup Expectations
Thorough cleanup is a critical component of a well-executed siding project. Expect the contractor to remove all construction debris, including scraps of siding, nails, and packaging materials. This should encompass not only the immediate work area but also surrounding areas such as your driveway, lawn, and flowerbeds. Any damage to landscaping should be addressed and, if possible, repaired. The contractor should leave your property in a cleaner, or at least as clean a condition as it was before the project began. For instance, a responsible contractor would sweep the driveway and remove any stray nails before leaving the job site.
Final Inspections and Walkthroughs
The final inspection is a collaborative process between you and the contractor. It’s an opportunity to verify that all aspects of the project meet the specifications outlined in the contract. This includes checking for any damage to existing structures, verifying the quality of the siding installation (proper alignment, caulking, flashing), and ensuring that all agreed-upon details have been completed. Take your time during this walkthrough, carefully examining all aspects of the work. Document any discrepancies or concerns with photographs or written notes. The contractor should be readily available to address any questions or concerns you may have. This is the time to address minor imperfections, if any.
Final Payment Checklist
Before releasing the final payment, a thorough review of the completed project is essential. This checklist will help ensure you are satisfied with the work before final payment is made.
- Verify that all work is completed as outlined in the contract.
- Inspect the siding for any damage, misalignment, or imperfections.
- Check that all debris has been removed from the property.
- Confirm that all permits and inspections have been completed successfully.
- Review the warranty documentation and understand its terms and conditions.
- Ensure all necessary paperwork, such as certificates of insurance, has been provided.
- Confirm that you are satisfied with the overall quality of workmanship and materials.
Last Point
Selecting a reliable siding contractor is a significant investment in your home’s value and longevity. By carefully considering the factors outlined in this guide—from licensing and insurance to project timelines and post-project procedures—you can significantly reduce the risk of costly mistakes and ensure a positive experience. Remember, thorough research, clear communication, and a well-defined contract are your best allies in achieving the beautiful, durable exterior you envision. Invest the time to find the right contractor, and your home will thank you for it.