Tag: exterior siding

  • How Much Does Aluminum Siding Cost Per Square Foot?

    How Much Does Aluminum Siding Cost Per Square Foot?

    How Much Does Aluminum Siding Cost Per Square Foot? This question is crucial for homeowners considering this durable and attractive exterior cladding. The cost, however, isn’t a single number; it’s a range influenced by several key factors. Understanding these factors – from material quality and labor costs to regional pricing and project complexity – is essential for accurate budgeting and informed decision-making. This guide will delve into each aspect, providing a comprehensive overview of the costs associated with aluminum siding installation.

    We’ll explore the various types of aluminum siding available, examining the differences in price per square foot based on thickness, finish, color, and texture. We’ll also break down labor costs, comparing professional installation to DIY approaches and highlighting potential hidden expenses like permits and the removal of existing siding. By the end, you’ll have a clear understanding of the potential costs involved and be better equipped to plan your project effectively.

    Average Cost Range

    The cost of aluminum siding installation varies considerably, depending on several factors. A homeowner can expect to pay anywhere from $3 to $15 per square foot for a complete installation. This wide range reflects the differences in material quality, labor costs, and the complexity of the project.

    Factors such as the homeowner’s location, the size and complexity of the house, and the chosen type of aluminum siding significantly impact the overall cost. Higher labor costs in certain regions will naturally increase the final price. A house with intricate architectural details, such as many dormers or complex angles, will require more time and expertise, thus increasing the cost per square foot. Similarly, the selection of premium siding with advanced features will increase the material cost.

    Factors Influencing Cost Variation

    Several key factors contribute to the variability in aluminum siding installation costs. These factors interact to determine the final price, making it crucial to consider each aspect when budgeting for the project.

    • Labor Costs: Labor rates vary significantly by geographic location. Urban areas generally have higher labor costs than rural areas. The experience level of the installer also plays a crucial role; experienced and reputable installers command higher fees.
    • Material Costs: The type of aluminum siding chosen greatly affects the overall cost. Basic aluminum siding is less expensive than premium options with added features such as insulation or enhanced durability. The thickness and finish of the siding also contribute to the price.
    • Project Complexity: Houses with complex designs, multiple gables, or unusual architectural features require more time and labor, resulting in higher installation costs. Simple, rectangular houses are typically less expensive to side.
    • Existing Siding Removal: If the homeowner needs to remove existing siding before installing the aluminum siding, this adds to the labor and disposal costs, increasing the overall expense.
    • Permits and Inspections: Building permits and inspections are necessary in many areas, adding to the total project cost. The cost of permits can vary by location and the complexity of the project.

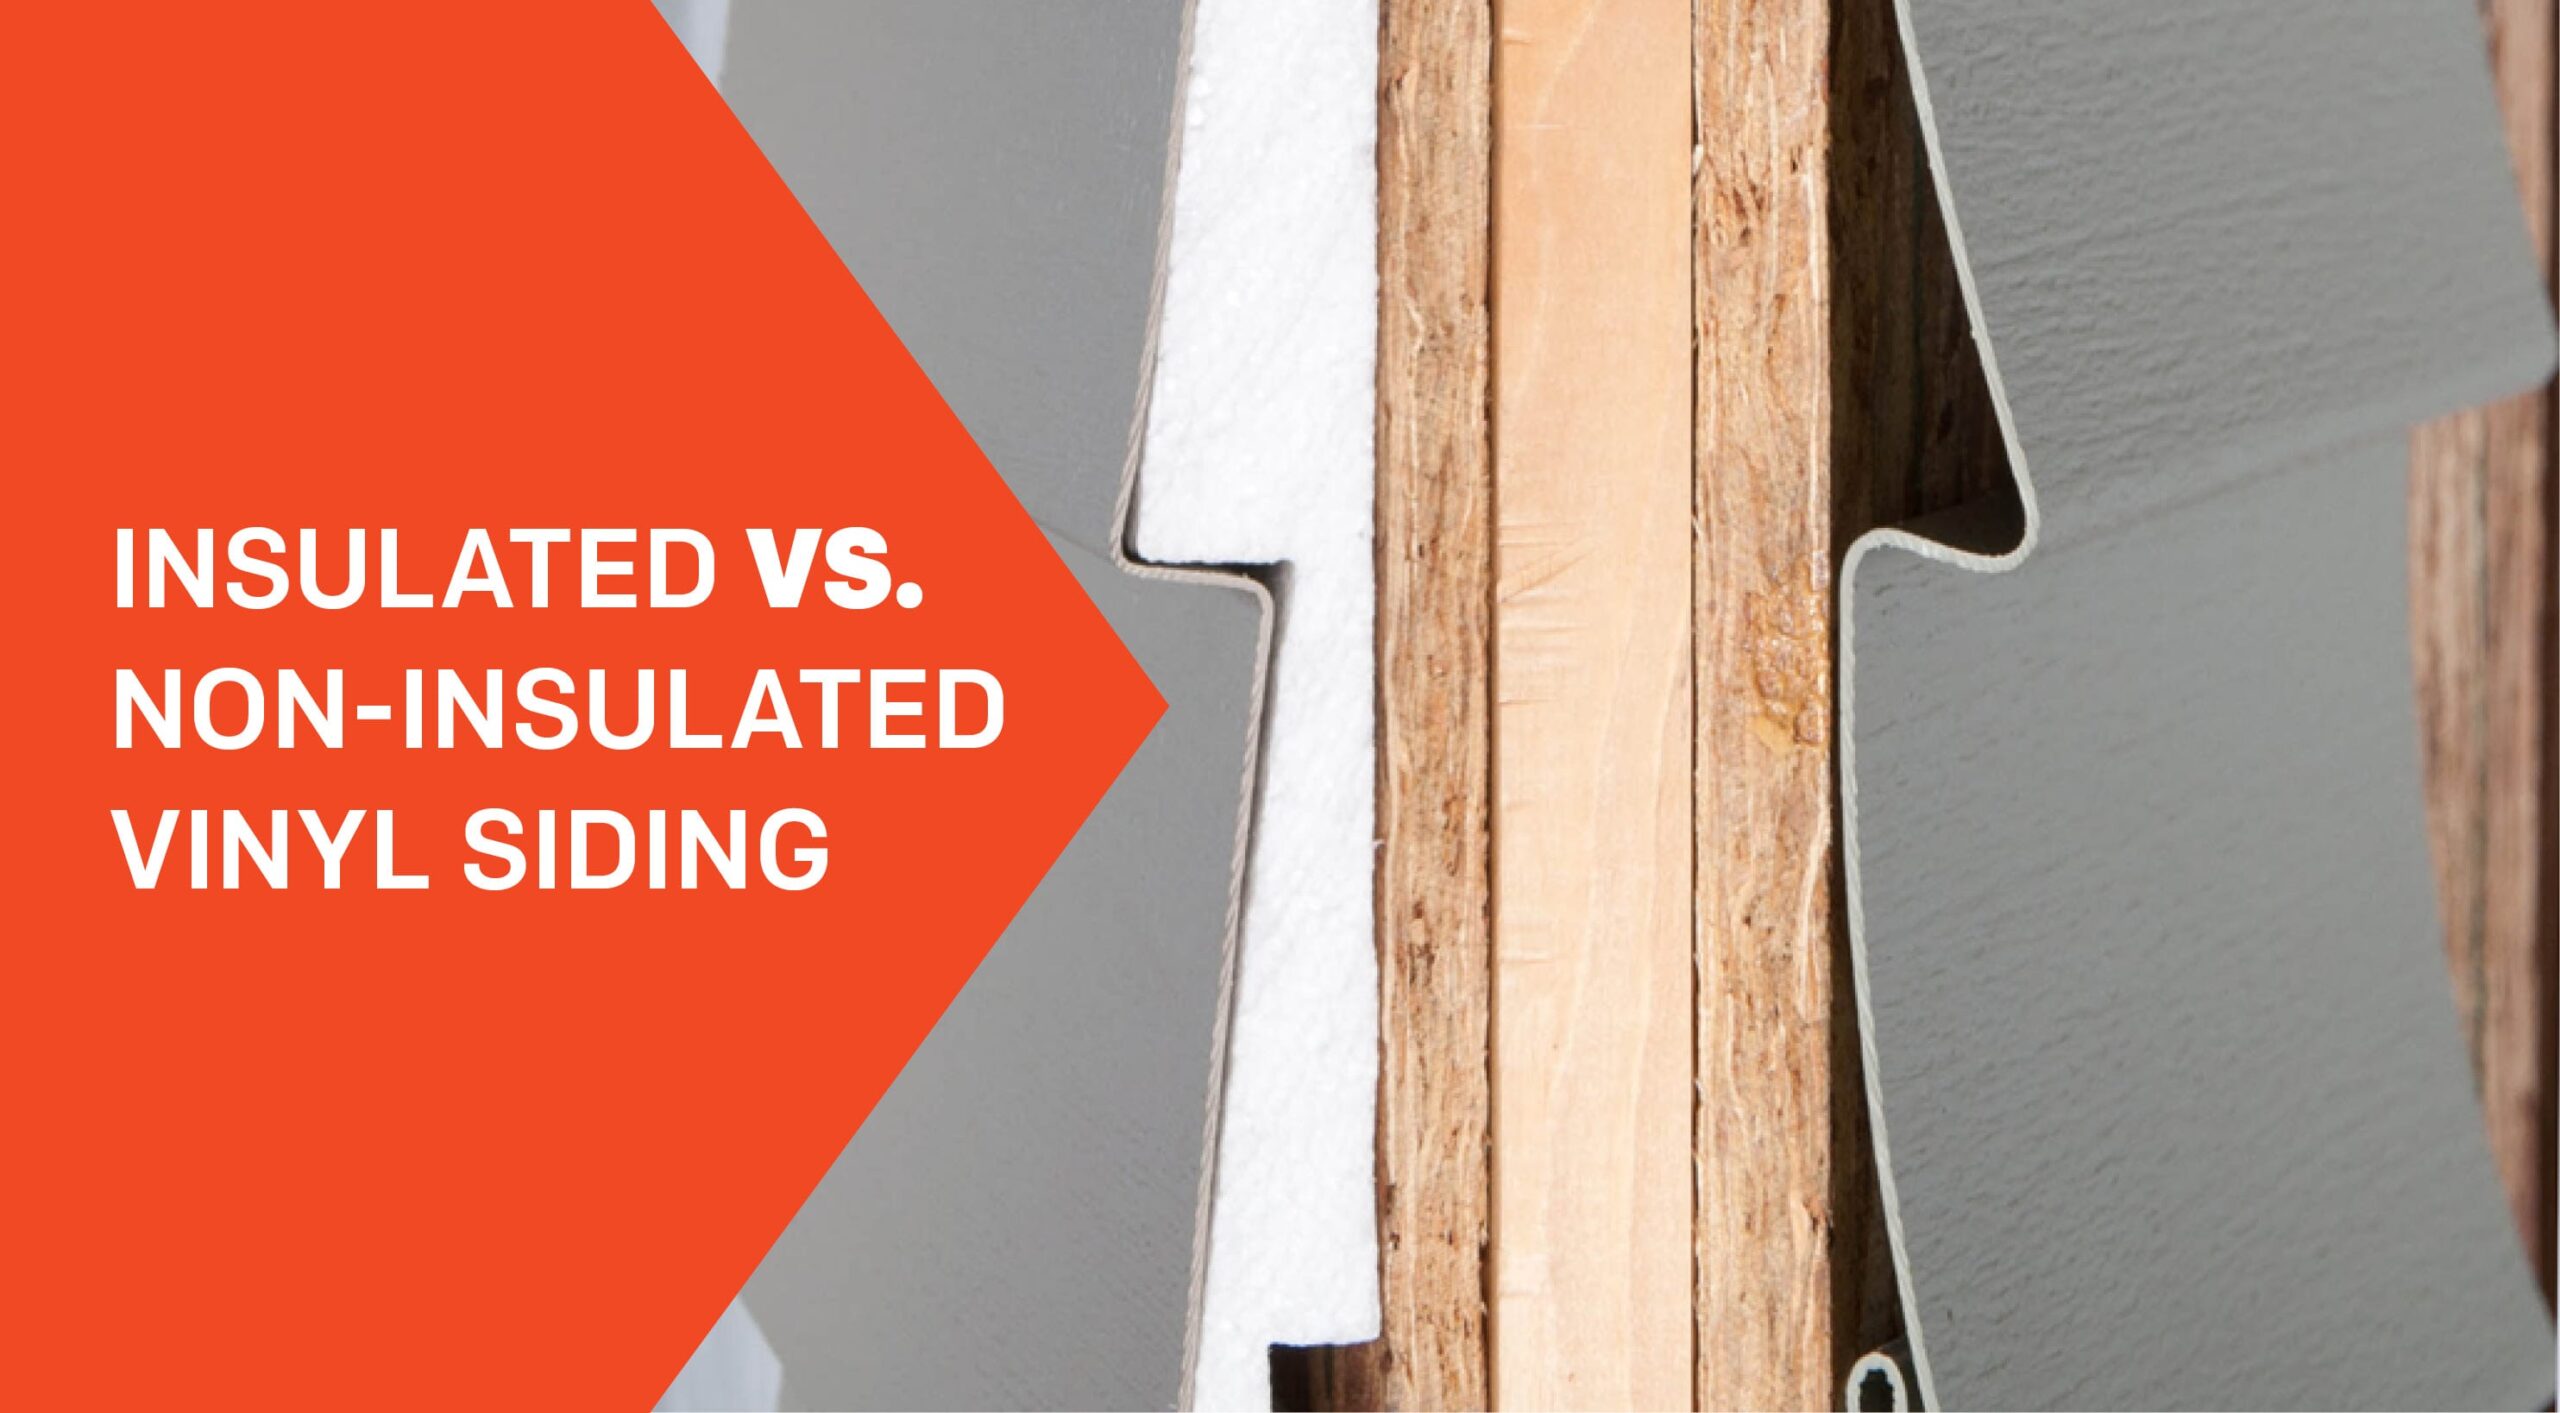
    Basic vs. Premium Aluminum Siding

    The difference between basic and premium aluminum siding is significant, impacting both the initial cost and the long-term value. Basic aluminum siding is typically thinner and offers fewer features, resulting in a lower price point. However, it may not be as durable or energy-efficient as premium options. Premium aluminum siding often includes features like thicker gauge aluminum, insulation backing for improved energy efficiency, and enhanced color retention. For example, a basic aluminum siding might cost $3-$5 per square foot, while a premium option could range from $8-$15 per square foot. This price difference reflects the superior quality and performance of the premium material. The increased upfront cost of premium siding may be offset by long-term savings on energy bills and reduced maintenance needs.

    Factors Affecting Cost

    Several key factors influence the final cost of aluminum siding per square foot, resulting in a wide range of prices across different projects. Understanding these factors allows homeowners to better budget for their siding projects and make informed decisions about material choices and contractors.

    Labor Costs

    Labor costs constitute a significant portion of the overall expense. The hourly rate of skilled installers varies depending on geographic location, experience level, and the complexity of the project. For instance, a simple installation on a single-story home with uncomplicated features will generally require less labor than a multi-story home with intricate architectural details or extensive repairs needed before siding installation. Furthermore, the need for specialized equipment or scaffolding can increase labor costs. A project requiring specialized techniques, such as working around complex window arrangements or dealing with difficult terrain, will command a higher labor rate. These increased labor costs directly translate to a higher price per square foot.

    Material Quality

    The quality of aluminum siding significantly impacts the price. Higher-quality siding typically features thicker aluminum, a more durable finish (e.g., Kynar 500 paint system), and enhanced features like improved insulation or enhanced weather resistance. These superior materials often come with a higher price tag. For example, a basic aluminum siding panel might cost significantly less than a premium panel with a thicker gauge of aluminum and a longer warranty against fading and damage. The increased durability and longevity offered by premium materials might justify the higher initial cost over the life of the siding.

    Regional Variations in Pricing

    Regional differences in labor costs, material availability, and local market conditions all contribute to variations in aluminum siding prices per square foot. Areas with a high cost of living or a shortage of skilled labor will likely have higher installation costs. Similarly, regions with limited access to aluminum siding suppliers might experience higher material prices due to transportation costs. For example, a project in a densely populated urban area with a high demand for skilled tradespeople may have significantly higher labor costs compared to a similar project in a rural area with more readily available labor.

    Project Complexity and Permits

    The complexity of the project and the need for permits also influence the final cost. Projects requiring extensive preparation work, such as removing existing siding, repairing underlying sheathing, or addressing significant structural issues, will naturally increase the overall expense. The need for permits and inspections adds to the overall project cost. For instance, a project involving the removal of asbestos-containing materials before siding installation will require specialized handling and disposal, significantly increasing the cost. Furthermore, obtaining the necessary permits and inspections from local authorities can add a substantial administrative fee to the project.

    Material Costs Breakdown

    Understanding the cost of aluminum siding involves breaking down the price into its component parts: the material itself and the associated labor. The material cost is significantly influenced by the type of aluminum siding chosen, including its thickness, finish, and color.

    Aluminum Siding Types and Costs

    The price per square foot of aluminum siding varies considerably depending on the specific type. Thicker siding generally offers greater durability and longevity, but comes at a higher cost. Similarly, different finishes impact both the aesthetic appeal and the price. The following table illustrates a typical cost range for various aluminum siding options. Note that these prices are estimates and can fluctuate based on location, supplier, and current market conditions.

    Siding Type Thickness (inches) Finish Type Cost per Square Foot (USD)
    Standard .024 Painted $2.00 – $3.50
    Heavy-Duty .032 Painted $3.00 – $4.50
    Premium .040 Painted $4.00 – $6.00
    Standard .024 Powder-coated $3.00 – $4.50
    Heavy-Duty .032 Powder-coated $4.00 – $5.50
    Premium .040 Powder-coated $5.00 – $7.00

    Color and Texture Options and Pricing

    The color and texture of your aluminum siding also influence the overall cost. While basic colors might be included in the standard pricing, more unique or specialized colors and textures often command a premium. For instance, wood-grain finishes generally cost more than solid colors. The following table provides examples of potential price differences. Remember that these are estimates, and actual costs may vary depending on the supplier and specific options available.

    Color/Texture Description Cost per Square Foot (USD) (Added to Base Cost) Example
    Solid Color Standard colors like white, beige, or gray. $0.00 – $0.50 Classic white aluminum siding
    Metallic Finish Colors with a metallic sheen. $0.50 – $1.50 Bronze or brushed aluminum
    Wood Grain Imitates the look of natural wood. $1.00 – $2.50 Cedar or oak-like patterns
    Specialty Colors Unique or less common colors. $1.50 – $3.00+ Deep reds, blues, or greens

    Labor Costs Breakdown

    Labor costs represent a significant portion of the overall expense when installing aluminum siding. Understanding these costs, which vary based on several factors, is crucial for accurate budgeting. This section details the components of labor costs and provides insights into typical pricing.

    Labor costs for aluminum siding installation are primarily determined by the hourly rates of the professionals involved and the total number of hours required to complete the project. Several skilled tradespeople may contribute to the process, each with their own specialized expertise and associated hourly rates. The complexity of the project, such as the presence of intricate architectural details or the need for extensive preparation work, will significantly impact the total labor hours and, consequently, the overall cost.

    Hourly Rates for Professionals

    The hourly rates for professionals involved in aluminum siding installation vary geographically and based on experience and specialization. Generally, you can expect the following ranges:

    It’s important to note that these are average ranges. Highly experienced and specialized installers in high-demand areas may command higher rates. Conversely, smaller, less established companies might offer slightly lower rates. Always obtain multiple quotes to compare pricing and ensure you’re getting a fair price for the services rendered.

    Profession Hourly Rate Range
    Siding Installer $40 – $75
    Project Manager/Supervisor $50 – $100
    Helpers/Laborers $25 – $45

    Project Size and Complexity Impact on Labor Costs

    The size and complexity of the project directly influence the total labor costs. A larger house with more surface area to cover will naturally require more labor hours than a smaller one. Similarly, a project with intricate architectural details, such as many dormers, gables, or complex trim work, will demand more time and skill, increasing the overall labor expense.

    For example, a simple, single-story ranch house might require a crew of two to three installers for a week, while a large, multi-story home with complex features could necessitate a larger crew for two or three weeks. Factors such as the condition of the existing siding (requiring more demolition and preparation time), the need for repairs to underlying structures, and the presence of obstacles (such as trees or difficult terrain) also significantly affect the total labor hours and costs. A detailed quote from a reputable contractor should explicitly outline these factors and their associated costs.

    Installation Process

    Professional installation of aluminum siding is a multi-step process that ensures a durable and aesthetically pleasing finish. Proper preparation and execution are crucial for a long-lasting result, minimizing the risk of future problems like water damage or warping. The following steps outline a typical installation procedure.

    1. Preparation and Measurement: This initial stage involves meticulous site preparation. Existing siding must be removed, and the underlying structure inspected for any damage that needs repair before installation begins. Accurate measurements of the house’s exterior are taken to determine the precise amount of siding needed, minimizing waste and ensuring a seamless fit.
    2. Installation of Flashing and J-Channel: Flashing, a thin metal strip, is installed around windows, doors, and other openings to prevent water from penetrating the wall. J-channel, a shaped piece of aluminum, provides a neat finish at the edges of the siding panels and helps guide the installation. Correct placement of flashing and J-channel is crucial for water management.
    3. Siding Panel Installation: Aluminum siding panels are typically installed horizontally, starting from the bottom and working upwards. Each panel is carefully overlapped with the one below, ensuring a watertight seal. Special attention is paid to aligning the panels and maintaining consistent spacing for a professional look.
    4. Corner and Trim Installation: Corner posts and trim pieces are installed to provide a finished look at the corners and edges of the house. These components are designed to complement the siding and protect the edges from the elements. Proper installation ensures a clean, consistent appearance.
    5. Finishing Touches: Once the siding is installed, any necessary caulking or sealing is applied to ensure a watertight seal around windows, doors, and other openings. A final inspection is performed to ensure that all panels are properly installed and the overall appearance is satisfactory. This step is crucial for long-term protection and aesthetic appeal.

    Importance of Professional Installation

    Professional installation ensures the proper use of specialized tools and techniques, leading to a superior, longer-lasting result. Improper installation can lead to problems such as gaps, leaks, and premature deterioration of the siding. A professional installer has the experience and knowledge to address any unforeseen challenges during the process, ensuring a smooth and efficient installation. For example, they can identify and rectify underlying structural issues before siding installation, preventing future problems. The cost of professional installation is a worthwhile investment in the long-term durability and appearance of the aluminum siding.

    Comparison with Other Materials

    Choosing the right siding material involves careful consideration of cost, durability, and aesthetic preferences. Aluminum siding, while a popular option, isn’t the only contender. This section compares its cost per square foot to that of vinyl and wood siding, highlighting the advantages and disadvantages of each.

    Aluminum siding offers a balance between cost and durability, but vinyl and wood present alternative options with their own sets of pros and cons. Understanding these differences is crucial for making an informed decision that aligns with your budget and long-term goals.

    Cost Comparison of Siding Materials

    The cost per square foot of siding can vary significantly based on factors like material quality, regional pricing, and labor costs. However, a general comparison can provide a useful benchmark. The following table presents average cost ranges; actual costs may vary depending on your specific project.

    Siding Material Cost Per Square Foot (Material Only) Cost Per Square Foot (Installed) Longevity (Years)
    Aluminum $2 – $8 $8 – $15 30-50+
    Vinyl $1 – $5 $5 – $12 20-30
    Wood $4 – $15+ $12 – $30+ 20-50+ (depending on wood type and maintenance)

    Advantages and Disadvantages of Each Siding Material

    Each siding material presents a unique combination of advantages and disadvantages regarding cost and longevity.

    Aluminum Siding: Aluminum siding is relatively inexpensive compared to wood, boasting excellent durability and resistance to weather damage, insects, and fire. However, it can dent more easily than vinyl and may not offer the same aesthetic appeal as wood. Its longevity is substantial, often exceeding 50 years with proper maintenance. For example, a well-maintained aluminum-sided home in a moderate climate could easily last for several generations.

    Vinyl Siding: Vinyl siding is typically the most affordable option, offering low maintenance and a wide variety of styles and colors. Its longevity is shorter than aluminum or high-quality wood siding, however, and it can be susceptible to damage from extreme temperatures or strong impacts. A common example of vinyl siding’s vulnerability is its potential for cracking under intense cold or heat. The lifespan of vinyl siding often depends on the quality of the product and its installation.

    Wood Siding: Wood siding provides a classic and aesthetically pleasing look. High-quality wood siding can be very durable and long-lasting, particularly if properly maintained with regular painting or staining. However, it is the most expensive option, requiring significant ongoing maintenance to prevent rot, insect infestation, and weathering. The longevity of wood siding can vary widely depending on the type of wood used (e.g., cedar vs. pine) and the climate. A well-maintained cedar home might last for decades, whereas pine siding in a humid climate may require more frequent maintenance.

    Hidden Costs

    While the upfront cost of aluminum siding per square foot is a significant factor, several hidden expenses can significantly inflate the total project cost. Failing to account for these can lead to budget overruns and project delays. Understanding these potential additional expenses is crucial for accurate budgeting and realistic project planning.

    Permitting Fees and Inspections

    Securing the necessary permits from your local municipality is a crucial step before starting any exterior home renovation project, including aluminum siding installation. Permitting fees vary widely depending on location, the size of your home, and the complexity of the project. For instance, a larger home requiring more extensive siding work might incur permit fees exceeding $500, while a smaller project could cost closer to $100. Furthermore, these fees often don’t include the cost of inspections, which are usually required at various stages of the installation process to ensure compliance with building codes. Failure to obtain the necessary permits can result in hefty fines and potential project shutdowns.

    Removal of Existing Siding

    If your home already has siding (wood, vinyl, etc.), its removal is a necessary step before installing aluminum siding. This process adds to the labor costs and may also reveal unforeseen issues like underlying damage to the sheathing or the presence of asbestos-containing materials. The cost of removing existing siding can vary significantly based on the type of siding, its condition, and the square footage of your home. Removing old wood siding, for example, is often more labor-intensive and costly than removing vinyl siding. Unexpected discoveries during removal, such as rotted wood requiring extensive repair, can dramatically increase the project’s overall expense. In one case, the removal of old asbestos-containing siding on a 1,500 sq ft home added approximately $2,000 to the overall cost due to the specialized handling and disposal requirements.

    Repair of Underlying Structure

    The installation of new aluminum siding often necessitates the repair or replacement of damaged underlying structures, such as rotting fascia boards, damaged sheathing, or deteriorated window and door trim. These issues may not be apparent until the old siding is removed. The cost of these repairs can be substantial, ranging from a few hundred dollars for minor repairs to thousands of dollars for extensive work. For example, replacing sections of rotten wood sheathing can quickly add several hundred dollars to the project, while extensive repairs to damaged fascia boards could cost over a thousand dollars. Failing to account for these potential repairs can lead to significant cost overruns.

    Unexpected Material Needs

    While a precise material estimate is typically provided upfront, unforeseen circumstances can arise during installation that require additional materials. For instance, unexpected damage to the existing structure might necessitate extra sheathing or flashing. Similarly, variations in the home’s dimensions or complex architectural features could require more siding panels than initially anticipated. These extra materials add to the project’s cost, potentially pushing the final bill higher than the original estimate. A common example is discovering more damaged areas requiring additional flashing or sealant than originally assessed, adding a few hundred dollars to the material costs.

    Waste Disposal Fees

    The removal of old siding and other construction debris generates significant waste. Disposal fees for this waste can add up, particularly if specialized disposal is required for hazardous materials like asbestos. These fees vary widely based on location and the amount of waste generated. In areas with stringent environmental regulations, the cost of properly disposing of construction waste can be substantial, adding several hundred dollars to the overall project cost.

    DIY vs. Professional Installation

    Choosing between DIY and professional installation for aluminum siding significantly impacts both the final cost and the outcome of your project. While a DIY approach might seem appealing for budget-conscious homeowners, it’s crucial to weigh the potential savings against the risks involved. This section compares the costs and associated benefits and drawbacks of each approach.

    The primary difference lies in labor costs. Professional installers possess the experience, specialized tools, and knowledge to complete the job efficiently and correctly. DIY projects, on the other hand, require significant time investment, tool acquisition or rental, and the potential for costly mistakes.

    Cost Comparison

    Professional installation typically adds substantially to the overall cost of aluminum siding. Labor charges can range from $2 to $5 per square foot, depending on factors such as project complexity, geographic location, and the installer’s experience. This means that for a 1000 square foot house, labor alone could cost between $2000 and $5000. In contrast, a DIY approach eliminates these labor costs, allowing homeowners to focus solely on material expenses. However, unforeseen complications or mistakes during a DIY installation could easily negate any initial savings.

    Potential Savings and Risks of DIY Installation

    A significant potential saving with DIY installation is the elimination of labor costs. Homeowners can purchase materials directly from suppliers, often at lower prices than those offered to contractors. For example, a homeowner might purchase aluminum siding panels for $2 per square foot directly from a supplier, whereas a contractor might pay $2.50 per square foot due to bulk purchasing discounts not available to individuals. However, this cost saving is contingent on successful project completion. Improper installation can lead to damage, leaks, and the need for costly repairs or even complete re-installation, significantly outweighing the initial savings. Furthermore, DIY projects often take considerably longer to complete, potentially leading to lost time and opportunity costs.

    Potential Savings and Risks of Professional Installation

    Professional installation offers peace of mind. Experienced installers guarantee proper installation, ensuring longevity, structural integrity, and protection against the elements. Their expertise minimizes the risk of mistakes that could lead to future repairs or replacements. While more expensive upfront, professional installation often comes with warranties, offering protection against defects in materials or workmanship. For example, a reputable installer might offer a 5-year warranty on their labor, mitigating the risk of costly repairs due to installation errors. The time saved is also a significant advantage, allowing homeowners to focus on other tasks. However, the higher initial cost can be a significant barrier for some homeowners.

    Warranty and Maintenance

    Aluminum siding offers a durable and low-maintenance exterior cladding option, but understanding the warranty and long-term maintenance is crucial for budgeting and planning. Manufacturers typically provide warranties covering defects in materials and workmanship, offering homeowners peace of mind regarding the initial quality of their investment. However, the specifics of maintenance significantly impact the siding’s lifespan and overall cost.

    Aluminum siding warranties generally cover defects in materials and workmanship for a period ranging from 10 to 50 years, depending on the manufacturer and specific product line. Some warranties may be prorated, meaning the manufacturer’s responsibility decreases over time. It’s essential to carefully review the warranty documentation provided by the manufacturer before installation to understand the exact terms and conditions, including what is and isn’t covered. For example, damage caused by severe weather events may not be included, while defects in the manufacturing process would likely be covered. Understanding these nuances helps homeowners make informed decisions and prepare for potential future expenses.

    Warranty Coverage Details

    Warranties usually cover issues such as peeling paint, cracking, or significant fading of the factory-applied finish. However, damage resulting from impact, improper installation, or neglect is typically excluded. Some manufacturers offer extended warranties for an additional fee, providing further protection against unforeseen circumstances. This extended coverage might include protection against hail damage or other weather-related issues. Reading the fine print of the warranty is crucial to understand the limitations and expectations. For instance, a warranty might cover the replacement of defective panels but not the associated labor costs for reinstallation.

    Long-Term Maintenance Requirements

    Aluminum siding requires minimal maintenance compared to other siding materials. Regular cleaning, typically once or twice a year, is sufficient to remove dirt, debris, and mildew buildup. A simple solution of mild detergent and water, applied with a soft brush or sponge, is usually all that’s needed. Pressure washing should be avoided as it can damage the siding’s finish. Periodic inspections for any signs of damage, such as dents or loose panels, are also recommended. Addressing minor issues promptly can prevent more extensive and costly repairs later. For instance, a small dent might be easily repaired with a putty, while a loose panel requires professional attention to avoid further damage or water ingress.

    Cost of Long-Term Maintenance

    The long-term maintenance costs associated with aluminum siding are relatively low. The annual cleaning can be done with readily available supplies, minimizing expense. Occasional repairs, such as replacing damaged panels, might incur additional costs, depending on the extent of the damage and the need for professional assistance. However, the infrequent need for repairs and the overall durability of aluminum siding make it a cost-effective option in the long run compared to materials requiring more frequent replacements or extensive maintenance. For example, a homeowner might spend around $50-$100 annually on cleaning supplies and minor repairs, significantly less than the maintenance costs associated with wood or vinyl siding.

    Example Project Cost Breakdown

    To illustrate the cost of aluminum siding installation, let’s consider a hypothetical project for a single-family home. This example will detail the breakdown of costs, allowing for a clearer understanding of the total expense involved. Remember that actual costs can vary significantly based on location, contractor, and project specifics.

    Project Details: A 1,500 Square Foot Home

    This example focuses on a 1,500 square foot home requiring new aluminum siding installation. We will assume a relatively standard design with minimal complexities, such as few dormers or unusual architectural features. More complex designs will naturally increase the cost.

    Material Costs

    The cost of materials is a significant portion of the overall project expense. The price per square foot of aluminum siding varies depending on the quality, thickness, and style chosen. For this example, we’ll assume a mid-range aluminum siding costing $3.00 per square foot. Additional materials like trim, flashing, and fasteners are also included in the estimate.

    Material Cost per Square Foot Total Square Footage Total Cost
    Aluminum Siding $3.00 1500 $4500
    Trim & Flashing $1.50 200 (estimated) $300
    Fasteners & Other $0.50 1500 $750
    Total Material Cost $5550

    Labor Costs

    Labor costs represent a considerable portion of the total project cost. The hourly rate for skilled siding installers varies by region and contractor experience. We’ll assume an average labor cost of $50 per hour for a two-person crew. The estimated labor hours for a 1500 square foot home are 40 hours.

    Labor Item Hourly Rate Hours Total Cost
    Installation $50/hour (per crew) 40 $4000
    Total Labor Cost $4000

    Total Project Cost

    The total project cost is the sum of the material and labor costs, plus any additional costs such as permits and disposal fees. For this example, we’ll assume $500 for permits and disposal.

    Total Project Cost = Material Costs + Labor Costs + Additional Costs

    Total Project Cost = $5550 + $4000 + $500 = $10050

    Therefore, the estimated total cost for aluminum siding installation on a 1500 square foot home in this example is $10,050. This is an estimate, and actual costs may vary depending on several factors as previously discussed.

    Last Word

    Ultimately, the cost of aluminum siding per square foot is highly variable. While a range can be provided, your specific project’s cost will depend on numerous factors. Careful consideration of these factors—material selection, labor costs, regional pricing, and potential hidden expenses—is paramount for accurate budgeting. By weighing the advantages and disadvantages against your budget and needs, you can make an informed decision about whether aluminum siding is the right choice for your home improvement project. Remember to obtain multiple quotes from reputable contractors to ensure you get the best price for your specific needs.

  • Best Insulated Siding Options for Extreme Climates

    Best Insulated Siding Options for Extreme Climates

    Best Insulated Siding Options for Extreme Climates: Protecting your home from the harshest weather conditions requires careful consideration of your siding choice. This guide explores various insulated siding materials, highlighting their thermal performance, durability, and cost-effectiveness in extreme climates. We’ll delve into installation techniques, maintenance strategies, and the long-term energy savings associated with each option, ensuring you make an informed decision for years of comfort and protection.

    From frigid winters to scorching summers, the right siding can significantly impact your home’s energy efficiency and longevity. Understanding the unique challenges posed by extreme temperatures, humidity, and intense sunlight is crucial. This exploration will equip you with the knowledge to choose the best insulated siding for your specific climate, minimizing maintenance needs and maximizing your investment.

    Types of Insulated Siding

    Choosing the right insulated siding for extreme climates is crucial for both energy efficiency and long-term durability. Several materials offer varying levels of insulation and performance characteristics, each with its own set of advantages and disadvantages. Understanding these differences is key to making an informed decision.

    Vinyl Insulated Siding

    Vinyl siding, often incorporating a foam insulation layer, is a popular choice due to its affordability and ease of installation. The foam backing enhances its insulating properties compared to traditional non-insulated vinyl. However, the R-value of vinyl siding with foam backing is generally lower than other insulated siding options. Its relatively low cost and ease of maintenance make it attractive, but its susceptibility to damage from impact and extreme temperature fluctuations should be considered in harsh climates. The color can fade over time with prolonged sun exposure.

    Fiber Cement Insulated Siding

    Fiber cement siding, a composite material of cement, cellulose fibers, and other additives, offers superior durability and fire resistance compared to vinyl. When combined with a foam insulation layer, it provides excellent thermal performance. Fiber cement is known for its longevity and ability to withstand extreme weather conditions, including high winds, heavy rain, and snow. While more expensive than vinyl, its extended lifespan and reduced maintenance requirements can offset the higher initial investment. However, it’s heavier than vinyl and requires more professional installation.

    Foam Insulated Siding

    Foam siding, typically made from polyurethane or polyisocyanurate, offers exceptional thermal performance with high R-values. Its lightweight nature makes it easier to install than fiber cement, but its susceptibility to damage from impact and UV degradation necessitates careful consideration in extreme climates. It is also more vulnerable to moisture damage if not properly installed and sealed. While its initial cost might be competitive, potential for damage and the need for careful installation must be factored in.

    Insulated Metal Siding

    Metal siding, often steel or aluminum, with a foam core provides a durable and energy-efficient option for extreme climates. The metal exterior offers excellent resistance to fire, impact, and insect damage. The foam core provides significant insulation, resulting in lower energy bills. However, metal siding can be prone to dents and scratches and may experience thermal expansion and contraction, potentially leading to noise issues in extreme temperatures. The higher initial cost is offset by its long lifespan and low maintenance needs.

    Comparison Table

    Siding Type R-Value (per inch) Approximate Lifespan (Years) Approximate Cost per Square Foot
    Vinyl (with foam backing) 1-2 20-30 $3-$8
    Fiber Cement (with foam backing) 2-4 50-80 $8-$15
    Foam (Polyurethane/Polyisocyanurate) 4-7 20-30 $5-$12
    Metal (with foam core) 3-5 50+ $10-$20

    Installation Methods and Considerations

    Proper installation of insulated siding is crucial for maximizing its energy efficiency and longevity, especially in extreme climates. Factors such as temperature fluctuations, high winds, heavy snowfall, and intense sunlight all significantly impact the installation process and the long-term performance of the siding. Careful planning and execution are essential to ensure a successful and durable installation.

    Best Practices for Extreme Climates

    Installing insulated siding in extreme climates requires specific considerations to mitigate the effects of harsh weather conditions. In extremely cold climates, it’s vital to ensure the materials are compatible with low temperatures and that the installation is completed before freezing temperatures set in. This might involve using specialized adhesives or fasteners designed for cold weather applications. Conversely, in hot climates, the focus shifts to preventing overheating and expansion of materials. Using appropriate sealants and fasteners that can withstand high temperatures is crucial. Proper ventilation behind the siding is also important in both hot and cold climates to prevent moisture buildup. This might involve incorporating ventilation channels or using breathable underlayments. Careful attention to expansion and contraction of materials due to temperature fluctuations is vital to prevent cracking or damage.

    Vapor Barriers and Air Sealing

    A properly installed vapor barrier is paramount to prevent moisture from entering the wall assembly. The vapor barrier should be installed continuously without gaps or tears, and all seams should be carefully sealed with appropriate tape. The placement of the vapor barrier depends on the climate and wall construction; in cold climates, it is typically placed on the warm side of the insulation to prevent moisture from condensing within the wall cavity. In hot and humid climates, it might be placed on the exterior side to prevent moisture intrusion from the outside. Air sealing is equally critical to minimize drafts and energy loss. All gaps and cracks around windows, doors, and other penetrations should be carefully sealed with caulk or sealant. This helps to maintain a consistent temperature within the building and reduce the load on the heating and cooling systems.

    Climate-Specific Installation Challenges

    High winds pose a significant challenge during installation, requiring the use of extra fasteners and reinforcement to prevent the siding from being blown off. Heavy snowfall can also put extra stress on the siding, so proper anchoring and snow load considerations are essential. In areas prone to hurricanes or tornadoes, impact-resistant siding should be considered, and the installation must be robust enough to withstand high winds and potential debris impact. In coastal areas, the siding should be chosen for its resistance to salt spray and moisture.

    Step-by-Step Installation of Insulated Vinyl Siding

    This guide outlines the installation of insulated vinyl siding, a popular choice for its durability and energy efficiency. Always refer to the manufacturer’s specific instructions for detailed guidance.

    Tools and Materials

    • Insulated vinyl siding panels
    • J-channel
    • Start and finish pieces
    • Fasteners (nails or screws)
    • Measuring tape
    • Level
    • Drill
    • Caulk
    • Safety glasses
    • Work gloves

    Safety Precautions

    Always wear safety glasses and work gloves during installation. Use caution when working at heights and use appropriate fall protection if necessary. Be mindful of power lines and other potential hazards.

    Installation Steps

    1. Prepare the wall surface: Ensure the wall is clean, dry, and free of any loose debris. Repair any damaged areas.
    2. Install the J-channel: Install the J-channel at the corners and around windows and doors.
    3. Install the starting piece: Attach the starting piece to the bottom of the wall, ensuring it is level.
    4. Install the siding panels: Snap the siding panels into place, starting from the bottom and working your way up. Use fasteners to secure the panels to the wall studs.
    5. Install the finish pieces: Install the finish pieces at the top of the wall and around windows and doors.
    6. Caulk all seams and joints: Caulk all gaps and seams to ensure a watertight seal.

    Impact of Climate on Siding Choice

    The choice of exterior siding is critically influenced by the prevailing climate. Extreme temperatures, high humidity, and intense sunlight all place significant stress on siding materials, impacting their longevity, aesthetic appeal, and energy efficiency. Understanding these impacts is crucial for selecting a siding system that will provide optimal performance and minimize maintenance over the lifespan of a structure.

    Extreme temperatures, both high and low, cause materials to expand and contract. This cyclical stress can lead to cracking, warping, and ultimately, failure of the siding. High humidity and rainfall contribute to moisture penetration, fostering the growth of mold and mildew and accelerating material degradation. Intense sunlight can cause fading and discoloration, diminishing the aesthetic value of the siding. The selection of appropriate siding must consider these factors to ensure long-term durability and performance.

    Temperature Effects on Siding Materials

    Different siding materials react differently to extreme temperatures. For instance, vinyl siding can become brittle and crack in extremely cold climates, while it may warp or sag under intense heat. Wood siding, while aesthetically pleasing, is susceptible to expansion and contraction, leading to gaps and potential moisture intrusion. Fiber cement siding generally offers better resistance to temperature fluctuations but is more prone to cracking if not properly installed. Metal siding, particularly aluminum and steel, demonstrates good dimensional stability across a wide temperature range but can experience thermal expansion and contraction, requiring careful consideration of expansion joints during installation. In arctic climates, materials like engineered wood or insulated vinyl siding might be more suitable due to their better resistance to cold-weather brittleness, while in desert climates, materials with high heat reflectivity, such as light-colored metal or fiber cement, are preferable to minimize heat absorption.

    Challenges Posed by High Humidity, Rainfall, and Sunlight

    High humidity and heavy rainfall create conditions conducive to moisture damage. Wood siding, if not properly treated, is highly susceptible to rot and decay. Vinyl siding, while generally moisture-resistant, can still trap moisture behind it if not properly installed, leading to mold growth. Fiber cement siding, being more resistant to moisture, is a popular choice in humid climates. However, prolonged exposure to moisture can still affect its performance. Intense sunlight can lead to fading and degradation of many siding materials. Darker-colored sidings absorb more heat, accelerating this process. The use of UV-resistant pigments in siding materials can mitigate this effect. In areas with frequent heavy rainfall, the use of water-resistant underlayment and proper flashing around windows and doors is critical, regardless of the siding material selected.

    Material Expansion and Contraction in Extreme Climates

    The expansion and contraction of siding materials due to temperature fluctuations is a major factor affecting their longevity. This is particularly pronounced in climates with significant temperature swings between day and night or across seasons. Materials with high coefficients of thermal expansion, such as vinyl, will expand and contract more than materials with lower coefficients, such as fiber cement. Proper installation techniques, including the use of expansion joints and fasteners designed to accommodate movement, are essential to minimize stress on the siding and prevent damage. Failure to account for expansion and contraction can lead to cracking, buckling, and premature failure of the siding system. For example, in areas with significant temperature swings, using a siding material with a lower coefficient of thermal expansion, such as fiber cement, might be more beneficial than vinyl, which is more prone to movement.

    Siding Suitability for Specific Extreme Climates

    Arctic climates demand siding materials with excellent resistance to cold temperatures and freeze-thaw cycles. Engineered wood siding, treated for moisture resistance, or insulated vinyl siding, offering better thermal performance, could be suitable options. Desert climates require materials that can withstand intense heat and sunlight. Light-colored metal siding or fiber cement siding with high reflectivity are generally preferred to minimize heat absorption and reduce the risk of fading. Coastal areas with high humidity and salt spray necessitate siding materials with exceptional resistance to moisture damage and corrosion. Fiber cement or properly treated wood siding may be considered in such environments. The choice of siding should always be made considering the specific challenges posed by the local climate to ensure long-term durability and performance.

    Energy Efficiency and Cost Savings

    Investing in insulated siding offers significant long-term financial benefits, particularly in regions experiencing extreme climates. The enhanced thermal performance translates directly into reduced energy consumption for heating and cooling, leading to substantial savings on utility bills and a faster return on the initial investment. This section will detail the financial aspects of choosing insulated siding, focusing on energy savings calculations, return on investment comparisons, and a breakdown of the overall installation costs.

    The energy savings achieved through insulated siding are directly related to the reduction in heat transfer through the exterior walls of a building. In extreme climates, this reduction can be substantial. For example, a home in a region with average winter temperatures of -10°C and summer temperatures of 35°C will experience a significantly lower energy demand with insulated siding compared to a home with traditional siding. This is because insulated siding creates a thermal barrier, minimizing the transfer of heat in both winter and summer, reducing the load on the heating and cooling systems.

    Energy Savings Calculations

    Calculating the precise energy savings depends on several factors, including the specific type of insulated siding, the climate, the size and orientation of the house, and the existing insulation levels. However, we can illustrate the potential savings with a simplified example. Let’s consider a 2,000 square foot home in a region with a high heating degree-day (HDD) and cooling degree-day (CDD) value. Assume the home currently uses a traditional siding system and has an annual energy cost of $3,000 for heating and cooling. Installing insulated siding with an R-value of 10 might reduce energy consumption by 20-30%, depending on the overall building envelope. This translates to annual savings of $600-$900 (20% of $3000 = $600; 30% of $3000 = $900). Over a 20-year period, this could accumulate to savings between $12,000 and $18,000.

    Annual Savings = (Percentage Reduction in Energy Consumption) x (Annual Energy Cost)

    Return on Investment (ROI) Comparison

    The initial cost of insulated siding varies significantly depending on the material chosen (e.g., vinyl, fiber cement, foam), the complexity of the installation, and regional labor costs. However, a general comparison can be made. Let’s assume the installation cost of insulated vinyl siding is $10,000, while insulated fiber cement siding might cost $15,000. Using the previously calculated annual savings of $600-$900, the ROI can be estimated. For vinyl siding, the payback period would range from 11 to 17 years ($10,000/$600 = 16.7 years; $10,000/$900 = 11.1 years). For fiber cement siding, the payback period would range from 17 to 25 years ($15,000/$600 = 25 years; $15,000/$900 = 16.7 years). This demonstrates that while the initial investment is higher for fiber cement, its superior durability and longer lifespan might offset the longer ROI period.

    Factors Influencing the Overall Cost of Insulated Siding Installation

    Several factors contribute to the total cost of insulated siding installation. Understanding these factors allows for better budgeting and informed decision-making.

    • Material Costs: The price of insulated siding varies widely depending on the material (vinyl, fiber cement, engineered wood, etc.), its thickness, and the manufacturer.
    • Labor Costs: Labor costs are significantly influenced by the size of the house, the complexity of the installation (e.g., removal of existing siding, repairs to underlying sheathing), and regional wage rates. Highly skilled labor may command a premium.
    • Permitting Fees: Building permits are typically required for exterior renovations, and the associated fees vary depending on local regulations and the scope of the project.
    • Preparation and Repair Costs: Existing siding removal, necessary repairs to underlying sheathing or framing, and the cost of any additional insulation may add to the overall expense.
    • Waste Disposal Fees: Disposal of old siding and other construction debris can incur additional costs.

    Financial Benefits of Choosing Insulated Siding

    The financial advantages of selecting insulated siding for extreme climates are compelling. These benefits extend beyond immediate cost savings and encompass long-term value and increased property value.

    • Reduced energy bills leading to significant long-term savings.
    • Faster return on investment compared to non-insulated siding options.
    • Increased home comfort due to better temperature regulation.
    • Potential increase in property value due to improved energy efficiency and curb appeal.
    • Lower maintenance costs due to the durability of many insulated siding materials.

    Maintenance and Lifespan

    Proper maintenance significantly extends the lifespan of insulated siding, especially in extreme climates where it faces harsh weather conditions. Regular care prevents costly repairs and ensures your home retains its curb appeal and energy efficiency for years to come. Neglecting maintenance can lead to premature deterioration and compromise the structural integrity of your siding.

    Potential Issues in Extreme Climates

    Extreme temperatures, heavy snowfall, intense sunlight, and strong winds all contribute to potential damage to insulated siding. For instance, extreme cold can cause cracking in certain materials, while intense heat can lead to warping or fading. Heavy snowfall can put extra stress on the siding, potentially causing it to buckle or break. Strong winds can dislodge poorly installed panels or damage vulnerable seams. Prolonged exposure to ultraviolet (UV) radiation from the sun can cause fading and discoloration, reducing the aesthetic appeal and potentially compromising the material’s protective properties. Salt spray in coastal areas accelerates corrosion and deterioration.

    Maintenance Practices for Extended Lifespan

    Regular cleaning and inspections are crucial for preventing costly repairs. A thorough cleaning removes dirt, debris, and pollutants that can accelerate weathering and damage. Regular inspections allow for the early detection of minor issues, such as cracks or loose panels, before they escalate into more significant problems. Addressing small problems promptly is significantly less expensive than dealing with extensive repairs later. For example, a small crack ignored can allow moisture to penetrate, leading to rot and the need for panel replacement.

    Maintenance Schedule for Insulated Siding

    A tailored maintenance schedule depends on the climate and the type of insulated siding installed. However, a general guideline includes:

    Task Frequency (Depending on Climate) Notes
    Inspection for damage (cracks, loose panels, etc.) Twice yearly (Spring and Fall) Pay close attention to corners, seams, and areas exposed to direct sunlight or wind.
    Cleaning (gentle wash with water and mild detergent) Annually or as needed Avoid harsh chemicals or high-pressure washers that can damage the siding.
    Repair of minor damage (caulking, patching) As needed Address any cracks or loose panels promptly to prevent further damage.
    Professional inspection and maintenance Every 5-10 years A professional can identify potential problems and perform necessary repairs.

    In regions with extreme weather, such as areas with frequent heavy snowfall or intense sun exposure, more frequent inspections and cleaning may be necessary. For example, areas prone to severe hailstorms should be checked more often for damage. Coastal areas should be inspected more frequently for signs of salt corrosion. This proactive approach significantly extends the lifespan of the siding and protects the investment made in home improvement.

    Sustainability and Environmental Impact

    Choosing insulated siding involves more than just aesthetics and energy efficiency; it also carries significant environmental implications. The manufacturing process, material sourcing, lifespan, and eventual disposal of siding all contribute to its overall environmental footprint. Understanding these factors allows for informed decision-making, enabling homeowners to minimize their environmental impact while improving their homes’ energy performance.

    The environmental impact of insulated siding varies greatly depending on the chosen material. Factors such as embodied carbon (the total greenhouse gas emissions associated with a product’s entire life cycle), recyclability, and the use of sustainable materials all play a crucial role. This section explores these factors in detail, providing a comparative analysis of different siding options to help consumers make environmentally conscious choices.

    Embodied Carbon of Different Siding Materials

    The embodied carbon of insulated siding materials differs significantly. For example, fiber cement siding generally has a lower embodied carbon footprint compared to vinyl siding due to the use of readily available natural materials in its production. However, the manufacturing process of fiber cement still involves energy consumption and the release of greenhouse gases. Vinyl siding, while often less expensive initially, typically possesses a higher embodied carbon footprint due to its reliance on fossil fuels during manufacturing and its limited recyclability. Wood siding, especially sustainably sourced and responsibly harvested wood, can present a lower embodied carbon footprint than vinyl, but this depends heavily on the specific wood species and forestry practices. Metal siding, such as aluminum or steel, also carries an environmental impact associated with its extraction and processing. The embodied carbon of each option can vary based on manufacturing processes, transportation distances, and the specific materials used. A comprehensive life-cycle assessment is necessary for an accurate comparison.

    Sustainable and Recycled Materials in Insulated Siding

    Several manufacturers are incorporating sustainable and recycled materials into their siding products. For instance, some vinyl siding manufacturers are utilizing recycled PVC content in their products, reducing reliance on virgin materials. Similarly, some fiber cement siding manufacturers are exploring the use of recycled materials in their formulations. The use of reclaimed wood in wood siding offers another avenue for sustainable construction, reducing the demand for newly harvested timber. The use of recycled aluminum in metal siding also contributes to reduced environmental impact. Choosing siding options with a high percentage of recycled content significantly reduces the overall environmental burden associated with its production.

    Certifications and Standards for Environmentally Friendly Siding

    Several certifications and standards exist to guide consumers towards environmentally friendly siding options. Look for certifications such as those from organizations focusing on sustainable forestry practices (e.g., Forest Stewardship Council – FSC) for wood siding, or those that verify recycled content percentages in other siding types. Additionally, certifications that address the entire life-cycle assessment, including manufacturing, transportation, and disposal, can provide a more holistic view of a product’s environmental impact. While specific certifications vary by region, checking for these labels can help consumers make informed choices that align with their sustainability goals.

    Warranty and Manufacturer Information

    Choosing insulated siding involves a significant investment, and understanding the warranty offered by the manufacturer is crucial for protecting that investment. A comprehensive warranty provides assurance regarding the product’s quality and longevity, offering recourse in case of defects or premature failure. This section details common warranty provisions and provides guidance on interpreting warranty terms to make informed purchasing decisions.

    Insulated siding warranties typically cover defects in materials and workmanship. Examples of common warranty clauses include coverage for fading, cracking, delamination, and damage from extreme weather conditions. The duration of these warranties varies significantly between manufacturers and product lines, ranging from 10 to 50 years or even lifetime warranties with specific conditions. Some warranties might be prorated, meaning the manufacturer’s responsibility for repair or replacement decreases over time. Others may be limited to the original purchaser or transferrable under specific conditions.

    Warranty Terms and Conditions

    Before purchasing insulated siding, meticulously review the warranty document provided by the manufacturer. Pay close attention to the specific details of what is covered and what is excluded. Common exclusions might include damage caused by improper installation, acts of God (e.g., hurricanes, tornadoes), or normal wear and tear. Understanding these limitations is crucial to avoid disappointment and disputes later on.

    Tips for Understanding Warranty Coverage

    To effectively assess a siding warranty, consider the following tips:

    • Duration: Note the length of the warranty and whether it covers the entire product or specific components. A longer warranty generally indicates greater confidence in the product’s durability.
    • Coverage: Carefully read the description of what is covered (e.g., material defects, labor costs, transportation). Some warranties might only cover the cost of materials, requiring you to pay for installation.
    • Exclusions: Identify any specific situations or types of damage that are not covered by the warranty. This information is often found in a separate section of the document.
    • Transferability: Determine if the warranty is transferable to a subsequent homeowner if you sell your property. This is a valuable consideration for long-term investment.
    • Process for Claiming: Understand the procedures involved in filing a warranty claim, including required documentation and timelines.

    Sample Warranty Comparison

    The following table provides a simplified comparison of warranties from three hypothetical manufacturers. Note that actual warranty terms and conditions will vary significantly based on the specific product and manufacturer.

    Manufacturer Warranty Duration Coverage Limitations
    ABC Siding 25 years Materials and workmanship; fading, cracking, delamination Excludes damage from improper installation, acts of God
    XYZ Cladding 30 years (prorated after 15 years) Materials only; fading, cracking Excludes labor costs, damage from impact, normal wear and tear
    123 Exterior Lifetime (limited) Materials; cracking, delamination Excludes fading, damage from improper installation, acts of God; Transferable only with proof of purchase

    Case Studies of Successful Installations

    Insulated siding has proven its effectiveness in various extreme climates, offering superior protection and energy efficiency. The following case studies highlight successful installations, emphasizing the crucial roles of proper material selection and installation techniques in achieving optimal results. These examples demonstrate the transformative impact of insulated siding, showcasing both improved energy performance and enhanced aesthetic appeal.

    Insulated Siding in a High-Altitude, Cold Climate (Colorado)

    A homeowner in a mountainous region of Colorado, experiencing extreme winter temperatures regularly dropping below -20°F (-29°C), opted for a high-density fiber cement insulated siding system. The installation team carefully addressed the challenges posed by the steep roof pitch and uneven terrain, employing specialized scaffolding and fastening techniques to ensure secure attachment. Prior to installation, the existing wood siding was assessed for rot and damage, with necessary repairs completed before the new siding was applied. The before-and-after visual transformation was dramatic; the previously drab and weathered exterior was replaced with a clean, modern look that significantly improved curb appeal. The homeowner reported a substantial reduction in heating costs, exceeding initial projections by approximately 15%, directly attributable to the superior insulation properties of the new siding. The improved energy efficiency also reduced the strain on the home’s heating system, extending its lifespan.

    Insulated Siding in a Coastal, High-Humidity Climate (Florida)

    A beachfront property in Florida, facing the challenges of intense sun, salt spray, and high humidity, was retrofitted with insulated vinyl siding. The selection of vinyl was strategic, as this material is highly resistant to moisture damage and UV degradation. To mitigate the impact of salt spray, the installers meticulously sealed all seams and joints, ensuring a watertight barrier. Prior to installation, existing aluminum siding was removed, and any underlying damage to the sheathing was repaired. The visual impact of the project was remarkable. The new insulated vinyl siding not only provided a more modern aesthetic but also offered superior protection against the harsh coastal elements. The homeowner reported a noticeable decrease in energy consumption, coupled with reduced maintenance needs compared to the previous aluminum siding. The lighter color of the new siding also helped reflect sunlight, further reducing the impact of the intense Florida sun on interior temperatures.

    Insulated Siding in an Arid, Hot Climate (Arizona)

    A home in the Sonoran Desert of Arizona, subjected to extreme heat and intense UV radiation, benefited from the installation of insulated stucco siding. The selection of light-colored stucco was crucial in minimizing heat absorption. The installers paid particular attention to proper ventilation behind the siding to prevent moisture buildup. Before installing the new siding, the existing stucco, which was showing significant signs of cracking and deterioration, was carefully removed. The improved energy efficiency was substantial, resulting in a significant reduction in cooling costs. The before-and-after visual transformation was evident, with the previously dull and faded exterior replaced by a crisp, clean, and modern facade that reflected the desert landscape. The homeowner also noted a significant reduction in the interior temperature fluctuations, creating a more comfortable living environment.

    Future Trends in Insulated Siding Technology

    The field of insulated siding is constantly evolving, driven by the increasing demand for energy-efficient and sustainable building materials, particularly in regions with extreme climates. Innovations in material science and manufacturing processes are leading to significant advancements in performance, durability, and environmental impact. These trends promise to reshape the insulated siding market in the coming years.

    Several key factors are driving these advancements. The growing awareness of climate change and the need to reduce carbon emissions are pushing the development of more sustainable materials and manufacturing processes. Simultaneously, the increasing cost of energy is incentivizing homeowners and builders to invest in energy-efficient building products, like high-performance insulated siding. Technological advancements are also playing a crucial role, enabling the creation of novel materials and improved manufacturing techniques.

    Advancements in Material Science

    The development of new composite materials is a significant trend. For instance, research is ongoing into using recycled materials in the production of insulated siding, reducing reliance on virgin resources and minimizing environmental impact. This includes exploring the use of recycled plastics and fibers in the core insulation layer and the outer cladding. Furthermore, advancements in polymer chemistry are leading to the development of more durable and weather-resistant cladding materials, extending the lifespan of the siding and reducing the need for frequent replacements. Examples include self-healing polymers that can repair minor damage, and coatings that provide superior UV resistance and protection against fading.

    Enhanced Energy Efficiency and Sustainability

    Insulated siding is already a key component of energy-efficient building envelopes. Future trends point towards even greater improvements in thermal performance. This includes the development of high-performance insulation materials with lower thermal conductivity, such as vacuum insulated panels (VIPs), which offer significantly better insulation than traditional foam insulation. The integration of phase-change materials (PCMs) into the siding’s design is another promising avenue. PCMs absorb and release heat as they change phase, effectively buffering temperature fluctuations and reducing energy consumption for heating and cooling. Additionally, the use of bio-based materials, such as rapidly renewable plant fibers, in the manufacturing process is gaining traction, further enhancing the sustainability profile of insulated siding.

    Impact on Cost and Availability

    The introduction of new materials and technologies will likely impact the cost and availability of insulated siding. Initially, some innovative products may be more expensive due to higher manufacturing costs and limited production scale. However, as these technologies mature and economies of scale are achieved, prices are expected to decrease, making them more accessible to a wider range of consumers. Increased competition among manufacturers will also contribute to price reductions. The availability of these advanced products will initially be limited, but as demand increases and production capacity expands, wider distribution is anticipated.

    Future Outlook for Insulated Siding in Extreme Climates

    The future outlook for insulated siding in extreme climates is positive. Advancements in material science, coupled with a growing focus on energy efficiency and sustainability, will lead to the development of even more effective and environmentally friendly products. These improvements will translate into significant energy savings, reduced environmental impact, and improved comfort for homeowners in regions experiencing extreme temperatures. The increased availability and affordability of high-performance insulated siding will make it an increasingly attractive option for new construction and renovations, contributing to a more sustainable and resilient built environment.

    Closing Notes

    Choosing the right insulated siding for extreme climates is a significant investment that pays off in energy savings, enhanced comfort, and increased home value. By carefully considering factors such as material properties, installation techniques, and long-term maintenance, you can protect your home from the elements and enjoy lasting peace of mind. This guide has provided a comprehensive overview to empower you to make the best decision for your unique needs and climate.

  • How Insulated Siding Improves Home Comfort and Efficiency

    How Insulated Siding Improves Home Comfort and Efficiency

    How Insulated Siding Improves Home Comfort and Efficiency: Investing in insulated siding offers a multifaceted approach to enhancing your home’s energy performance and overall living experience. This upgrade not only contributes significantly to reduced energy bills but also creates a more comfortable and quieter living environment. We’ll explore the various types of insulated siding, their installation, maintenance, and the long-term benefits they provide, including increased home value and curb appeal.

    From understanding the composition of different insulated siding materials to analyzing the return on investment, this comprehensive guide equips homeowners with the knowledge needed to make informed decisions about improving their home’s comfort and efficiency. We will delve into the science behind how insulated siding minimizes heat transfer, reduces drafts, and even dampens noise pollution. We’ll also examine the environmental considerations and the long-term cost-effectiveness compared to traditional siding options. By the end, you’ll have a clear understanding of whether insulated siding is the right choice for your home.

    Introduction to Insulated Siding

    Insulated siding offers a compelling alternative to traditional siding, enhancing both the aesthetic appeal and energy efficiency of your home. It combines the protective outer layer of traditional siding with an integrated layer of insulation, creating a more comfortable and cost-effective living environment. This integrated design streamlines installation and reduces the need for separate insulation measures, resulting in a more efficient and streamlined construction process.

    Insulated siding materials typically consist of an outer layer designed for weather resistance and aesthetic appeal, a core layer providing insulation, and sometimes a backing layer for added protection and structural support. The outer layer is often made of materials like vinyl, fiber cement, or engineered wood, each offering unique benefits in terms of durability, maintenance, and appearance. The core insulation is commonly made of rigid foam insulation, such as expanded polystyrene (EPS) or extruded polystyrene (XPS), known for their excellent thermal resistance. These materials contribute significantly to the overall energy efficiency of the siding system.

    Insulated Siding Types

    The choice of insulated siding depends on several factors, including budget, aesthetic preferences, and the specific climate. Different types of insulated siding offer varying levels of performance and longevity.

    • Vinyl Insulated Siding: This is a popular choice due to its affordability, low maintenance, and wide range of colors and styles. The vinyl outer layer is durable and easy to clean, while the foam core provides effective insulation. Vinyl insulated siding is often a good option for homeowners seeking a balance between cost and performance.
    • Fiber Cement Insulated Siding: Offering superior durability and fire resistance compared to vinyl, fiber cement insulated siding is a more premium option. It’s known for its long lifespan and ability to withstand harsh weather conditions. However, it is typically more expensive than vinyl siding and requires more careful installation.
    • Engineered Wood Insulated Siding: Engineered wood siding combines the natural beauty of wood with enhanced durability and moisture resistance. The insulation core helps to prevent moisture damage and improve energy efficiency. This type of siding often provides a more sophisticated aesthetic appeal but may require more maintenance than vinyl.

    Insulated Siding vs. Traditional Siding

    A key difference lies in the integrated insulation. Traditional siding requires separate installation of insulation, often within the wall cavity. This can lead to thermal bridging—heat loss through areas where the insulation is not continuous—and potential gaps in the insulation layer. Insulated siding, on the other hand, eliminates this issue by incorporating insulation directly within the siding panel.

    Feature Insulated Siding Traditional Siding
    Insulation Integrated within siding panel Installed separately in wall cavity
    Installation Often faster and simpler More complex, requiring separate insulation installation
    Energy Efficiency Generally higher due to reduced thermal bridging Can be less efficient due to potential thermal bridging and installation inconsistencies
    Maintenance Varies depending on material; generally low to moderate Varies depending on material; may require more frequent repainting or repairs
    Cost Generally more expensive upfront Typically less expensive upfront, but may have higher long-term energy costs

    Energy Efficiency Benefits

    Insulated siding offers significant advantages in improving a home’s energy efficiency, leading to both increased comfort and lower energy bills. By creating an effective barrier against heat transfer, it helps maintain a consistent indoor temperature year-round, reducing the strain on your heating and cooling systems.

    Insulated siding reduces heat transfer in both summer and winter months. During summer, the insulating layer prevents the outside heat from penetrating the walls, keeping the interior cooler and reducing the workload on your air conditioning system. Conversely, in winter, the insulation minimizes heat loss from the interior, helping to keep your home warmer and reducing the demand on your heating system. This two-way protection translates directly into substantial energy savings.

    Impact on Energy Bills

    The impact of insulated siding on energy bills is demonstrably positive. By reducing the energy needed to heat and cool your home, you can expect a noticeable decrease in your monthly utility costs. The exact amount of savings will vary depending on factors such as climate, home size, existing insulation, and the type of insulated siding installed. However, studies consistently show significant reductions in energy consumption. For example, a study by the Oak Ridge National Laboratory indicated that homes with insulated siding experienced an average reduction of 15-25% in heating and cooling costs compared to homes with traditional siding. This translates to substantial savings over the lifespan of the siding.

    Energy Savings Data

    Several studies and real-world examples support the energy-saving claims of insulated siding. Independent testing by organizations like the National Fenestration Rating Council (NFRC) provides data on the thermal performance of various siding materials. This data is often expressed in terms of R-value, which measures the material’s resistance to heat flow. A higher R-value indicates better insulation. For instance, a typical insulated vinyl siding might have an R-value of 4 or higher, significantly exceeding the R-value of traditional wood or aluminum siding. This improved R-value directly contributes to lower energy consumption and reduced utility bills. Homeowners who have installed insulated siding often report savings ranging from 10% to 30% on their annual energy bills, depending on factors such as climate and home size. These savings not only offset the initial cost of installation but also provide long-term financial benefits.

    Improved Home Comfort

    Insulated siding significantly enhances your home’s comfort by creating a more stable and pleasant indoor environment. This improvement stems from its ability to regulate temperature, reduce drafts, and minimize external noise intrusion.

    Insulated siding minimizes temperature fluctuations by acting as a barrier against heat transfer. In the summer, it prevents the sun’s heat from penetrating the walls, keeping your home cooler and reducing the strain on your air conditioning system. Conversely, during winter, it effectively insulates your home, retaining heat and reducing the amount of energy needed to maintain a comfortable temperature. This results in a more consistent internal temperature, regardless of external weather conditions. The improved thermal mass provided by the siding helps to moderate temperature swings, preventing sudden temperature drops or spikes.

    Reduced Drafts and Air Leaks

    Drafts and air leaks are common culprits behind discomfort in homes, leading to uneven temperatures and energy waste. Insulated siding effectively seals gaps and cracks in your exterior walls, preventing cold air from entering in winter and warm air from escaping in summer. This creates a tighter building envelope, minimizing drafts and improving the overall comfort level within your home. The reduction in air infiltration also contributes to better indoor air quality by preventing the entry of pollutants and allergens from the outside.

    Noise Reduction

    Noise pollution is a significant factor affecting home comfort. Insulated siding plays a crucial role in sound dampening, reducing the amount of external noise that penetrates your home. The added insulation layer acts as a sound barrier, absorbing and deflecting sound waves, creating a quieter and more peaceful indoor environment. This is particularly beneficial for homes located near busy roads, airports, or other noisy areas.

    Noise Level (dB) Without Insulated Siding With Insulated Siding
    Traffic Noise 75-85 60-70
    Construction Noise 90-100 75-85
    Neighbor Noise 55-65 40-50

    Installation Process and Considerations

    Insulated siding installation is a multifaceted process requiring careful planning and execution. While it can be a DIY project for experienced homeowners, professional installation is often recommended, especially for larger homes or complex designs. Understanding the process, potential challenges, and necessary precautions is crucial for a successful outcome.

    The typical installation of insulated siding involves several key steps, beginning with the preparation of the existing exterior walls. This includes removing old siding, repairing any damaged areas, and ensuring the underlying structure is sound. Next, the installation of furring strips or other fastening systems provides a level surface for the new siding and helps to create a proper air gap for insulation. The insulated siding panels are then installed, overlapping appropriately and secured using appropriate fasteners. Finally, trim pieces and accessories are installed to complete the project, ensuring a clean and professional finish. This process varies slightly depending on the specific type of insulated siding used, but the core steps remain consistent.

    Potential Installation Challenges and Solutions

    Several challenges can arise during insulated siding installation. These can range from unforeseen structural issues to difficulties with fitting panels around complex architectural features. Careful planning and preparation can mitigate many of these problems. For instance, improperly prepared surfaces can lead to uneven siding and compromised insulation. Solutions include addressing structural issues before starting installation and using appropriate shims and fasteners to ensure a level surface. Working with difficult angles or curves requires precise measurements and cuts, which may necessitate specialized tools and techniques. In such cases, utilizing pre-fabricated components or seeking professional assistance may prove advantageous.

    DIY Installation Step-by-Step Guide

    For homeowners considering a DIY approach, careful planning and preparation are paramount. A step-by-step guide, coupled with a realistic assessment of one’s skills, is essential. Attempting installation without sufficient knowledge or experience can lead to costly mistakes and potentially compromise the integrity of the home’s exterior.

    1. Thorough Assessment and Planning: Carefully measure the area requiring siding and purchase sufficient materials. This includes siding panels, fasteners, trim, and any necessary underlayment. Account for waste and potential errors. Consider creating detailed diagrams to visualize the installation process.
    2. Surface Preparation: Remove existing siding, ensuring a clean and level surface. Repair any damaged areas of the underlying wall structure. This might involve patching holes, replacing rotten wood, or addressing any other structural issues. A properly prepared surface is critical for a successful installation.
    3. Installation of Furring Strips (if necessary): Install furring strips to create a level surface and air gap behind the siding. Ensure they are properly spaced and securely fastened to the wall. This step improves insulation and ventilation.
    4. Siding Panel Installation: Begin installing the siding panels from the bottom, working upwards. Follow the manufacturer’s instructions carefully regarding overlap and fastening. Ensure proper alignment and spacing between panels. Utilize appropriate tools to ensure accurate cuts and clean lines.
    5. Trim and Accessory Installation: Install trim pieces around windows, doors, and corners, ensuring a neat and professional finish. This adds to the overall aesthetic appeal and protects the edges of the siding.
    6. Final Inspection: Once the installation is complete, conduct a thorough inspection to ensure all panels are securely fastened and there are no gaps or visible imperfections. Address any issues before the project is considered finished.

    Maintenance and Longevity

    Insulated siding, while offering significant long-term benefits, requires some maintenance to ensure its continued performance and aesthetic appeal. Understanding these requirements and the lifespan of different materials will help homeowners make informed decisions and maximize their investment. Proper care can significantly extend the life of your siding and prevent costly repairs down the line.

    Proper maintenance significantly impacts the longevity and performance of insulated siding. Regular cleaning and prompt attention to any damage are key to preserving its energy efficiency and aesthetic value. Neglecting maintenance can lead to premature deterioration and compromise the investment.

    Insulated Siding Maintenance Requirements

    Regular cleaning is crucial to maintain the appearance and performance of insulated siding. This typically involves washing the siding with a mild detergent and water solution using a soft brush or sponge. Power washing should be avoided as it can damage the siding’s surface. Annual inspections are recommended to check for any signs of damage, such as cracks, dents, or loose panels. Promptly addressing any damage will prevent further deterioration and potential water intrusion. For example, a small crack left unrepaired can allow moisture to penetrate, leading to rot or mold growth. Additionally, it’s advisable to trim back any overhanging branches that might scratch or damage the siding during storms.

    Lifespan and Durability of Insulated Siding Types

    The lifespan of insulated siding varies depending on the material used, the quality of installation, and the level of maintenance provided. Vinyl insulated siding, for example, is known for its durability and can last for 30-50 years with proper care. Fiber cement insulated siding, while more expensive initially, offers an even longer lifespan, often exceeding 50 years. Aluminum insulated siding is also quite durable and can last for several decades, but it’s more susceptible to dents and scratches. Wood insulated siding, while aesthetically pleasing, requires more frequent maintenance and has a shorter lifespan than vinyl or fiber cement, typically ranging from 20-30 years depending on the type of wood and the climate. The choice of material should consider the local climate, budget, and desired aesthetic.

    Long-Term Cost-Effectiveness of Insulated Siding

    While the initial cost of insulated siding might be higher than that of non-insulated options, the long-term cost-effectiveness is undeniable. The energy savings resulting from improved insulation can significantly offset the higher upfront investment over the siding’s lifespan. For example, a homeowner might spend an extra $5,000 on insulated siding compared to non-insulated alternatives. However, the reduced energy bills over 30 years could easily exceed this amount, leading to substantial savings. Furthermore, the increased lifespan of insulated siding reduces the need for frequent replacements, further contributing to its long-term cost-effectiveness compared to options requiring more frequent maintenance or replacement. This makes insulated siding a sound financial investment for homeowners seeking both energy efficiency and long-term value.

    Environmental Impact

    Insulated siding offers significant environmental advantages compared to traditional siding options, contributing to a more sustainable building practice and reduced carbon footprint. The benefits extend from the manufacturing process to the long-term energy savings it provides for homeowners.

    The sustainability of insulated siding hinges on the materials used in its production. Many manufacturers utilize recycled content in their products, reducing reliance on virgin materials and minimizing landfill waste. Furthermore, the use of materials with high recycled content contributes to a smaller carbon footprint throughout the product lifecycle. For example, some insulated siding manufacturers incorporate recycled plastic or wood fibers into their formulations, diverting waste from landfills and reducing the demand for new raw materials. The selection of sustainably sourced wood for certain types of insulated siding further enhances its environmental profile.

    Material Sustainability in Insulated Siding Production

    The environmental impact of insulated siding production is significantly influenced by the materials employed. Common materials include vinyl, fiber cement, and engineered wood. Vinyl siding, while often criticized for its reliance on fossil fuels, can incorporate recycled PVC content, reducing its overall environmental impact. Fiber cement siding, a composite material, typically contains a mix of cement, cellulose fibers, and other additives, offering a more sustainable alternative to some traditional siding options. Engineered wood siding often utilizes recycled wood fibers, further minimizing environmental impact. The selection of materials with high recycled content and sustainable sourcing practices directly impacts the overall sustainability of the product.

    Comparison of Carbon Footprint: Insulated vs. Traditional Siding

    A life-cycle assessment comparing insulated siding to traditional options reveals significant differences in carbon footprint. Traditional siding materials, such as wood, often require extensive harvesting and processing, resulting in higher greenhouse gas emissions. Furthermore, the lack of insulation in traditional siding necessitates increased energy consumption for heating and cooling, adding to the overall carbon footprint of the building over its lifetime. Insulated siding, by contrast, reduces energy consumption through improved insulation, thereby offsetting some of the emissions associated with its manufacturing. While the initial manufacturing process of insulated siding may have a slightly higher carbon footprint compared to some traditional options, the long-term energy savings from reduced heating and cooling needs significantly decrease the overall environmental impact over the siding’s lifespan. Studies comparing life-cycle assessments of various siding types often demonstrate that insulated siding presents a lower overall carbon footprint when considering the entire building lifecycle.

    Cost Analysis and Return on Investment

    Investing in insulated siding represents a significant home improvement, and understanding the associated costs and potential return on investment (ROI) is crucial for making an informed decision. This section will analyze the initial investment and demonstrate how to calculate the potential long-term financial benefits of this upgrade.

    The initial cost of purchasing and installing insulated siding varies considerably depending on several factors. These factors include the size of your home, the type of siding chosen (vinyl, fiber cement, etc.), the complexity of the installation (e.g., requiring significant repairs or removal of existing siding), regional labor costs, and the chosen contractor’s pricing. A rough estimate for a mid-sized home might range from $10,000 to $30,000 or more, but it’s essential to obtain multiple quotes from reputable contractors for an accurate assessment specific to your project.

    Calculating Return on Investment for Insulated Siding

    Calculating the ROI for insulated siding involves comparing the initial investment cost to the long-term savings generated through reduced energy consumption. This calculation requires estimating both the upfront costs and the anticipated annual energy savings. Several factors influence the accuracy of this calculation, including your current energy consumption, local energy prices, the R-value of the chosen insulated siding, and climate conditions.

    Sample ROI Calculation

    Let’s consider a hypothetical example: A homeowner invests $15,000 in installing insulated siding on a 1,500 square foot home. Assume their current annual heating and cooling costs are $2,000. After installation, they experience a 20% reduction in energy bills, resulting in annual savings of $400 ($2,000 x 0.20).

    To calculate the simple payback period, divide the initial investment by the annual savings: $15,000 / $400 = 37.5 years. This indicates that it would take approximately 37.5 years to recoup the initial investment through energy savings alone.

    However, a more comprehensive ROI calculation would also consider factors such as increased home value and potential tax credits. For instance, if the insulated siding increases the home’s value by $5,000, this should be added to the total return. Additionally, some regions offer tax incentives for energy-efficient home improvements. These factors can significantly improve the overall ROI, potentially shortening the payback period considerably. Therefore, it is crucial to factor in all relevant financial aspects for a realistic assessment.

    A thorough ROI calculation requires considering not only energy savings but also potential increases in home value and any applicable tax credits or rebates.

    Home Value and Curb Appeal

    Investing in insulated siding offers a significant return, not just in energy savings, but also in increased home value and enhanced curb appeal. A visually appealing and energy-efficient home is highly desirable in the real estate market, leading to a faster sale and a potentially higher selling price. Furthermore, improved curb appeal can positively impact a homeowner’s enjoyment of their property.

    Insulated siding dramatically improves a home’s aesthetic appeal by providing a clean, modern, and well-maintained look. The variety of colors and styles available allows homeowners to personalize their homes to reflect their individual tastes and complement their landscaping. This improved appearance not only enhances the property’s visual attractiveness but also contributes significantly to its market value. Appraisers often consider curb appeal a key factor when assessing a home’s worth.

    Siding Styles and Colors that Enhance Curb Appeal

    The selection of siding style and color significantly impacts a home’s overall curb appeal. Choosing the right combination can transform a house from ordinary to extraordinary. Consider the architectural style of your home when making your selection.

    • Classic Vinyl Siding: Available in a wide range of colors, including traditional earth tones like beige, brown, and gray, as well as bolder options like navy blue or deep red. This style offers a timeless appeal and requires minimal maintenance. Imagine a two-story colonial home with crisp white trim and deep charcoal vinyl siding – a classic and elegant combination.
    • Modern Fiber Cement Siding: Fiber cement offers a sophisticated, low-maintenance alternative to wood siding. Its sleek lines and ability to mimic the look of wood, stone, or stucco makes it ideal for contemporary or craftsman-style homes. Consider a sleek, gray fiber cement siding on a modern ranch-style home, accented with black windows and a dark gray front door.
    • Traditional Wood Siding: While requiring more maintenance, wood siding offers unparalleled natural beauty and character. Natural wood tones like cedar or redwood can create a warm and inviting aesthetic, especially for homes with a rustic or farmhouse design. Picture a charming cabin-style home with stained cedar siding, complementing its stone foundation and surrounding trees.

    Choosing the Right Insulated Siding

    Selecting the ideal insulated siding involves careful consideration of several key factors to ensure optimal performance, longevity, and aesthetic appeal for your home. The right choice depends on your climate, budget, and personal preferences. Understanding these factors will guide you towards a decision that maximizes both energy efficiency and curb appeal.

    Factors Influencing Insulated Siding Selection

    Several critical factors should be evaluated when choosing insulated siding. These include climate conditions, budget constraints, home style, and desired maintenance levels. The interplay of these factors will ultimately determine the most suitable material for your specific needs.

    • Climate: Homes in colder climates will benefit from siding with higher R-values (a measure of thermal resistance), offering superior insulation against freezing temperatures. Conversely, warmer climates might prioritize siding with better ventilation properties to prevent moisture buildup. For example, fiber cement siding might be preferred in a humid coastal climate due to its resistance to moisture damage, while vinyl siding, with its lower cost, might be suitable in a dry, desert climate.
    • Budget: Insulated siding options vary significantly in price. Vinyl siding is generally the most affordable, while fiber cement and engineered wood siding represent higher initial investments. It’s crucial to balance cost with long-term energy savings and durability.
    • Home Style: The architectural style of your home should influence your siding choice. Certain materials complement specific styles better than others. For example, traditional homes might pair well with clapboard siding, while modern homes might look better with sleek, smooth-surface options.
    • Maintenance Requirements: Different siding materials require varying levels of maintenance. Vinyl siding is generally low-maintenance, while wood siding requires regular painting or staining to protect against rot and insect damage. Fiber cement requires less maintenance than wood but more than vinyl.

    Material Comparison and Climate Suitability

    Various materials offer unique properties impacting their suitability for different climates. Understanding these differences is key to making an informed decision.

    Material Climate Suitability Pros Cons
    Vinyl Mild to moderate climates; less suitable for extreme temperatures or high humidity. Affordable, low maintenance, variety of colors and styles. Can be easily damaged, less durable than other options, may fade in intense sunlight.
    Fiber Cement Most climates; durable and resistant to fire, insects, and moisture. Durable, low maintenance, fire-resistant, resists insects and rot. Higher initial cost, heavier than vinyl, requires professional installation.
    Engineered Wood Moderate climates; less suitable for extremely wet or dry conditions. Aesthetically pleasing, relatively durable, can be painted or stained. More susceptible to moisture damage than fiber cement, requires regular maintenance.

    Insulated Siding Selection Decision-Making Flowchart

    A structured approach simplifies the decision-making process. The following flowchart provides a step-by-step guide.

    Begin by assessing your budget and climate. If budget is limited and climate is mild, consider vinyl siding. If budget allows and climate is extreme, consider fiber cement. If aesthetic appeal is prioritized and climate is moderate, consider engineered wood. Finally, factor in maintenance requirements and home style before making a final decision.

    Case Studies and Real-World Examples

    Illustrating the tangible benefits of insulated siding requires looking beyond theoretical data. This section presents real-world examples showcasing the impact of insulated siding on homes, highlighting homeowner experiences and the visual transformations achieved. We’ll explore specific cases to demonstrate the practical advantages and long-term value this upgrade provides.

    Successful Insulated Siding Installations

    The following examples demonstrate the successful application of insulated siding across various home styles and climates. These cases highlight the versatility and effectiveness of this home improvement solution.

    Example 1: A Colonial-Style Home in New England. A 1920s Colonial home in Massachusetts, originally clad in aging clapboard, underwent a complete exterior renovation. The installation of insulated vinyl siding not only dramatically improved the home’s curb appeal—transforming its faded, weathered exterior into a crisp, clean white—but also significantly reduced energy consumption. Before the renovation, the homeowners reported high heating bills during winter. After installation, they experienced a 30% reduction in their annual heating costs. The new siding’s robust construction also provided better protection against harsh New England weather, reducing maintenance needs. The visual transformation involved replacing the aged, uneven clapboard with smooth, uniformly colored vinyl siding, enhancing the home’s architectural details. The before image showed a home with noticeable discoloration and damage, while the after image showcased a revitalized home with a clean, updated appearance.

    Example 2: A Ranch-Style Home in the Southwest. A ranch-style home in Arizona, initially faced with stucco showing signs of cracking and fading, benefited from the installation of insulated fiber cement siding. The light-colored siding reflected sunlight, significantly reducing the interior temperature and lowering cooling costs. The homeowners reported a 20% decrease in their annual cooling bills. Furthermore, the fiber cement siding proved highly resistant to the intense desert sun and high temperatures, maintaining its appearance and structural integrity for years without requiring significant maintenance. The before image displayed the cracked and faded stucco, highlighting its deteriorated condition. The after image showcased the smooth, uniformly colored fiber cement siding, which improved the home’s aesthetic appeal and provided a more modern look.

    Homeowner Testimonials

    Direct feedback from homeowners who have experienced the benefits of insulated siding provides compelling evidence of its effectiveness.

    “We were hesitant about the investment at first, but the energy savings from our new insulated siding have already paid for a significant portion of the installation cost. Beyond that, our home is so much more comfortable year-round,” said Mrs. Johnson, a homeowner from Maine who opted for insulated vinyl siding.

    “The upgrade was a game-changer for our home in Phoenix. The insulated siding kept the interior significantly cooler during the scorching summers, drastically reducing our energy bills and improving our comfort level,” stated Mr. Rodriguez, a homeowner in Arizona who chose insulated fiber cement siding.

    Before-and-After Visual Transformations

    The visual impact of insulated siding is often as striking as its functional benefits.

    Many homes, particularly older ones, exhibit signs of wear and tear, such as peeling paint, damaged siding, and uneven surfaces. The installation of insulated siding not only addresses these issues but also offers a chance to refresh the home’s exterior color and style. Before-and-after photos commonly reveal a dramatic transformation, showcasing the updated appearance of the home. For instance, a weathered wood-sided home might be transformed into a modern, sleek structure with a new color scheme, while a home with outdated vinyl siding can be updated with a more contemporary style and color. The improvement is often so dramatic that it can add significantly to the overall aesthetic appeal and curb appeal of the property. In many cases, the renewed appearance not only improves the home’s value but also enhances the neighborhood’s aesthetic.

    Summary

    Ultimately, the decision to install insulated siding represents a significant investment in your home’s future. By weighing the initial costs against the long-term energy savings, increased comfort, enhanced curb appeal, and improved home value, homeowners can confidently assess the return on investment. The enhanced energy efficiency, reduced noise levels, and improved comfort contribute to a more enjoyable and valuable living space, making insulated siding a worthwhile consideration for any homeowner seeking to upgrade their property.

  • Pros and Cons of Insulated Vinyl Siding

    Pros and Cons of Insulated Vinyl Siding

    Pros and Cons of Insulated Vinyl Siding: Choosing the right siding for your home is a significant decision, impacting both aesthetics and long-term costs. Insulated vinyl siding presents a compelling option, promising energy efficiency and low maintenance. However, understanding its full range of advantages and disadvantages is crucial before making a commitment. This exploration delves into the multifaceted nature of insulated vinyl siding, examining its initial investment, long-term savings, durability, and environmental impact to help you make an informed choice.

    This comprehensive guide provides a balanced perspective, weighing the benefits against the potential drawbacks. We’ll compare insulated vinyl siding to other popular materials, analyzing factors such as lifespan, maintenance requirements, and aesthetic appeal. By the end, you’ll possess the knowledge needed to confidently determine if insulated vinyl siding is the right solution for your home improvement project.

    Initial Cost Comparison

    Choosing the right siding for your home involves careful consideration of various factors, not least of which is the initial cost. While insulated vinyl siding offers many advantages, understanding its price point relative to other common materials is crucial for informed decision-making. This section will compare the upfront costs of insulated vinyl siding with those of wood, fiber cement, and aluminum siding.

    Average Costs Per Square Foot of Different Siding Materials

    The initial cost of siding installation varies significantly depending on the material chosen. Labor costs, material quality, and regional differences all play a role. The following table provides average cost estimates per square foot for various siding options. It’s important to remember that these are averages, and actual costs can fluctuate based on several factors.

    Siding Material Average Cost Per Square Foot (USD) Range (USD) Notes
    Insulated Vinyl Siding $8-$15 $5 – $20+ Includes installation; cost varies greatly depending on features, thickness, and installation complexity.
    Wood Siding $10-$30 $7 – $40+ Price varies dramatically based on wood type (e.g., cedar, redwood) and quality. Requires more maintenance.
    Fiber Cement Siding $12-$25 $8 – $35+ Durable and low-maintenance, but typically more expensive than vinyl.
    Aluminum Siding $7-$12 $5 – $18+ Generally less expensive than vinyl or fiber cement, but may not offer the same insulation value.

    Factors Influencing the Initial Cost of Insulated Vinyl Siding Installation

    Several factors contribute to the overall cost of installing insulated vinyl siding. Understanding these factors allows for more accurate budgeting and informed comparisons with other siding options.

    Labor Costs: Labor costs are a significant component of the total installation expense. The complexity of the project, the size of the house, and the experience level of the installer all influence labor costs. A more complex project with intricate detailing will generally cost more to install than a simple, straightforward job.

    Material Quality: The quality of the insulated vinyl siding itself impacts the price. Higher-quality siding often features thicker panels, improved insulation properties, and more durable materials, resulting in a higher initial cost. Conversely, lower-quality siding may be less expensive but may have a shorter lifespan and require more frequent repairs.

    Regional Variations: Regional differences in labor rates, material availability, and permitting requirements can affect the total cost. Areas with high labor costs or limited access to materials will likely have higher installation costs than regions with more favorable conditions. For example, installation costs in major metropolitan areas tend to be higher than those in rural areas.

    Long-Term Cost Savings

    Insulated vinyl siding offers significant long-term cost savings primarily through reduced energy consumption and lower maintenance needs. While the initial investment may be higher than some other siding options, these savings accumulate over the lifespan of the siding, often making it a financially sound choice in the long run.

    The insulation properties of insulated vinyl siding work by creating a barrier that reduces heat transfer between the interior and exterior of your home. This means less energy is required to heat your home in the winter and cool it in the summer. For example, a home in a climate with average winter temperatures of 30°F and summer temperatures of 90°F could see a reduction in heating and cooling costs of 10-15% or more depending on the existing insulation levels and the R-value of the vinyl siding. This translates to substantial savings over a period of 10, 20, or even 30 years. A homeowner with an annual energy bill of $2000 could potentially save $200-$300 annually, accumulating to thousands of dollars in savings over the lifetime of the siding. This savings is further amplified by the increasing cost of energy.

    Maintenance Cost Comparison

    The long-term maintenance costs associated with insulated vinyl siding are generally lower compared to other siding materials such as wood or aluminum. This is due to the durability and low-maintenance nature of vinyl.

    • Vinyl Siding: Vinyl siding is resistant to rot, insect infestation, and warping. It typically requires only occasional cleaning with soap and water to maintain its appearance. Repairs are infrequent and usually involve replacing individual panels, which is relatively inexpensive and easy. The lifespan of properly installed vinyl siding can exceed 30 years, minimizing the need for complete replacement.
    • Wood Siding: Wood siding requires regular painting or staining to prevent deterioration and insect damage. It is susceptible to rot, warping, and cracking, necessitating more frequent and costly repairs. The lifespan of wood siding is significantly shorter than vinyl, often requiring replacement within 15-20 years.
    • Aluminum Siding: While aluminum siding is durable and relatively low-maintenance, it can dent easily and is prone to fading over time. Repairs can be more complex than with vinyl, potentially involving specialized tools and techniques. Aluminum siding, while lasting a long time, may require repainting to maintain its appearance.

    Durability and Lifespan

    Insulated vinyl siding offers a compelling combination of aesthetics and longevity, making it a popular choice for homeowners. Understanding its durability and lifespan, compared to other materials, is crucial for making an informed decision. This section will explore the expected lifespan of insulated vinyl siding and its resilience against various weather conditions, providing a comparative analysis with other common siding options.

    Insulated Vinyl Siding Lifespan and Maintenance Compared to Other Materials

    The lifespan of siding varies significantly depending on the material, quality of installation, and environmental factors. Proper installation and regular maintenance can extend the life of any siding. The following table provides a general comparison of expected lifespans and typical maintenance needs for several common siding materials. Note that these are estimates, and actual lifespans can vary.

    Siding Material Expected Lifespan (Years) Maintenance Needs Cost Considerations
    Insulated Vinyl Siding 30-50+ Occasional cleaning, occasional repair of minor damage. Relatively high initial cost, but lower long-term maintenance costs.
    Wood Siding 20-40 Regular painting or staining, occasional repair or replacement of damaged boards. Prone to rot and insect infestation. Moderate initial cost, but higher long-term maintenance costs.
    Aluminum Siding 30-50 Occasional cleaning, repainting may be needed if desired. Moderate initial cost, relatively low maintenance costs.
    Fiber Cement Siding 50+ Occasional cleaning, repainting every 10-15 years. High initial cost, but very low maintenance costs.

    Resistance to Weather Conditions

    Insulated vinyl siding is engineered to withstand a wide range of weather conditions. Its resistance to extreme temperatures prevents expansion and contraction issues common with wood or aluminum siding, minimizing warping and cracking. The material’s inherent water resistance significantly reduces the risk of moisture damage, rot, and mold growth. While impact-resistant, insulated vinyl siding may dent or crack from severe impacts, such as a large hailstone or falling branch. However, individual panels can usually be replaced relatively easily and inexpensively compared to repairing damage to other siding materials. For example, a dent in a vinyl siding panel might require only replacing the damaged panel, while a similar dent in wood siding might require significant repair or replacement of multiple boards. The low maintenance needs of vinyl siding, especially compared to wood, are a significant advantage in harsh climates. For instance, in regions with frequent snow and ice, the resistance to moisture damage reduces the risk of costly repairs associated with water intrusion and subsequent rot.

    Aesthetic Appeal and Design Options

    Insulated vinyl siding offers a surprisingly diverse range of aesthetic options, moving beyond the perception of a purely functional material. Homeowners can achieve a variety of looks, from traditional to contemporary, significantly impacting curb appeal and property value. The availability of numerous colors, textures, and styles allows for personalized expression and seamless integration with existing architectural details.

    The impact of insulated vinyl siding on a home’s curb appeal is substantial. Careful selection of color, texture, and style can dramatically enhance the visual appeal, creating a more welcoming and attractive exterior. Conversely, a poorly chosen siding can detract from the home’s overall aesthetic. For example, a stark white siding might clash with a home’s brickwork or landscaping, while a muted, earth-toned option could blend seamlessly, enhancing the natural surroundings. The right siding choice can transform a house into a home that reflects the owner’s personality and taste.

    Color Variety and Options

    Insulated vinyl siding is available in a wide spectrum of colors, ranging from classic neutrals like white, beige, and gray to bolder hues such as deep blues, reds, and greens. Many manufacturers offer color palettes designed to coordinate with popular architectural styles and regional aesthetics. For example, a craftsman-style home might benefit from warm earth tones, while a modern home could be enhanced by cool grays or blacks. The permanence of the color, thanks to the siding’s UV-resistant properties, also contributes to long-term aesthetic appeal. This ensures the home maintains its fresh look for years to come, avoiding the fading and discoloration common with other materials.

    Texture and Style Choices

    Beyond color, insulated vinyl siding offers a variety of textures to mimic the appearance of other materials, such as wood, stone, or stucco. This allows homeowners to achieve the desired aesthetic without the high maintenance requirements of those materials. For instance, siding that replicates the look of cedar shakes can provide a rustic charm, while a smooth, stucco-like finish offers a clean, contemporary feel. Different profiles and panel sizes further contribute to the design possibilities. Some manufacturers offer wider panels for a more modern look, while others provide narrower panels to emulate traditional clapboard. The varied styles allow homeowners to tailor the appearance of their homes to their individual preferences and architectural style.

    Impact on Overall Curb Appeal

    The choice of insulated vinyl siding significantly impacts the overall curb appeal of a home. A well-chosen siding complements the home’s architecture, landscaping, and surrounding environment, creating a cohesive and visually pleasing exterior. A poorly chosen siding, however, can create a jarring contrast, detracting from the home’s aesthetic value. For example, a brightly colored siding on a traditionally styled home might appear out of place, while a dark-colored siding on a small home could make it appear smaller and less inviting. Careful consideration of color, texture, and style, along with the home’s existing features and the surrounding landscape, is crucial in achieving a visually appealing and harmonious result.

    Installation Process and Difficulty

    Insulated vinyl siding installation is a relatively straightforward process, though it does require some skill and attention to detail to ensure a professional-looking and long-lasting result. Proper installation is crucial for maximizing the benefits of the siding, including its energy efficiency and weather protection. While a homeowner with some DIY experience might attempt the installation, it’s often recommended to hire experienced professionals for larger projects to ensure proper techniques are used and the warranty remains valid.

    The typical installation process for insulated vinyl siding involves several key steps. These steps are designed to create a seamless and durable exterior wall covering that provides both aesthetic and functional benefits.

    Typical Installation Steps

    The installation process typically begins with preparation and ends with final inspections and clean-up. A well-executed installation ensures the longevity and performance of the insulated vinyl siding.

    • Preparation: This crucial first step involves measuring the area to be sided, ordering the necessary materials (including starter strips, J-channels, and trim), and preparing the existing wall surface. This may involve removing old siding, repairing any damaged areas, and ensuring the wall is clean and dry.
    • Installation of Flashing and Water Barriers: Before siding installation, proper flashing and water barriers are installed around windows, doors, and other openings to prevent water penetration. This step is critical for preventing water damage and maintaining the integrity of the wall system.
    • Starter Strip Installation: A starter strip is installed at the bottom of the wall to provide a level starting point for the siding panels. This ensures a straight and even installation.
    • Siding Panel Installation: Insulated vinyl siding panels are then installed, overlapping each other and engaging with the locking mechanism. This process is typically done from bottom to top, ensuring each panel is properly aligned and secured.
    • Corner and J-Channel Installation: Corner and J-channel pieces are used to finish the edges of the siding and create a neat, professional look. These pieces are installed to neatly cover exposed edges and corners.
    • Trim and Accessory Installation: Finally, various trim pieces, such as window and door trim, are installed to complete the look and provide additional protection. These pieces add the finishing touches and ensure a professional look.
    • Final Inspection and Clean-up: A thorough inspection is conducted to ensure all panels are properly installed and there are no gaps or loose pieces. Any necessary adjustments are made, and the area is cleaned up.

    Installation Difficulty Compared to Other Siding Types

    The installation difficulty of insulated vinyl siding is generally considered moderate. Compared to other siding types, it presents a different set of challenges and advantages.

    • Compared to Wood Siding: Insulated vinyl siding is generally easier to install than wood siding. Wood siding requires more precise cuts, more careful handling to avoid damage, and often needs more specialized tools. Wood also requires regular maintenance such as painting or staining.
    • Compared to Fiber Cement Siding: Fiber cement siding is heavier and more difficult to handle and cut than vinyl siding, requiring more physical effort and specialized tools. It also requires more careful handling to avoid breakage.
    • Compared to Aluminum Siding: Aluminum siding can be easier to install than insulated vinyl siding in some aspects, particularly in terms of weight. However, aluminum siding can be more prone to denting and requires careful handling to avoid damage.

    Environmental Impact

    Insulated vinyl siding presents a complex environmental profile, encompassing both the manufacturing process and the eventual disposal of the material. Understanding its impact requires considering its lifecycle, from raw material extraction to end-of-life management, and comparing it to alternatives. This section will explore the environmental considerations associated with insulated vinyl siding.

    The manufacturing of insulated vinyl siding is energy-intensive. The production of vinyl involves the use of fossil fuels, primarily natural gas, resulting in greenhouse gas emissions. Furthermore, the creation of the insulating foam core often involves the use of blowing agents, some of which have been linked to ozone depletion and global warming. The transportation of raw materials and finished products also contributes to the overall carbon footprint.

    Manufacturing Processes and Emissions

    Vinyl siding production is a multi-stage process beginning with the extraction and processing of raw materials, including petroleum-based PVC (polyvinyl chloride) and additives. The polymerization of PVC is energy-intensive and releases volatile organic compounds (VOCs) into the atmosphere. The manufacturing of the foam core, typically polyurethane or polyisocyanurate, also contributes to greenhouse gas emissions through the use of blowing agents. While manufacturers are increasingly adopting more environmentally friendly blowing agents, the overall impact remains a significant consideration. The exact emission levels vary depending on the specific manufacturing processes and the chosen materials. Life cycle assessments (LCAs) conducted by independent organizations offer more detailed breakdowns of emissions associated with different manufacturers and product formulations.

    Disposal and Recycling of Vinyl Siding

    Disposal of vinyl siding poses another environmental challenge. Vinyl siding is not readily biodegradable, and landfilling it contributes to the accumulation of waste in landfills. While some vinyl siding can be recycled, the recycling infrastructure for this material is not as well-developed as for other building materials. The recycling process itself can also consume energy and resources. Many municipalities do not have dedicated recycling programs for vinyl siding, leading to its disposal in landfills where it can persist for centuries. The incineration of vinyl siding, while reducing landfill volume, releases harmful pollutants into the air if not properly managed. This makes responsible disposal crucial for minimizing the environmental impact.

    Comparison with Other Siding Materials

    The environmental impact of insulated vinyl siding must be weighed against other siding options. For instance, wood siding, while renewable, often requires the use of pesticides and herbicides during its cultivation and can have a significant embodied carbon footprint depending on its source and transportation. Fiber cement siding, though durable and relatively low-maintenance, has a high embodied energy content due to its manufacturing process. Metal siding, often made from recycled materials, has a lower carbon footprint than vinyl but can contribute to light pollution and requires significant energy for production. A comprehensive comparison requires considering the entire lifecycle of each material, including manufacturing, transportation, installation, maintenance, and disposal. Independent LCA studies provide valuable data for making informed comparisons.

    Maintenance Requirements

    Insulated vinyl siding is renowned for its low-maintenance nature, a significant advantage for homeowners. However, while it requires less upkeep than many other siding materials, regular care ensures its longevity and continued aesthetic appeal. Understanding the necessary maintenance tasks and comparing them to alternatives helps homeowners make informed decisions.

    Regular cleaning is the cornerstone of maintaining insulated vinyl siding. Dirt, pollen, and other airborne debris can accumulate, dulling the siding’s appearance and potentially trapping moisture. This can lead to discoloration or even damage over time.

    Cleaning Insulated Vinyl Siding

    Cleaning insulated vinyl siding is a straightforward process. A simple solution of mild detergent and water, applied with a soft-bristled brush or sponge, is usually sufficient. For stubborn stains, a pressure washer can be effective, but it’s crucial to maintain a safe distance to avoid damaging the siding. Always rinse thoroughly with clean water afterward to remove any soap residue. Annual cleaning is recommended, with more frequent cleaning in areas with heavy pollution or tree cover. Avoid harsh chemicals or abrasive cleaners, as these can scratch or damage the vinyl surface.

    Repairing Damaged Insulated Vinyl Siding

    While durable, insulated vinyl siding can sometimes be damaged. Minor scratches or dents may only require cleaning and potentially some touch-up paint. More significant damage, such as cracks or holes, may necessitate replacing individual panels. This is generally a relatively easy repair for DIY homeowners with basic tools, but larger repairs or extensive damage might require professional assistance. The ease of replacing individual panels is a key advantage over some other siding materials, where damage may necessitate more extensive and costly repairs.

    Maintenance Comparison with Other Siding Options

    Compared to wood siding, insulated vinyl requires significantly less maintenance. Wood siding needs regular painting or staining to prevent rot and insect infestation, and it’s susceptible to warping and cracking. Aluminum siding, while durable, can dent easily and may require repainting to maintain its appearance. Fiber cement siding, while very durable, is more challenging to repair and requires more intensive cleaning than vinyl. Brick, stone, and stucco, though highly durable, are the most demanding in terms of cleaning and repair, often requiring professional assistance for significant maintenance. The low-maintenance nature of insulated vinyl siding significantly reduces both time and cost commitments compared to these alternatives.

    Warranty and Guarantees

    Choosing insulated vinyl siding involves a significant investment, making the manufacturer’s warranty a crucial factor in your decision. Understanding the terms and conditions of these warranties is vital for protecting your investment and ensuring long-term satisfaction. This section details typical warranty offerings and highlights some key differences among manufacturers.

    Manufacturers typically offer warranties covering various aspects of their insulated vinyl siding products. These warranties often include a limited lifetime warranty on the material itself, protecting against defects in manufacturing such as cracking, fading, or peeling. Additionally, many manufacturers offer warranties against damage from extreme weather conditions, such as hail or high winds. The specific coverage and duration can vary significantly, however, depending on the brand and the specific product line. It’s essential to read the fine print carefully before making a purchase.

    Typical Warranty Coverage

    Most manufacturers provide warranties covering defects in material and workmanship. This typically means that if the siding develops a defect due to a manufacturing flaw within the warranty period, the manufacturer will replace the defective siding at no cost to the homeowner. Some warranties extend to cover issues arising from normal wear and tear, while others specify exclusions for damage caused by improper installation or acts of God. For example, a manufacturer might offer a 50-year warranty against fading, but this might not cover damage caused by a severe hurricane. The warranty document will explicitly outline these conditions.

    Comparison of Warranty Offerings

    While comparing warranties across different manufacturers requires reviewing individual documents, some general trends can be observed. Companies known for higher-end products often offer more comprehensive warranties with longer coverage periods. For instance, one manufacturer might offer a lifetime warranty against fading and cracking, while another might offer a shorter, limited warranty with more restrictions. Similarly, some warranties cover labor costs associated with repairs or replacements, while others only cover the cost of the materials. A homeowner considering different brands should compare these factors carefully to determine the best value. It is advisable to obtain warranty documentation from multiple manufacturers and compare the details of their offerings side-by-side. Pay close attention to the fine print and understand the limitations and exclusions before making a purchasing decision. The most comprehensive warranty isn’t always the best; the best warranty is the one that best fits your needs and expectations.

    Sound Insulation Properties

    Insulated vinyl siding offers a degree of sound insulation, though it’s not its primary function. The insulating foam core contributes to noise reduction by absorbing some sound energy before it reaches the underlying wall structure. However, it’s crucial to understand that the level of sound dampening provided is relatively modest compared to specialized acoustic materials.

    The noise reduction provided by insulated vinyl siding stems primarily from the air space created by the foam core. This air gap acts as a barrier, hindering the transmission of sound waves. The density and thickness of the foam core directly impact its sound-absorbing capabilities; thicker, denser foam offers better sound insulation. The effectiveness is also influenced by the overall construction of the building, including the wall assembly and other materials used.

    Comparison of Noise Reduction with Other Siding Materials

    Insulated vinyl siding’s sound insulation properties are comparable to, or slightly better than, standard vinyl siding, which offers minimal sound dampening. However, it generally falls short of materials specifically designed for acoustic performance, such as solid wood siding or certain types of fiber cement siding. These materials, due to their density and mass, offer superior sound absorption and reduction capabilities. For instance, a thick, solid wood wall would demonstrably reduce noise more effectively than insulated vinyl siding, due to the wood’s density and inherent sound-dampening properties. Similarly, engineered wood siding products often outperform insulated vinyl siding in acoustic performance. The choice of siding material for noise reduction should be carefully considered based on the specific needs and priorities of the project, weighing the benefits against other factors like cost, maintenance, and aesthetic appeal.

    Resistance to Pests and Mold

    Insulated vinyl siding offers several advantages regarding pest and mold resistance, contributing to its long-term durability and low-maintenance profile. Unlike wood siding, which is susceptible to various forms of damage, vinyl’s composition provides a significant barrier against many common household pests and the growth of mold and mildew.

    The inherent properties of vinyl make it an unattractive habitat for many insects and pests. Termites, for example, find it difficult to penetrate and digest vinyl, unlike wood. Similarly, other wood-boring insects are deterred by the material’s non-porous nature. This resistance reduces the risk of structural damage and the need for costly pest control treatments.

    Pest Resistance of Insulated Vinyl Siding

    Insulated vinyl siding’s resistance to pests stems from its composition and manufacturing process. The material is non-porous, meaning it doesn’t provide the necessary food source or moisture for many insects to thrive. This is in stark contrast to wood siding, which is porous and readily absorbs moisture, creating an ideal breeding ground for insects and encouraging decay. Furthermore, the solid, continuous surface of vinyl siding leaves little space for insects to burrow or nest. While no material is completely pest-proof, vinyl siding offers a significant level of protection compared to traditional wood alternatives. For instance, in regions with high termite activity, choosing vinyl siding can significantly reduce the likelihood of infestation and the associated repair costs.

    Mold and Mildew Resistance of Insulated Vinyl Siding

    Vinyl siding’s resistance to mold and mildew is equally important. The non-porous nature of the material prevents moisture absorption, hindering the growth of mold and mildew. This is crucial because moisture is a primary catalyst for fungal growth. Unlike wood, which can retain moisture and become a breeding ground for mold and mildew, vinyl siding sheds water effectively, minimizing the risk of fungal colonization. The smooth surface of vinyl siding also makes it easier to clean, further reducing the chances of mold and mildew buildup. Regular cleaning with soap and water is usually sufficient to maintain the cleanliness and prevent the growth of these organisms. This characteristic contributes to the overall longevity and aesthetic appeal of the siding, reducing the need for costly repairs or replacements due to mold damage. This contrasts sharply with wood siding, which often requires more frequent cleaning and treatment to prevent mold and mildew problems.

    Resale Value Impact

    Insulated vinyl siding’s impact on a home’s resale value is a complex issue, influenced by various factors beyond just the siding itself. While it offers several benefits that can indirectly boost value, the direct impact is often subtle and depends heavily on the overall condition of the property and prevailing market trends. A well-maintained home with attractive, high-quality insulated vinyl siding will generally command a better price than a comparable home with older, damaged, or less desirable siding. However, it’s crucial to remember that siding is just one aspect of a home’s overall appeal.

    The presence of insulated vinyl siding can positively influence a home’s resale value primarily by enhancing curb appeal and energy efficiency. Potential buyers are often attracted to homes that appear well-maintained and offer lower utility costs. Energy-efficient features, such as insulated siding, are increasingly sought after in today’s market, reflecting a growing awareness of environmental concerns and long-term cost savings. This translates to a potentially higher asking price and faster sale compared to homes with less energy-efficient exterior cladding. However, overspending on premium siding in a neighborhood where such features are not highly valued might not yield a proportional return on investment.

    Comparison of Siding Materials’ Impact on Market Value

    Different siding materials have varying effects on a home’s market value. High-end materials like fiber cement or cedar shake generally command a premium, reflecting their higher initial cost and perceived prestige. However, these options also require more maintenance and may not always be the most cost-effective choice. Aluminum siding, while durable, is often perceived as less aesthetically pleasing and may not add significant value compared to vinyl. Brick, stone, and stucco are considered high-value materials, but their installation costs are considerably higher than vinyl siding. The optimal choice depends on a variety of factors including the home’s style, location, and the target buyer demographic. For example, a contemporary home in a modern development might benefit more from fiber cement siding than a traditional home in a suburban neighborhood, where vinyl siding might be perfectly appropriate and competitive. In many cases, insulated vinyl siding presents a strong balance between cost-effectiveness, durability, and aesthetic appeal, making it a viable option for increasing a home’s resale value without excessive investment.

    Ultimate Conclusion

    Ultimately, the decision of whether or not to install insulated vinyl siding hinges on a careful consideration of individual needs and priorities. While the initial cost may be higher than some alternatives, the potential for long-term energy savings and low maintenance can offset this expense. The durability, aesthetic versatility, and relatively straightforward installation process further enhance its appeal. However, potential environmental concerns and limitations in design flexibility warrant careful evaluation. By weighing the pros and cons outlined in this guide, homeowners can make a well-informed decision that aligns with their budget, lifestyle, and long-term goals.

  • Top-Rated Siding Contractors for High-Quality Home Renovation

    Top-Rated Siding Contractors for High-Quality Home Renovation

    Top-Rated Siding Contractors for High-Quality Home Renovation: Transforming your home’s exterior requires careful consideration of materials, installation expertise, and contractor reputation. This guide helps you navigate the process of finding the perfect team for your project, ensuring a beautiful and long-lasting result that enhances your home’s curb appeal and protects it from the elements. We’ll explore key factors to consider when selecting a contractor, from verifying licenses and insurance to analyzing customer reviews and understanding warranties.

    Choosing the right siding contractor is a crucial step in any home renovation. A high-quality installation not only improves your home’s aesthetics but also significantly impacts its longevity and energy efficiency. This guide provides a comprehensive framework for evaluating potential contractors, ensuring you make an informed decision that aligns with your budget and expectations. We will cover everything from understanding different siding materials and their associated costs to navigating the complexities of contracts and warranties.

    Defining “High-Quality” in Home Renovation Siding

    High-quality home renovation siding goes beyond mere aesthetics; it encompasses a harmonious blend of superior materials, meticulous workmanship, and enduring longevity. A truly high-quality siding installation protects your home from the elements for decades, enhancing its curb appeal and increasing its value. This involves careful consideration of material selection, precise installation techniques, and a commitment to exceeding industry standards.

    Superior Siding Materials and Their Benefits

    The choice of siding material significantly impacts the overall quality and lifespan of your home’s exterior. Different materials offer unique advantages, catering to various budgets and aesthetic preferences. Selecting the right material is crucial for achieving long-term durability and weather resistance.

    • Fiber Cement Siding: Known for its exceptional durability, resistance to fire, rot, and insects, fiber cement siding mimics the look of wood but requires minimal maintenance. Its strength ensures it can withstand harsh weather conditions, including strong winds and heavy rain. Its longevity often exceeds 50 years, making it a cost-effective long-term solution.
    • Vinyl Siding: A popular and budget-friendly option, vinyl siding is relatively easy to install and maintain. It comes in a wide array of colors and styles, offering considerable design flexibility. While not as durable as fiber cement, high-quality vinyl siding can still last for several decades with proper installation and care. It’s resistant to moisture and insects.
    • Metal Siding (Aluminum or Steel): Metal siding offers unmatched durability and longevity, often lasting 50 years or more. It’s highly resistant to fire, pests, and extreme weather conditions. Steel siding, in particular, provides superior strength and impact resistance. While initially more expensive than vinyl or fiber cement, its long lifespan often makes it a cost-effective choice in the long run.
    • Wood Siding: While requiring more maintenance than other options, wood siding offers unparalleled aesthetic appeal and can significantly enhance a home’s character. Properly treated and maintained wood siding can last for decades, but it is susceptible to rot, insect damage, and requires regular painting or staining.

    Importance of Proper Installation Techniques

    Even the highest-quality siding materials will fail prematurely without proper installation. A meticulous installation process ensures the siding’s weather resistance, structural integrity, and overall longevity. Improper installation can lead to water damage, structural weaknesses, and a significant reduction in the siding’s lifespan.

    • Proper Flashing and Caulking: Careful application of flashing around windows, doors, and other penetrations prevents water intrusion, a major cause of siding damage. Similarly, thorough caulking seals gaps and joints, preventing air leakage and moisture penetration.
    • Accurate Measurement and Cutting: Precise measurements and cuts ensure a clean, professional finish and prevent gaps that can compromise weather resistance. Using the correct tools and techniques is essential for achieving accurate results.
    • Adherence to Manufacturer’s Instructions: Following the manufacturer’s guidelines for installation is crucial for ensuring the siding’s warranty remains valid and for achieving optimal performance. This includes proper ventilation, fastener spacing, and overall installation sequence.
    • Experienced and Qualified Installers: Hiring experienced and qualified siding installers is paramount. Professionals possess the expertise to handle complex installations, ensure proper ventilation, and address any unforeseen challenges during the process. They understand the importance of detail and can identify potential problems before they become major issues. Their expertise minimizes the risk of costly repairs and ensures a long-lasting, high-quality installation.

    Identifying Top-Rated Contractors

    Finding the right siding contractor for your home renovation project is crucial for ensuring a successful and aesthetically pleasing outcome. A thorough vetting process is essential to avoid potential problems and ensure you’re investing in quality workmanship and materials. This section outlines a methodology for identifying top-rated siding contractors in your area and provides criteria for evaluating their reputation.

    A systematic approach to finding top-rated siding contractors involves a multi-step process combining online research, direct inquiries, and verification of credentials. This ensures you are selecting a contractor with a proven track record of high-quality work and customer satisfaction.

    Methodology for Identifying Top-Rated Siding Contractors

    The identification of top-rated siding contractors requires a structured approach encompassing several key steps. First, utilize online search engines to identify contractors operating within your desired geographic area. Then, narrow down the initial list by considering factors such as years of experience, specialization in siding installation, and proximity to your location. Finally, conduct thorough background checks and obtain multiple estimates before making your final decision. This process ensures a balanced approach, combining readily available online information with crucial verification steps.

    Criteria for Evaluating Contractor Reputation

    Evaluating a contractor’s reputation involves scrutinizing several key aspects. A strong reputation is built on a foundation of positive online reviews, proper licensing and insurance, and a history of successfully completed projects.

    This list outlines the essential criteria:

    • Online Reviews: Examine reviews on platforms like Google My Business, Yelp, and Angie’s List. Look for consistency in positive feedback and how the contractor addresses negative reviews. Pay attention to the volume and recency of reviews, as a high number of recent positive reviews is a strong indicator of current customer satisfaction.
    • Licensing and Insurance: Verify that the contractor possesses the necessary licenses and insurance coverage for operating in your area. This protects you from potential liabilities in case of accidents or disputes. Contact your state’s licensing board to verify the validity of their license and inquire about any complaints filed against them.
    • Years of Experience: While not always indicative of quality, a longer history in the industry often suggests a higher level of experience and established processes. Inquire about the types of siding projects they have undertaken and the range of materials they have worked with.
    • References and Portfolio: Request references from previous clients and examine a portfolio of their completed projects. This provides visual evidence of their workmanship and attention to detail. Contacting previous clients allows you to directly assess their experiences and satisfaction levels.
    • Warranty and Guarantees: Inquire about the warranties offered on both workmanship and materials. A comprehensive warranty indicates confidence in their work and a commitment to customer satisfaction. Understand the terms and conditions of the warranty before signing any contract.

    Contractor Comparison Table

    The following table provides a framework for comparing different contractors. Remember to replace the example data with your own research findings.

    Contractor Name Years in Business Online Review Score (out of 5) Warranty Details
    ABC Siding Solutions 15 4.8 5-year workmanship, 20-year material
    XYZ Exterior Renovations 8 4.5 2-year workmanship, 10-year material
    123 Home Improvement 20 4.7 10-year workmanship, 25-year material

    Contractor Licensing and Insurance Verification

    Protecting your investment and ensuring a smooth renovation process hinges on choosing a reputable contractor. A crucial aspect of this selection process is verifying their licensing and insurance coverage. Failing to do so can expose you to significant financial and legal risks.

    Hiring a contractor without proper licensing and insurance can lead to a multitude of problems. Unlicensed contractors may lack the necessary skills and training, resulting in substandard work, costly repairs, or even structural damage. Furthermore, if an accident occurs on your property during the renovation, an uninsured contractor leaves you personally liable for any injuries or damages. This could result in substantial legal fees and financial losses. Protecting yourself from these potential risks is paramount.

    Verifying Contractor Credentials

    Verifying a contractor’s license and insurance involves a straightforward process, readily accessible through online resources. This proactive approach safeguards your interests and contributes to a successful renovation project.

    1. Check Your State’s Licensing Board Website: Each state maintains a database of licensed contractors. Visit your state’s contractor licensing board website (a simple online search for “[Your State] contractor licensing board” will suffice). These websites typically allow you to search for contractors by name, license number, or business address. Verify that the contractor’s license is current and in good standing. Look for any disciplinary actions or complaints filed against them.
    2. Request Proof of Insurance: Ask the contractor to provide proof of general liability insurance and workers’ compensation insurance. General liability insurance protects you from financial responsibility if someone is injured on your property during the renovation. Workers’ compensation insurance covers medical expenses and lost wages for the contractor’s employees if they are injured on the job. Thoroughly review the certificates of insurance to confirm coverage amounts and policy expiration dates. Ensure the policies are active and cover the scope of your project.
    3. Confirm Insurance Coverage with the Insurer: While the contractor provides proof of insurance, it’s prudent to verify the information directly with the insurance company. Contact the insurer listed on the certificate to confirm the policy’s validity and coverage details. This added step ensures the provided documentation is accurate and up-to-date.
    4. Review References and Testimonials: While not directly related to licensing and insurance, checking references and online reviews can provide additional insights into the contractor’s reputation and work quality. This step complements the verification of credentials, offering a more holistic assessment of the contractor’s suitability.

    Analyzing Customer Reviews and Testimonials

    Customer reviews and testimonials offer invaluable insights into the performance of siding contractors. Analyzing this feedback allows potential clients to make informed decisions and helps contractors identify areas for improvement. A comprehensive review analysis considers both positive and negative comments, examining patterns and common themes to develop a holistic understanding of a contractor’s strengths and weaknesses.

    A robust analysis goes beyond simply counting positive and negative reviews. It delves into the specifics of the feedback, identifying recurring issues or praise. For example, consistently positive comments about communication and professionalism suggest a contractor excels in customer service, while recurring complaints about missed deadlines or shoddy workmanship indicate potential problems. Comparing reviews across different platforms, such as Google Reviews, Yelp, and HomeAdvisor, provides a more comprehensive picture, as each platform may attract different types of reviewers and have varying review moderation policies.

    Common Themes in Customer Reviews Regarding Siding Installation

    Analyzing numerous customer reviews reveals several recurring themes. Positive reviews frequently highlight factors such as timely completion, professional conduct of the crew, meticulous attention to detail in installation, and excellent communication throughout the project. Negative reviews, conversely, often cite issues with project timelines, poor communication, substandard workmanship (e.g., gaps in siding, improper flashing), and inadequate cleanup after completion. Some reviews may focus on the contractor’s responsiveness to post-installation issues or warranty claims.

    Comparative Analysis of Reviews from Different Platforms

    Contrasting reviews from various platforms allows for a more nuanced understanding of contractor performance. For instance, a contractor might receive overwhelmingly positive reviews on their own website, but more mixed reviews on independent platforms like Yelp. This discrepancy could indicate a bias in self-reported reviews or highlight areas where the contractor needs improvement. Analyzing reviews across platforms helps to identify any patterns that might be overlooked when only considering a single source. For example, consistent complaints about billing practices across multiple platforms would be a more serious concern than isolated incidents on a single platform.

    Summary of Key Findings from Review Analysis

    A summary of the review analysis should present a concise overview of the contractor’s performance, highlighting both strengths and weaknesses. For example, a contractor might receive high praise for their skilled installers but criticism for poor project management. This summary should be factual and avoid subjective interpretations. Presenting the findings in a structured format, perhaps using a table to compare contractors across key performance indicators (KPIs) such as communication, timeliness, quality of work, and customer service, enhances clarity and facilitates easy comparison. For instance, a table could list contractors and assign scores based on the frequency of positive and negative comments related to each KPI. This allows for a quick visual comparison of contractors’ overall performance.

    Evaluating Contractor Experience and Expertise

    Choosing a siding contractor based solely on price can be a costly mistake. Experience and expertise are crucial factors in ensuring a high-quality, long-lasting home renovation. A seasoned professional brings a wealth of knowledge, problem-solving skills, and a proven track record to your project, minimizing potential issues and maximizing the final result.

    Experienced contractors understand the nuances of various siding materials, installation techniques, and potential challenges specific to different climates and home styles. This understanding translates to a smoother process, fewer unforeseen complications, and a superior final product.

    Specialized Skills and Certifications

    High-quality siding installation requires a range of specialized skills and knowledge beyond basic carpentry. Contractors specializing in siding often possess certifications demonstrating their proficiency in specific areas. These certifications validate their training and expertise, providing homeowners with an added layer of assurance.

    Contractor Experience and Certifications Comparison

    The following table compares three hypothetical contractors, highlighting their experience and relevant certifications. Note that this is for illustrative purposes and real-world contractor qualifications will vary.

    Contractor Name Years of Experience Certifications Specialization
    ABC Siding Solutions 15+ years Certified Installer (CertainTeed, James Hardie), OSHA 10 Vinyl and Fiber Cement Siding
    ProSiding Inc. 8 years Certified Installer (LP SmartSide), EPA Lead Renovation, Repair and Painting (RRP) Wood and Fiber Cement Siding
    Elite Exterior Renovations 20+ years Certified Installer (multiple manufacturers), OSHA 30, ICPI (Interlocking Concrete Pavement Institute) Certified Installer Various Siding Types, Including Stone Veneer

    Understanding Warranty and Guarantees

    Choosing siding for your home is a significant investment, and understanding the warranties offered is crucial for protecting that investment. Warranties provide a level of assurance regarding the quality of materials and workmanship, outlining the responsibilities of both the contractor and the manufacturer in case of defects or failures. A thorough understanding of these warranties is essential before committing to a contract.

    Warranties offered by siding contractors and manufacturers vary considerably. It is important to carefully compare these warranties before making a decision, as the scope of coverage and duration can differ significantly.

    Types of Siding Warranties

    Several types of warranties commonly accompany siding installations. These warranties typically cover different aspects of the project, and understanding their nuances is vital. For example, a manufacturer’s warranty typically covers defects in the siding material itself, while a contractor’s warranty might cover their workmanship during the installation process. Some warranties are limited to specific defects, while others offer more comprehensive coverage.

    Importance of Understanding Warranty Terms and Conditions

    Before signing any contract, carefully review all warranty terms and conditions. Pay close attention to the duration of the warranty, what is and is not covered, and the process for filing a claim. Look for exclusions, such as damage caused by acts of nature or improper maintenance. Understanding these details will prevent future misunderstandings and ensure you are adequately protected. For instance, a warranty might cover material defects for 20 years but only cover labor for one year. Understanding this difference is crucial.

    Comparing Warranty Offerings from Various Contractors

    Contractors may offer varying warranty lengths and coverage. Some might offer a shorter, more limited warranty, while others provide more extensive coverage for a longer period. For example, one contractor might offer a 5-year warranty on labor and a 20-year warranty on materials, while another might offer a 10-year warranty on both labor and materials. Direct comparison of these offerings is essential in making an informed decision. Always obtain warranty details in writing and compare them side-by-side to fully understand the differences. This allows for a fair comparison and helps to identify the best value for your investment.

    Estimating Project Costs and Budgeting

    Planning your siding renovation budget requires careful consideration of various factors. Understanding the typical cost ranges and potential influences will empower you to make informed decisions and avoid unexpected expenses. This section provides a breakdown of costs and a sample budget template to guide you through the process.

    Siding installation costs vary significantly depending on several key factors. The type of siding chosen, the size of the house, the complexity of the project (including necessary repairs), and regional labor costs all play a crucial role in determining the final price. Accurate cost estimation requires a detailed assessment by a qualified contractor who can consider your specific needs and circumstances.

    Typical Costs Associated with Siding Installation

    While precise figures depend on the factors mentioned above, a general understanding of cost ranges is helpful. The cost of materials typically ranges from $2 to $15 per square foot, depending on the siding material (vinyl, fiber cement, wood, etc.). Labor costs can add another $3 to $10 per square foot, varying based on project complexity and location. Additional costs may include permits, demolition of existing siding, and repairs to underlying sheathing or structure. For a 1500 square foot house, this could translate to a total cost ranging from $7,500 to $37,500 (and potentially higher depending on complexities). This is a broad range, and it’s crucial to obtain multiple detailed quotes from reputable contractors.

    Factors Influencing Overall Project Cost

    Several factors significantly influence the final cost of your siding renovation project. Understanding these factors allows for more accurate budgeting and realistic expectations.

    • Siding Material: Vinyl siding is generally the most affordable option, while fiber cement and wood siding are more expensive due to their durability and aesthetic appeal. Metal siding presents another option with a higher initial cost but often a longer lifespan.
    • House Size and Complexity: Larger houses and those with complex architectural features (such as many dormers or intricate trim) will require more materials and labor, increasing the overall cost.
    • Existing Siding Condition: If the existing siding requires significant repairs or removal before new siding can be installed, this will add to the project’s expense. Rotten wood or damaged sheathing must be addressed before new siding is installed.
    • Labor Costs: Regional variations in labor rates and the contractor’s experience level directly impact the cost of labor. Highly experienced and reputable contractors may charge more than less experienced ones.
    • Permits and Inspections: Necessary permits and inspections add to the overall project cost. These costs vary by location and the specifics of the project.
    • Additional Services: Any additional services, such as window and door trim replacement, insulation upgrades, or repairs to underlying structures, will increase the total project cost.

    Sample Budget Template

    A well-structured budget is essential for managing expenses effectively. The following template provides a framework for planning your siding renovation project.

    Expense Category Estimated Cost Actual Cost
    Materials (Siding, Trim, Fasteners)
    Labor (Installation, Removal of Old Siding)
    Permits and Inspections
    Underlayment/Sheathing Repairs
    Waste Removal
    Contingency (Unexpected Expenses) (10-15% of total estimated cost)
    Total Estimated Cost

    Remember to obtain multiple detailed quotes from reputable contractors before finalizing your budget. The contingency fund is crucial to accommodate unforeseen issues that may arise during the project.

    Communication and Project Management

    Effective communication and meticulous project management are cornerstones of a successful home renovation, particularly when dealing with exterior siding. A seamless process relies heavily on the consistent exchange of information and the proactive organization of tasks by the contractor. Open communication fosters trust and minimizes misunderstandings, leading to a more positive experience for the homeowner.

    Project management encompasses all aspects of planning, execution, and monitoring of the renovation. Reputable contractors employ strategies that ensure the project stays on schedule and within budget, while maintaining high standards of workmanship. This includes detailed planning, regular progress updates, and proactive problem-solving.

    Effective Communication Strategies

    Clear and consistent communication is paramount. This involves establishing a primary point of contact, scheduling regular meetings or calls, and utilizing various communication methods (e.g., email, text, project management software) to suit the homeowner’s preferences. Providing regular updates on project progress, including potential delays or challenges, prevents surprises and keeps the homeowner informed. Furthermore, contractors should actively solicit feedback from the homeowner and address concerns promptly. For example, a daily log of work completed, along with photographs, can provide transparency and build confidence. Another example is a dedicated online portal where the homeowner can access project documents, schedules, and communication history.

    Project Management Techniques

    Reputable contractors utilize various project management techniques to ensure efficiency and quality. These include creating a detailed project timeline with milestones, assigning specific tasks to team members, and utilizing checklists to track progress. Regular site visits are crucial for monitoring progress, addressing unforeseen issues, and maintaining quality control. Proactive risk management is also essential; identifying potential problems (e.g., material delays, weather disruptions) and developing contingency plans minimizes disruptions. For instance, a well-defined schedule might include buffer days to account for unexpected delays. A Gantt chart visually displays the project timeline, tasks, and dependencies, offering a clear overview for both the contractor and homeowner.

    Addressing Potential Challenges

    Effective communication helps mitigate potential conflicts. Should unexpected issues arise (e.g., discovering rotted wood requiring additional repairs), the contractor should promptly inform the homeowner, explain the implications, and propose solutions. Openly discussing cost adjustments and timeline revisions ensures transparency and prevents misunderstandings. For example, a change order detailing the necessary modifications, their cost, and the revised timeline, ensures clarity and agreement. A proactive approach to problem-solving, combined with clear communication, helps maintain a positive working relationship and minimizes stress for both parties.

    Siding Material Selection and Considerations

    Choosing the right siding material is a crucial decision in any home renovation project, significantly impacting your home’s aesthetics, durability, and long-term maintenance needs. The selection process should consider factors such as budget, climate, personal style, and the overall architectural design of your home. This section details the characteristics of common siding materials to help you make an informed choice.

    Vinyl Siding

    Vinyl siding is a popular choice due to its affordability and low maintenance. It’s available in a wide range of colors and styles, mimicking the look of wood or other materials. However, vinyl can be susceptible to damage from severe weather, especially in areas with extreme temperature fluctuations. Its lifespan is typically 20-30 years, depending on quality and installation. The surface is smooth and relatively uniform in texture. Imagine a clean, slightly glossy finish, available in a spectrum of colors from classic white to vibrant blues and greens. The texture is generally smooth, though some manufacturers offer textured options to mimic wood grain.

    Wood Siding

    Wood siding offers a classic, natural aesthetic that many homeowners find appealing. It’s durable and can last for decades with proper maintenance, including regular painting or staining. However, wood siding requires more upkeep than vinyl, and it’s susceptible to rot, insect infestation, and moisture damage. The initial cost is generally higher than vinyl. Consider the rich, varied texture of natural wood – the subtle knots, the grain patterns, the slight imperfections that add character. The visual appeal can range from the rustic charm of rough-sawn cedar to the sleek elegance of smooth, painted redwood. The color palette is limited only by the stain or paint applied.

    Fiber Cement Siding

    Fiber cement siding combines the durability of cement with the workability of wood. It is highly resistant to fire, rot, insects, and extreme weather conditions, making it a long-lasting and low-maintenance option. While more expensive than vinyl, its longevity and resilience often justify the higher upfront cost. Its lifespan can exceed 50 years. The texture can vary greatly, mimicking wood grain, stucco, or even brick. Imagine a siding that appears solid and substantial, offering a refined, almost stone-like appearance. The texture can range from a smooth, painted finish to a deeply embossed wood-grain pattern, providing a sense of depth and realism.

    Metal Siding

    Metal siding, typically made of aluminum or steel, is exceptionally durable and resistant to damage from fire, insects, and extreme weather. It’s also low-maintenance and requires minimal upkeep. However, it can be more expensive than vinyl or wood and may dent or scratch more easily. Metal siding often features a smooth, consistent finish with a slightly reflective quality. Imagine a clean, modern look, available in a variety of colors and finishes. The texture is typically smooth, although some options may have a slightly textured, slightly matte finish.

    Post-Installation Inspection and Maintenance

    A thorough post-installation inspection is crucial to ensure the siding installation meets the agreed-upon standards and to identify any potential issues early on. This step protects your investment and guarantees the longevity of your new siding. A comprehensive inspection allows for prompt rectification of any defects, preventing more extensive and costly repairs later.

    Proper maintenance is equally vital for preserving the beauty and durability of your siding. Regular cleaning and prompt attention to minor issues will significantly extend the lifespan of your investment and maintain its aesthetic appeal. Neglecting maintenance can lead to premature deterioration and costly repairs.

    Post-Installation Inspection Checklist

    A detailed inspection should cover several key areas to ensure the quality of the work. This checklist provides a comprehensive guide for homeowners to follow.

    • Overall Appearance: Check for straight lines, consistent spacing between panels, and proper alignment with other home features (windows, doors, trim).
    • Flashing and Caulking: Examine all flashing around windows, doors, and other penetrations to ensure proper installation and sealing to prevent water damage.
    • Panel Alignment and Securing: Verify that all siding panels are securely fastened and properly aligned, with no gaps or loose pieces. Inspect for any signs of damage to the panels themselves.
    • Trim and Accessories: Ensure that all trim pieces, such as corner boards and J-channels, are correctly installed and properly sealed.
    • Water Management: Verify that gutters and downspouts are properly functioning to direct water away from the house and prevent water accumulation near the foundation.
    • Damage Assessment: Look for any dents, scratches, or other damage to the siding that may have occurred during installation. Note the location and severity of any damage found.

    Siding Maintenance Tips

    Following these maintenance tips will help prolong the life and beauty of your new siding.

    • Regular Cleaning: Clean your siding at least once or twice a year, using a soft brush, mild detergent, and water. Avoid high-pressure washers, which can damage the siding.
    • Prompt Repair of Damage: Address any minor damage, such as cracks or loose panels, immediately to prevent further deterioration. Small repairs are much less expensive than large-scale replacements.
    • Seasonal Inspections: Perform thorough inspections twice a year, in spring and fall, to check for any signs of damage or deterioration. This proactive approach can prevent costly repairs down the line.
    • Gutter and Downspout Maintenance: Regularly clean gutters and downspouts to ensure proper water drainage away from the foundation and siding. Clogged gutters can lead to water damage and premature siding deterioration.
    • Tree and Shrub Trimming: Keep trees and shrubs trimmed away from the siding to prevent damage from branches rubbing against the surface. This is especially important for vinyl siding, which can be easily scratched.

    End of Discussion

    Ultimately, selecting a top-rated siding contractor for your high-quality home renovation hinges on meticulous research and careful evaluation. By following the steps outlined in this guide—from verifying credentials and reviewing testimonials to understanding warranties and managing project costs—you can confidently choose a team that will deliver exceptional results. Remember, investing in a reputable contractor is an investment in the long-term value and beauty of your home. A well-executed siding project not only enhances your property’s curb appeal but also provides significant protection against weather damage, contributing to increased energy efficiency and overall home value.

  • Fiber Cement Siding Budget: Hidden Costs

    Fiber Cement Siding Budget: Hidden Costs

    Budgeting for Fiber Cement Siding: Hidden Costs to Consider is more than just calculating material costs; it’s about understanding the often-overlooked expenses that can significantly impact your project’s final price. From permits and professional consultation to waste disposal and unforeseen repairs, a comprehensive budget requires meticulous planning. This guide will equip you with the knowledge to navigate these complexities and ensure a smooth, financially responsible siding upgrade.

    Choosing fiber cement siding offers durability and aesthetic appeal, but the initial cost is only the tip of the iceberg. This article delves into the various hidden costs associated with this popular exterior cladding, offering practical advice and cost estimations to help you prepare a realistic budget. We’ll explore everything from material pricing and labor expenses to permits, underlayment, and even contingency planning for unforeseen circumstances.

    Initial Costs

    Budgeting for fiber cement siding requires a thorough understanding of initial costs, primarily focusing on material pricing and quantity. Accurate estimations are crucial to avoid unexpected expenses during your project. This section will detail the factors influencing material costs and provide guidance on calculating the necessary amount of siding.

    Material Pricing and Quantity

    Fiber cement siding prices vary significantly depending on several factors. Thickness is a key determinant, with thicker boards generally offering superior durability and weather resistance but commanding a higher price. Color and texture choices also influence cost; more intricate textures and custom colors often increase the price per square foot. Generally, expect to pay anywhere from $6 to $15 per square foot for fiber cement siding, before installation. This range accounts for differences in thickness (ranging from 5/16″ to 1″), texture (smooth, cedar shake, etc.), and color options.

    Calculating Siding Quantity

    Accurately determining the amount of siding needed is critical for effective budgeting. Begin by calculating the total square footage of your house’s exterior walls that require siding. This involves measuring the height and width of each wall section and multiplying them together. Remember to account for windows and doors by subtracting their areas from the total wall area. It is crucial to add a waste factor to account for cuts, fitting around corners, and potential damage. A 10-15% waste factor is generally recommended, though more complex designs may require a higher percentage. The formula for calculating the required siding is:

    Total Square Footage of Walls x (1 + Waste Factor) = Total Siding Needed (in square feet)

    For example, if your house has 1000 square feet of wall space and you use a 10% waste factor, you’ll need 1000 x 1.10 = 1100 square feet of siding.

    Fiber Cement Siding Manufacturer Comparison

    The following table compares pricing and features from three major fiber cement siding manufacturers. Note that pricing can fluctuate based on location, retailer, and specific product choices. Warranty details may also vary depending on the specific product and installation. This data is illustrative and should be verified with current manufacturer information.

    Manufacturer Price per Square Foot (USD) Warranty (Years) Available Colors
    James Hardie $8 – $14 30 (depending on product) Wide range, including custom colors
    CertainTeed $7 – $13 30 (depending on product) Extensive selection, including custom colors
    Nichiha $9 – $15 50 (depending on product) Diverse range, known for unique textures

    Labor Costs

    Installing fiber cement siding involves significant labor costs, a crucial aspect often overlooked in initial budgeting. Understanding these costs, whether you opt for professional installation or a DIY approach, is vital for accurate project planning and financial preparedness. This section breaks down the factors influencing labor expenses and compares the potential costs for a typical project.

    Labor costs for fiber cement siding installation vary considerably depending on several key factors. These factors significantly impact the overall project expense, necessitating careful consideration before commencing the project.

    Professional Installation Costs

    Professional installers bring expertise, efficiency, and warranty protection. However, their services command a higher price. The hourly rate for experienced installers can range from $40 to $80 or more, depending on geographic location and project complexity. For a 1500 sq ft house, professional installation could cost anywhere between $5,000 and $12,000 or more, This wide range reflects variations in regional labor rates, the intricacy of the design (including trim work and detailing), and the installer’s experience and reputation. For instance, a project requiring extensive custom trim work in a high-cost area like San Francisco might fall towards the higher end of this range, while a simpler installation in a more affordable region could be closer to the lower end.

    DIY Installation Costs

    A DIY approach can potentially save money on labor, but it comes with significant risks. While you eliminate the hourly rate of a professional installer, you must account for the cost of renting specialized tools (such as scaffolding, nail guns, and cutting equipment), purchasing necessary safety gear, and potentially the cost of materials wasted due to inexperience. Additionally, time commitment is a major factor; a project that might take a professional crew a few days could take a homeowner several weekends, representing a significant opportunity cost. While the initial savings might seem appealing, the risk of mistakes leading to costly repairs or even complete siding replacement could easily negate any initial savings. A conservative estimate for a DIY approach on a 1500 sq ft house, factoring in tool rental, materials, and time, could range from $2,000 to $4,000, though this is a highly variable figure.

    Factors Influencing Labor Costs

    Several key factors significantly impact the overall labor cost for fiber cement siding installation. These include:

    • Geographic Location: Labor rates vary considerably across different regions. Metropolitan areas typically command higher rates than rural areas.
    • Installer Experience: Experienced and reputable installers often charge more per hour due to their expertise and efficiency, minimizing potential errors and delays.
    • Project Complexity: Intricate trim work, complex designs, and the need for specialized techniques (such as around windows and doors) will significantly increase labor costs.
    • Project Size: Larger projects generally command a lower per-square-foot cost due to economies of scale. However, a larger project will still require more total labor hours.

    Comparison of Professional vs. DIY Labor Costs

    For a 1500 sq ft house, the difference between professional and DIY installation can be substantial. Professional installation could cost between $5,000 and $12,000, while a DIY approach might range from $2,000 to $4,000. However, it’s crucial to weigh the potential cost savings against the risks associated with DIY installation, including the possibility of costly mistakes, delays, and the loss of valuable time. Choosing a professional installer ensures a higher quality of workmanship, warranty protection, and a quicker project completion, although at a higher initial cost.

    Permits and Inspections

    Before you begin your fiber cement siding project, understanding the local regulations regarding permits and inspections is crucial. Navigating this process correctly ensures compliance with building codes, avoids potential penalties, and protects your investment. Failure to obtain the necessary permits can lead to significant delays, fines, and even the need to remove and reinstall the siding.

    The permitting process for siding installation varies considerably depending on your location. Factors such as the size of the project, the type of siding being used, and local building codes all play a role. Generally, you will need to submit detailed plans to your local building department, which may include specifications of the materials, the installation method, and potentially architectural drawings. These plans are then reviewed to ensure compliance with local codes and safety regulations. Once approved, you’ll receive a permit allowing you to begin the work. Inspections are typically scheduled at various stages of the project, such as after the sheathing is installed and again after the siding is completed. These inspections verify that the work meets the required standards.

    Permitting Costs and Inspection Fees

    The costs associated with obtaining permits and undergoing inspections can vary significantly. Permit fees are usually based on the project’s value or square footage. For example, a small residential project might incur permit fees ranging from $100 to $500, while larger commercial projects could cost several thousand dollars. Inspection fees are typically charged per inspection, with each visit costing anywhere from $50 to $200 or more, depending on the complexity of the work and the jurisdiction. It’s advisable to contact your local building department early in the planning stages to obtain accurate cost estimates for your specific project.

    Penalties for Non-Compliance

    Non-compliance with building codes and regulations can result in a range of penalties. These may include stop-work orders, requiring you to halt construction until the violations are corrected. Significant fines can be levied, often proportionate to the severity and extent of the violations. In some cases, the building department may even require the removal of improperly installed siding, leading to substantial additional costs. Furthermore, non-compliance can affect the value of your property and potentially impact your homeowner’s insurance coverage. For instance, a homeowner in California who failed to obtain the necessary permits for a siding replacement project could face fines exceeding $1000 and be required to bring the work into compliance, leading to additional expenses for re-inspection and potential remediation. It’s imperative to prioritize compliance to avoid these potentially costly and time-consuming repercussions.

    Underlayment and Preparation

    Proper underlayment and surface preparation are crucial for a long-lasting and aesthetically pleasing fiber cement siding installation. Neglecting these steps can lead to issues such as moisture penetration, uneven siding application, and premature deterioration. This section details the various underlayment options and the necessary steps for preparing your existing wall surface.

    Choosing the right underlayment and meticulously preparing the surface are vital steps in ensuring the longevity and quality of your fiber cement siding. The underlayment acts as a barrier against moisture and provides a stable base for the siding, while proper surface preparation ensures a smooth, even finish and prevents future problems. The cost of these steps, while often overlooked, significantly impacts the overall project budget.

    Underlayment Options and Costs

    Several types of underlayment are suitable for fiber cement siding installations, each offering varying degrees of protection and cost. The choice depends on factors such as climate, existing wall condition, and budget.

    • Housewrap: A permeable membrane that allows moisture vapor to escape while preventing liquid water from penetrating. Housewrap is relatively inexpensive, typically costing between $0.25 and $0.75 per square foot. It’s a good option for most climates but may not offer the same level of protection as other options in extremely wet regions.
    • Water-Resistive Barrier (WRB): A more robust and waterproof membrane than housewrap, offering superior protection against moisture. WRB costs range from $0.50 to $1.50 per square foot, reflecting its enhanced performance. This is a preferred choice in areas with high rainfall or humidity.
    • Fluid-Applied Membranes: These liquid-applied membranes create a seamless, waterproof barrier. They are more expensive, typically ranging from $1.00 to $3.00 per square foot, but offer excellent protection and are particularly suitable for complex wall shapes and details.

    Surface Preparation Procedures

    Preparing the existing wall surface is a labor-intensive but essential step. This process involves removing old siding, repairing damaged areas, and ensuring a smooth, clean surface for the new siding. The complexity and cost of this step vary greatly depending on the existing wall condition and the type of siding being removed.

    Step-by-Step Guide to Wall Preparation

    The following steps outline the process of preparing a wall for fiber cement siding installation, including the removal of old siding. Remember to always prioritize safety and wear appropriate personal protective equipment (PPE).

    1. Assessment and Planning: Carefully inspect the existing wall for damage, rot, or insect infestation. Note any areas requiring repair or replacement. This step is crucial for accurate cost estimation. Expect to spend approximately 1-2 hours on this phase.
    2. Old Siding Removal (if necessary): If removing existing siding, start by carefully removing nails and staples. Use a pry bar to gently separate the siding from the sheathing. Dispose of old siding responsibly according to local regulations. This phase may take anywhere from 4-8 hours depending on the square footage and type of siding being removed. Labor costs will be a significant factor here.
    3. Sheathing Repair: Repair any damaged sheathing, replacing rotten or damaged sections with new material. Ensure the sheathing is properly fastened and level. This step may require additional materials and labor, adding to the overall cost.
    4. Surface Cleaning: Thoroughly clean the wall surface to remove dirt, debris, and loose material. This can be done using a pressure washer or a stiff brush. This step should take approximately 2-4 hours depending on the size of the wall.
    5. Underlayment Installation: Install the chosen underlayment according to the manufacturer’s instructions. Ensure proper overlapping and sealing to create a continuous moisture barrier. This step typically takes 4-6 hours depending on the size of the area and the complexity of the wall.

    Costs associated with these steps will vary significantly based on the size of the project, the condition of the existing wall, the chosen underlayment, and the labor rates in your area. For example, removing asbestos siding will require specialized contractors and add significantly to the overall cost. A realistic budget should include contingency for unforeseen issues.

    Trim and Accessories

    The final, and often overlooked, aspect of fiber cement siding installation is the trim and accessories. These seemingly minor components play a crucial role in both the aesthetic appeal and the longevity of your siding. Properly installed trim not only enhances the overall look but also protects vulnerable areas from water damage, contributing significantly to the overall cost-effectiveness of the project. Ignoring these details can lead to costly repairs down the line.

    Various trim pieces and accessories are necessary to achieve a professional and weather-tight finish. Accurate costing requires careful consideration of the project’s specific needs and the chosen materials. Prices can vary widely based on material quality, regional pricing, and supplier discounts.

    Trim Piece and Accessory Costs

    The following list details common trim pieces and accessories, their functions, and estimated costs. These are average estimates and may vary depending on factors mentioned previously. Always obtain multiple quotes from reputable suppliers before making purchasing decisions. Remember that the quantity needed will depend heavily on the size and complexity of your home’s exterior.

    • Corner Boards: These cover the exterior corners of the house, providing a clean, finished look and protecting the corner edges from damage. Cost: $2 – $5 per linear foot. For a house with 100 linear feet of corner, this could range from $200 to $500.
    • J-Channels: Used to neatly finish the edges of siding around windows and doors, preventing water penetration. Cost: $1 – $3 per linear foot. A typical house might need 50 linear feet, costing $50 to $150.
    • Flashing: Essential for diverting water away from vulnerable areas like window and door frames, preventing water damage. Cost: $0.50 – $2 per linear foot, varying significantly based on material (aluminum, galvanized steel, etc.). The cost of flashing is highly variable depending on the complexity of the installation.
    • Soffit and Fascia Trim: These cover the underside of the eaves and the vertical board beneath the roofline. Cost: $3 – $8 per linear foot. The cost depends significantly on the material and style chosen (e.g., vinyl, aluminum, wood). A house with 200 linear feet of soffit and fascia could cost between $600 and $1600.
    • Window and Door Trim: Provides a finished look around windows and doors and helps to seal them against the elements. Cost: Varies greatly depending on material and style, from $2 to $10 per linear foot or more for intricate designs. The total cost will depend on the number and size of windows and doors.

    Waste Removal and Disposal

    Replacing your siding involves generating significant waste, and responsible disposal is crucial both for cost and environmental reasons. Failing to account for waste removal can significantly inflate your overall project budget. This section details the costs and environmentally sound practices associated with disposing of old siding and related materials.

    The cost of waste removal and disposal for fiber cement siding projects varies greatly depending on several factors. These include the amount of waste generated (determined by the size of your home and the amount of old siding being removed), your location (local landfill fees and regulations differ), the type of disposal method chosen (e.g., dumpster rental versus hiring a junk removal service), and whether hazardous materials are present (e.g., asbestos-containing materials in older homes require specialized and more expensive handling).

    Costs of Different Waste Disposal Methods

    Several options exist for disposing of fiber cement siding waste. Each carries a different price tag and environmental impact. A direct comparison requires knowing specific local costs, but we can outline general cost ranges.

    • Dumpster Rental: This is generally a cost-effective option for larger projects. The cost depends on the dumpster size (ranging from small 10-yard containers to large 40-yard containers) and rental duration. Expect to pay anywhere from a few hundred to over a thousand dollars, depending on your needs and location. This method typically requires you to sort and load the waste yourself.
    • Junk Removal Service: Hiring a junk removal service is more convenient but usually more expensive. They handle all aspects of waste removal, including loading and transportation. Costs are typically based on volume or weight of waste and can range from several hundred to several thousand dollars, depending on the project scale and location. This option often includes disposal fees.
    • Recycling and Repurposing (if applicable): Some fiber cement siding components might be recyclable depending on local regulations and facilities. This option could significantly reduce disposal costs, potentially even leading to savings or credits, but may require additional effort in sorting and transporting materials to designated recycling centers. The cost will vary greatly depending on the feasibility and logistics.

    Environmentally Friendly Disposal Options

    Minimizing environmental impact during a siding replacement project is essential. Several strategies can reduce the waste stream and promote responsible disposal.

    • Proper Sorting and Separation: Separate recyclable materials (such as metal flashing or plastic packaging) from non-recyclable waste. This maximizes recycling opportunities and minimizes landfill burden.
    • Donation or Reuse: If the old siding is in good condition, consider donating it to organizations that might reuse it for other projects. This diverts materials from landfills and reduces waste.
    • Landfill Disposal: For non-recyclable materials, responsible landfill disposal is necessary. Ensure compliance with all local regulations and choose a landfill with appropriate waste management practices.
    • Hazardous Waste Disposal (if applicable): If you suspect your old siding contains asbestos or other hazardous materials, contact your local environmental agency for proper disposal procedures. Improper handling of hazardous materials can pose serious health and environmental risks, and specialized disposal is significantly more expensive.

    Unexpected Repairs and Contingencies

    Even with meticulous planning, unforeseen issues can arise during a fiber cement siding installation. Addressing these potential problems proactively is crucial to avoid budget overruns and project delays. This section details how to account for such unexpected repairs and establish a contingency budget.

    Unexpected repairs can stem from various sources. Discovering rotted wood under the existing siding is a common example. This necessitates additional time and expense for wood replacement before siding installation can proceed. Other potential problems include unforeseen structural issues, such as damaged sheathing or framing, requiring repairs before siding can be applied. Unexpectedly encountering asbestos or lead paint during the removal of old siding would also significantly impact the project’s cost and timeline, necessitating specialized handling and disposal procedures.

    Contingency Budget Calculation

    A contingency budget is essential to absorb the financial shock of unforeseen expenses. A common approach is to allocate a percentage of the total estimated project cost as a contingency fund. This percentage varies depending on the project’s complexity and the age and condition of the existing structure. For a relatively straightforward siding replacement on a well-maintained home, a 5-10% contingency might suffice. However, for older homes or those with known issues, a higher percentage, perhaps 15-20%, is more prudent.

    To calculate the contingency budget, multiply the total estimated project cost by the chosen contingency percentage. For example, a $10,000 estimated project cost with a 10% contingency would require a $1,000 contingency fund.

    Impact of Unexpected Costs

    The impact of unexpected costs on the overall budget can be significant. Even seemingly minor unforeseen issues can quickly escalate costs, leading to project delays and potential budget overruns. For instance, discovering extensive rotted wood requiring significant structural repairs could easily double or triple the initial cost estimate. Failing to adequately account for such possibilities can result in a frustrating and financially challenging experience. A well-defined contingency budget, therefore, acts as a safety net, minimizing the financial impact of unexpected repairs and ensuring the project’s completion within a reasonable budget.

    Professional Consultation

    Planning a fiber cement siding project involves many intricate details, and overlooking even minor aspects can lead to significant cost overruns and aesthetic disappointments. Engaging a professional for design and planning can mitigate these risks, ensuring a smoother, more cost-effective project. While there’s an upfront cost for their services, the long-term benefits often outweigh the expense.

    Professional design and planning services for fiber cement siding typically encompass a detailed assessment of your home’s exterior, consideration of your aesthetic preferences, material selection advice, and the creation of comprehensive installation plans. These plans will include precise measurements, material quantities, and a detailed breakdown of the installation process. The cost varies depending on the complexity of the project, the size of your home, and the professional’s experience and fees. Expect to pay anywhere from a few hundred dollars for a simple consultation to several thousand dollars for a large, complex project with extensive design work.

    Costs of Professional Design and Planning Services

    The cost of hiring a professional for design and planning services varies significantly based on several factors. These factors include the size and complexity of the project, the level of detail required in the plans, the professional’s experience and reputation, and their geographic location. For example, a simple consultation to discuss material choices and general design might cost between $200 and $500. However, a comprehensive design package that includes detailed drawings, material specifications, and a project timeline could range from $1,000 to $5,000 or more, particularly for large or unusually shaped homes. Some professionals charge an hourly rate, while others offer fixed-price packages. It’s crucial to obtain multiple quotes to compare pricing and services.

    Benefits of Professional Consultation in Avoiding Costly Mistakes

    Professional consultation offers numerous advantages that can significantly reduce the likelihood of costly mistakes during a fiber cement siding project. A seasoned professional possesses in-depth knowledge of building codes, material specifications, and best installation practices. They can identify potential issues early on, preventing costly rework or delays. For instance, a professional might recognize a structural problem that needs addressing before siding installation, saving you from unexpected expenses later. Their expertise in material selection can help you choose products that are both aesthetically pleasing and durable, minimizing the risk of premature deterioration or damage. Accurate planning also ensures you purchase the correct amount of materials, avoiding waste and unnecessary expenses. Finally, a well-defined plan streamlines the installation process, reducing labor costs and project completion time.

    Comparison of Professional vs. DIY Planning

    Choosing between professional design and planning versus a DIY approach involves weighing the costs and benefits of each option. While DIY planning might seem like a way to save money upfront, it can lead to significant cost overruns and delays in the long run. The risk of errors and omissions is higher with DIY planning, potentially resulting in costly mistakes that require rectification. Moreover, a lack of expertise can lead to poor material selection and suboptimal installation, compromising the longevity and aesthetic appeal of the siding. Professional planning, on the other hand, provides peace of mind and minimizes the risk of costly errors, ultimately leading to a more efficient and successful project, even though it involves an initial investment. The long-term cost savings and improved outcome often justify the expense of professional consultation.

    Financing Options

    Securing the necessary funds for your fiber cement siding project is a crucial step. Understanding the various financing options available will allow you to choose the most suitable and cost-effective method for your specific circumstances. This section will explore different financing avenues, comparing their interest rates and terms to help you make an informed decision.

    Financing a fiber cement siding project can often be achieved through several avenues, each with its own set of advantages and disadvantages. Careful consideration of interest rates, repayment terms, and associated fees is paramount before committing to any specific plan.

    Home Improvement Loans

    Home improvement loans are specifically designed to finance projects like siding replacements. These loans typically offer fixed interest rates, predictable monthly payments, and loan terms ranging from several months to several years. The interest rate offered will depend on factors such as your credit score, the loan amount, and the lender. For example, a homeowner with excellent credit might secure a loan with an interest rate of 5%, while someone with a lower credit score might face a higher rate, perhaps around 8%. The application process usually involves providing documentation such as proof of income, credit history, and a detailed project estimate. It’s important to shop around and compare offers from different lenders to find the best terms.

    Credit Cards

    Using a credit card can offer immediate access to funds, making it a convenient option for smaller projects. However, credit cards often carry high interest rates, which can significantly increase the overall cost of the project if the balance isn’t paid off quickly. For instance, a standard credit card might have an interest rate exceeding 18%, making it a far less attractive option than a dedicated home improvement loan for larger projects. Furthermore, relying solely on credit cards can negatively impact your credit score if you fail to manage repayments effectively.

    Personal Loans

    Personal loans are another alternative for financing home improvements. These loans can be obtained from banks, credit unions, or online lenders. Similar to home improvement loans, personal loans offer fixed interest rates and terms, but the interest rates and terms might vary depending on the lender and your creditworthiness. The application process typically involves submitting a loan application and providing financial documentation. While offering flexibility, personal loans may not always offer the most favorable interest rates compared to loans specifically designed for home improvements.

    Lines of Credit

    A home equity line of credit (HELOC) uses your home’s equity as collateral. This can result in lower interest rates than other loan options, but it also carries the risk of foreclosure if you fail to make payments. The interest rate on a HELOC is often variable, meaning it can fluctuate over time. Borrowers need to carefully assess their ability to manage variable interest rates before opting for this financing method. A detailed understanding of the terms and conditions is crucial before using a HELOC for home improvement projects.

    Insurance and Warranties

    Protecting your investment in fiber cement siding extends beyond the initial installation costs. Comprehensive insurance coverage and understanding manufacturer warranties are crucial for safeguarding your property and financial commitment. This section details the importance of both in ensuring long-term value and peace of mind.

    Securing adequate insurance during the installation process is paramount. General liability insurance for the contractor protects you from potential financial losses due to accidents or damage during the project. Furthermore, it’s advisable to verify your homeowner’s insurance policy covers damage to your property during construction and the replacement cost of the siding in case of unforeseen events like fire or severe weather. This proactive approach minimizes your risk and avoids potentially significant out-of-pocket expenses.

    Manufacturer Warranties for Fiber Cement Siding

    Manufacturer warranties provide a crucial safety net against defects in materials and workmanship. These warranties vary significantly in terms of length, coverage, and specific terms and conditions. It is essential to carefully review the warranty document provided by the manufacturer before making a purchase decision. Pay close attention to exclusions, such as damage caused by improper installation or acts of God. Understanding the warranty’s limitations allows for informed decision-making and helps manage expectations regarding potential repairs or replacements.

    Comparison of Manufacturer Warranties

    The following table compares the warranty lengths and coverage offered by several leading fiber cement siding manufacturers. Note that these are examples and specific terms may vary depending on the product line and year of purchase. Always refer to the manufacturer’s official warranty documentation for the most accurate and up-to-date information.

    Manufacturer Warranty Length (Years) Coverage Specific Exclusions (Examples)
    Manufacturer A 30 Material defects, fading Improper installation, damage from impact
    Manufacturer B 50 Material defects, cracking, peeling Acts of God, vandalism, normal wear and tear
    Manufacturer C 25 Material defects Improper maintenance, damage from extreme weather
    Manufacturer D 30 Material defects, color fade Damage from pests, improper cleaning

    Final Summary

    Successfully budgeting for fiber cement siding involves a proactive approach to cost estimation. While the initial material cost is a significant factor, understanding and accounting for the hidden expenses—labor, permits, underlayment, waste disposal, and potential unforeseen issues—is crucial for a realistic budget. By carefully considering each aspect outlined in this guide, homeowners can confidently embark on their siding project, minimizing financial surprises and maximizing their investment. Remember, a well-planned budget protects both your finances and the successful completion of your home improvement project.