Tag: Home Renovation

  • How to Get Accurate Siding Replacement Estimates

    How to Get Accurate Siding Replacement Estimates

    How to Get Accurate Siding Replacement Estimates is crucial for a successful home improvement project. Replacing your siding is a significant investment, and understanding the process of obtaining precise estimates is paramount to avoiding costly surprises and ensuring a smooth renovation. This guide will equip you with the knowledge to navigate the complexities of siding replacement, from understanding the scope of work to negotiating fair prices and securing appropriate warranties.

    This comprehensive guide breaks down the process into manageable steps, covering everything from accurately measuring your home’s exterior to selecting reputable contractors and understanding the intricacies of different siding materials. We’ll explore how to decipher detailed estimates, identify potential hidden costs, and navigate the complexities of permits, inspections, and financing options. By the end, you’ll be confident in your ability to obtain accurate estimates and make informed decisions for your siding replacement project.

    Understanding the Scope of Work

    Accurately estimating the cost of siding replacement requires a thorough understanding of the project’s scope. Several factors contribute to the final price, and neglecting any of them can lead to significant discrepancies between the estimate and the actual cost. A detailed assessment of these factors is crucial for both homeowners and contractors to ensure a fair and accurate price.

    Several key factors influence the cost of siding replacement. These factors interact in complex ways, so a comprehensive evaluation is necessary for a precise estimate.

    Factors Influencing Siding Replacement Costs

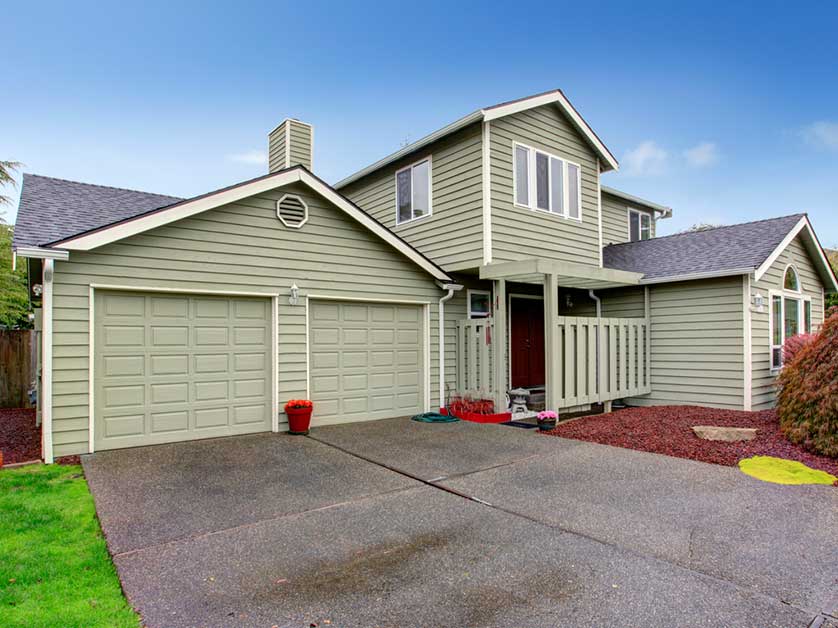
    The cost of siding replacement is determined by a combination of material costs, labor costs, and the complexity of the project. Material costs vary significantly depending on the type of siding chosen (e.g., vinyl, wood, fiber cement), its quality, and its aesthetic features. Labor costs are influenced by the size of the house, the condition of the existing siding (requiring more or less demolition and preparation), the accessibility of the work area (scaffolding needs?), and the contractor’s experience and overhead. Additional factors include permits, waste disposal, and any unforeseen repairs discovered during the project. For example, a large two-story home with intricate architectural details will naturally require more labor and potentially more expensive materials than a smaller, simpler ranch-style house. A project requiring significant removal of rotted wood will also add to the overall cost.

    Measuring the Area Needing Siding Replacement

    Accurate measurement of the area requiring siding replacement is paramount for obtaining an accurate estimate. This involves more than simply calculating the square footage of the house’s exterior walls. Detailed measurements should account for windows, doors, vents, and other features that will not require new siding. The process typically involves using a measuring tape to determine the linear dimensions of each wall section, then subtracting the areas of openings. Professional contractors often use specialized software to create a detailed plan of the house, facilitating precise calculations and material ordering. For instance, measuring a 20ft x 30ft wall section with a single 3ft x 7ft window would involve calculating the total wall area (600 sq ft) and subtracting the window area (21 sq ft) resulting in 579 sq ft of siding needed for that particular section. This process is repeated for every section of the house requiring new siding.

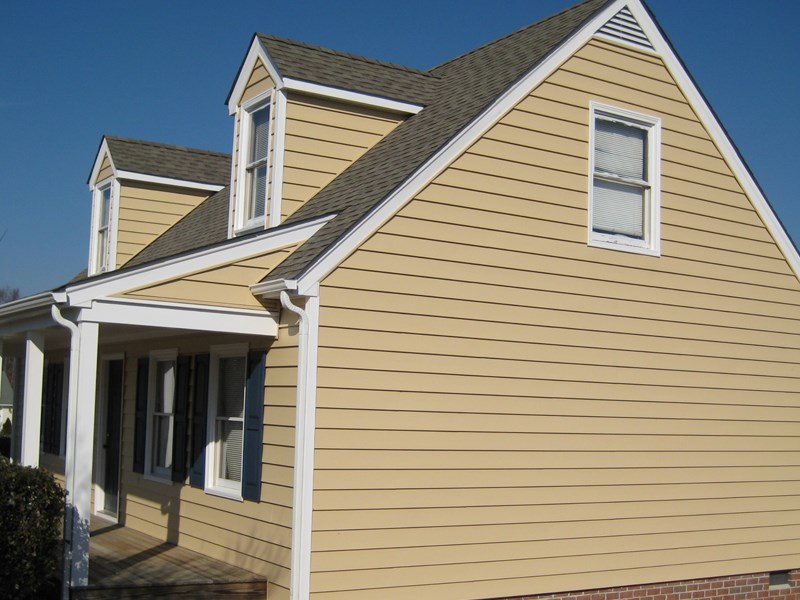
    Siding Material Types and Their Cost Impact

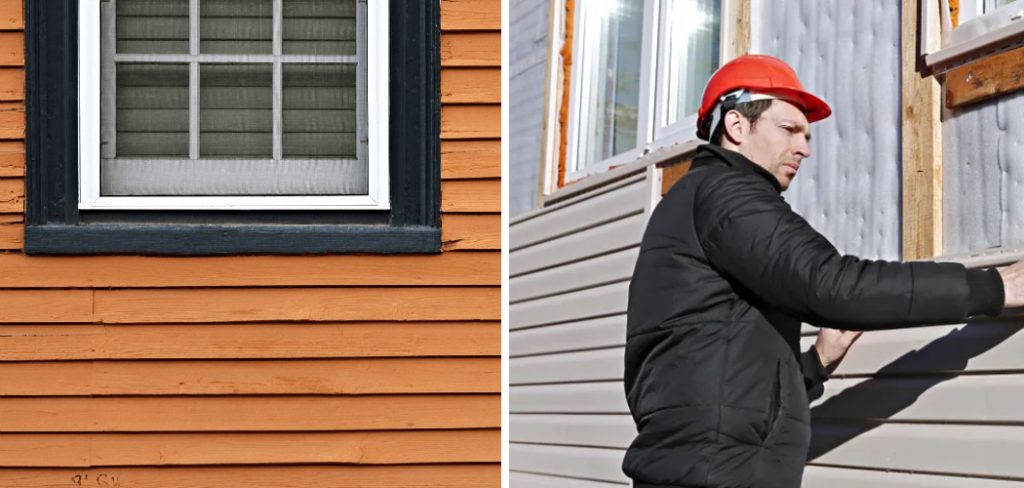
    Different siding materials significantly impact the overall project cost. Vinyl siding is generally the most affordable option, offering a balance of durability and cost-effectiveness. However, it might not be as aesthetically pleasing or long-lasting as other options. Wood siding, while offering a classic look, is more expensive and requires more maintenance. Fiber cement siding provides excellent durability and fire resistance but is typically more costly than vinyl. Metal siding, such as aluminum or steel, offers exceptional durability and longevity, but often comes with a higher price tag. The choice of siding material directly affects not only the material cost but also the labor cost, as different materials require different installation techniques and expertise. For example, installing intricate wood siding requires specialized skills and thus a higher labor cost compared to installing vinyl siding.

    Finding Reputable Contractors

    Choosing the right contractor is crucial for a successful siding replacement project. A reputable contractor possesses the necessary experience, licensing, and insurance to ensure quality workmanship and protect you from potential liabilities. Thorough vetting is essential to avoid costly mistakes and project delays.

    Selecting a contractor involves careful consideration of their experience, licensing, insurance, and bidding process. This section provides guidance on how to effectively assess these critical factors.

    Contractor Experience and Reliability Assessment

    To gauge a contractor’s experience and reliability, several key questions should be addressed. Gathering this information will help you make an informed decision. Consider asking about the number of years they’ve been in business, their specific experience with siding replacement (including the types of siding they’ve worked with), and the size and scope of past projects similar to yours. Inquiring about their process for managing projects, including timelines and communication, will provide further insight into their professionalism. Furthermore, requesting references from previous clients allows you to independently verify their work quality and overall customer satisfaction. Finally, reviewing online reviews and testimonials can provide valuable additional insights into their reputation.

    Verification of Contractor Licenses and Insurance

    Verifying a contractor’s license and insurance is a critical step in protecting yourself from potential problems. Contact your state’s licensing board to confirm the contractor’s license is valid, current, and in good standing. This verification process helps ensure the contractor meets the minimum standards of competence and professionalism required by your state. Similarly, request proof of general liability and workers’ compensation insurance. General liability insurance protects you from financial losses if an accident occurs on your property during the project. Workers’ compensation insurance covers medical expenses and lost wages for employees injured on the job, protecting you from potential liability for their injuries. Failure to verify these crucial elements could leave you exposed to significant financial risks.

    Comparison of Contractor Bidding Processes

    Contractors utilize different bidding processes, each with its own advantages and disadvantages. Some contractors provide fixed-price bids, offering a total cost for the entire project upfront. This approach provides clarity and predictability regarding the final cost, but it may not account for unforeseen issues that could arise during the project. Other contractors use cost-plus bids, where the final cost is determined by the actual materials and labor used. This method offers flexibility to address unexpected issues, but it can lead to cost overruns if not carefully managed. Finally, some contractors provide a range of estimated costs, acknowledging potential variations in the final price based on factors discovered during the project. Understanding these differences is key to selecting a bidding process that aligns with your project’s needs and risk tolerance. For example, a complex project with potential for unforeseen issues might benefit from a cost-plus bid, while a straightforward project might be better suited to a fixed-price bid.

    Detailed Breakdown of Estimates

    Receiving a detailed estimate is crucial for a successful siding replacement project. A comprehensive breakdown allows you to compare quotes effectively, understand the true cost, and avoid unexpected expenses. A transparent estimate builds trust with the contractor and ensures you’re both on the same page regarding the project’s scope and financial implications.

    A well-structured estimate should clearly outline all costs associated with the project. This includes labor, materials, permits, and any other potential expenses. Failing to receive a detailed breakdown can lead to disagreements and cost overruns later in the process.

    Sample Estimate Template

    A clear and organized estimate significantly simplifies the comparison process. The following table illustrates a sample estimate template that contractors should use:

    Item Labor Cost Materials Cost Permits & Fees
    Siding Removal & Disposal $XXX $XXX $0
    Sheathing Repair (if needed) $XXX $XXX $0
    New Siding Installation $XXX $XXX $0
    Flashing & Caulking $XXX $XXX $0
    Permit Acquisition $0 $0 $XXX
    Clean Up $XXX $0 $0
    Total $XXX $XXX $XXX

    Note: Replace the “$XXX” placeholders with the actual costs provided by the contractor. Remember that prices will vary depending on factors such as location, materials chosen, and the size of the project.

    Detailed Materials List

    The inclusion of a detailed materials list is paramount. This list should specify the type, quantity, and brand of each material to be used. For example, instead of simply stating “siding,” the list should detail the type of siding (e.g., vinyl, fiber cement, wood), its color, manufacturer, and the square footage needed. This level of detail allows for accurate cost comparisons and ensures that you understand exactly what materials will be used in your project. Discrepancies between the quoted materials and those actually used should be immediately addressed.

    Potential Hidden Costs and Their Identification

    Unforeseen costs can significantly impact the final project price. Common hidden costs include unexpected repairs to underlying sheathing, additional labor required due to unforeseen complications (e.g., rotted wood), changes in material pricing, and disposal fees. To identify potential hidden costs, carefully review the estimate for any vague or unspecified items. Ask the contractor clarifying questions about any ambiguous entries and request a detailed breakdown of any additional charges that may arise. It is prudent to obtain multiple estimates to compare pricing and identify any potential discrepancies. For example, one contractor might include sheathing repair in their base price, while another might list it as an add-on, potentially leading to a higher final cost.

    Material Costs and Pricing

    Understanding material costs is crucial for accurate siding replacement estimates. The type of siding you choose significantly impacts both the initial expense and the long-term cost of ownership. Different materials offer varying levels of durability, maintenance requirements, and aesthetic appeal, all of which influence the overall price.

    Siding Material Price Comparison

    Vinyl, wood, and fiber cement are common siding choices, each with its own price range. Vinyl siding is generally the most affordable option, offering a wide range of colors and styles at a lower cost per square foot compared to wood or fiber cement. Wood siding, particularly premium varieties like cedar or redwood, commands a significantly higher price due to its natural beauty and inherent characteristics. Fiber cement siding falls somewhere in between, providing a durable, low-maintenance alternative at a cost often exceeding vinyl but generally less than high-end wood. Price fluctuations are common depending on the specific manufacturer, finish, and regional availability. For example, a basic vinyl siding might cost between $3 and $8 per square foot installed, while high-end wood siding could range from $15 to $30 or more. Fiber cement typically falls within $8 to $15 per square foot installed. These figures are estimates and can vary widely based on several factors.

    Material Quality and Longevity

    The quality of siding materials directly impacts both the upfront cost and the long-term expenses associated with maintenance and replacement. Higher-quality materials, while more expensive initially, often offer superior durability, resistance to weather damage, and a longer lifespan, ultimately reducing the total cost of ownership over time. For instance, a thicker, more robust vinyl siding with a better warranty will cost more upfront but is less likely to require repairs or replacement within a shorter timeframe compared to a thinner, less expensive option. Similarly, higher-grade wood siding, treated for rot and insect resistance, will be more expensive but require less maintenance and last longer than untreated wood. Fiber cement siding, known for its fire resistance and durability, also exhibits a longer lifespan, though higher-quality options within this category will typically come with a higher price tag.

    Obtaining Multiple Material Quotes

    Securing multiple quotes for siding materials from different suppliers is essential for ensuring you receive competitive pricing. Contact at least three to five different suppliers, providing them with detailed specifications of your siding needs, including the type of material, quantity, color, and any special features. Compare not only the price per unit but also the total cost, including delivery fees and any applicable taxes. Be sure to clarify the warranty offered on the materials and inquire about potential discounts or bulk purchase options. This comparative approach will enable you to make an informed decision and potentially save a significant amount of money on your siding project. Remember to verify the supplier’s reputation and reliability before committing to a purchase.

    Labor Costs and Timelines

    Understanding labor costs and project timelines is crucial for accurate siding replacement budgeting. These factors, often intertwined, significantly impact the overall cost and can vary considerably depending on several key variables. Accurate estimation requires a careful consideration of these variables to avoid unexpected expenses and delays.

    Labor costs for siding replacement are influenced by several factors. The experience level of the crew directly affects the speed and efficiency of the work, leading to variations in overall labor costs. More experienced crews, while commanding higher hourly rates, often complete the job faster, potentially offsetting the higher cost per hour with reduced overall labor time. Geographical location also plays a significant role; labor rates in high-cost-of-living areas tend to be higher than in more affordable regions. Finally, project complexity, including the size of the house, the type of siding being installed, and the presence of intricate architectural details or difficult-to-access areas, all contribute to increased labor hours and therefore higher costs.

    Factors Affecting Labor Costs

    Several factors influence the final labor costs associated with a siding replacement project. These include the experience and skill level of the workers, the prevailing wage rates in the specific geographic location, and the complexity of the project itself. For instance, a larger, more complex project with intricate detailing will naturally require more labor hours than a smaller, simpler project. Similarly, a crew with extensive experience in siding installation will likely complete the work more efficiently than a less experienced team, potentially leading to lower overall labor costs despite higher hourly rates. The type of siding material also influences labor costs; some materials are more challenging to install than others, impacting the time required and, consequently, the labor expenses.

    Realistic Timelines for Siding Replacement Projects

    The timeline for a siding replacement project varies greatly depending on the size of the house, the complexity of the design, and weather conditions. A small house with simple siding might take a few days to a week, while a larger, more complex project could take several weeks or even months. For example, a 1,500 square foot ranch-style home with standard vinyl siding might be completed within 7-10 business days by an experienced crew. However, a 3,000 square foot Victorian home with intricate detailing and multiple materials might take 4-6 weeks or longer. Unforeseen circumstances, such as inclement weather, material delays, or unexpected structural issues, can further extend the project timeline. It’s crucial to discuss realistic timelines with contractors and factor in potential delays during the planning phase.

    Negotiating Labor Costs

    Negotiating labor costs requires a balance between securing a fair price and ensuring quality workmanship. Before negotiating, obtain multiple detailed estimates from reputable contractors. Compare not only the total cost but also the breakdown of labor and materials. Ask for clarification on any unclear items in the estimate. If a contractor’s labor cost seems significantly higher or lower than others, inquire about the reasoning behind the difference. Focus on the value proposition—experience, warranty, materials used—rather than solely on the price. Remember that a slightly higher upfront cost might be justified by superior quality and a shorter project timeline, potentially saving you time and stress in the long run. Always ensure that the agreed-upon labor costs are clearly outlined in a written contract before work begins.

    Permits and Inspections

    Obtaining the necessary permits and undergoing inspections are crucial steps in a successful siding replacement project. These processes ensure your project complies with local building codes, protects your investment, and helps guarantee the quality of the workmanship. Ignoring these steps can lead to fines, legal issues, and potential safety hazards.

    Permitting Process for Siding Replacement

    Securing the necessary permits typically involves submitting an application to your local building department. This application will require detailed information about the project, including the type of siding being used, the scope of work, and often, detailed drawings or plans. The review process can vary depending on your location and the complexity of the project; expect delays of a few days to several weeks. You’ll likely need to pay a fee, the amount of which varies by jurisdiction and project size. For example, a small residential siding replacement might cost between $100 and $500, while larger commercial projects could cost significantly more. After review and approval, the permit will be issued, allowing you to legally commence work. Failure to obtain a permit before starting work can result in stop-work orders, fines, and potential legal action.

    Importance of Inspections

    Inspections are conducted by building officials at various stages of the project to verify compliance with building codes and ensure the work meets minimum quality standards. These inspections typically occur after the preparation of the existing siding, during the installation of new siding, and after completion. Inspectors will assess aspects such as proper installation techniques, adherence to code requirements for flashing and water management, and overall quality of materials. A failed inspection may require corrective work before the project can be completed and signed off. This ensures the long-term durability and safety of your siding and protects your home from potential damage. A positive inspection, on the other hand, offers peace of mind and protects your investment.

    Costs Associated with Permits and Inspections

    The costs associated with permits and inspections are typically separate from the contractor’s estimate. Permit fees vary significantly by location and project scope. Inspection fees are usually charged per inspection, with the number of inspections depending on the project’s complexity. For instance, a small residential project might involve two or three inspections, each costing between $50 and $150. Therefore, budgeting for these additional costs is essential for accurate project cost planning. It is always advisable to inquire about permit and inspection fees directly with your local building department to get the most accurate estimate for your specific project.

    Warranty and Guarantees

    Securing a comprehensive warranty is crucial when investing in siding replacement. Understanding the types of warranties offered, their terms, and limitations will protect your investment and ensure you receive the promised quality and service. This section will clarify the different warranties involved and highlight their importance in your decision-making process.

    Siding warranties typically come from two sources: the manufacturer and the contractor. Manufacturer warranties cover defects in the siding material itself, such as flaws in manufacturing or material failure due to inherent weaknesses. Contractor warranties, on the other hand, cover the workmanship of the installation. These warranties often overlap but address different aspects of the project’s success. It’s vital to carefully review both to understand the complete coverage.

    Manufacturer Warranties

    Manufacturer warranties vary considerably depending on the siding material (vinyl, fiber cement, wood, etc.) and the specific product line. Some offer limited warranties covering defects for a specific period, typically ranging from 10 to 50 years, while others offer more comprehensive warranties that include labor and material costs for repairs. For example, a high-end vinyl siding manufacturer might offer a 50-year warranty against fading, cracking, and peeling, while a less expensive option may only provide a 20-year warranty against manufacturing defects. Always obtain a copy of the manufacturer’s warranty documentation before making a purchase. Pay close attention to what is and is not covered, including exclusions related to improper installation or damage from extreme weather events.

    Contractor Warranties

    Contractor warranties primarily cover the quality of the installation. A typical contractor warranty might cover issues such as leaks, improper flashing, or faulty installation leading to siding damage within a specific timeframe, usually 1-2 years. Some contractors offer extended warranties for an additional fee, providing longer-term protection against workmanship issues. It’s important to note that contractor warranties often require adherence to specific maintenance guidelines. Failure to maintain the siding properly might void the warranty. For instance, a contractor might require annual cleaning and inspection of the siding to ensure the warranty remains valid.

    Warranty Limitations

    Understanding the limitations of both manufacturer and contractor warranties is paramount. Warranties rarely cover damage caused by acts of God (e.g., hurricanes, tornadoes), vandalism, or improper maintenance. They may also exclude damage resulting from modifications or alterations to the siding after installation. Some warranties contain stipulations about the use of specific cleaning products or repair methods. For example, using abrasive cleaners could void a warranty. Before signing any contract, carefully read the fine print to understand the scope of coverage and any exclusions that may apply. Clarify any ambiguities with the contractor or manufacturer to avoid misunderstandings later. A thorough understanding of warranty limitations ensures realistic expectations and prevents potential disputes down the line.

    Payment Schedules and Financing Options

    Securing financing and establishing a clear payment schedule are crucial aspects of your siding replacement project. Understanding the different options available and their implications will help you make informed decisions and ensure a smooth process. This section outlines typical payment structures and financing choices to consider.

    Payment schedules generally align with project milestones. A common approach involves several installments tied to specific stages of completion. This protects both the homeowner and the contractor, ensuring fair compensation for work performed.

    Sample Payment Schedule

    A typical payment schedule might look like this:

    Milestone Payment Percentage
    Contract signing and material ordering 10%
    Completion of demolition and preparation 20%
    Completion of installation (50%) 30%
    Final inspection and completion 40%

    Note: These percentages are examples, and the actual schedule will depend on the specifics of your project and agreement with the contractor. Always review the payment schedule carefully before signing the contract.

    Financing Options for Siding Replacement

    Several financing options exist to help manage the cost of siding replacement. These can significantly impact your overall budget and repayment plan.

    Homeowners can explore various financing routes, each with its advantages and disadvantages.

    Home Equity Loan or Line of Credit (HELOC)

    Home equity loans and HELOCs utilize the equity in your home as collateral. They typically offer lower interest rates than personal loans but carry the risk of foreclosure if payments are not met. The approval process involves a credit check and appraisal of your property. A significant advantage is the potential for tax deductibility of the interest.

    Personal Loan

    Personal loans are unsecured loans, meaning they don’t require collateral. They offer flexibility in terms of repayment schedules but often come with higher interest rates compared to home equity loans. Approval depends on your credit score and income.

    Contractor Financing

    Some contractors offer financing options directly to their clients. This can streamline the process, but it’s crucial to understand the terms and interest rates carefully. These plans might have limitations on the amount financed or specific repayment periods.

    Credit Cards

    Using credit cards can be a convenient short-term solution, but high interest rates can make it a costly option if not paid off quickly. Careful budgeting and prompt repayment are crucial to avoid accumulating significant debt.

    Advantages and Disadvantages of Different Payment Methods

    The best payment method depends on your individual financial situation and the terms offered by your contractor. Carefully weigh the advantages and disadvantages before making a decision.

    Payment Method Advantages Disadvantages
    Cash Often results in a lower overall cost due to the absence of interest. Requires a significant upfront capital investment.
    Home Equity Loan/HELOC Potentially lower interest rates, tax deductibility. Uses home equity as collateral, risks foreclosure.
    Personal Loan Flexible repayment schedules, no collateral needed (usually). Typically higher interest rates compared to home equity loans.
    Contractor Financing Streamlined process. Potentially limited options, interest rates may vary.
    Credit Cards Convenience. High interest rates if not paid promptly.

    Addressing Unexpected Issues

    Siding replacement projects, while meticulously planned, can sometimes encounter unforeseen complications. Understanding these possibilities and how they’re handled is crucial for a smooth and successful renovation. Proper communication between the contractor and homeowner is key to navigating these challenges effectively.

    Unexpected issues during a siding replacement project can significantly impact both the timeline and the final cost. Therefore, it’s vital to have a plan in place to address these contingencies. This involves proactive communication from the contractor, transparency about additional costs, and a clearly defined process for handling changes to the original scope of work.

    Examples of Unexpected Issues

    During a siding replacement, various unforeseen problems can arise. These often involve underlying structural issues or deterioration not visible during the initial inspection. For instance, extensive rotted wood beneath the existing siding might necessitate more extensive repairs than initially anticipated. Similarly, discovering damaged sheathing or structural framing requires addressing these issues before new siding can be installed. Other unexpected issues might include discovering lead paint, requiring specialized and more costly abatement procedures, or encountering unexpected obstacles such as underground utilities or difficult-to-access areas.

    Contractor Handling of Unforeseen Problems

    When unexpected issues arise, a reputable contractor will promptly inform the homeowner. This communication should include a clear explanation of the problem, its potential impact on the project timeline and budget, and proposed solutions. They should provide photographic evidence of the issue and discuss different options for repair, outlining the associated costs for each. The contractor should obtain the homeowner’s approval before proceeding with any additional work. Detailed documentation of these changes, including photos and written agreements, is crucial for maintaining transparency and avoiding future disputes.

    Accounting for Potential Unexpected Expenses in the Estimate

    While it’s impossible to predict every possible issue, a comprehensive estimate should include a contingency clause. This clause acknowledges the possibility of unforeseen problems and allocates a percentage (typically 5-10%) of the total estimated cost to cover unexpected expenses. This contingency fund allows for the resolution of minor problems without requiring significant budget adjustments or project delays. A detailed breakdown of the contingency allocation should be provided to the homeowner for transparency. For example, an estimate of $10,000 might include a $500-$1000 contingency to address minor unforeseen issues such as localized wood rot or minor adjustments to flashing. Larger, more significant unforeseen problems will require separate change orders.

    Final Thoughts

    Securing accurate siding replacement estimates requires diligent research, careful planning, and effective communication with contractors. By following the steps outlined in this guide—from understanding the scope of work and finding reputable contractors to analyzing detailed estimates and addressing potential unexpected issues—you can confidently navigate the process and ensure a successful and cost-effective siding replacement project. Remember, a well-informed homeowner is best positioned to achieve the desired outcome within budget and timeline expectations. Take your time, ask questions, and choose wisely.

  • What Factors Affect the Cost of Siding Replacement?

    What Factors Affect the Cost of Siding Replacement?

    What Factors Affect the Cost of Siding Replacement? This question is crucial for homeowners considering this significant home improvement project. Replacing your siding is a substantial investment, and understanding the various cost drivers ensures a realistic budget and prevents unpleasant surprises. From material selection and labor costs to permits and unforeseen repairs, numerous factors contribute to the final price tag. This guide delves into each aspect, providing a comprehensive overview to empower you with the knowledge needed to make informed decisions.

    The cost of siding replacement is influenced by a complex interplay of factors. Material choice significantly impacts the initial investment, with options ranging from budget-friendly vinyl to more durable but expensive materials like fiber cement and metal. Labor costs vary depending on geographic location, contractor experience, project complexity, and the extent of necessary repairs to the underlying structure. Permitting and inspection fees are also essential considerations, varying based on local regulations and the scope of the project. Finally, unexpected issues, such as rotted wood or insect infestations, can add unforeseen expenses, highlighting the importance of thorough inspections and contingency planning.

    Material Costs

    The cost of siding replacement is significantly influenced by the chosen material. Different materials offer varying degrees of durability, aesthetics, and maintenance requirements, leading to substantial differences in overall project expense. Understanding these variations is crucial for making an informed decision that aligns with your budget and long-term goals.

    Siding Material Cost Variations

    Several factors contribute to the price differences between siding materials. These include the raw material costs, manufacturing processes, installation complexity, and regional availability. Generally, vinyl siding is the most budget-friendly option, while materials like wood and fiber cement tend to be more expensive. Metal siding can also be a costly choice depending on the type of metal used. The following provides average price ranges per square foot, but these can fluctuate based on location, supplier, and material quality. These figures represent estimates and should be verified with local contractors for accurate pricing.

    Siding Material Average Cost per Square Foot Lifespan (Years) Maintenance Requirements
    Vinyl $3 – $12 20-40 Low; occasional cleaning
    Wood $10 – $30+ 25-50+ (with proper maintenance) High; regular painting, staining, and sealing
    Fiber Cement $8 – $20+ 50+ Moderate; occasional cleaning and repainting
    Metal (Aluminum or Steel) $10 – $30+ 40-75+ Low; occasional cleaning

    Longevity and Maintenance Impact on Long-Term Costs

    The initial cost of siding is only one factor to consider. Long-term costs associated with maintenance and eventual replacement significantly influence the overall expense. Materials with longer lifespans and lower maintenance requirements, such as fiber cement and metal siding, can result in lower long-term costs despite higher initial investment. Conversely, materials like wood, while aesthetically pleasing, require significant ongoing maintenance, which can add up over time. Vinyl siding offers a balance, with a moderate lifespan and minimal maintenance needs. The choice should reflect the balance between upfront investment and long-term cost considerations. For example, a homeowner might choose a more expensive, longer-lasting fiber cement siding to avoid the repeated costs of repainting wood siding every few years.

    Labor Costs

    Labor costs represent a significant portion of the overall expense in siding replacement projects. These costs are influenced by a variety of factors, making it crucial to understand these elements to accurately budget for your project. Understanding these factors will allow for more informed decision-making and realistic cost projections.

    The cost of labor for siding replacement is highly variable. Several key factors contribute to the final price a homeowner will pay. These include the geographic location of the project, the experience and reputation of the contractor, and the complexity of the job itself. These factors often interact, creating a range of possible labor costs that can be difficult to predict without a detailed assessment of the specific project.

    Geographical Location’s Influence on Labor Costs

    Labor rates for skilled tradespeople, including siding installers, vary considerably across different regions of the country. Areas with a higher cost of living typically have higher labor rates to attract and retain qualified workers. For example, a siding installation in a major metropolitan area like New York City will likely cost significantly more in labor than a similar project in a rural area of the Midwest. This difference reflects the higher demand for skilled labor and the increased expenses associated with living and operating a business in high-cost areas. The availability of qualified installers also plays a role; areas with a shortage of skilled workers may command higher prices.

    Contractor Experience and its Impact on Labor Costs

    Experienced and reputable contractors often charge higher hourly or project rates than less experienced ones. Their expertise translates to efficiency, quality workmanship, and a lower risk of errors or delays. While the initial cost may seem higher, the potential for long-term savings due to reduced repair needs or increased property value often justifies the investment. Conversely, a less experienced contractor may offer lower rates, but the risk of subpar work, delays, or the need for costly repairs down the line should be carefully considered.

    Project Complexity and its Effect on Labor Costs

    The complexity of a siding replacement project significantly impacts labor costs. Simple projects involving the direct replacement of existing siding with a similar material on a straightforward structure will typically require less labor than more complex jobs. A project requiring extensive repairs to the underlying structure, removal of difficult-to-access siding, or the installation of specialized siding materials will necessitate more time and labor, resulting in a higher overall cost.

    Factors Increasing or Decreasing Labor Costs

    Understanding the factors that can influence labor costs is essential for accurate budgeting. The following list outlines elements that can either increase or decrease the overall labor expenses.

    • Factors that Increase Labor Costs:
      • Extensive repairs to underlying sheathing or framing.
      • Removal of difficult-to-remove siding (e.g., asbestos siding).
      • Complex architectural features (e.g., many dormers, angles, or intricate trim).
      • High material costs necessitating longer handling and installation times.
      • Working on multiple stories or difficult-to-access areas (e.g., steep roofs).
      • Additional work required due to unforeseen issues (e.g., rotted wood).
      • Working in inclement weather conditions (potential for delays and added safety measures).
    • Factors that Decrease Labor Costs:
      • Simple, straightforward house design.
      • Use of readily available, easy-to-install siding materials.
      • Good condition of the underlying structure, requiring minimal repairs.
      • Large-scale projects (economies of scale can sometimes lower per-unit labor costs).
      • Efficient project management and coordination by the contractor.

    For instance, replacing simple vinyl siding on a ranch-style home with minimal underlying damage would likely have lower labor costs compared to replacing cedar shake siding on a Victorian home with significant rot and needing extensive repairs to the underlying structure. The added complexity of the Victorian home necessitates more skilled labor and more time, significantly impacting the overall labor cost.

    Permits and Inspections

    Obtaining the necessary permits and passing inspections are crucial steps in any siding replacement project. These processes, while sometimes perceived as bureaucratic hurdles, are vital for ensuring the safety and legality of the work, protecting your investment, and maintaining compliance with local building codes. Ignoring these steps can lead to significant fines, delays, and even the need for costly rework.

    Permitting and inspection costs vary widely depending on several factors, including the scope of the project, the location, and the specific requirements of local authorities. Understanding these factors beforehand can help you accurately budget for your siding replacement.

    Permit Acquisition Process and Associated Costs

    The process of obtaining a permit typically begins with submitting an application to your local building department. This application usually requires detailed plans and specifications of the proposed siding replacement, including materials to be used and the overall scope of the project. The application fee itself varies considerably; a small residential project might incur a fee of a few hundred dollars, while a larger commercial project could cost several thousand. Following the application, a review process takes place where the building department assesses the plans for compliance with local building codes. Any revisions needed will extend the timeline and potentially add to the overall costs. Once approved, the permit is issued, allowing the work to commence. Failure to obtain a permit before starting work can result in significant penalties. For instance, a homeowner in a suburb of Chicago might expect to pay between $300 and $800 for a permit to replace the siding on a single-family home, while a larger multi-unit building could cost upwards of $2000.

    Influence of Local Regulations and Building Codes on Permit and Inspection Fees

    Local regulations and building codes significantly influence both permit and inspection fees. Stricter codes, often found in areas with higher population density or stringent environmental regulations, may necessitate more rigorous inspections and, consequently, higher fees. For example, areas prone to hurricanes or wildfires might have stricter building codes concerning wind resistance or fire-retardant materials, leading to more extensive inspections and higher associated costs. Conversely, areas with less stringent codes might have lower permit fees and fewer inspections. The specific materials used can also impact costs; using unconventional or less-common materials might require additional review and inspection, potentially leading to increased fees.

    Examples of Varied Permit Costs

    Permit costs can vary dramatically based on several factors. A simple siding replacement on a small single-family home in a rural area with minimal building codes might cost as little as $100-$200 for the permit. However, a larger project involving complex design elements, multiple buildings, or the use of specialized materials in a densely populated urban area with stringent codes could easily cost $1000 or more. Similarly, the addition of features like new windows or doors alongside siding replacement can significantly increase permit costs, as these additions require separate permits and inspections. A historical district might require even more extensive review and potentially higher fees due to the need to preserve architectural integrity.

    Waste Removal

    Responsible disposal of old siding materials is a crucial, yet often overlooked, aspect of siding replacement projects. The cost associated with this step can significantly impact the overall project budget, and choosing the most appropriate method requires careful consideration of both environmental responsibility and financial practicality. Failing to account for waste removal can lead to unexpected expenses and potential legal ramifications.

    The cost of disposing of old siding varies considerably depending on several factors, primarily the volume of waste generated and the chosen disposal method. Different siding materials also present unique challenges and costs. For example, asbestos-containing siding requires specialized handling and disposal, significantly increasing expenses. Proper disposal prevents environmental contamination and ensures compliance with local regulations.

    Waste Disposal Method Costs

    Several methods exist for disposing of old siding, each with its own cost structure. Dumpster rental offers a convenient solution for larger projects, allowing for on-site disposal. However, the cost depends on the dumpster size and rental duration. Hauling, on the other hand, involves hiring a contractor to remove and transport the waste to a designated disposal site. This method typically costs more per cubic yard than dumpster rental, but it may be more efficient for smaller projects or when access is limited. Recycling options, where available, can offer cost savings but may require sorting and preparation of materials.

    Scenario: Impact of Siding Volume on Waste Disposal Costs

    Consider a homeowner replacing the siding on a 2,000 square foot house. If the old siding is vinyl, a relatively lightweight material, the volume of waste might be approximately 10 cubic yards. Renting a 10-cubic-yard dumpster for a week could cost between $300 and $500, depending on location and rental company. However, if the house had wood siding, known for its higher density, the same project might generate 15-20 cubic yards of waste, increasing dumpster rental costs to $500-$800 or even necessitating the use of multiple dumpsters. Alternatively, hiring a hauling service could cost significantly more, potentially ranging from $800 to $1500 or more, depending on the distance to the disposal site and the labor involved. This scenario highlights how the type and amount of siding removed directly impact waste disposal costs.

    Preparation and Repair Costs

    Preparing your home for new siding is often more involved than simply removing the old material. Hidden costs associated with this preparatory phase can significantly impact the overall project budget. Understanding these potential expenses is crucial for accurate cost estimation and avoiding unexpected financial burdens.

    The condition of your existing house structure directly influences the preparation costs. Issues such as damaged sheathing, rotted wood, insect infestation, or water damage necessitate repairs before new siding can be installed. Ignoring these problems will lead to premature failure of the new siding and potentially more extensive, costly repairs down the line. A thorough inspection is vital for accurate cost projection.

    Assessment of Existing Damage and Associated Costs

    A comprehensive assessment of the existing house structure is the first step in estimating preparation costs. This involves a visual inspection to identify areas needing repair, followed by a more detailed assessment, possibly including probing suspect areas to determine the extent of damage. For example, a visual inspection might reveal damaged or rotted wood around windows, while probing might reveal extensive water damage beneath the surface. The cost will vary depending on the type and extent of damage. Minor repairs, such as patching small holes in the sheathing, might cost a few hundred dollars, while extensive rot repair requiring sheathing replacement could run into thousands.

    Examples of Preparation Costs

    Consider a scenario where a homeowner discovers rotted wood around several windows during the siding assessment. Replacing the damaged wood framing and sheathing around two windows might cost between $500 and $1000 depending on material costs and labor rates. If the problem is more widespread, involving several areas of the house, and requires significant sheathing replacement, the costs could easily exceed $3000. Furthermore, the presence of insect infestation, such as termites, would necessitate additional treatment and repair, adding another layer of expense. The cost of pest control and remediation could range from $500 to several thousand dollars depending on the severity of the infestation and the size of the house. Similarly, extensive water damage behind the siding may require costly repairs to the underlying structure, including moisture mitigation and mold remediation, before new siding can be installed.

    Estimating Preparation Costs

    Estimating preparation costs requires a detailed assessment. This can be done by a contractor, who will typically provide a written estimate based on their inspection. Homeowners can also attempt a rough estimate by considering the following:

    The area of damaged sheathing (in square feet) multiplied by the cost per square foot of replacement sheathing and labor.

    The number of windows or doors requiring repair multiplied by an estimated cost per window or door repair.

    The cost of pest control and/or mold remediation, if necessary.

    It is crucial to remember that these are estimates, and unforeseen problems may arise during the preparation process, leading to additional costs. It is always advisable to include a contingency buffer of 10-20% in the overall budget to account for such eventualities. This will help ensure that the project remains within budget and avoids unpleasant surprises.

    Additional Features and Upgrades

    Upgrading your siding installation beyond the basic replacement can significantly impact the final cost. However, these additions often provide long-term benefits, such as increased energy efficiency, improved curb appeal, and enhanced home protection. Carefully considering these options and their associated costs is crucial for making informed decisions about your siding project.

    Adding features like insulation, flashing, or trim during siding replacement involves additional material and labor costs. The extent of the price increase depends on the scope of the upgrades and the complexity of the installation. For instance, adding extra insulation to the exterior walls requires more materials and time, leading to a higher overall project cost. Similarly, intricate trim work demands specialized skills and precision, resulting in increased labor expenses.

    Insulation and Energy Efficiency

    Including insulation during siding replacement can substantially improve a home’s energy efficiency. This is particularly true when upgrading to more energy-efficient siding materials. For example, installing rigid foam insulation boards under vinyl or fiber cement siding can significantly reduce heat transfer, lowering energy bills and improving comfort. The added cost of the insulation materials and the slightly increased labor time are often offset by long-term savings on heating and cooling expenses. A homeowner might expect to see a return on investment through lower utility bills within a few years, depending on factors such as climate, home size, and existing insulation levels. A case study of a similar project in a comparable climate zone revealed that adding insulation reduced energy costs by approximately 15% annually.

    Flashing and Water Protection

    Proper flashing is essential for preventing water damage. While basic flashing is often included in standard siding installations, upgrading to more robust or specialized flashing can add to the project cost. For example, using self-adhering flashing membranes or installing additional flashing around windows and doors provides enhanced protection against water infiltration, minimizing the risk of costly repairs down the line. This added cost can be viewed as an investment in the long-term durability and maintenance of the home’s exterior. The cost of this upgrade depends on the size of the home and the complexity of the roofline.

    Trim and Finishing Details

    Adding decorative trim or upgrading to higher-quality trim significantly enhances a home’s aesthetic appeal. However, this also increases the overall project cost due to the additional materials and the skilled labor required for precise installation. Choosing elaborate trim designs or materials like cedar or composite will be more expensive than using basic vinyl or aluminum trim. The added cost is often justified by the increased property value and enhanced curb appeal. For example, upgrading from basic vinyl trim to custom-milled cedar trim could increase the overall siding cost by 10-20%, depending on the amount of trim used.

    Upgrading to Energy-Efficient Siding

    Upgrading to energy-efficient siding options, such as fiber cement or insulated vinyl siding, involves higher upfront costs compared to standard vinyl siding. However, these materials offer superior insulation properties, leading to lower energy bills and a potential return on investment over time. Fiber cement siding, for example, is more durable and energy-efficient than vinyl, but it also comes with a higher initial cost. The long-term cost savings from reduced energy consumption can outweigh the higher initial investment. A study comparing energy consumption in homes with different siding materials showed a significant reduction in energy usage with fiber cement siding compared to standard vinyl siding.

    Contractor Fees and Contracts

    Choosing the right contractor is crucial for a successful siding replacement project. Their fees and the contract terms significantly impact the final cost. Understanding different pricing models and contract details empowers homeowners to make informed decisions and avoid unexpected expenses.

    Contractor pricing models vary, directly influencing the overall project cost. Two common methods are hourly rates and per-square-foot pricing. Hourly rates offer transparency for labor costs but can be difficult to predict accurately for the entire project. Per-square-foot pricing provides a more straightforward upfront estimate, but may not account for complexities or unforeseen issues that arise during the project. For instance, a complex project with extensive repairs might exceed the initial per-square-foot estimate, leading to unexpected additional costs if not clearly outlined in the contract. Some contractors may also use a combination of these methods, charging per square foot for materials and hourly for labor.

    Contractor Pricing Models and Their Impact on Total Cost

    Hourly rates offer clarity regarding labor charges, allowing homeowners to easily track expenses. However, this method requires accurate time estimation, which can be challenging, leading to potential cost overruns if the project takes longer than anticipated. Per-square-foot pricing, while providing a seemingly simpler upfront cost estimate, may overlook project intricacies. Unexpected complexities, such as extensive rotted wood requiring significant repair, could inflate the final cost beyond the initial estimate. A hybrid approach, combining per-square-foot pricing for materials and an hourly rate for labor, aims to balance transparency and predictability. It’s important to compare quotes from contractors using different pricing models to determine the most cost-effective and transparent option for your specific project.

    Contract Review and Key Considerations

    Thoroughly reviewing the contract before signing is paramount. The contract should explicitly detail all included and excluded services, materials, and payment schedules. Overlooking crucial details can lead to disputes and extra expenses later. A comprehensive contract protects both the homeowner and the contractor. For example, a contract might specify the type and quality of siding materials, the scope of demolition and waste removal, and any warranties offered. It should also clearly define the payment schedule, including any down payments, progress payments, and final payment terms. Ambiguous clauses can be exploited, resulting in unexpected charges.

    Checklist for Comparing Contractor Bids

    Before making a decision, comparing bids from multiple contractors is essential. A structured approach ensures a fair and informed comparison.

    The following checklist aids in this process:

    • Detailed Scope of Work: Ensure each bid precisely describes the project’s scope, including materials, labor, and any additional services.
    • Pricing Model Clarity: Verify the pricing method (hourly, per-square-foot, or hybrid) and understand any potential cost fluctuations.
    • Payment Schedule: Compare payment terms, including down payments, progress payments, and final payment conditions.
    • Materials Specifications: Check the quality and type of siding materials proposed, and ensure they meet your expectations.
    • Warranty Information: Review the warranty provided on materials and workmanship. Longer warranties typically indicate greater contractor confidence.
    • References and Reviews: Check references and online reviews to assess the contractor’s reputation and past performance.
    • Permits and Insurance: Confirm that the contractor is licensed, insured, and will obtain necessary permits.
    • Timeline and Completion Date: Compare estimated project timelines to ensure they align with your schedule.
    • Contract Terms and Conditions: Carefully review all clauses to understand your rights and obligations.

    Seasonal Variations

    The cost of siding replacement, like many home improvement projects, is significantly influenced by seasonal factors. These factors primarily relate to weather conditions impacting work feasibility and contractor availability, leading to fluctuations in both labor and material costs throughout the year. Understanding these seasonal variations can help homeowners plan their projects for optimal cost-effectiveness.

    Seasonal fluctuations affect both labor and material costs. During peak seasons, typically spring and summer, demand for siding replacement services is high. This increased demand leads to higher labor costs as contractors are in high demand and can charge premium rates. Simultaneously, material prices might also increase due to higher overall demand and potential supply chain constraints. Conversely, during the off-peak seasons of autumn and winter, contractors often have more availability, leading to potentially lower labor rates. However, weather conditions might present challenges, potentially leading to project delays and increased costs associated with weather-related damage or protection measures.

    Peak Season Costs

    Peak seasons, usually spring and summer, present a higher cost profile for siding replacement. The increased demand for contractors’ services during these months results in higher labor rates. Contractors are often booked months in advance, and the competition for their services drives up prices. Material costs can also be higher due to increased demand and potential supply chain pressures. For example, a siding replacement project estimated at $10,000 during the off-season might cost $12,000-$15,000 during the peak season, reflecting a 20-50% increase in labor and potential material surcharges. This increase is primarily attributed to the higher demand and limited contractor availability.

    Off-Season Costs

    Conversely, off-peak seasons (autumn and winter) typically offer more favorable pricing. Reduced demand allows homeowners to negotiate better rates with contractors who are more readily available. While material costs might remain relatively stable, the lower labor costs can significantly reduce the overall project expense. However, it’s crucial to consider potential weather-related delays and associated costs. For instance, prolonged periods of rain or snow can halt progress, potentially extending the project timeline and incurring additional costs for protective measures or weather-related repairs. A project that might cost $12,000 during peak season could be completed for $9,000-$11,000 during the off-season, depending on the specific location and weather conditions.

    Weather Delays and Their Impact

    Unforeseen weather events can significantly impact the timeline and cost of siding replacement projects. Rain, snow, extreme heat, or high winds can cause delays, potentially extending the project duration and leading to increased labor costs. Furthermore, weather-related damage to materials or partially completed work might require additional repairs and replacement, adding to the overall expense. For instance, a heavy rainstorm could damage exposed sheathing, requiring additional repairs before siding installation can resume, increasing both the time and cost of the project. To mitigate these risks, homeowners should carefully review contracts for clauses addressing weather-related delays and potential cost implications. A detailed project schedule, incorporating contingency plans for potential weather disruptions, is crucial for managing both the timeline and budget effectively.

    Unexpected Issues and Repairs

    Siding replacement projects, while planned meticulously, can encounter unforeseen complications. These unexpected issues can significantly impact both the timeline and the overall cost of the project. Understanding these potential problems and incorporating contingency planning is crucial for responsible budgeting and managing expectations.

    Unexpected problems during siding replacement often stem from hidden damage or conditions not readily apparent during the initial inspection. Addressing these issues promptly and effectively is vital to prevent further damage and ensure the longevity of the new siding. Failing to account for these possibilities can lead to significant budget overruns and project delays.

    Potential Unexpected Problems and Their Cost Impact

    The following table outlines some common unexpected problems encountered during siding replacement, their potential causes, and their estimated cost impact. These estimates are averages and can vary widely depending on the severity of the issue, location, and the chosen contractor. It’s important to remember that these are just examples, and other unforeseen circumstances may arise.

    Unexpected Problem Potential Cause Estimated Cost Impact Example
    Rotted Wood Sheathing Water damage, insect infestation, poor initial construction $500 – $5,000+ Extensive rot requiring replacement of multiple sections of sheathing behind a large area of siding. This could involve labor to remove the rotted wood, purchase of replacement lumber, and additional time for proper installation and drying.
    Insect Infestation Carpenter ants, termites, or other wood-boring insects $1,000 – $10,000+ A significant infestation requiring professional pest control treatment before siding installation, potentially followed by repairs to damaged wood framing. The cost depends on the extent of the infestation and the necessary treatment.
    Mold or Mildew Growth Moisture trapped behind siding, poor ventilation $300 – $2,000+ Mold remediation may require specialized cleaning and potentially the removal and replacement of affected materials. The cost depends on the size of the affected area and the level of remediation required.
    Damaged or Deteriorated Underlayment Age, moisture damage, previous repairs $200 – $1,000+ Repair or replacement of damaged house wrap or other underlayment materials is necessary to ensure proper moisture protection for the new siding. This involves removing the damaged material and installing new underlayment, adding to both labor and material costs.

    Contingency Planning for Unexpected Expenses

    Incorporating a contingency plan into your siding replacement budget is essential. This plan should account for the possibility of unexpected issues. A reasonable approach is to allocate a percentage of the total project cost specifically for unforeseen repairs. This percentage can vary, but a range of 10-20% is often recommended, depending on the age and condition of your home. This allows for flexibility in addressing unforeseen problems without jeopardizing the overall project. For example, if the estimated cost of your siding replacement is $10,000, allocating $1,000 – $2,000 as a contingency fund would provide a buffer for unexpected repairs. It’s crucial to discuss potential unexpected costs with your contractor upfront and ensure they are factored into the overall quote or contract.

    Ending Remarks

    Replacing your siding is a considerable undertaking, but with careful planning and a thorough understanding of the cost factors involved, you can approach the project with confidence. By considering material costs, labor expenses, permitting requirements, waste disposal, necessary repairs, and potential upgrades, you can create a realistic budget and select a contractor who aligns with your needs and financial constraints. Remember to factor in potential unexpected issues and always review contracts meticulously before commencing the project. A well-informed approach ensures a smooth and successful siding replacement, enhancing your home’s curb appeal and protecting it for years to come.

  • Comparing Siding Replacement Estimates from Different Contractors

    Comparing Siding Replacement Estimates from Different Contractors

    Comparing Siding Replacement Estimates from Different Contractors is a crucial step in any home renovation project. This process involves careful analysis of various factors, from pricing structures and labor costs to material quality and contractor reputation. Understanding these nuances can save homeowners significant time and money, ultimately ensuring a successful and satisfying outcome. This guide will walk you through a comprehensive comparison process, enabling informed decision-making.

    By systematically examining the details presented in multiple estimates, homeowners can identify the best value proposition. This includes evaluating not only the upfront costs but also considering long-term factors such as material durability, warranty coverage, and the contractor’s overall experience and reliability. Making a well-informed choice contributes to a positive renovation experience and a lasting investment in your home.

    Understanding the Estimates

    Carefully reviewing multiple siding replacement estimates is crucial for making an informed decision. By comparing pricing structures, labor costs, and materials, you can identify the best value for your investment. This analysis focuses on three hypothetical estimates to illustrate the comparison process. Remember to replace these examples with your actual estimates.

    Pricing Structures Comparison

    Three distinct pricing structures were observed in the hypothetical estimates. Contractor A provided a fixed-price quote, offering a single, all-inclusive price encompassing labor and materials. Contractor B offered a detailed breakdown of costs, separating labor, materials, and permitting fees. Contractor C used a square-foot pricing model, multiplying the area of the house needing siding by a per-square-foot cost, with separate line items for materials and labor. The fixed-price quote from Contractor A simplifies comparison but lacks transparency, while the detailed breakdown from Contractor B facilitates a comprehensive analysis. Contractor C’s approach is common but might not account for complexities in the project, potentially leading to unforeseen costs.

    Labor Cost Breakdown

    The labor cost breakdown varied significantly across the three estimates. Contractor A’s fixed-price quote included labor but didn’t specify the hourly rate or number of labor hours. Contractor B detailed labor costs as $15 per square foot, totaling $3,000 for a 200-square-foot project. This included preparation, installation, and cleanup. Contractor C estimated labor at $10 per square foot, totaling $2,000 for the same project, reflecting a potential difference in labor efficiency or skill level. These discrepancies highlight the importance of understanding the scope of work included in each labor cost.

    Materials Used and Cost Impact

    The estimates revealed differences in the types of siding materials proposed. Contractor A suggested using vinyl siding, a relatively inexpensive option, while Contractor B proposed fiber cement siding, a more durable but pricier choice. Contractor C recommended a premium cedar wood siding, leading to the highest material cost. The type of siding significantly impacts the overall cost. Vinyl siding (Contractor A) cost $5,000, fiber cement (Contractor B) $8,000, and cedar wood (Contractor C) $12,000 for the same 200-square-foot project. This difference reflects the varying durability, aesthetic appeal, and maintenance requirements of each material. Consider the long-term cost implications when comparing materials beyond initial price.

    Analyzing Labor Costs

    Labor costs represent a significant portion of your siding replacement project’s total expense. A thorough comparison of labor costs across different contractor estimates is crucial for making an informed decision. This analysis should consider not only the hourly rates and total labor hours but also the experience and qualifications of the work crews and the warranties offered on their workmanship.

    Understanding the breakdown of labor costs allows for a more accurate assessment of value and helps identify potential discrepancies or areas of concern among competing bids. Factors such as crew size, projected project duration, and the complexity of the job all influence the final labor costs.

    Hourly Rates and Total Labor Hours

    Each contractor’s estimate should clearly detail the hourly rate charged for labor and the estimated number of hours required to complete the project. For example, Contractor A might quote $50 per hour for a crew of three workers, totaling 100 labor hours, while Contractor B might propose $60 per hour for a two-person crew, requiring 150 labor hours. Direct comparison reveals that Contractor A’s total labor cost ($15,000) is less than Contractor B’s ($9,000). However, a further investigation into the specifics of the work is necessary. Are the differing labor hours justified by the scope of work or project complexity? Does the higher hourly rate of Contractor B reflect a more skilled or experienced crew? These are important questions to consider.

    Experience Level of Work Crews

    The experience level of the installation crew significantly impacts the quality of the work and the overall project timeline. Look for details in the estimates about the crew’s experience with similar projects, their certifications (if applicable), and the average tenure of workers within the company. A contractor with a highly experienced and well-trained crew might justify a higher hourly rate due to increased efficiency and reduced risk of errors or rework. For example, Contractor C might highlight their team’s average of 10 years of experience in siding installation and their certifications from the relevant industry associations, indicating a higher level of expertise. Conversely, Contractor D might mention a younger, less experienced crew, potentially leading to a lower hourly rate but also a higher risk of mistakes or delays.

    Labor Warranties and Guarantees

    Scrutinize the warranties offered on the labor itself. A reputable contractor will typically provide a warranty covering their workmanship for a specific period, typically one to two years. This warranty should clearly outline what is covered (e.g., defects in installation, material failures due to installation errors), the duration of coverage, and the process for filing a claim. The length and comprehensiveness of the labor warranty can be a valuable indicator of the contractor’s confidence in their work and their commitment to customer satisfaction. For instance, Contractor E might offer a two-year warranty on all labor, while Contractor F might only offer a one-year warranty, suggesting a potential difference in confidence in their work or a less robust commitment to rectifying potential problems.

    Material Specifications

    Careful consideration of the siding materials proposed by each contractor is crucial for long-term value and aesthetic appeal. This section will compare the types and qualities of materials, manufacturer warranties, and the expected longevity and maintenance requirements of each option. This analysis will help you make an informed decision based on your budget and long-term goals.

    Siding Material Comparison

    Each contractor’s estimate should clearly specify the type of siding material being offered. Common options include vinyl, fiber cement, wood, and engineered wood. Vinyl siding is generally the most affordable, while fiber cement and wood offer superior durability and aesthetic appeal, but at a higher cost. Engineered wood siding combines the aesthetics of natural wood with enhanced durability and resistance to rot and insects. Direct comparison of the proposed materials – their manufacturer, specific product line, and color – is essential. For instance, one contractor might propose CertainTeed Monogram vinyl siding, while another might offer James Hardie fiber cement siding. These differences impact not only cost but also the overall look and longevity of your home’s exterior.

    Manufacturer Warranties

    The warranty offered by the siding manufacturer is a critical aspect to consider. Warranties typically cover defects in materials and workmanship, but the length and specific terms can vary significantly. Carefully review each warranty to understand its limitations. Some warranties might cover only the materials, while others might include labor. For example, a CertainTeed vinyl siding warranty might offer a 30-year limited warranty against defects, while a James Hardie fiber cement siding warranty could provide a 30-year non-prorated warranty against defects. Note that the contractor’s own warranty on installation will also be important, independent of the manufacturer’s warranty.

    Siding Material Longevity and Maintenance

    The longevity and maintenance requirements of different siding materials differ considerably. This table summarizes the typical lifespan and maintenance needs of common siding options:

    Siding Material Typical Lifespan (Years) Maintenance Requirements Cost Considerations
    Vinyl 20-40 Minimal; occasional cleaning Low initial cost, potentially higher replacement cost over time
    Fiber Cement 50+ Moderate; periodic painting or staining Higher initial cost, lower long-term replacement cost
    Wood 20-50 (depending on species and treatment) High; regular painting, staining, and potential repairs High initial cost, potentially high maintenance costs
    Engineered Wood 30-50 Moderate; periodic cleaning and occasional repainting Medium initial cost, moderate maintenance costs

    Payment Terms and Financing Options

    Choosing the right siding contractor often involves careful consideration of not only the quality of materials and workmanship but also the payment structure. Understanding the payment terms and financing options offered by different contractors is crucial for budgeting and ensuring a smooth project completion. This section will compare the various payment schedules and financing options to help you make an informed decision.

    Payment schedules vary significantly among contractors. Some may require a large upfront deposit, while others might prefer staged payments tied to project milestones. Understanding these differences is vital for managing your cash flow effectively. Financing options, if available, can ease the financial burden of a large home improvement project. However, it’s important to compare interest rates and repayment terms to choose the most suitable option.

    Payment Schedules

    Contractors typically outline their payment schedules in the contract. These schedules often involve a down payment, progress payments at various stages of the project (e.g., after material delivery, after completion of framing, after installation), and a final payment upon project completion and your satisfaction. For example, one contractor might require 20% upfront, 30% upon completion of the framing, 30% upon installation, and 20% final payment. Another might opt for a 50% deposit and the remaining 50% upon completion. It’s vital to compare these structures and ensure they align with your budget and payment capabilities.

    Financing Options

    Several contractors offer financing options, often partnering with financial institutions to provide loans specifically for home improvement projects. These loans typically come with interest rates and repayment terms. For instance, a contractor might offer a 0% interest loan for 12 months, or a loan with a fixed interest rate over several years. It’s important to review the terms and conditions of any financing offer, including the Annual Percentage Rate (APR), any associated fees, and the total cost of the loan over its lifespan. Always compare these offers from different contractors and with other financing options available to you independently.

    Upfront Costs and Deposits

    The upfront cost, usually a deposit or down payment, serves as a commitment from the homeowner and often covers initial materials procurement or project preparation. The percentage of the total project cost required as a deposit varies greatly. A high deposit may indicate a contractor’s confidence in their work, but it can also place a significant burden on the homeowner’s finances. Lower deposits might seem attractive but could indicate a less established contractor or a higher risk of project delays. Thoroughly review the contract to understand what the deposit covers and what recourse you have if the project is not completed as agreed.

    Late Payment Penalties

    Most contractor contracts stipulate penalties for late payments. These penalties can range from late fees (a fixed amount or a percentage of the outstanding balance) to interest charges or even suspension of work until the outstanding payment is received. Understanding the specific late payment penalties outlined in each contract is crucial to avoid unexpected financial repercussions. For example, a contract might state a late payment fee of $50 per day or an interest rate of 1.5% per month on overdue payments. It is advisable to plan carefully to avoid any late payment situations.

    Contractor Experience and Reputation

    Choosing a contractor for your siding replacement is a significant investment, and their experience and reputation play a crucial role in ensuring a successful project. Thoroughly investigating a contractor’s history and client feedback is essential to making an informed decision. This section compares the experience and reputation of the contractors you’ve received estimates from.

    This analysis considers several key factors to assess the reliability and trustworthiness of each contractor. We will examine their years of experience in siding installation, relevant certifications and licenses, and the feedback provided by previous clients. A comprehensive review of these factors allows for a more objective comparison.

    Contractor Experience and Certifications

    The following table summarizes the years of experience and relevant certifications held by each contractor. This information is crucial in determining their level of expertise and adherence to industry best practices. Note that the presence of certifications does not guarantee superior workmanship, but it indicates a commitment to professional standards.

    Contractor Name Years of Experience Certifications/Licenses
    ABC Siding Solutions 15 years Certified Residential Contractor (CRC), Licensed in [State]
    XYZ Home Improvements 8 years Licensed in [State]
    123 Exterior Renovations 20 years Certified Siding Installer (CSI), Licensed in [State], A+ rating with the Better Business Bureau

    Online Reviews and Customer Testimonials

    Examining online reviews and testimonials offers valuable insights into past client experiences. These reviews provide a firsthand account of the contractor’s professionalism, workmanship, communication, and overall project management. While individual experiences can vary, a consistent pattern of positive or negative feedback can be indicative of a contractor’s reliability.

    Below is a summary of online reviews for each contractor. Note that the number of reviews and the overall rating are taken from [Platform Name, e.g., Google Reviews, Yelp] as of [Date].

    • ABC Siding Solutions: Average rating of 4.5 stars out of 5 based on 75 reviews. Positive comments frequently mentioned excellent communication and attention to detail. Negative comments were rare and generally related to minor scheduling delays.
    • XYZ Home Improvements: Average rating of 3.8 stars out of 5 based on 30 reviews. Positive comments praised the competitive pricing. Negative comments cited occasional communication issues and minor quality control problems.
    • 123 Exterior Renovations: Average rating of 4.8 stars out of 5 based on 150 reviews. Consistently high praise for professionalism, quality of work, and customer service. Few negative comments were reported, mostly addressing minor issues promptly resolved.

    Contractor Pros and Cons

    Based on the analysis of experience, certifications, and online reviews, the following summarizes the advantages and disadvantages of each contractor:

    • ABC Siding Solutions:
      • Pros: Solid experience, good communication, generally positive reviews.
      • Cons: Occasional minor scheduling delays reported.
    • XYZ Home Improvements:
      • Pros: Competitive pricing.
      • Cons: Communication issues and minor quality control problems reported in some reviews.
    • 123 Exterior Renovations:
      • Pros: Extensive experience, multiple certifications, overwhelmingly positive reviews, excellent reputation.
      • Cons: None significant reported.

    Project Timeline and Scheduling

    The project timeline is a critical factor when comparing siding replacement estimates. A shorter timeline might seem appealing, but it’s crucial to understand the implications of rushed work versus a more deliberate approach. Contractors’ schedules should align with your availability and any other relevant factors, such as weather conditions.

    Understanding the proposed timelines from different contractors allows for a comprehensive comparison, enabling you to choose the contractor best suited to your needs and preferences. Delays can significantly impact your budget and overall project satisfaction. Careful consideration of potential delays is essential for a smooth and successful siding replacement.

    Estimated Project Timelines

    Each contractor’s estimate should clearly outline the expected project duration, broken down into phases if possible (e.g., demolition, installation, cleanup). Compare these timelines directly. For example, Contractor A might estimate completion in 7 days, while Contractor B proposes 10 days. These differences may be due to various factors including crew size, project complexity, and scheduling efficiency. A detailed breakdown of each phase’s duration can provide a more nuanced understanding.

    Potential Delays and Unforeseen Circumstances

    Several factors can cause delays. Unexpected weather conditions (heavy rain, extreme heat, or snow) can significantly impact outdoor work. Discovering unforeseen issues during demolition, such as rotted wood or damaged sheathing, may require additional time for repairs. Supply chain disruptions could delay the arrival of materials. Finally, unforeseen scheduling conflicts within the contractor’s team could also lead to delays. A reputable contractor will proactively communicate potential delays and offer solutions to mitigate their impact. For example, a delay caused by material shortage might be offset by prioritizing other tasks.

    Project Timeline Comparison Chart

    Contractor Total Project Time (Days) Demolition (Days) Installation (Days) Cleanup (Days)
    Contractor A 7 1 5 1
    Contractor B 10 2 7 1
    Contractor C 9 1.5 6.5 1
    Contractor D 12 2 8 2

    Permits and Licenses

    Obtaining the necessary permits and ensuring your contractor is properly licensed and insured are crucial steps in a successful siding replacement project. These aspects significantly impact the legality, safety, and overall quality of the work. A thorough comparison of these elements across different contractor estimates is essential before making a final decision.

    Permit costs and licensing information should be clearly outlined in each estimate. The absence of these details can indicate a potential lack of professionalism or even illegal operation. Understanding the implications of missing permits and licenses is vital to avoid future complications and potential legal liabilities.

    Permit Costs and Inclusion

    Each estimate should explicitly state the costs associated with obtaining the necessary permits. These costs can vary depending on your location, the scope of the project, and the specific permits required. For example, a larger project involving significant structural changes might require more permits and incur higher costs compared to a smaller, simpler job. Compare the breakdown of permit fees provided by each contractor. Discrepancies should prompt further investigation to ensure accuracy and transparency. Some contractors may include permit fees in their overall price, while others may list them separately. Clarify this detail with each contractor to avoid unexpected expenses.

    Contractor Licensing and Insurance

    Verify that each contractor holds the necessary licenses and insurance to perform the work. This typically includes a general contractor’s license and liability insurance. Request copies of these documents to confirm their validity and coverage. Estimates should clearly state the contractor’s licensing information and insurance policy details, including the policy number and the insurance company’s contact information. The absence of proper licensing and insurance exposes you to significant risks, including potential liability for accidents or damages during the project. Insufficient insurance coverage could leave you financially responsible for unforeseen events.

    Obtaining Necessary Permits

    The process of obtaining building permits generally involves submitting an application to your local building department along with detailed plans and specifications for the project. This application often requires information about the materials being used, the scope of work, and the contractor’s licensing information. The building department will review the application and plans to ensure compliance with local building codes and regulations. Once approved, you will receive a permit that allows the contractor to legally commence the work. The timeline for permit approval can vary depending on the complexity of the project and the efficiency of the local building department. In some cases, the contractor may handle the permit application process, while in others, the homeowner may be responsible. Clarify who is responsible for obtaining the permits and the associated timeline with each contractor. Delays in obtaining permits can significantly impact the project timeline, so factor this into your decision-making process.

    Warranties and Guarantees

    Understanding the warranties offered by different siding contractors is crucial for protecting your investment. A comprehensive warranty provides peace of mind and safeguards against potential defects or issues that may arise after installation. Comparing warranties allows you to make an informed decision based on the level of protection each contractor provides.

    Thoroughly reviewing the warranty documents provided by each contractor is essential. Pay close attention to the specific terms, conditions, and limitations of each warranty to ensure you understand the extent of coverage. Note that warranties often vary in their length and the types of issues they cover.

    Warranty Duration and Coverage

    The duration of warranties varies significantly between contractors and even between the materials and labor components of the project. Some manufacturers offer lifetime warranties on their siding products, while others provide shorter, limited warranties, typically ranging from 10 to 20 years. Labor warranties usually cover a shorter period, often ranging from 1 to 5 years. It’s vital to note whether these warranties are transferable to future homeowners if you plan to sell your property in the near future. For example, Contractor A might offer a 25-year warranty on their vinyl siding and a 2-year warranty on their labor, while Contractor B might offer a 15-year warranty on their fiber cement siding and a 1-year warranty on their labor.

    Warranty Limitations and Exclusions

    Warranties are not always absolute. Many contain specific limitations and exclusions that restrict their coverage. Common exclusions include damage caused by acts of God (such as hurricanes or floods), improper maintenance by the homeowner, or damage resulting from modifications or alterations made to the siding after installation. Some warranties might also exclude certain types of defects, such as minor cosmetic imperfections. For example, a warranty might cover major structural defects but exclude minor scratches or discoloration. Carefully reviewing these limitations is essential to avoid misunderstandings or disputes later. Understanding these limitations will help you assess the true value and protection offered by each warranty.

    Comparison of Contractor Warranties

    To facilitate comparison, consider creating a table summarizing the key features of each contractor’s warranty. This table could include columns for contractor name, material used, material warranty duration, material warranty exclusions, labor warranty duration, and labor warranty exclusions. This organized comparison will highlight the differences and allow for a clearer understanding of the overall value proposition of each contractor’s offer. For instance, a table might show that Contractor A’s warranty covers material defects for 25 years and labor for 2 years, excluding damage from extreme weather events, while Contractor B’s warranty covers material defects for 15 years and labor for 1 year, with similar exclusions.

    Cleanup and Waste Disposal

    Careful consideration of cleanup and waste disposal procedures is crucial when comparing siding replacement estimates. Contractors should detail their methods for managing debris and ensuring a clean worksite throughout and after the project. Differences in these approaches can significantly impact the overall cost and the level of disruption to your property.

    Waste and debris removal methods vary considerably between contractors. Some may use dumpsters placed strategically on your property, while others might opt for smaller, more frequent pickups. The frequency of waste removal directly affects the cleanliness of your property during the project. Furthermore, the method of disposal itself—landfill versus recycling—can impact both cost and environmental responsibility. It is important to ascertain whether the contractor’s methods align with your preferences and local environmental regulations.

    Waste Removal Methods

    Contractors should clearly outline their plan for handling construction debris. This should include details on the type of containers used (dumpsters, smaller bins), the frequency of removal, and the disposal method employed. For example, one contractor might describe using a large dumpster for the duration of the project, while another might detail a system of daily or bi-daily smaller container removal. This information allows for a direct comparison of approaches and associated costs. Inquire about the contractor’s commitment to recycling and responsible waste management practices. A responsible contractor will clearly state their commitment to minimizing environmental impact.

    Responsibility for Cleanup

    The contract should explicitly state the contractor’s responsibility for cleanup and waste disposal. This typically includes the removal of all construction debris, including scrap siding, packaging materials, and leftover building supplies. However, it’s important to clarify whether the contractor is responsible for cleaning areas beyond the immediate project site, such as driveways or walkways. Some contractors may offer additional cleaning services at an extra cost. A clear understanding of these responsibilities prevents misunderstandings and potential disputes after the project’s completion. A detailed breakdown of these responsibilities should be included in the written contract.

    Addressing Project-Related Damage

    Any damage incurred during the siding replacement process should be addressed by the contractor. This might include damage to landscaping, gutters, or other exterior features. Reputable contractors will have procedures in place to document, assess, and repair any accidental damage. The contractor’s estimate should ideally include a contingency for unforeseen damage, or at least clearly outline the process for handling such situations. For instance, a contractor might provide photographic documentation of existing conditions before commencing work, serving as a baseline for comparison after project completion. If damage does occur, a responsible contractor will promptly address it to the homeowner’s satisfaction.

    Total Project Cost and Value

    Comparing siding replacement estimates requires a thorough analysis of the total project cost and the value each proposal offers. This involves not only looking at the bottom line price but also understanding what contributes to that price and the long-term benefits each option provides. A lower upfront cost might seem attractive, but it could ultimately prove more expensive if the materials are inferior or the warranty inadequate.

    The total cost encompasses materials, labor, permits, and any other associated fees. The value proposition, however, considers the quality of materials, the experience and reputation of the contractor, the length and comprehensiveness of the warranty, and the overall expected lifespan of the new siding. By carefully weighing these factors, you can determine which estimate offers the best combination of cost and value.

    Comparative Analysis of Estimates

    To effectively compare, organize the information from each estimate into a clear format. This will help you easily identify key differences and advantages. Consider creating a table like the one below, which summarizes the key aspects of each estimate received. Remember to replace the example data with your own.

    Contractor Total Cost Material Type Warranty Length
    ABC Siding $15,000 Vinyl Siding – Premium Grade 25 Years
    XYZ Construction $12,000 Vinyl Siding – Standard Grade 10 Years
    123 Home Improvements $18,000 Fiber Cement Siding 30 Years

    Value Proposition Assessment

    Each estimate’s value proposition depends on individual priorities. For example, ABC Siding offers a premium-grade vinyl siding with a long warranty, suggesting higher quality and longer lifespan, justifying the higher price. XYZ Construction’s lower price reflects the use of standard-grade vinyl siding and a shorter warranty, implying a potentially shorter lifespan and higher risk of future repairs. 123 Home Improvements offers a higher initial investment but uses durable fiber cement siding with an extended warranty, indicating superior long-term value despite the higher upfront cost. The choice depends on your budget and your desired balance between initial cost and long-term durability.

    End of Discussion

    Ultimately, comparing siding replacement estimates requires a multifaceted approach. By carefully considering the elements discussed – pricing, labor, materials, contractor reputation, timelines, and warranties – homeowners can make a confident and informed decision. Choosing the right contractor and siding materials will not only enhance your home’s curb appeal but also ensure long-term value and peace of mind. Remember, a thorough comparison empowers you to make the best choice for your home and budget.

  • Top-Rated Siding Contractors for High-Quality Home Renovation

    Top-Rated Siding Contractors for High-Quality Home Renovation

    Top-Rated Siding Contractors for High-Quality Home Renovation: Transforming your home’s exterior requires careful consideration of materials, installation expertise, and contractor reputation. This guide helps you navigate the process of finding the perfect team for your project, ensuring a beautiful and long-lasting result that enhances your home’s curb appeal and protects it from the elements. We’ll explore key factors to consider when selecting a contractor, from verifying licenses and insurance to analyzing customer reviews and understanding warranties.

    Choosing the right siding contractor is a crucial step in any home renovation. A high-quality installation not only improves your home’s aesthetics but also significantly impacts its longevity and energy efficiency. This guide provides a comprehensive framework for evaluating potential contractors, ensuring you make an informed decision that aligns with your budget and expectations. We will cover everything from understanding different siding materials and their associated costs to navigating the complexities of contracts and warranties.

    Defining “High-Quality” in Home Renovation Siding

    High-quality home renovation siding goes beyond mere aesthetics; it encompasses a harmonious blend of superior materials, meticulous workmanship, and enduring longevity. A truly high-quality siding installation protects your home from the elements for decades, enhancing its curb appeal and increasing its value. This involves careful consideration of material selection, precise installation techniques, and a commitment to exceeding industry standards.

    Superior Siding Materials and Their Benefits

    The choice of siding material significantly impacts the overall quality and lifespan of your home’s exterior. Different materials offer unique advantages, catering to various budgets and aesthetic preferences. Selecting the right material is crucial for achieving long-term durability and weather resistance.

    • Fiber Cement Siding: Known for its exceptional durability, resistance to fire, rot, and insects, fiber cement siding mimics the look of wood but requires minimal maintenance. Its strength ensures it can withstand harsh weather conditions, including strong winds and heavy rain. Its longevity often exceeds 50 years, making it a cost-effective long-term solution.
    • Vinyl Siding: A popular and budget-friendly option, vinyl siding is relatively easy to install and maintain. It comes in a wide array of colors and styles, offering considerable design flexibility. While not as durable as fiber cement, high-quality vinyl siding can still last for several decades with proper installation and care. It’s resistant to moisture and insects.
    • Metal Siding (Aluminum or Steel): Metal siding offers unmatched durability and longevity, often lasting 50 years or more. It’s highly resistant to fire, pests, and extreme weather conditions. Steel siding, in particular, provides superior strength and impact resistance. While initially more expensive than vinyl or fiber cement, its long lifespan often makes it a cost-effective choice in the long run.
    • Wood Siding: While requiring more maintenance than other options, wood siding offers unparalleled aesthetic appeal and can significantly enhance a home’s character. Properly treated and maintained wood siding can last for decades, but it is susceptible to rot, insect damage, and requires regular painting or staining.

    Importance of Proper Installation Techniques

    Even the highest-quality siding materials will fail prematurely without proper installation. A meticulous installation process ensures the siding’s weather resistance, structural integrity, and overall longevity. Improper installation can lead to water damage, structural weaknesses, and a significant reduction in the siding’s lifespan.

    • Proper Flashing and Caulking: Careful application of flashing around windows, doors, and other penetrations prevents water intrusion, a major cause of siding damage. Similarly, thorough caulking seals gaps and joints, preventing air leakage and moisture penetration.
    • Accurate Measurement and Cutting: Precise measurements and cuts ensure a clean, professional finish and prevent gaps that can compromise weather resistance. Using the correct tools and techniques is essential for achieving accurate results.
    • Adherence to Manufacturer’s Instructions: Following the manufacturer’s guidelines for installation is crucial for ensuring the siding’s warranty remains valid and for achieving optimal performance. This includes proper ventilation, fastener spacing, and overall installation sequence.
    • Experienced and Qualified Installers: Hiring experienced and qualified siding installers is paramount. Professionals possess the expertise to handle complex installations, ensure proper ventilation, and address any unforeseen challenges during the process. They understand the importance of detail and can identify potential problems before they become major issues. Their expertise minimizes the risk of costly repairs and ensures a long-lasting, high-quality installation.

    Identifying Top-Rated Contractors

    Finding the right siding contractor for your home renovation project is crucial for ensuring a successful and aesthetically pleasing outcome. A thorough vetting process is essential to avoid potential problems and ensure you’re investing in quality workmanship and materials. This section outlines a methodology for identifying top-rated siding contractors in your area and provides criteria for evaluating their reputation.

    A systematic approach to finding top-rated siding contractors involves a multi-step process combining online research, direct inquiries, and verification of credentials. This ensures you are selecting a contractor with a proven track record of high-quality work and customer satisfaction.

    Methodology for Identifying Top-Rated Siding Contractors

    The identification of top-rated siding contractors requires a structured approach encompassing several key steps. First, utilize online search engines to identify contractors operating within your desired geographic area. Then, narrow down the initial list by considering factors such as years of experience, specialization in siding installation, and proximity to your location. Finally, conduct thorough background checks and obtain multiple estimates before making your final decision. This process ensures a balanced approach, combining readily available online information with crucial verification steps.

    Criteria for Evaluating Contractor Reputation

    Evaluating a contractor’s reputation involves scrutinizing several key aspects. A strong reputation is built on a foundation of positive online reviews, proper licensing and insurance, and a history of successfully completed projects.

    This list outlines the essential criteria:

    • Online Reviews: Examine reviews on platforms like Google My Business, Yelp, and Angie’s List. Look for consistency in positive feedback and how the contractor addresses negative reviews. Pay attention to the volume and recency of reviews, as a high number of recent positive reviews is a strong indicator of current customer satisfaction.
    • Licensing and Insurance: Verify that the contractor possesses the necessary licenses and insurance coverage for operating in your area. This protects you from potential liabilities in case of accidents or disputes. Contact your state’s licensing board to verify the validity of their license and inquire about any complaints filed against them.
    • Years of Experience: While not always indicative of quality, a longer history in the industry often suggests a higher level of experience and established processes. Inquire about the types of siding projects they have undertaken and the range of materials they have worked with.
    • References and Portfolio: Request references from previous clients and examine a portfolio of their completed projects. This provides visual evidence of their workmanship and attention to detail. Contacting previous clients allows you to directly assess their experiences and satisfaction levels.
    • Warranty and Guarantees: Inquire about the warranties offered on both workmanship and materials. A comprehensive warranty indicates confidence in their work and a commitment to customer satisfaction. Understand the terms and conditions of the warranty before signing any contract.

    Contractor Comparison Table

    The following table provides a framework for comparing different contractors. Remember to replace the example data with your own research findings.

    Contractor Name Years in Business Online Review Score (out of 5) Warranty Details
    ABC Siding Solutions 15 4.8 5-year workmanship, 20-year material
    XYZ Exterior Renovations 8 4.5 2-year workmanship, 10-year material
    123 Home Improvement 20 4.7 10-year workmanship, 25-year material

    Contractor Licensing and Insurance Verification

    Protecting your investment and ensuring a smooth renovation process hinges on choosing a reputable contractor. A crucial aspect of this selection process is verifying their licensing and insurance coverage. Failing to do so can expose you to significant financial and legal risks.

    Hiring a contractor without proper licensing and insurance can lead to a multitude of problems. Unlicensed contractors may lack the necessary skills and training, resulting in substandard work, costly repairs, or even structural damage. Furthermore, if an accident occurs on your property during the renovation, an uninsured contractor leaves you personally liable for any injuries or damages. This could result in substantial legal fees and financial losses. Protecting yourself from these potential risks is paramount.

    Verifying Contractor Credentials

    Verifying a contractor’s license and insurance involves a straightforward process, readily accessible through online resources. This proactive approach safeguards your interests and contributes to a successful renovation project.

    1. Check Your State’s Licensing Board Website: Each state maintains a database of licensed contractors. Visit your state’s contractor licensing board website (a simple online search for “[Your State] contractor licensing board” will suffice). These websites typically allow you to search for contractors by name, license number, or business address. Verify that the contractor’s license is current and in good standing. Look for any disciplinary actions or complaints filed against them.
    2. Request Proof of Insurance: Ask the contractor to provide proof of general liability insurance and workers’ compensation insurance. General liability insurance protects you from financial responsibility if someone is injured on your property during the renovation. Workers’ compensation insurance covers medical expenses and lost wages for the contractor’s employees if they are injured on the job. Thoroughly review the certificates of insurance to confirm coverage amounts and policy expiration dates. Ensure the policies are active and cover the scope of your project.
    3. Confirm Insurance Coverage with the Insurer: While the contractor provides proof of insurance, it’s prudent to verify the information directly with the insurance company. Contact the insurer listed on the certificate to confirm the policy’s validity and coverage details. This added step ensures the provided documentation is accurate and up-to-date.
    4. Review References and Testimonials: While not directly related to licensing and insurance, checking references and online reviews can provide additional insights into the contractor’s reputation and work quality. This step complements the verification of credentials, offering a more holistic assessment of the contractor’s suitability.

    Analyzing Customer Reviews and Testimonials

    Customer reviews and testimonials offer invaluable insights into the performance of siding contractors. Analyzing this feedback allows potential clients to make informed decisions and helps contractors identify areas for improvement. A comprehensive review analysis considers both positive and negative comments, examining patterns and common themes to develop a holistic understanding of a contractor’s strengths and weaknesses.

    A robust analysis goes beyond simply counting positive and negative reviews. It delves into the specifics of the feedback, identifying recurring issues or praise. For example, consistently positive comments about communication and professionalism suggest a contractor excels in customer service, while recurring complaints about missed deadlines or shoddy workmanship indicate potential problems. Comparing reviews across different platforms, such as Google Reviews, Yelp, and HomeAdvisor, provides a more comprehensive picture, as each platform may attract different types of reviewers and have varying review moderation policies.

    Common Themes in Customer Reviews Regarding Siding Installation

    Analyzing numerous customer reviews reveals several recurring themes. Positive reviews frequently highlight factors such as timely completion, professional conduct of the crew, meticulous attention to detail in installation, and excellent communication throughout the project. Negative reviews, conversely, often cite issues with project timelines, poor communication, substandard workmanship (e.g., gaps in siding, improper flashing), and inadequate cleanup after completion. Some reviews may focus on the contractor’s responsiveness to post-installation issues or warranty claims.

    Comparative Analysis of Reviews from Different Platforms

    Contrasting reviews from various platforms allows for a more nuanced understanding of contractor performance. For instance, a contractor might receive overwhelmingly positive reviews on their own website, but more mixed reviews on independent platforms like Yelp. This discrepancy could indicate a bias in self-reported reviews or highlight areas where the contractor needs improvement. Analyzing reviews across platforms helps to identify any patterns that might be overlooked when only considering a single source. For example, consistent complaints about billing practices across multiple platforms would be a more serious concern than isolated incidents on a single platform.

    Summary of Key Findings from Review Analysis

    A summary of the review analysis should present a concise overview of the contractor’s performance, highlighting both strengths and weaknesses. For example, a contractor might receive high praise for their skilled installers but criticism for poor project management. This summary should be factual and avoid subjective interpretations. Presenting the findings in a structured format, perhaps using a table to compare contractors across key performance indicators (KPIs) such as communication, timeliness, quality of work, and customer service, enhances clarity and facilitates easy comparison. For instance, a table could list contractors and assign scores based on the frequency of positive and negative comments related to each KPI. This allows for a quick visual comparison of contractors’ overall performance.

    Evaluating Contractor Experience and Expertise

    Choosing a siding contractor based solely on price can be a costly mistake. Experience and expertise are crucial factors in ensuring a high-quality, long-lasting home renovation. A seasoned professional brings a wealth of knowledge, problem-solving skills, and a proven track record to your project, minimizing potential issues and maximizing the final result.

    Experienced contractors understand the nuances of various siding materials, installation techniques, and potential challenges specific to different climates and home styles. This understanding translates to a smoother process, fewer unforeseen complications, and a superior final product.

    Specialized Skills and Certifications

    High-quality siding installation requires a range of specialized skills and knowledge beyond basic carpentry. Contractors specializing in siding often possess certifications demonstrating their proficiency in specific areas. These certifications validate their training and expertise, providing homeowners with an added layer of assurance.

    Contractor Experience and Certifications Comparison

    The following table compares three hypothetical contractors, highlighting their experience and relevant certifications. Note that this is for illustrative purposes and real-world contractor qualifications will vary.

    Contractor Name Years of Experience Certifications Specialization
    ABC Siding Solutions 15+ years Certified Installer (CertainTeed, James Hardie), OSHA 10 Vinyl and Fiber Cement Siding
    ProSiding Inc. 8 years Certified Installer (LP SmartSide), EPA Lead Renovation, Repair and Painting (RRP) Wood and Fiber Cement Siding
    Elite Exterior Renovations 20+ years Certified Installer (multiple manufacturers), OSHA 30, ICPI (Interlocking Concrete Pavement Institute) Certified Installer Various Siding Types, Including Stone Veneer

    Understanding Warranty and Guarantees

    Choosing siding for your home is a significant investment, and understanding the warranties offered is crucial for protecting that investment. Warranties provide a level of assurance regarding the quality of materials and workmanship, outlining the responsibilities of both the contractor and the manufacturer in case of defects or failures. A thorough understanding of these warranties is essential before committing to a contract.

    Warranties offered by siding contractors and manufacturers vary considerably. It is important to carefully compare these warranties before making a decision, as the scope of coverage and duration can differ significantly.

    Types of Siding Warranties

    Several types of warranties commonly accompany siding installations. These warranties typically cover different aspects of the project, and understanding their nuances is vital. For example, a manufacturer’s warranty typically covers defects in the siding material itself, while a contractor’s warranty might cover their workmanship during the installation process. Some warranties are limited to specific defects, while others offer more comprehensive coverage.

    Importance of Understanding Warranty Terms and Conditions

    Before signing any contract, carefully review all warranty terms and conditions. Pay close attention to the duration of the warranty, what is and is not covered, and the process for filing a claim. Look for exclusions, such as damage caused by acts of nature or improper maintenance. Understanding these details will prevent future misunderstandings and ensure you are adequately protected. For instance, a warranty might cover material defects for 20 years but only cover labor for one year. Understanding this difference is crucial.

    Comparing Warranty Offerings from Various Contractors

    Contractors may offer varying warranty lengths and coverage. Some might offer a shorter, more limited warranty, while others provide more extensive coverage for a longer period. For example, one contractor might offer a 5-year warranty on labor and a 20-year warranty on materials, while another might offer a 10-year warranty on both labor and materials. Direct comparison of these offerings is essential in making an informed decision. Always obtain warranty details in writing and compare them side-by-side to fully understand the differences. This allows for a fair comparison and helps to identify the best value for your investment.

    Estimating Project Costs and Budgeting

    Planning your siding renovation budget requires careful consideration of various factors. Understanding the typical cost ranges and potential influences will empower you to make informed decisions and avoid unexpected expenses. This section provides a breakdown of costs and a sample budget template to guide you through the process.

    Siding installation costs vary significantly depending on several key factors. The type of siding chosen, the size of the house, the complexity of the project (including necessary repairs), and regional labor costs all play a crucial role in determining the final price. Accurate cost estimation requires a detailed assessment by a qualified contractor who can consider your specific needs and circumstances.

    Typical Costs Associated with Siding Installation

    While precise figures depend on the factors mentioned above, a general understanding of cost ranges is helpful. The cost of materials typically ranges from $2 to $15 per square foot, depending on the siding material (vinyl, fiber cement, wood, etc.). Labor costs can add another $3 to $10 per square foot, varying based on project complexity and location. Additional costs may include permits, demolition of existing siding, and repairs to underlying sheathing or structure. For a 1500 square foot house, this could translate to a total cost ranging from $7,500 to $37,500 (and potentially higher depending on complexities). This is a broad range, and it’s crucial to obtain multiple detailed quotes from reputable contractors.

    Factors Influencing Overall Project Cost

    Several factors significantly influence the final cost of your siding renovation project. Understanding these factors allows for more accurate budgeting and realistic expectations.

    • Siding Material: Vinyl siding is generally the most affordable option, while fiber cement and wood siding are more expensive due to their durability and aesthetic appeal. Metal siding presents another option with a higher initial cost but often a longer lifespan.
    • House Size and Complexity: Larger houses and those with complex architectural features (such as many dormers or intricate trim) will require more materials and labor, increasing the overall cost.
    • Existing Siding Condition: If the existing siding requires significant repairs or removal before new siding can be installed, this will add to the project’s expense. Rotten wood or damaged sheathing must be addressed before new siding is installed.
    • Labor Costs: Regional variations in labor rates and the contractor’s experience level directly impact the cost of labor. Highly experienced and reputable contractors may charge more than less experienced ones.
    • Permits and Inspections: Necessary permits and inspections add to the overall project cost. These costs vary by location and the specifics of the project.
    • Additional Services: Any additional services, such as window and door trim replacement, insulation upgrades, or repairs to underlying structures, will increase the total project cost.

    Sample Budget Template

    A well-structured budget is essential for managing expenses effectively. The following template provides a framework for planning your siding renovation project.

    Expense Category Estimated Cost Actual Cost
    Materials (Siding, Trim, Fasteners)
    Labor (Installation, Removal of Old Siding)
    Permits and Inspections
    Underlayment/Sheathing Repairs
    Waste Removal
    Contingency (Unexpected Expenses) (10-15% of total estimated cost)
    Total Estimated Cost

    Remember to obtain multiple detailed quotes from reputable contractors before finalizing your budget. The contingency fund is crucial to accommodate unforeseen issues that may arise during the project.

    Communication and Project Management

    Effective communication and meticulous project management are cornerstones of a successful home renovation, particularly when dealing with exterior siding. A seamless process relies heavily on the consistent exchange of information and the proactive organization of tasks by the contractor. Open communication fosters trust and minimizes misunderstandings, leading to a more positive experience for the homeowner.

    Project management encompasses all aspects of planning, execution, and monitoring of the renovation. Reputable contractors employ strategies that ensure the project stays on schedule and within budget, while maintaining high standards of workmanship. This includes detailed planning, regular progress updates, and proactive problem-solving.

    Effective Communication Strategies

    Clear and consistent communication is paramount. This involves establishing a primary point of contact, scheduling regular meetings or calls, and utilizing various communication methods (e.g., email, text, project management software) to suit the homeowner’s preferences. Providing regular updates on project progress, including potential delays or challenges, prevents surprises and keeps the homeowner informed. Furthermore, contractors should actively solicit feedback from the homeowner and address concerns promptly. For example, a daily log of work completed, along with photographs, can provide transparency and build confidence. Another example is a dedicated online portal where the homeowner can access project documents, schedules, and communication history.

    Project Management Techniques

    Reputable contractors utilize various project management techniques to ensure efficiency and quality. These include creating a detailed project timeline with milestones, assigning specific tasks to team members, and utilizing checklists to track progress. Regular site visits are crucial for monitoring progress, addressing unforeseen issues, and maintaining quality control. Proactive risk management is also essential; identifying potential problems (e.g., material delays, weather disruptions) and developing contingency plans minimizes disruptions. For instance, a well-defined schedule might include buffer days to account for unexpected delays. A Gantt chart visually displays the project timeline, tasks, and dependencies, offering a clear overview for both the contractor and homeowner.

    Addressing Potential Challenges

    Effective communication helps mitigate potential conflicts. Should unexpected issues arise (e.g., discovering rotted wood requiring additional repairs), the contractor should promptly inform the homeowner, explain the implications, and propose solutions. Openly discussing cost adjustments and timeline revisions ensures transparency and prevents misunderstandings. For example, a change order detailing the necessary modifications, their cost, and the revised timeline, ensures clarity and agreement. A proactive approach to problem-solving, combined with clear communication, helps maintain a positive working relationship and minimizes stress for both parties.

    Siding Material Selection and Considerations

    Choosing the right siding material is a crucial decision in any home renovation project, significantly impacting your home’s aesthetics, durability, and long-term maintenance needs. The selection process should consider factors such as budget, climate, personal style, and the overall architectural design of your home. This section details the characteristics of common siding materials to help you make an informed choice.

    Vinyl Siding

    Vinyl siding is a popular choice due to its affordability and low maintenance. It’s available in a wide range of colors and styles, mimicking the look of wood or other materials. However, vinyl can be susceptible to damage from severe weather, especially in areas with extreme temperature fluctuations. Its lifespan is typically 20-30 years, depending on quality and installation. The surface is smooth and relatively uniform in texture. Imagine a clean, slightly glossy finish, available in a spectrum of colors from classic white to vibrant blues and greens. The texture is generally smooth, though some manufacturers offer textured options to mimic wood grain.

    Wood Siding

    Wood siding offers a classic, natural aesthetic that many homeowners find appealing. It’s durable and can last for decades with proper maintenance, including regular painting or staining. However, wood siding requires more upkeep than vinyl, and it’s susceptible to rot, insect infestation, and moisture damage. The initial cost is generally higher than vinyl. Consider the rich, varied texture of natural wood – the subtle knots, the grain patterns, the slight imperfections that add character. The visual appeal can range from the rustic charm of rough-sawn cedar to the sleek elegance of smooth, painted redwood. The color palette is limited only by the stain or paint applied.

    Fiber Cement Siding

    Fiber cement siding combines the durability of cement with the workability of wood. It is highly resistant to fire, rot, insects, and extreme weather conditions, making it a long-lasting and low-maintenance option. While more expensive than vinyl, its longevity and resilience often justify the higher upfront cost. Its lifespan can exceed 50 years. The texture can vary greatly, mimicking wood grain, stucco, or even brick. Imagine a siding that appears solid and substantial, offering a refined, almost stone-like appearance. The texture can range from a smooth, painted finish to a deeply embossed wood-grain pattern, providing a sense of depth and realism.

    Metal Siding

    Metal siding, typically made of aluminum or steel, is exceptionally durable and resistant to damage from fire, insects, and extreme weather. It’s also low-maintenance and requires minimal upkeep. However, it can be more expensive than vinyl or wood and may dent or scratch more easily. Metal siding often features a smooth, consistent finish with a slightly reflective quality. Imagine a clean, modern look, available in a variety of colors and finishes. The texture is typically smooth, although some options may have a slightly textured, slightly matte finish.

    Post-Installation Inspection and Maintenance

    A thorough post-installation inspection is crucial to ensure the siding installation meets the agreed-upon standards and to identify any potential issues early on. This step protects your investment and guarantees the longevity of your new siding. A comprehensive inspection allows for prompt rectification of any defects, preventing more extensive and costly repairs later.

    Proper maintenance is equally vital for preserving the beauty and durability of your siding. Regular cleaning and prompt attention to minor issues will significantly extend the lifespan of your investment and maintain its aesthetic appeal. Neglecting maintenance can lead to premature deterioration and costly repairs.

    Post-Installation Inspection Checklist

    A detailed inspection should cover several key areas to ensure the quality of the work. This checklist provides a comprehensive guide for homeowners to follow.

    • Overall Appearance: Check for straight lines, consistent spacing between panels, and proper alignment with other home features (windows, doors, trim).
    • Flashing and Caulking: Examine all flashing around windows, doors, and other penetrations to ensure proper installation and sealing to prevent water damage.
    • Panel Alignment and Securing: Verify that all siding panels are securely fastened and properly aligned, with no gaps or loose pieces. Inspect for any signs of damage to the panels themselves.
    • Trim and Accessories: Ensure that all trim pieces, such as corner boards and J-channels, are correctly installed and properly sealed.
    • Water Management: Verify that gutters and downspouts are properly functioning to direct water away from the house and prevent water accumulation near the foundation.
    • Damage Assessment: Look for any dents, scratches, or other damage to the siding that may have occurred during installation. Note the location and severity of any damage found.

    Siding Maintenance Tips

    Following these maintenance tips will help prolong the life and beauty of your new siding.

    • Regular Cleaning: Clean your siding at least once or twice a year, using a soft brush, mild detergent, and water. Avoid high-pressure washers, which can damage the siding.
    • Prompt Repair of Damage: Address any minor damage, such as cracks or loose panels, immediately to prevent further deterioration. Small repairs are much less expensive than large-scale replacements.
    • Seasonal Inspections: Perform thorough inspections twice a year, in spring and fall, to check for any signs of damage or deterioration. This proactive approach can prevent costly repairs down the line.
    • Gutter and Downspout Maintenance: Regularly clean gutters and downspouts to ensure proper water drainage away from the foundation and siding. Clogged gutters can lead to water damage and premature siding deterioration.
    • Tree and Shrub Trimming: Keep trees and shrubs trimmed away from the siding to prevent damage from branches rubbing against the surface. This is especially important for vinyl siding, which can be easily scratched.

    End of Discussion

    Ultimately, selecting a top-rated siding contractor for your high-quality home renovation hinges on meticulous research and careful evaluation. By following the steps outlined in this guide—from verifying credentials and reviewing testimonials to understanding warranties and managing project costs—you can confidently choose a team that will deliver exceptional results. Remember, investing in a reputable contractor is an investment in the long-term value and beauty of your home. A well-executed siding project not only enhances your property’s curb appeal but also provides significant protection against weather damage, contributing to increased energy efficiency and overall home value.

  • Factors That Affect Fiber Cement Siding Installation Costs

    Factors That Affect Fiber Cement Siding Installation Costs

    Factors That Affect Fiber Cement Siding Installation Costs are multifaceted, influencing the final price tag significantly. Understanding these factors empowers homeowners to make informed decisions and budget effectively for their exterior renovation projects. From material selection and labor considerations to site-specific challenges and hidden expenses, a comprehensive understanding is crucial for a successful and financially sound outcome. This exploration will delve into each key aspect, providing clarity and guidance throughout the process.

    The cost of fiber cement siding installation is not a simple equation. It’s a dynamic interplay of various elements, ranging from the inherent cost of the materials themselves—influenced by brand, thickness, and finish—to the complexities of the installation process, which can be affected by the home’s design, site conditions, and even local regulations. We will examine these elements in detail, offering insights into how each contributes to the overall project expense and providing practical strategies for managing costs.

    Material Costs

    Fiber cement siding offers a durable and attractive exterior cladding option, but the cost can vary significantly depending on several factors. Understanding these cost drivers is crucial for accurate budgeting and informed decision-making during a home renovation or new construction project. This section will detail the key components contributing to the overall material expense.

    Fiber Cement Siding Material Pricing

    The price of fiber cement siding is influenced by brand reputation, product thickness, and surface texture. Thicker siding generally offers superior durability and weather resistance, justifying a higher price. Similarly, intricate textures, such as those mimicking natural wood grain, often command a premium compared to simpler, smooth finishes. The following table provides a comparative price range per square foot for three prominent brands, acknowledging that prices can fluctuate based on location and supplier. These figures represent average costs and may not reflect all available options or current market conditions.

    Brand Thickness (in) Texture Price per sq ft ($)
    Brand A (Example) 5/16 Smooth 2.50 – 3.50
    Brand A (Example) 1/2 Wood Grain 3.00 – 4.00
    Brand B (Example) 5/16 Smooth 2.25 – 3.25
    Brand B (Example) 1/2 Stucco 3.50 – 4.50
    Brand C (Example) 5/16 Wood Grain 2.75 – 3.75
    Brand C (Example) 1/2 Smooth 3.25 – 4.25

    Impact of Material Sourcing and Transportation

    The origin of the fiber cement siding and the distance it needs to travel to reach the installation site significantly impact the final cost. Sourcing materials locally often reduces transportation expenses, potentially leading to lower overall material costs. Conversely, importing siding from distant manufacturers can add substantially to the price due to increased freight charges and handling fees. For instance, a project utilizing siding manufactured overseas might see a 10-20% increase in material costs compared to a project using domestically sourced materials, depending on the distance and shipping method. This is especially relevant for larger projects requiring significant quantities of siding.

    Fiber Cement Siding Finish Price Variations

    Different surface finishes influence the price of fiber cement siding. Simpler finishes, such as smooth surfaces, generally cost less than more complex textures that mimic natural materials like wood grain or stucco. The manufacturing process for textured finishes often requires additional steps and specialized tooling, resulting in higher production costs that are passed on to the consumer.

    Finish Type Price per sq ft ($) (Relative Comparison)
    Smooth Lowest
    Wood Grain Medium
    Stucco Medium to High

    Labor Costs

    Labor costs represent a significant portion of the overall expense in fiber cement siding installation. Understanding the factors that influence these costs is crucial for accurate budgeting and project planning. This section details the various labor tasks involved and the elements that determine the final labor price.

    The labor involved in fiber cement siding installation encompasses a wide range of tasks, from initial site preparation to final cleanup. Efficient and skilled labor directly impacts the quality, durability, and overall cost-effectiveness of the project.

    Labor Tasks Involved in Fiber Cement Siding Installation

    A comprehensive breakdown of the labor tasks includes preparation, installation, and post-installation cleanup. Each stage requires specific skills and expertise, contributing to the overall labor cost.

    • Preparation: This involves measuring and marking the area, removing existing siding (if necessary), inspecting the underlying structure for damage, and preparing the surface for installation (e.g., sheathing, flashing, and house wrap installation or repair).
    • Installation: This is the core of the project and includes cutting and fitting the fiber cement panels, installing trim and accessories (e.g., corner boards, J-channels, and window/door trim), and fastening the siding securely to the structure. This step requires precision and attention to detail to ensure a weather-tight and aesthetically pleasing finish.
    • Cleanup: This involves removing debris and waste materials, cleaning the work area, and ensuring the site is left in a safe and presentable condition. Proper cleanup is essential for both safety and client satisfaction.

    Factors Influencing Labor Rates

    Several factors significantly impact the hourly or daily labor rates charged by contractors. These factors should be considered when planning your project budget.

    • Geographic Location: Labor costs vary considerably depending on the region. Areas with a higher cost of living typically have higher labor rates. For example, a contractor in a major metropolitan area like New York City will likely charge more than one in a smaller town in rural Nebraska.
    • Contractor Experience and Skill: Experienced and highly skilled contractors often command higher rates due to their expertise and efficiency. A seasoned professional with a proven track record of quality work may charge more than a less experienced installer. This difference often reflects in the overall quality and longevity of the installation.
    • Project Complexity: Complex projects involving intricate designs, difficult-to-access areas, or extensive repairs will typically involve higher labor costs. For instance, a project requiring extensive custom cutting and fitting of panels around complex architectural features will cost more than a straightforward installation on a simple rectangular house.

    Labor Cost Comparison: Installation Methods

    The method of installation (horizontal versus vertical siding) can also influence labor costs. While the difference may not be dramatic, certain aspects can impact the overall time and skill required.

    Generally, the difference in labor cost between horizontal and vertical installation is relatively small. However, vertical installation might slightly increase labor costs if it involves more complex cutting and fitting around windows and doors, or if specialized scaffolding is required for higher areas.

    Preparation and Site Conditions

    Proper site preparation significantly impacts the overall cost of fiber cement siding installation. Overlooking these preliminary steps can lead to unforeseen expenses and delays, ultimately increasing the final project cost. Factors such as existing siding removal, sheathing repair, and ensuring adequate drainage all contribute to the pre-installation budget.

    Site preparation costs are highly variable and depend on the specific conditions of each project. These costs are often overlooked in initial budgeting, leading to cost overruns. Careful assessment and planning during the initial phases of the project are crucial to avoid these issues.

    Existing Siding Removal and Sheathing Repair

    Removing existing siding, particularly if it’s damaged or difficult to remove, adds considerable time and labor to the project. For instance, removing asbestos siding requires specialized handling and disposal, significantly increasing costs. Similarly, repairing underlying sheathing, which may involve replacing rotted or damaged sections, adds to both material and labor expenses. The extent of the repair work directly correlates with the overall cost. A house with extensive water damage behind the old siding could require a complete replacement of the sheathing, resulting in substantially higher costs than a house with minimal damage. The cost of replacing a section of sheathing, for example, can range from $50 to $200 depending on the size and the material used.

    Impact of Complex House Structures

    The complexity of a house’s structure directly affects installation time and, consequently, labor costs. Features such as dormers, multiple angles, and intricate detailing require more precise cutting and fitting of the fiber cement siding, increasing labor hours and potentially material waste. For example, installing siding on a house with numerous dormers might take 20% longer than a similar-sized house with a simpler design, leading to a corresponding increase in labor costs. The increased complexity also necessitates more skilled labor, potentially commanding higher hourly rates.

    Difficult Site Access

    Difficult site access, such as steep slopes, narrow driveways, or limited space for staging materials, significantly impacts both labor and material costs. These conditions can slow down the installation process, increasing labor hours. Furthermore, transporting materials to the worksite might require specialized equipment, adding to the overall expenses. For example, using a crane to lift materials to a high-altitude house with difficult access can easily add several hundred dollars to the overall project cost. Similarly, if the site has limited space, materials might need to be transported in smaller batches, increasing the number of trips and labor costs associated with material handling.

    Permits and Inspections

    Obtaining the necessary permits and passing inspections are crucial steps in any fiber cement siding installation project. These processes, while sometimes perceived as bureaucratic hurdles, directly impact the overall cost and timeline of the project. Failure to secure proper permits can lead to significant fines and even force project shutdowns, resulting in substantial cost overruns.

    Permitting and inspection costs vary significantly depending on location, project scope, and the specific requirements of local authorities. These costs aren’t just about the fees themselves; they also encompass the time and effort spent navigating the permitting process, potentially involving multiple applications, revisions, and follow-up communications.

    Permitting Fees and Regional Variations

    Permit fees for construction projects, including fiber cement siding installation, are determined at the local level. These fees are often calculated based on the project’s square footage, the type of work being performed, and the complexity of the project. For example, a small residential project in a rural area might incur permit fees ranging from $100 to $500, while a larger commercial project in a densely populated urban area could cost several thousand dollars. In some jurisdictions, additional fees may apply for inspections or plan reviews. For instance, the city of Austin, Texas, might charge a different fee than a county in rural Iowa. Specific fee schedules are available on the websites of local building departments or county offices.

    Cost Increases Due to Delays and Revisions

    Delays in obtaining permits, often due to incomplete applications or backlogs at the permitting office, can significantly increase project costs. Each day of delay can translate into additional labor costs, equipment rental fees, and potential project financing charges. Furthermore, if the initial permit application is rejected due to discrepancies or missing information, the process of revision and resubmission adds further delays and expense. For example, a two-week delay in a project costing $10,000 per week could easily add $20,000 to the total cost. Revisions to plans, necessitated by permit requirements, can also add to the architect’s or designer’s fees and potentially require additional material purchases.

    Typical Permits Required for Fiber Cement Siding Installation

    The specific permits required vary depending on location and project specifics, but the following table outlines commonly needed permits:

    Permit Type Description Typical Cost Range
    Building Permit Authorizes the construction or alteration of a structure. $100 – $5,000+
    Demolition Permit (if applicable) Required if existing siding is being removed. $50 – $200+
    Electrical Permit (if applicable) Needed if electrical work is involved (e.g., new outlets). $50 – $200+
    Plumbing Permit (if applicable) Required if plumbing work is involved (e.g., relocating water lines). $50 – $200+
    Inspection Fees Fees for various inspections throughout the project (e.g., framing, electrical, final). Varies greatly depending on the number and type of inspections

    Additional Materials and Accessories

    Beyond the fiber cement siding itself, several additional materials and accessories are crucial for a successful and aesthetically pleasing installation. These items, while seemingly minor, significantly impact both the final appearance and the overall cost of the project. Careful consideration of these supplementary materials is essential for accurate budgeting and planning.

    The cost of these additional materials can vary considerably depending on factors such as material quality, brand reputation, and regional pricing. Higher-end options often boast improved durability, weather resistance, and aesthetic appeal, justifying their higher price tag. Conversely, choosing more budget-friendly alternatives can lead to cost savings, but may compromise longevity or visual impact.

    Types of Trim and Accessories

    A wide range of trim and accessories are available to complement fiber cement siding, enhancing its visual appeal and providing necessary functionality. These include corner pieces, J-channels, starter strips, flashing, and various types of trim boards designed to finish edges and create a professional look. The selection process should consider both the architectural style of the home and the desired level of detail.

    Cost Variations in Trim and Accessories

    Different materials and manufacturers offer varying price points for trim and accessories. For instance, aluminum trim is generally less expensive than matching fiber cement trim, but may not offer the same durability or aesthetic consistency. Similarly, pre-finished trim can be more costly than unfinished trim that requires on-site painting, but it saves labor and potentially improves the overall finish. Choosing higher-quality materials often results in a longer lifespan and less maintenance over time, potentially offsetting the initial higher cost.

    Cost of Common Accessories

    The following table provides estimated costs for common fiber cement siding accessories. Note that these prices are approximate and can fluctuate based on location, supplier, and quantity purchased. It is always advisable to obtain quotes from multiple suppliers for the most accurate pricing.

    Accessory Estimated Cost per Linear Foot (USD)
    Corner Pieces $2.00 – $5.00
    J-Channels $1.50 – $4.00
    Starter Strips $1.00 – $3.00
    Flashing (various types) $2.00 – $8.00
    Trim Boards (various profiles) $3.00 – $10.00+

    Waste Removal and Disposal

    Proper waste removal and disposal significantly impact the overall cost of fiber cement siding installation. Failing to account for these expenses can lead to unexpected budget overruns. The costs involved depend on several factors, including the amount of waste generated, the type of waste, local regulations, and the chosen disposal method.

    Waste disposal regulations and landfill fees vary considerably by location. Understanding these local requirements is crucial for accurate cost estimation. For instance, the disposal of asbestos-containing materials, if present in old siding, requires specialized handling and significantly increases disposal costs. Similarly, the volume of waste directly correlates with disposal expenses; a larger project with more old siding and construction debris will naturally generate higher removal and disposal costs.

    Costs Associated with Waste Removal and Disposal

    The cost of removing and disposing of old siding and construction debris is a composite of several factors. Labor costs for loading and transporting the waste are a primary component. These costs are influenced by the accessibility of the disposal site, the distance to the site, and the amount of time required for loading and unloading. Dumping fees at the landfill are another major expense, varying widely based on the type of waste, volume, and local regulations. For example, disposal fees for construction debris are often higher than for regular household waste. Finally, the rental or purchase of appropriate containers (e.g., dumpsters) for waste collection adds to the overall cost. A large-scale project might require multiple dumpster rentals over the course of the project, increasing the expense. Smaller projects may only need a single dumpster for a shorter period.

    Impact of Waste Disposal Regulations and Landfill Fees

    Local regulations significantly influence waste disposal costs. Some regions have stricter regulations regarding the disposal of certain materials, such as treated lumber or hazardous waste, leading to increased costs for specialized handling and disposal. Landfill fees also vary significantly across regions and even between different landfills within the same region. Some municipalities may offer discounted rates for certain types of waste or for residents, while others may charge premium rates to offset environmental costs. For instance, a region with stringent environmental regulations and a focus on recycling might have higher landfill fees to encourage waste reduction and recycling initiatives. Conversely, a region with less stringent regulations may have lower fees, but this could come at the cost of environmental sustainability.

    Comparison of Waste Removal Methods

    Different waste removal methods exist, each with its own cost implications. Hiring a junk removal service offers convenience but typically comes at a higher cost compared to renting a dumpster and handling the disposal independently. Junk removal services handle all aspects of waste removal, from loading and transportation to disposal, offering a streamlined solution. Renting a dumpster, on the other hand, requires more hands-on involvement but can be more cost-effective for larger projects with substantial waste generation. The choice between these methods depends on the project’s size, budget, and the homeowner’s willingness to participate in the waste removal process. A homeowner might also consider recycling options to reduce the volume of waste sent to landfills, potentially lowering overall disposal costs. For example, certain types of siding might be recyclable, reducing landfill fees and contributing to environmental sustainability.

    Contractor Overhead and Profit Margin

    Understanding the contractor’s overhead and profit margin is crucial for accurately budgeting your fiber cement siding installation. These costs, often overlooked, significantly impact the final price you pay. Failing to account for them can lead to unexpected expenses and project delays.

    Contractor overhead and profit are essential components of the overall project cost, representing the business expenses and desired earnings of the contractor. These factors, while not directly related to materials or labor on the job site, are nonetheless critical in determining the total project cost. A clear understanding of these components allows for more accurate budgeting and informed decision-making during the project planning phase.

    Contractor Overhead Costs

    Contractor overhead encompasses all business expenses incurred outside of direct labor and materials. These costs are necessary for the contractor to operate and maintain their business, ensuring they can provide services and complete projects successfully. Accurate estimation of these costs is essential for a contractor to price projects competitively while ensuring profitability.

    • Insurance: Contractors carry various insurance policies, including general liability, workers’ compensation, and potentially commercial auto insurance. These premiums can be substantial, especially for larger companies or those operating in high-risk environments. For example, a small contracting business might pay several thousand dollars annually for liability insurance alone.
    • Equipment: Investing in and maintaining equipment like ladders, scaffolding, power tools, and vehicles is a significant expense. Costs include initial purchase price, repairs, maintenance, fuel, and storage. A contractor specializing in siding might need to invest in specialized tools, adding to their overall equipment expenses.
    • Transportation: Fuel costs, vehicle maintenance, and travel time to and from job sites contribute to transportation expenses. These costs can be significant, particularly for contractors working on multiple projects spread across a wide geographical area. For instance, a contractor traveling between multiple suburban sites daily will accumulate substantial fuel and vehicle wear-and-tear costs.
    • Office and Administrative Expenses: This includes rent or mortgage payments for office space, utilities, phone lines, computer equipment, software, and administrative staff salaries. Even smaller contractors often incur these costs, even if working from home, through the use of internet services and software subscriptions.

    Contractor Profit Margin

    The profit margin represents the percentage of profit a contractor aims to earn on a project. This margin compensates for the risks involved, the overhead costs, and the contractor’s expertise and time investment. A typical profit margin for construction projects, including siding installation, ranges from 10% to 20%, although it can vary based on several factors, including project size, complexity, and competition. A larger, more complex project might command a slightly higher profit margin to offset the increased risk and management overhead.

    Contractor Pricing Structures

    Contractors typically use one of two main pricing structures: hourly rates or fixed prices.

    • Hourly Rate: This method charges a set hourly rate for labor, with material costs added separately. It provides transparency but can be less predictable in terms of total cost for the client, especially for larger or more complex projects where the total labor hours are difficult to estimate precisely. This structure offers less risk for the contractor if unforeseen complications arise.
    • Fixed Price (Lump Sum): This method provides a single, upfront price covering both labor and materials. It offers predictability for the client but requires the contractor to accurately estimate the project’s scope and potential challenges. This structure places more risk on the contractor as any unforeseen issues could reduce their profit margin or even lead to a loss.

    Project Size and Complexity

    The overall size and complexity of a fiber cement siding installation project significantly influence the final cost. Larger houses naturally require more materials and labor, leading to higher expenses. Intricate architectural designs further add to the cost, demanding specialized skills and potentially more time-consuming installation processes.

    The square footage of the house’s exterior is the most direct determinant of material costs. More square footage translates directly to a greater need for fiber cement panels, fasteners, and other related materials. For example, a 3,000 square foot house will inherently require significantly more siding than a 1,500 square foot house, leading to a proportional increase in material expenses. This increase is not always linear, however, as bulk purchasing can sometimes offer slight discounts.

    Intricate Design Elements and Their Impact on Costs

    Intricate design elements, such as numerous windows, dormers, complex trim details (e.g., intricate molding, multiple layers of trim), and varied siding profiles, substantially increase both labor and material costs. These features require more precise cutting, fitting, and installation, demanding additional time and expertise from the installation crew. The need for custom-cut pieces and specialized tools further adds to the overall expenses. For instance, a house with numerous bay windows and extensive decorative trim will necessitate more meticulous work and specialized labor, resulting in a higher labor cost compared to a house with a simpler, more uniform exterior. Similarly, the increased material usage for intricate trim details directly increases material costs.

    Project Size and Timeline

    Project size directly impacts the overall timeline and increases the potential for cost overruns. Larger projects inherently take longer to complete, potentially extending beyond initial estimates and increasing labor costs due to extended project duration. Unexpected issues, such as unforeseen damage to underlying sheathing or complex structural details, can further prolong the project, adding to the final cost. For example, a large, multi-story house with intricate detailing might take several weeks longer to complete than a smaller, simpler home, leading to increased labor costs and potentially impacting other project-related expenses. A larger project also presents a greater risk of material shortages or delivery delays, which can disrupt the timeline and lead to additional costs. Thorough planning and realistic scheduling are crucial to mitigate these risks in larger projects.

    Hidden Costs

    Fiber cement siding installation, while seemingly straightforward, can harbor unexpected expenses. These hidden costs, often overlooked during initial budgeting, can significantly impact the final project cost. Understanding these potential expenses is crucial for responsible financial planning and avoiding project delays or cost overruns.

    Unforeseen circumstances during fiber cement siding installation can lead to substantial additional expenses. These unexpected costs stem from various sources, ranging from discovering underlying structural problems to accidental damage of materials during the installation process. A comprehensive approach to budgeting necessitates incorporating a contingency plan to mitigate the financial impact of these unforeseen events. Failing to account for these possibilities can lead to project delays, compromised quality, and significant financial strain.

    Unforeseen Structural Issues

    Discovering underlying structural problems, such as rotted wood, damaged sheathing, or inadequate framing, during the siding installation process is a common source of hidden costs. These issues often require extensive repairs before the new siding can be installed, adding significant time and expense to the project. For example, if extensive rot is discovered behind the existing siding, the cost of replacing damaged framing members, sheathing, and potentially even insulation can easily exceed the original siding budget. This necessitates a thorough pre-installation inspection to minimize the risk of such surprises.

    Material Damage

    Accidental damage to materials during the installation process is another significant contributor to hidden costs. Fiber cement siding, while durable, is susceptible to chipping, cracking, or breaking if handled improperly. Replacing damaged panels can be expensive, particularly if specialized or custom-ordered materials are involved. Similarly, damage to other materials, such as flashing or trim, during the installation can also add to the overall cost. A meticulous approach to handling and installation, coupled with experienced installers, can help minimize the risk of material damage.

    Contingency Budgeting

    Including a contingency budget is crucial for managing the financial risks associated with unforeseen circumstances. This budget should represent a percentage of the overall project cost, typically ranging from 10% to 20%, depending on the project’s complexity and potential risks. This allows for unexpected expenses without jeopardizing the project’s completion. For instance, a $10,000 siding project with a 15% contingency budget would allocate $1,500 to cover potential hidden costs. This proactive approach protects against financial hardship and ensures a smoother project completion.

    Common Hidden Costs and Their Impact

    Hidden Cost Potential Impact on Budget
    Unforeseen structural repairs (rotted wood, damaged sheathing) Can increase costs by 20-50% or more, depending on the extent of the damage.
    Material damage during installation Can add 5-15% to the overall material costs.
    Unexpected delays due to weather or material availability Can lead to increased labor costs and potential penalties for project completion delays.
    Permitting issues or additional inspections Can add several hundred to thousands of dollars depending on the complexity and location.
    Disposal of unexpected hazardous materials Can significantly increase waste removal and disposal costs.

    End of Discussion

    Ultimately, the cost of fiber cement siding installation is a personalized calculation, shaped by a unique combination of factors. While a precise figure is impossible to provide without specific project details, understanding the key influences—material costs, labor rates, site conditions, permits, and potential hidden expenses—allows for a more realistic budget and minimizes the risk of cost overruns. By carefully considering each aspect, homeowners can confidently embark on their exterior renovation project, ensuring both aesthetic appeal and financial prudence.

  • How to Install Vinyl Siding Over Existing Wood Siding

    How to Install Vinyl Siding Over Existing Wood Siding

    How to Install Vinyl Siding Over Existing Wood Siding: Transforming your home’s exterior with vinyl siding offers a blend of aesthetic appeal and lasting protection. This comprehensive guide walks you through each step, from assessing your existing wood siding to completing the final touches. We’ll cover essential preparations, material selection, installation techniques, and troubleshooting common issues, ensuring a successful and visually stunning renovation project.

    This detailed process ensures a professional finish, enhancing your home’s curb appeal while providing long-term protection against the elements. We’ll explore various siding types, address specific challenges like working around windows and doors, and provide crucial safety advice throughout the process. Whether you’re a seasoned DIY enthusiast or a first-timer, this guide empowers you to confidently undertake this rewarding home improvement project.

    Assessing Existing Wood Siding

    Before installing vinyl siding over existing wood siding, a thorough assessment is crucial to ensure a successful and long-lasting installation. Neglecting this step can lead to future problems, such as moisture damage and premature failure of the vinyl siding. A careful inspection will identify potential issues and allow for necessary repairs before the new siding is applied.

    Inspection for Damage, Rot, and Moisture

    Inspecting the existing wood siding involves a systematic approach to identify any damage, rot, or moisture problems. Begin by visually examining the entire surface of the siding, paying close attention to areas prone to moisture accumulation, such as near the ground, around windows and doors, and in shaded areas. Look for signs of rot, such as discoloration, soft or spongy areas, and crumbling wood. Check for cracks, splits, loose boards, insect infestation (termite damage is particularly concerning), and any other physical damage. Use a screwdriver or similar tool to gently probe suspicious areas to assess the extent of any rot. The presence of moisture can often be detected by a darker discoloration of the wood or a musty odor. A moisture meter can provide a more precise measurement of moisture content in the wood. High moisture levels indicate a need for significant repair or replacement before installing the vinyl siding.

    Identifying Areas Needing Repair

    Once areas of damage, rot, or excessive moisture have been identified, it is important to determine the extent of the necessary repairs. Minor damage, such as small cracks or loose boards, can often be repaired by filling cracks with wood filler, securing loose boards with nails or screws, and applying a waterproof sealant. More extensive damage, such as significant rot or insect infestation, may require replacing entire sections of siding. It’s vital to remove all affected wood to ensure that the repair is complete and prevents further damage. Properly repairing damaged areas ensures a solid base for the new vinyl siding and prevents future problems. For example, a section of siding with extensive termite damage should be entirely removed and replaced with new, treated lumber before proceeding.

    Determining Structural Soundness

    The existing wood siding must provide adequate support for the new vinyl siding. A structurally unsound wall could lead to the vinyl siding failing or becoming damaged. Assess the condition of the sheathing beneath the wood siding. If the sheathing is damaged or deteriorated, it must be repaired or replaced before installing the vinyl siding. Look for signs of sagging, buckling, or water damage to the sheathing. Check the structural integrity of the wall framing. If there are any signs of significant structural damage, consult a structural engineer to determine the necessary repairs before proceeding with the vinyl siding installation. For instance, significant warping of the underlying sheathing may necessitate replacement before installation, ensuring a flat surface for proper vinyl siding adherence.

    Preparing the Surface

    Proper surface preparation is crucial for a successful vinyl siding installation over existing wood siding. A well-prepared surface ensures proper adhesion, preventing future problems like buckling, warping, or detachment of the new siding. This process involves removing damaged or loose wood siding, thoroughly cleaning the remaining surface, and applying appropriate primers and sealants to create a stable and receptive base for the vinyl siding.

    Removing Loose or Damaged Wood Siding

    Removing loose or damaged wood siding is the first step in preparing the surface. This ensures a smooth, even surface for the new vinyl siding and prevents irregularities from showing through. Carefully inspect the existing wood siding, identifying any loose boards, rotting sections, or areas showing significant damage.

    1. Begin by using a pry bar to carefully remove loose or damaged siding boards. Work from the bottom up, starting with the lowest row of siding. Insert the pry bar gently between the siding and the underlying structure, avoiding damage to the remaining siding or house framing.
    2. For stubborn boards, consider using a hammer and nail puller to remove any remaining nails. Be cautious to avoid damaging the underlying sheathing.
    3. Once a section of siding is removed, inspect the underlying sheathing for any damage. Replace or repair any damaged sheathing before proceeding. This step is crucial to ensuring a solid base for the new vinyl siding.
    4. Dispose of the removed siding and debris properly, following local regulations for waste disposal.

    Cleaning and Preparing the Surface

    After removing loose or damaged siding, thoroughly clean the remaining surface. A clean surface ensures optimal adhesion of the primer and sealant, which are essential for a long-lasting installation.

    1. Use a stiff-bristled brush or pressure washer to remove dirt, debris, cobwebs, and any loose paint or wood particles from the existing siding. If using a pressure washer, maintain a safe distance to avoid damaging the underlying sheathing or causing water damage.
    2. Allow the surface to completely dry before proceeding. This is crucial for proper adhesion of the primer and sealant. Moisture can hinder the bonding process, leading to potential problems down the line.
    3. Inspect the surface for any remaining loose or damaged areas. Address any remaining issues before moving on to the next step. This will ensure a consistent and reliable base for the vinyl siding.

    Applying Primers and Sealants

    Applying appropriate primers and sealants is vital for creating a stable and receptive surface for the vinyl siding. Primers improve adhesion and sealants prevent moisture from penetrating the wood, protecting it from rot and decay. The specific type of primer and sealant will depend on the condition of the existing wood siding and the climate.

    1. Apply a high-quality wood primer designed for exterior use. This will create a uniform surface for the vinyl siding to adhere to, improving the overall bond and longevity of the installation. Follow the manufacturer’s instructions for application.
    2. After the primer has dried completely, apply a weatherproof sealant to all seams and joints in the existing wood siding. This prevents moisture intrusion, protecting the underlying structure and ensuring a longer lifespan for the vinyl siding installation. Again, carefully follow the manufacturer’s instructions for application and drying time.
    3. Allow the primer and sealant to dry completely before installing the vinyl siding. This will ensure proper adhesion and prevent problems such as bubbling or peeling of the new siding.

    Choosing the Right Vinyl Siding

    Selecting the appropriate vinyl siding is crucial for a successful and long-lasting installation. The choice involves considering several factors beyond simply aesthetics, ensuring both a visually appealing and structurally sound exterior. Proper selection will contribute significantly to the overall longevity and value of your home improvement project.

    Vinyl Siding Profiles

    Different vinyl siding profiles offer varied appearances and functionalities. Understanding these differences helps in choosing the best option for your home’s architectural style and personal preference. Common profiles include clapboard (the most traditional style, mimicking traditional wooden clapboards), Dutch lap (featuring a wider, more pronounced overlap), shingle (designed to resemble individual wood shingles), and vertical siding (a modern alternative offering a clean, contemporary look). Clapboard siding is a versatile choice suitable for most homes, offering a classic and timeless appeal. Dutch lap siding provides a more substantial and textured appearance, ideal for homes seeking a bolder aesthetic. Shingle siding, with its layered look, is often used to create a rustic or cottage-style feel. Vertical siding provides a sleek, modern look that complements contemporary architectural styles. The choice depends largely on personal preference and the overall architectural style of the house.

    Color and Finish Selection

    The color and finish of your vinyl siding significantly impact the curb appeal of your home. Consider the existing architectural style, landscaping, and surrounding neighborhood when making your selection. Lighter colors generally reflect more sunlight, potentially reducing cooling costs, while darker colors can absorb more heat. A variety of finishes are available, including smooth, textured, and wood-grain finishes. A smooth finish provides a clean and modern look, while textured finishes offer a more traditional appearance. Wood-grain finishes mimic the look of natural wood, offering a classic and rustic feel. It’s advisable to obtain samples and view them in different lighting conditions before making a final decision to ensure the chosen color complements your home and personal taste. Consider the long-term impact of the color choice on the overall aesthetic appeal and resale value of your property.

    Building Codes and Local Regulations

    Compliance with building codes and local regulations is paramount throughout the entire siding installation process. These regulations often specify requirements regarding the type of siding allowed, its installation methods, and fire safety standards. Before purchasing any siding, it is essential to check with your local building department to obtain the necessary permits and understand any specific regulations that apply to your project. Failure to comply with these regulations could result in delays, fines, or even the need to remove and reinstall the siding. Understanding and adhering to these regulations ensures a safe and legally compliant installation. Contacting your local building authority provides a crucial first step towards a successful and compliant siding project.

    Installing the Starting Strip and J-Channel

    Installing the starting strip and J-channel are crucial first steps in vinyl siding installation, ensuring a straight, level, and professional-looking finish. These components provide a solid foundation for the rest of the siding and create clean transitions around windows and doors. Proper installation requires attention to detail and the use of appropriate tools.

    The starting strip, typically a thin piece of vinyl, forms the base for the first row of siding. It’s installed along the bottom edge of the wall, creating a level line to which subsequent siding panels will be attached. The J-channel, a J-shaped piece of vinyl, is used to neatly finish the edges of siding around windows and doors, allowing the siding to overlap the trim and providing a weatherproof seal.

    Starting Strip Installation

    Begin by establishing a perfectly level baseline along the entire bottom of the wall where the siding will be installed. Use a level and chalk line to mark this line. This is essential for preventing the appearance of a sloping or uneven installation. The starting strip is then nailed directly to this line, ensuring that the top edge of the strip is flush with the chalk line. Use galvanized siding nails spaced approximately 6 to 8 inches apart. Over-nailing can damage the strip, while under-nailing can lead to instability. It’s important to avoid driving the nails too deeply, as this can cause the vinyl to buckle. The nails should be countersunk just enough to hold the strip securely.

    J-Channel Installation

    J-channel installation around windows and doors requires precise measurement and careful placement. The J-channel should be installed before applying the siding panels to these areas. Begin by measuring the length of the window or door opening. Cut the J-channel to the appropriate length, ensuring a snug fit. The open end of the J-channel should face outward. This allows the siding to slip neatly into the channel and overlap the trim. Use galvanized siding nails to secure the J-channel to the framing, again spacing the nails approximately 6 to 8 inches apart. Ensure the J-channel is plumb and level to create a clean and professional finish. The use of a level is critical in ensuring the correct alignment of the J-channel.

    Ensuring Proper Alignment and Levelness

    Maintaining proper alignment and levelness throughout the installation process is paramount. Using a level to check the starting strip and J-channel is crucial before proceeding to the next steps. Any discrepancies should be corrected immediately. Regularly checking the alignment of the siding panels as they are installed against the starting strip and J-channel will prevent cumulative errors that could lead to significant problems later. For long stretches of wall, it is advisable to use a laser level to ensure a consistently level baseline. This precision will be especially important in areas with slight slopes or uneven terrain.

    Installing Vinyl Siding Panels

    Installing vinyl siding panels is the core of the project, requiring precision and attention to detail to ensure a professional-looking and weather-resistant finish. Proper overlapping and fastening are crucial for preventing water damage and maintaining the structural integrity of the siding. This section will guide you through the process step-by-step.

    Panel Installation Procedure

    Begin by selecting a starting point, typically a corner or a less visible area. Remember to always work from bottom to top, ensuring each panel is properly overlapped and secured. Using the appropriate nails and spacing is essential for preventing damage and ensuring a long-lasting installation.

    1. Snapping the First Panel: Start with a full-length panel, aligning its bottom edge with the installed starting strip or J-channel. Gently snap the panel into place, ensuring a tight fit. The panel should slide easily into the channel.
    2. Fastening the First Panel: Use galvanized siding nails, spacing them according to the manufacturer’s recommendations (see table below). Avoid overdriving nails, as this can damage the panel and compromise its weather resistance. Aim for the nailing slots to prevent cracking.
    3. Installing Subsequent Panels: Overlap each subsequent panel by the recommended amount (typically a few inches, as specified by the manufacturer). Snap the panel into place and fasten it securely using the same nailing technique as the first panel.
    4. Working Around Obstacles: For windows, doors, and other obstacles, carefully measure and cut the panels to fit. Use a sharp utility knife or a siding cutter for clean cuts. Remember to account for expansion and contraction of the vinyl.
    5. Finishing the Installation: Once all panels are installed, inspect the work carefully to ensure all overlaps are correct and all nails are securely fastened. Trim any excess siding as needed.

    Vinyl Siding Nailing Patterns and Spacing

    The following table outlines recommended nailing patterns and spacing for common vinyl siding types. Always refer to your specific siding manufacturer’s instructions for precise details, as these can vary slightly.

    Siding Type Nail Spacing (inches) Nailing Pattern Notes
    Standard Lap Siding 6-8 inches Staggered, near the top of the panel within the nailing slots Avoid nailing near the edges.
    Dutch Lap Siding 6-8 inches Staggered, near the top of the panel within the nailing slots Requires careful alignment of the overlaps.
    Board and Batten Siding 8-12 inches Centered on the vertical boards Spacing may vary depending on board width.
    Shake Siding 6-8 inches Staggered, near the top edge within the nailing slots May require specialized nails.

    Cutting and Fitting Panels Around Corners and Obstacles

    Precise cuts are necessary to achieve a neat and professional finish around corners and obstacles. Measure twice, cut once, to avoid wasting materials and ensure a perfect fit. Always use sharp tools to prevent damaging the siding.

    1. Measuring and Marking: Carefully measure the area requiring a cut, taking into account the overlap needed for proper installation.
    2. Cutting the Panel: Use a sharp utility knife or a specialized siding cutter to make clean, straight cuts. A miter saw can be used for angled cuts around corners.
    3. Fitting the Panel: Carefully position the cut panel into place, ensuring a snug fit against the adjacent panels and any existing trim.
    4. Securing the Panel: Fasten the cut panel using the same nailing technique as with full-length panels. Pay close attention to nailing placement to prevent damage.
    5. Finishing Touches: Inspect the finished corner or obstacle area for any gaps or inconsistencies. Make any necessary adjustments or repairs.

    Working Around Windows and Doors

    Installing vinyl siding around windows and doors requires careful measurement and precise cutting to ensure a watertight and aesthetically pleasing finish. This section details the techniques and considerations for successfully completing this crucial step in your siding project. Proper installation around these openings prevents water intrusion and enhances the overall look of your home’s exterior.

    Successfully installing vinyl siding around windows and doors hinges on accurate measurements and the use of appropriate trim and accessories. The goal is to create a seamless transition between the siding and the window or door frame, maintaining a clean, professional appearance while ensuring a weatherproof seal. This involves using J-channel, window trim, and sometimes, Z-flashing, depending on the specific configuration of your windows and doors.

    Measuring and Cutting Vinyl Siding Panels

    Accurate measurement is paramount when working around openings. Begin by carefully measuring the distance between the window or door frame and the adjacent siding. This measurement will determine the length of the vinyl siding panel needed. Remember to account for the overlap required for proper installation. Use a sharp utility knife or siding shears for clean, precise cuts. Avoid excessive force, which can damage the vinyl. Always measure twice and cut once to minimize waste and ensure a perfect fit. For particularly complex cuts, consider using a template to guide your cutting. For instance, if you are working with a uniquely shaped window, you can create a template from cardboard to accurately transfer the shape to your vinyl siding.

    Using J-Channel and Window Trim

    J-channel is a crucial component for creating a neat and watertight seal around windows and doors. It provides a finished edge and allows for easy installation of the siding panels. The J-channel is installed around the perimeter of the window or door opening, ensuring it’s level and plumb. Once the J-channel is secured, you can then install the vinyl siding panels, fitting them snugly into the channel. Window trim is then used to cover the exposed edges of the J-channel and further enhance the aesthetic appeal. This trim is typically installed over the J-channel and creates a clean transition between the siding and the window frame. The process is similar for doors, although you may need to use additional accessories like corner trim depending on the design of your door frame.

    Creating a Watertight Seal

    A watertight seal is essential to prevent water damage to your home’s interior. To achieve this, ensure that all seams and joints are properly sealed using appropriate sealant. Pay particular attention to the areas where the vinyl siding meets the window or door frame. Apply a high-quality, weather-resistant sealant to these joints to create a continuous barrier against moisture. Ensure that the sealant is compatible with both the vinyl siding and the window/door frame material. Using a caulking gun ensures a consistent and even application. For example, if you’re working with a wooden window frame, you’ll want to choose a sealant specifically designed for wood and vinyl. Regular inspection of these areas after installation and throughout the life of the siding is recommended.

    Finishing Touches

    Adding the finishing touches to your vinyl siding installation is crucial for achieving a professional and long-lasting result. This final stage involves installing soffit and fascia vinyl, adding corner and trim pieces, and meticulously caulking all seams and joints to prevent water damage. Careful attention to detail during this phase will significantly enhance the overall appearance and durability of your new siding.

    Soffit and Fascia Vinyl Installation

    Soffit and fascia vinyl are installed to complete the look and protect the underlying structure. Soffit panels, typically installed horizontally, cover the underside of the eaves, providing ventilation and a clean finish. Fascia boards, installed vertically, cover the ends of the rafters. Both are available in various colors and styles to match your chosen siding. Installation generally involves using a starter strip similar to that used for the main siding, followed by overlapping the panels to ensure a watertight seal. Remember to allow for expansion and contraction by leaving small gaps between the panels and using appropriate fasteners. For instance, using galvanized nails spaced approximately 6-8 inches apart is a common practice, avoiding over-fastening which could lead to warping. Proper alignment and cutting of the panels are key to a neat and seamless appearance.

    Corner and Trim Piece Installation

    Corner and trim pieces provide a finished look and protect vulnerable areas. Corner pieces are designed to neatly cover the outside corners of the house, preventing water penetration. Trim pieces are used around windows, doors, and other architectural features. These pieces are typically installed after the main siding panels are in place, ensuring a smooth transition between the different components. Accurate measurement and precise cutting are essential to achieve a professional finish. For example, using a miter saw for accurate angles will significantly improve the overall aesthetic appeal. Proper alignment is vital to avoid gaps or overlaps. Many manufacturers provide detailed instructions specific to their products, which should be carefully followed.

    Caulking and Sealing

    Caulking and sealing all joints and seams is paramount to prevent water damage. Water intrusion is a major cause of deterioration in any exterior cladding system. All gaps, especially around windows, doors, and corners, should be carefully filled with high-quality exterior-grade caulk. This should be done immediately after installing the siding and trim pieces. Choose a caulk that is flexible and durable to withstand temperature fluctuations and movement. Apply the caulk in a smooth, continuous bead, ensuring complete coverage of all gaps. Excess caulk should be immediately removed to prevent an unsightly finish. For instance, a paintable caulk allows for matching the color to your siding, creating a seamless and professional finish. Regular inspection and maintenance of caulking will ensure the long-term integrity of your vinyl siding.

    Safety Precautions

    Installing vinyl siding, while generally straightforward, involves working at heights and using tools that can pose risks if not handled correctly. Prioritizing safety throughout the project is crucial to prevent injuries and ensure a successful installation. This section details essential safety measures to maintain a safe working environment.

    Proper safety measures significantly reduce the likelihood of accidents. Failing to adhere to these guidelines could result in serious injury or property damage. This section outlines vital safety practices, including the use of appropriate personal protective equipment and the safe handling and disposal of construction materials.

    Potential Hazards and Safety Measures

    Working at heights is an inherent risk in siding installation. Ladders should be used correctly, ensuring they are placed on stable, level ground and extend at least three feet above the roofline. A spotter should be present whenever working on ladders above six feet. Falls are a major concern, so secure footing and proper ladder technique are paramount. Power tools, such as circular saws and nail guns, present cutting and impact hazards. Always use these tools according to manufacturer instructions, ensuring they are properly maintained and in good working order. Eye protection and hearing protection are essential when operating power tools. Sharp objects, such as scrap pieces of siding and exposed nails, pose puncture and laceration risks. Wear work gloves and sturdy footwear to protect hands and feet. Furthermore, be mindful of overhead power lines and maintain a safe distance to prevent electrocution. Always check for underground utilities before digging.

    Personal Protective Equipment (PPE)

    Appropriate PPE is non-negotiable for siding installation. This includes safety glasses or goggles to protect eyes from flying debris, hearing protection (earplugs or muffs) to mitigate noise from power tools, work gloves to protect hands from cuts and abrasions, and sturdy work boots with steel toes to protect feet from falling objects or punctures. A hard hat should be worn when working at heights to protect against head injuries from falling objects. Depending on the specific tasks, additional PPE might be necessary, such as a dust mask to prevent inhalation of harmful particles during sanding or cutting. The use of proper PPE is not merely a suggestion; it’s a critical aspect of responsible and safe work practices.

    Waste Handling and Disposal

    Proper waste disposal is essential for environmental protection and compliance with local regulations. Separate construction waste into recyclable materials (e.g., scrap wood, metal) and non-recyclable materials (e.g., broken siding pieces, packaging). Dispose of hazardous materials, such as leftover paint or solvents, according to local guidelines. Never mix hazardous waste with regular trash. Ensure that all waste is properly contained and transported to designated disposal sites or recycling centers. Leaving waste materials scattered on the site can create hazards, potentially leading to injuries or environmental damage. Following proper waste disposal protocols contributes to a cleaner and safer work environment.

    Troubleshooting Common Issues

    Even with careful planning and execution, problems can arise during vinyl siding installation. Understanding common issues and their solutions is crucial for a successful and long-lasting project. Addressing these problems promptly will prevent further complications and ensure a professional-looking finish.

    Buckling and Warping

    Buckling and warping of vinyl siding panels are often caused by improper installation, expansion and contraction due to temperature fluctuations, or damage during handling. Buckled panels appear wavy or uneven, while warped panels are distorted in shape. To prevent buckling, ensure proper spacing between panels to allow for thermal expansion. Avoid forcing panels into place, as this can lead to warping. For existing buckling, carefully remove the affected panels and reinstall them correctly, ensuring proper alignment and spacing. If the panel itself is warped beyond repair, replacement is necessary. Remember that vinyl siding expands and contracts with temperature changes, so sufficient expansion gaps are essential. Consider using a pry bar to gently release pressure points causing the buckling, always exercising caution to avoid damage to the panel or underlying structure.

    Gaps Between Panels

    Gaps between vinyl siding panels are unsightly and can compromise the weatherproofing of your home. These gaps can result from incorrect panel overlap, inadequate expansion space, or damage to the panels. To address gaps, inspect the adjacent panels and ensure they are properly overlapped. The recommended overlap should be clearly defined in the manufacturer’s instructions. If the gap is due to insufficient expansion space, you may need to carefully remove and reposition the panels, ensuring adequate spacing is maintained throughout. If the panels themselves are damaged, they will need to be replaced. Remember to check that the underlying framework is straight and true; uneven framing can also contribute to gaps between panels.

    Damaged Panels

    Damage to vinyl siding panels can occur during transportation, installation, or due to impacts after installation. Scratches, dents, and cracks can detract from the appearance and compromise the protective qualities of the siding. Minor scratches can often be buffed out with a soft cloth and appropriate vinyl cleaner. Deeper scratches or dents may require replacement of the affected panel. Cracked panels must be replaced to prevent water intrusion. When replacing a damaged panel, ensure a precise fit to maintain the overall aesthetic and weatherproofing of the installation. Using the correct tools and techniques for removal and installation will minimize the risk of further damage.

    Conclusion

    Successfully installing vinyl siding over existing wood siding significantly enhances your home’s curb appeal and durability. By following the steps outlined in this guide, you can achieve a professional-looking result that adds value and protection to your property. Remember to prioritize safety and attention to detail throughout the process. With careful planning and execution, you can enjoy a beautifully renovated exterior for years to come. The pride of accomplishment will be well worth the effort!